教學課程:使用通知中樞和Google Firebase雲端通訊將通知傳送至特定裝置
概觀
重要
自 2024 年 6 月起,FCM 舊版 API 將不再受到支援,且將會淘汰。 若要避免推播通知服務中的任何中斷,您必須 儘快移轉至 FCM v1 通訊協定 。
本教學課程說明如何使用 Azure 通知中樞將重大新聞通知廣播至 Android 應用程式。 完成時,您將能夠註冊您感興趣的突發新聞類別,並只接收這些類別的推播通知。 此案例是許多應用程式的常見模式,其中通知必須傳送給先前宣告感興趣的使用者群組,例如 RSS 閱讀程式、音樂迷的應用程式等等。
在通知中樞中建立註冊時,會加入一或多個 標籤 來啟用廣播案例。 當通知傳送至標記時,已註冊標籤的所有裝置都會收到通知。 因為標籤只是字串,所以不需要事先布建它們。 如需標籤的詳細資訊,請參閱 通知中樞路由和標記表達式。
在本教學課程中,您會執行下列動作:
- 將類別選取專案新增至行動應用程式。
- 已向標記註冊通知。
- 傳送標記的通知。
- 測試應用程式
必要條件
本教學課程是以您在教學課程:使用 Azure 通知中樞和 Firebase 雲端通訊將通知推送至 Android 裝置中建立的應用程式為基礎。 開始本教學課程之前,請先完成 教學課程:使用 Azure 通知中樞和 Firebase 雲端通訊將通知推送至 Android 裝置。
將類別選取專案新增至應用程式
第一個步驟是將UI元素新增至現有的主要活動,讓用戶能夠選取要註冊的類別。 使用者所選取的類別會儲存在裝置上。 啟動應用程式時,您的通知中心內會建立以所選取類別作為標籤的裝置註冊。
res/layout/activity_main.xml file開啟 ,並將內容取代為下列內容:<LinearLayout xmlns:android="http://schemas.android.com/apk/res/android" xmlns:tools="http://schemas.android.com/tools" android:layout_width="match_parent" android:layout_height="match_parent" tools:context="com.example.breakingnews.MainActivity" android:orientation="vertical"> <CheckBox android:id="@+id/worldBox" android:layout_width="wrap_content" android:layout_height="wrap_content" android:text="@string/label_world" /> <CheckBox android:id="@+id/politicsBox" android:layout_width="wrap_content" android:layout_height="wrap_content" android:text="@string/label_politics" /> <CheckBox android:id="@+id/businessBox" android:layout_width="wrap_content" android:layout_height="wrap_content" android:text="@string/label_business" /> <CheckBox android:id="@+id/technologyBox" android:layout_width="wrap_content" android:layout_height="wrap_content" android:text="@string/label_technology" /> <CheckBox android:id="@+id/scienceBox" android:layout_width="wrap_content" android:layout_height="wrap_content" android:text="@string/label_science" /> <CheckBox android:id="@+id/sportsBox" android:layout_width="wrap_content" android:layout_height="wrap_content" android:text="@string/label_sports" /> <Button android:layout_width="wrap_content" android:layout_height="wrap_content" android:onClick="subscribe" android:text="@string/button_subscribe" /> <TextView android:layout_width="wrap_content" android:layout_height="wrap_content" android:text="Hello World!" android:id="@+id/text_hello" /> </LinearLayout>開啟檔案並
res/values/strings.xml新增下列幾行:<string name="button_subscribe">Subscribe</string> <string name="label_world">World</string> <string name="label_politics">Politics</string> <string name="label_business">Business</string> <string name="label_technology">Technology</string> <string name="label_science">Science</string> <string name="label_sports">Sports</string>圖形
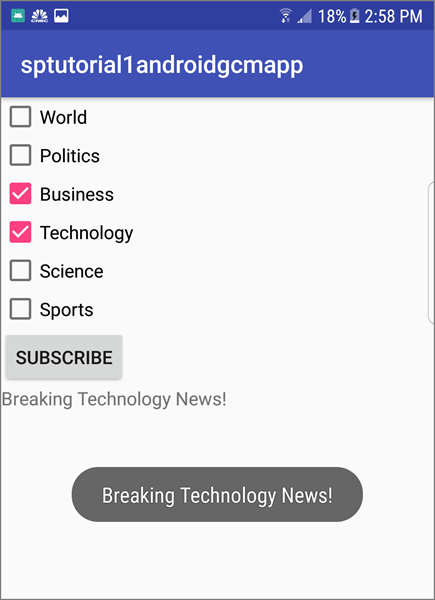
main_activity.xml化版面配置看起來應該如下圖所示:
在與類別
MainActivity相同的套件中建立類別Notifications。import java.util.HashSet; import java.util.Set; import java.util.concurrent.TimeUnit; import android.content.Context; import android.content.SharedPreferences; import android.os.AsyncTask; import android.util.Log; import android.widget.Toast; import com.google.android.gms.tasks.OnSuccessListener; import com.google.firebase.iid.FirebaseInstanceId; import com.google.firebase.iid.InstanceIdResult; import com.microsoft.windowsazure.messaging.NotificationHub; public class Notifications { private static final String PREFS_NAME = "BreakingNewsCategories"; private FirebaseInstanceId fcm; private NotificationHub hub; private Context context; private String senderId; public static String FCM_token = ""; private static final String TAG = "Notifications"; public Notifications(Context context, String hubName, String listenConnectionString) { this.context = context; this.senderId = senderId; fcm = FirebaseInstanceId.getInstance(); hub = new NotificationHub(hubName, listenConnectionString, context); } public void storeCategoriesAndSubscribe(Set<String> categories) { SharedPreferences settings = context.getSharedPreferences(PREFS_NAME, 0); settings.edit().putStringSet("categories", categories).commit(); subscribeToCategories(categories); } public Set<String> retrieveCategories() { SharedPreferences settings = context.getSharedPreferences(PREFS_NAME, 0); return settings.getStringSet("categories", new HashSet<String>()); } public void subscribeToCategories(final Set<String> categories) { new AsyncTask<Object, Object, Object>() { @Override protected Object doInBackground(Object... params) { try { FirebaseInstanceId.getInstance().getInstanceId().addOnSuccessListener(new OnSuccessListener<InstanceIdResult>() { @Override public void onSuccess(InstanceIdResult instanceIdResult) { FCM_token = instanceIdResult.getToken(); Log.d(TAG, "FCM Registration Token: " + FCM_token); } }); TimeUnit.SECONDS.sleep(1); String templateBodyFCM = "{\"data\":{\"message\":\"$(messageParam)\"}}"; hub.registerTemplate(FCM_token,"simpleFCMTemplate", templateBodyFCM, categories.toArray(new String[categories.size()])); } catch (Exception e) { Log.e("MainActivity", "Failed to register - " + e.getMessage()); return e; } return null; } protected void onPostExecute(Object result) { String message = "Subscribed for categories: " + categories.toString(); Toast.makeText(context, message, Toast.LENGTH_LONG).show(); } }.execute(null, null, null); } }此類別會使用本機記憶體來儲存此裝置必須接收的新聞類別。 它也包含註冊這些類別的方法。
在您的
MainActivity類別中,新增 的Notifications欄位:private Notifications notifications;然後,更新
onCreate方法,如下列程式代碼所示。 您可以在 Notifications 類別的 subscribeToCategories 方法中向通知中樞註冊。@Override protected void onCreate(Bundle savedInstanceState) { super.onCreate(savedInstanceState); setContentView(R.layout.activity_main); mainActivity = this; FirebaseService.createChannelAndHandleNotifications(getApplicationContext()); notifications = new Notifications(this, NotificationSettings.HubName, NotificationSettings.HubListenConnectionString); notifications.subscribeToCategories(notifications.retrieveCategories()); }確認中樞名稱和 連接字串 已在 Notification 設定 類別中正確設定。
注意
因為隨用戶端應用程式散佈的憑證通常不安全,您應只將接聽存取權的金鑰隨用戶端應用程式散佈。 您的應用程式可透過接聽存取權來註冊通知,但無法修改現有的註冊或無法傳送通知。 在安全的後端服務中,會使用完整存取金鑰來傳送通知和變更現有的註冊。
然後,新增下列匯入:
import android.widget.CheckBox;
import java.util.HashSet;
import java.util.Set;
import android.view.View;
新增下列
subscribe方法來處理訂閱按鈕 click 事件:public void subscribe(View sender) { final Set<String> categories = new HashSet<String>(); CheckBox world = (CheckBox) findViewById(R.id.worldBox); if (world.isChecked()) categories.add("world"); CheckBox politics = (CheckBox) findViewById(R.id.politicsBox); if (politics.isChecked()) categories.add("politics"); CheckBox business = (CheckBox) findViewById(R.id.businessBox); if (business.isChecked()) categories.add("business"); CheckBox technology = (CheckBox) findViewById(R.id.technologyBox); if (technology.isChecked()) categories.add("technology"); CheckBox science = (CheckBox) findViewById(R.id.scienceBox); if (science.isChecked()) categories.add("science"); CheckBox sports = (CheckBox) findViewById(R.id.sportsBox); if (sports.isChecked()) categories.add("sports"); notifications.storeCategoriesAndSubscribe(categories); }此方法會建立一份類別清單,並使用
Notifications類別在本機儲存體中儲存清單,並在通知中心註冊對應標籤。 變更類別時,系統會使用新類別重新建立註冊。
您的應用程式現在可以在裝置上的本機儲存體中儲存一組類別,並在使用者每次變更類別選項時在通知中心註冊。
註冊通知
這些步驟會在啟動時,使用已儲存在本機儲存體中的類別在通知中心註冊。
確認下列程式代碼位於 類別中
MainActivity方法的onCreate結尾:notifications.subscribeToCategories(notifications.retrieveCategories());此程式碼可確保應用程式每次啟動時都會從本機儲存體擷取類別,並要求這些類別的註冊。
然後更新
onStart()類別的MainActivity方法,如下所示:@Override protected void onStart() { super.onStart(); isVisible = true; Set<String> categories = notifications.retrieveCategories(); CheckBox world = (CheckBox) findViewById(R.id.worldBox); world.setChecked(categories.contains("world")); CheckBox politics = (CheckBox) findViewById(R.id.politicsBox); politics.setChecked(categories.contains("politics")); CheckBox business = (CheckBox) findViewById(R.id.businessBox); business.setChecked(categories.contains("business")); CheckBox technology = (CheckBox) findViewById(R.id.technologyBox); technology.setChecked(categories.contains("technology")); CheckBox science = (CheckBox) findViewById(R.id.scienceBox); science.setChecked(categories.contains("science")); CheckBox sports = (CheckBox) findViewById(R.id.sportsBox); sports.setChecked(categories.contains("sports")); }此程式代碼會根據先前儲存類別的狀態來更新主要活動。
現在已完成此應用程式,且可在裝置本機儲存體中儲存一組類別,以供每次使用者變更類別選項在通知中心註冊時使用。 接著,定義可將類別通知傳送至此應用程式的後端。
傳送加註標記的通知
在本節中,您會從 .NET 主控台應用程式將即時新聞以加註標記的範本通知形式傳送。
在 Visual Studio 中,建立新的 Visual C# 主控台應用程式:
- 在主功能表上,選取 [檔案]>[新增]>[專案]。
- 在 [建立新專案] 中,針對 C# 在範本清單中選取 [主控台應用程式 \(.NET Framework\)],接著選取 [下一步]。
- 輸入應用程式的名稱。
- 在 [解決方案] 中,選擇 [新增到解決方案],再選取 [建立] 以建立專案。
選取 [工具]>[NuGet 套件管理員]>[套件管理員主控台],然後在主控台視窗中執行下列命令:
Install-Package Microsoft.Azure.NotificationHubs此動作會使用 Microsoft.Azure.NotificationHubs 套件來新增對 Azure 通知中樞 SDK 的參考。
開啟 Program.cs 檔案,並新增下列
using陳述式:using Microsoft.Azure.NotificationHubs;在
Program類別中,新增或取代 (如果方法已存在) 下列方法:private static async void SendTemplateNotificationAsync() { // Define the notification hub. NotificationHubClient hub = NotificationHubClient.CreateClientFromConnectionString("<connection string with full access>", "<hub name>"); // Apple requires the apns-push-type header for all requests var headers = new Dictionary<string, string> {{"apns-push-type", "alert"}}; // Create an array of breaking news categories. var categories = new string[] { "World", "Politics", "Business", "Technology", "Science", "Sports"}; // Send the notification as a template notification. All template registrations that contain // "messageParam" and the proper tags will receive the notifications. // This includes APNS, GCM/FCM, WNS, and MPNS template registrations. Dictionary<string, string> templateParams = new Dictionary<string, string>(); foreach (var category in categories) { templateParams["messageParam"] = "Breaking " + category + " News!"; await hub.SendTemplateNotificationAsync(templateParams, category); } }此程式碼會分別將範本通知傳送給字串陣列中的六個標籤。 使用標籤可確保裝置只會收到已登錄類別的通知。
在上述程式碼中,請使用您的通知中樞名稱及通知中樞儀表板的 DefaultFullSharedAccessSignature 連接字串,來取代
<hub name>和<connection string with full access>預留位置。在
Main()方法中新增下列程式碼行:SendTemplateNotificationAsync(); Console.ReadLine();建置主控台應用程式。
測試應用程式
在 Android Studio 中,在 Android 裝置或模擬器上執行應用程式。 應用程式 UI 提供一組切換,可讓您選擇要訂閱的類別。
啟用一或多個類別切換,然後按一下 [訂閱] 。 應用程式會將選取的類別轉換成標籤,並在通知中心內為選取的標籤要求新裝置註冊。 已註冊的類別會傳回並顯示在快顯通知中。

執行 .NET 控制台應用程式,以傳送每個類別的通知。 所選類別的通知會顯示為快顯通知。
下一步
在本教學課程中,您已將廣播通知傳送給已註冊類別的特定 Android 裝置。 若要瞭解如何將通知推播給特定使用者,請繼續進行下列教學課程: