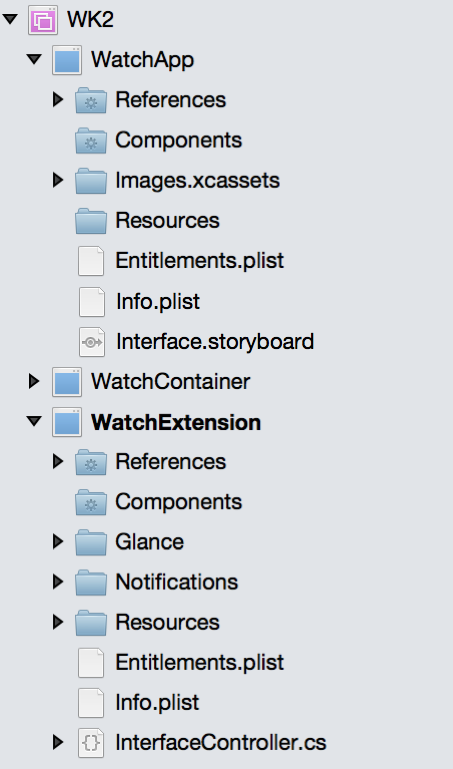
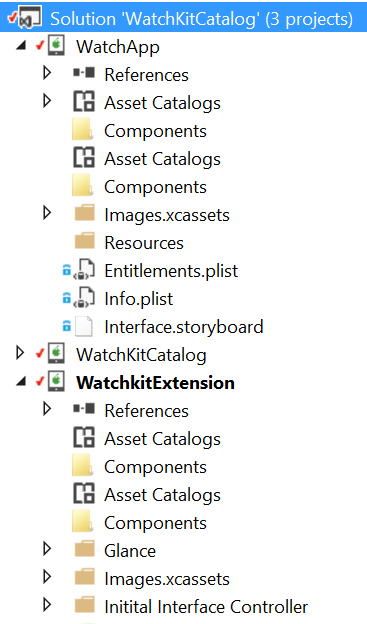
在您依照安裝程式和安裝中的步驟建立解決方案之後,您將有 3 個專案:
- 用於設定或其他裝置系統管理工作的 iOS 父應用程式。 (使用其他類型的 iOS 擴充功能,這通常稱為「容器」應用程式。使用 Watch Apps 時,使用者就能夠開始執行監看式應用程式,而不需要執行父應用程式;
- Watch 延伸模組,其中包含監看式應用程式的程序代碼;和
- 監看式應用程式,其中包含在監看式上呈現的分鏡腳本和影像資源。
檢查您的 參考是否正確:父應用程式具有監看式應用程式的參考,以及監看式應用程式具有延伸模塊的參考。
確認您的套件組合標識碼遵循 *.watchkitextension *.watchkitapp 慣例,而且您的延伸模組 Info.plist 檔案已將它 設定為 WKApp 套件組合標識符 值設定為監看式應用程式的套件組合標識符。
您現在應該能夠執行監看式應用程式,但因為監看式應用程式內的分鏡腳本檔案是空白的,因此您將無法分辨。
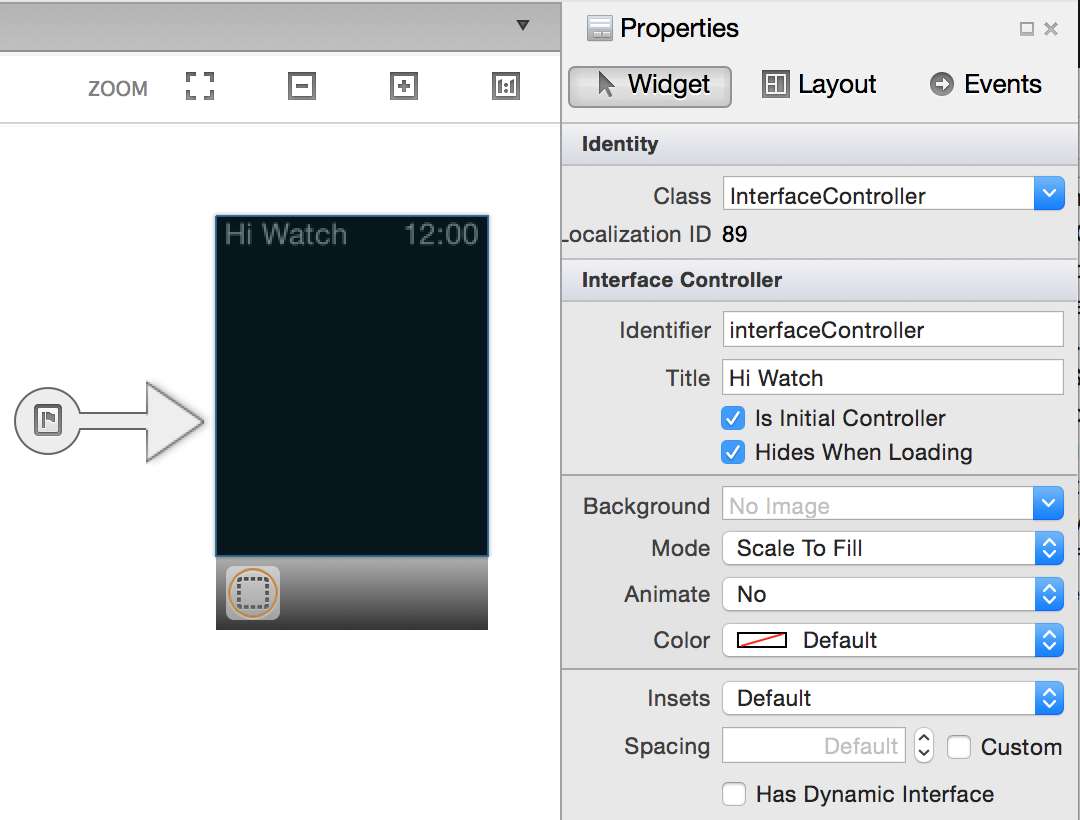
按兩下 Watch App 中的 Interface.storyboard 來啟動 Xamarin iOS 設計工具(如果您在 Mac 上,您也可以以滑鼠右鍵按兩下並 開啟 [使用 > Xcode 介面產生器]
確定 [工具箱] 和 [屬性] 面板可見,
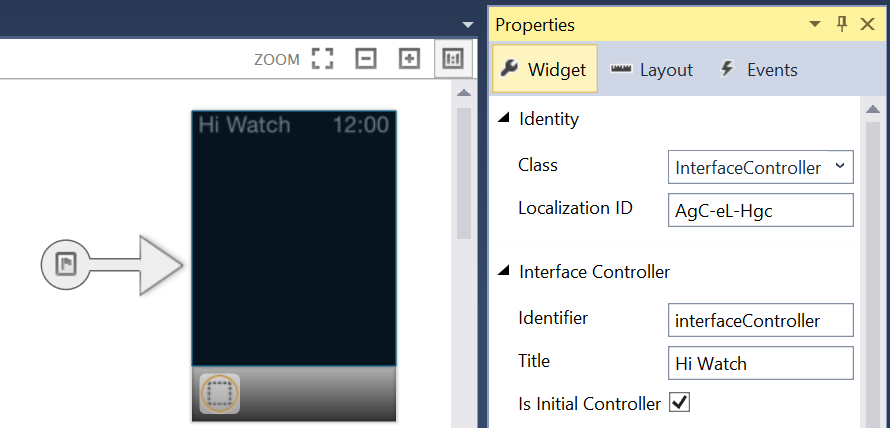
按兩下以選取介面控制器,
將介面控制器的標識碼和標題設定為 interfaceController 和 Hi Watch,
確認類別已設定為 InterfaceController
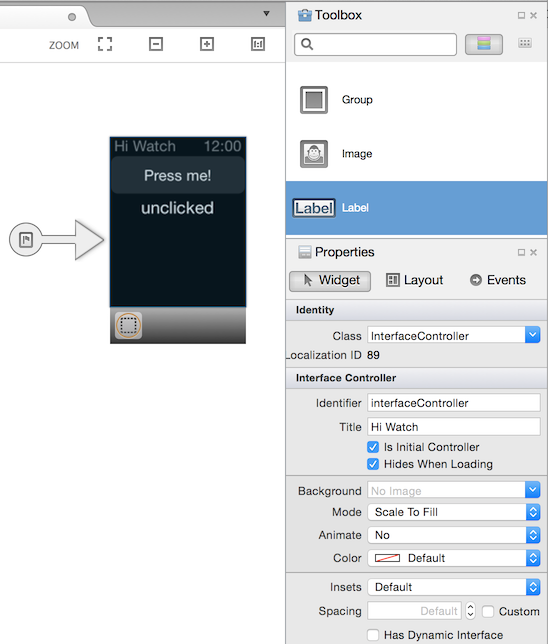
建立您的 UI:
- 從 [ 工具箱] 面板,
- 將按鈕和標籤拖放到場景,以及
- 設定控制項的文字和屬性,如下所示:
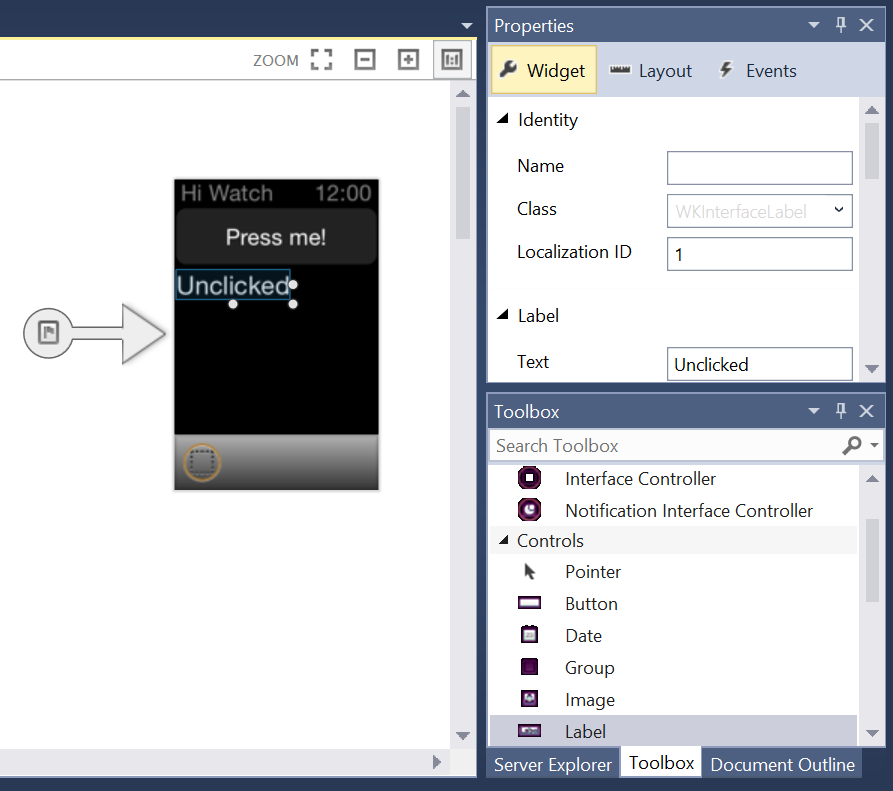
在每個控件的 [屬性] 板中設定 [名稱]。 在這裡範例中,我們已使用
myButton和myLabel。選取分鏡腳本上的按鈕,然後移至 [屬性 ] 面板的 [事件 ] 列表,然後
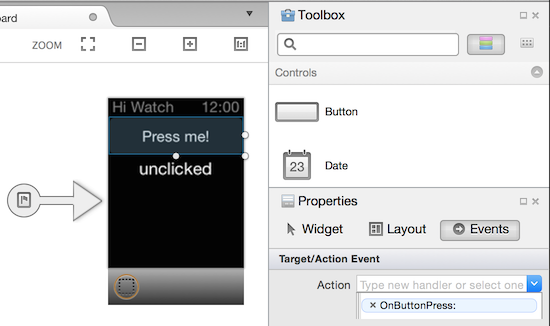
輸入
OnButtonPress並按 Enter 鍵,以建立新的動作。 動作會出現在清單中,且部分方法會自動在 C# 中建立。
儲存分鏡腳本之後, InterfaceController.designer.cs 會以控件名稱和actions更新。 如果您在更新此檔案之後開啟此檔案,您可以看到 RegisterAttribute 對應至控制器的方式,以及 UI 控件如何對應至以 標記 OutletAttribute 的 C# 實例變數,以及 Actions 如何對應至標記的部分 ActionAttribute方法:
// WARNING
//
// This file has been generated automatically by Visual Studio for Mac from the outlets and
// actions declared in your storyboard file.
// Manual changes to this file will not be maintained.
//
[Register ("InterfaceController")]
partial class InterfaceController
{
    [Outlet]
    [GeneratedCode ("iOS Designer", "1.0")]
    WatchKit.WKInterfaceButton myButton { get; set; }

    [Outlet]
    [GeneratedCode ("iOS Designer", "1.0")]
    WatchKit.WKInterfaceLabel myLabel { get; set; }

    [Action ("OnButtonPress:")]
    [GeneratedCode ("iOS Designer", "1.0")]
    partial void OnButtonPress (WatchKit.WKInterfaceButton sender);

    void ReleaseDesignerOutlets ()
    {
        if (myButton != null) {
            myButton.Dispose ();
            myButton = null;
        }
        if (myLabel != null) {
            myLabel.Dispose ();
            myLabel = null;
        }
    }
}
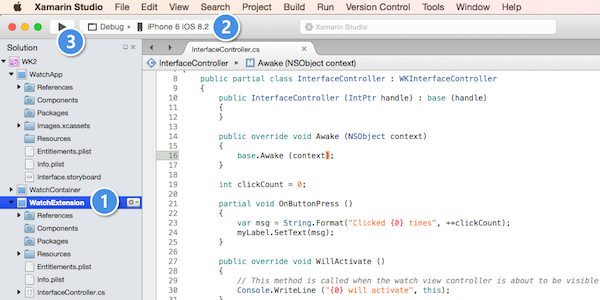
現在開啟 InterfaceController.cs (非 InterfaceController.designer.cs),並新增下列程式代碼:
int clickCount = 0;
partial void OnButtonPress (WatchKit.WKInterfaceButton sender)
{
  var msg = String.Format("Clicked {0} times", ++clickCount);
  myLabel.SetText(msg);
}
此程式代碼應該相當透明:每次呼叫函式時,OnButtonPress實例變數clickCount都會遞增。 的文字 myLabel 會變更為反映此計數; myLabel當然,是您在 XCode 中建立的其中一個輸出名稱。 函 partial 式是與您所指定動作名稱相關聯的函式實作。
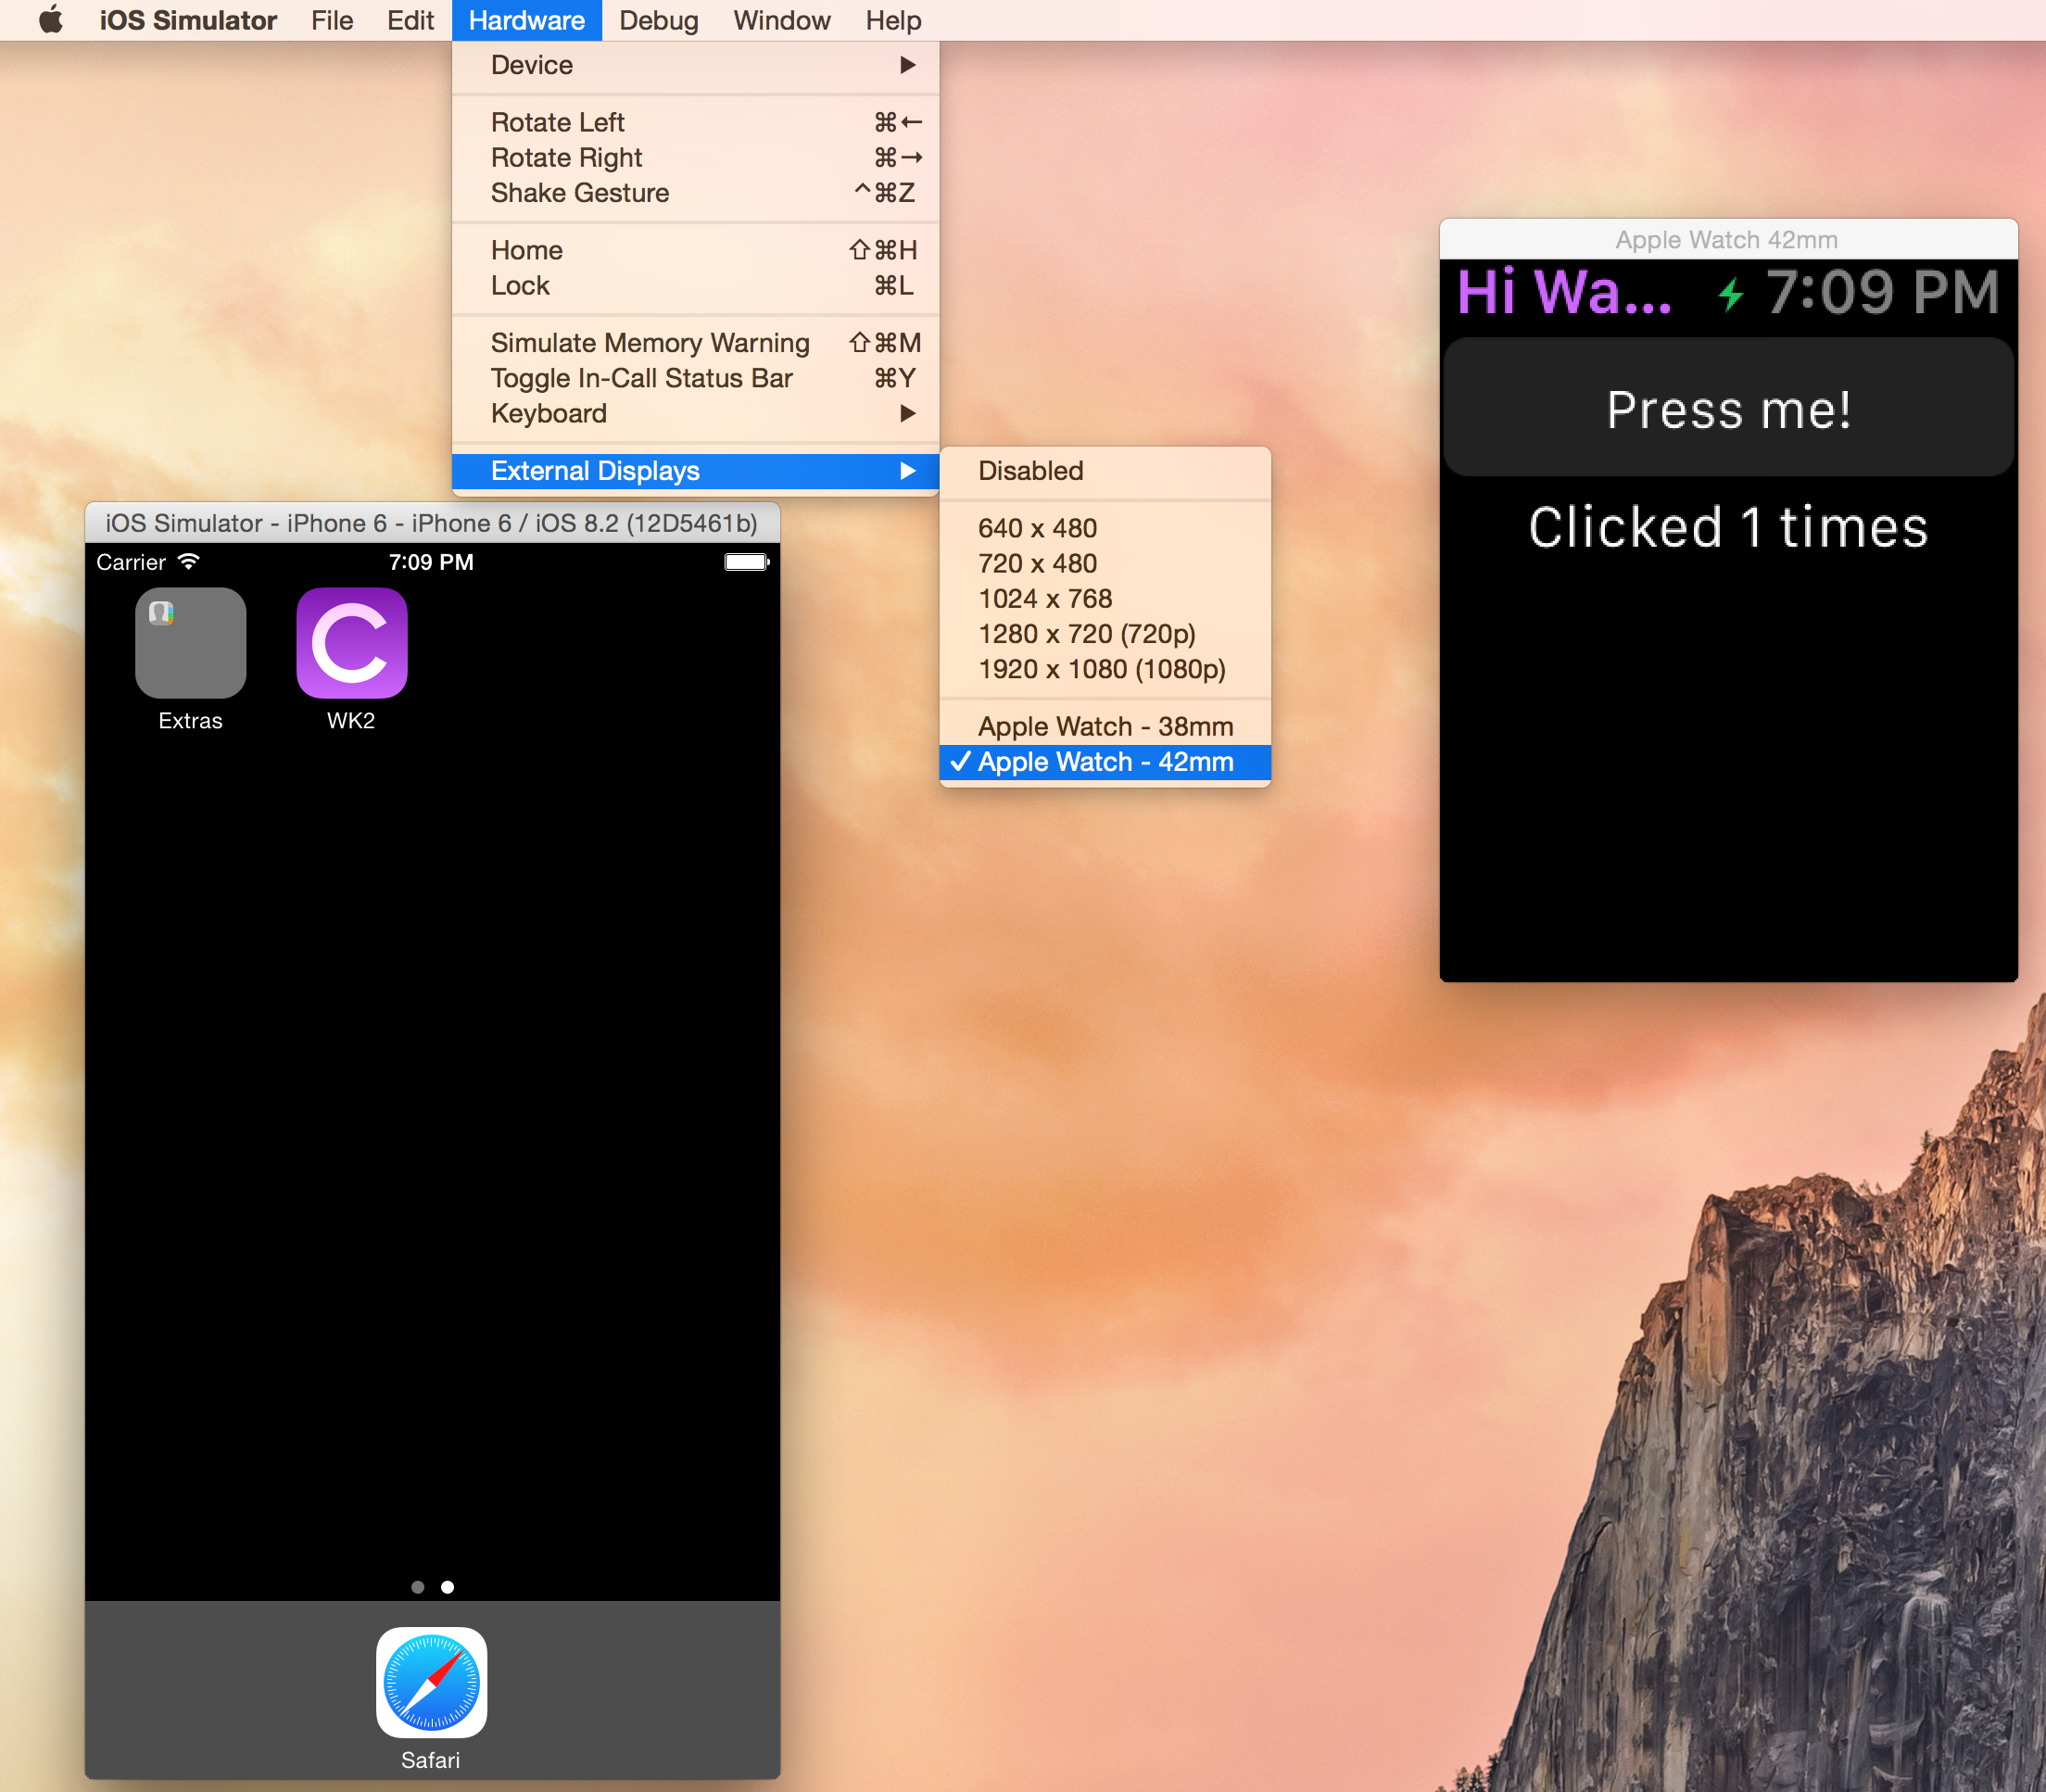
如果它還不是啟始專案,
以滑鼠右鍵按兩下您的 Watch Extension 專案,然後選擇 [ 設定為啟始專案]
將 [部署目標] 設定為 Watch Kit 相容的模擬器映射(例如 i 電話 6 iOS 8.2),
按下 [偵 錯] 按鈕以觸發組建和模擬器啟動。

當模擬器啟動時,請按按鈕以遞增標籤。 恭喜,您已擁有監看應用程式!