將 App Service 應用程式移至另一個區域
重要
從 2025 年 3 月 31 日起,當 Azure 區域中發生災害時,我們不再將 Azure App Service Web 應用程式放在災害復原模式中。 我們強烈鼓勵您實作常用的災害復原技術,以避免發生區域性災害時,Web 應用程式的功能或資料遺失。
本文說明如何在影響整個 Azure 區域的災害期間,將 App Service 資源恢復上線。 當災害使得整個 Azure 區域離線時,裝載於該區域的所有 App Service 應用程式都會處於災害復原模式。 提供的功能可協助您將應用程式還原至不同的區域,或從受影響應用程式復原檔案。
App Service 資源有區域限定,無法跨區域移動。 您必須將應用程式還原至不同區域中的新應用程式,然後為新的應用程式建立鏡像設定或資源。
必要條件
- 無。 還原自動備份通常需要標準或進階層;但在災害復原模式中,受影響的應用程式都會自動啟用 (無論所屬層級)。
準備
識別受影響應用程式目前使用的所有 App Service 資源。 例如:
- App Service 應用程式
- App Service 方案
- 部署位置
- 在 Azure 中購買的自訂網域
- TLS/SSL 憑證
- Azure 虛擬網路整合
- 混合式連線。
- 受控識別
- 備份設定
某些資源 (例如匯入的憑證或混合式連線) 會包含與其他 Azure 服務的整合。 如需如何跨區域移動這些資源的詳細資訊,請參閱個別服務的文件。
將應用程式還原至不同的區域
在不同的 Azure 區域中建立新 App Service 應用程式,而不是該受影響應用程式。 這是災害復原案例中的目標應用程式。
在 Azure 入口網站中,瀏覽至受影響應用程式的管理頁面。 在失敗的 Azure 區域中,受影響應用程式會顯示警告文字。 按一下警告文字。

在 [還原備份] 頁面中,根據下表設定還原作業。 完成後,請按一下 [確定] 。
設定 值 Description 快照集 (預覽) 擷取快照集。 有兩個最新的快照集可供使用。 還原目的地 現有的應用程式 按一下下方說明 [請按一下這裡變更還原目的地應用程式] 的附註,然後選取目標應用程式。 在災害案例中,您只能將快照集還原至不同 Azure 區域中的應用程式。 還原網站設定 是 
將目標應用程式中的其他項目設定成受影響應用程式的鏡像,然後驗證您的設定。
當您準備好讓自訂網域指向目標應用程式時,請重新對應網域名稱。
僅復原應用程式內容
如果您只想要從受影響應用程式復原檔案而不還原受影響應用程式,請使用下列步驟:
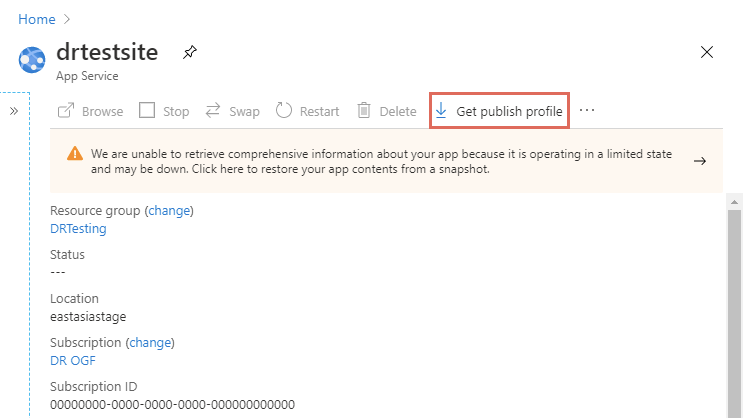
在 Azure 入口網站中,瀏覽至受影響應用程式的管理頁面,然後按一下 [取得發佈設定檔]。

開啟下載的檔案,尋找其名稱中包含
ReadOnly - FTP的發佈設定檔。 這就是災害復原設定檔。 例如:<publishProfile profileName="%app-name% - ReadOnly - FTP" publishMethod="FTP" publishUrl="ftp://%ftp-site%/site/wwwroot" ftpPassiveMode="True" userName="%app-name%\$%app-name%" userPWD="" destinationAppUrl="http://%app-name%.azurewebsites.net" SQLServerDBConnectionString="" mySQLDBConnectionString="" hostingProviderForumLink="" controlPanelLink="http://windows.azure.com" webSystem="WebSites"> <databases /> </publishProfile>複製三個屬性值:
publishUrl:FTP 主機名稱userName和userPWD:FTP 認證
使用您選擇的 FTP 用戶端,使用主機名稱和認證連線至受影響應用程式的 FTP 主機。
連線之後,請下載整個 /site/wwwroot 資料夾。 下列螢幕擷取畫面顯示如何在 FileZilla 中進行下載。
