建置 Windows Presentation Foundation (WPF) Blazor 應用程式
注意
這不是這篇文章的最新版本。 如需目前版本,請參閱本文的 .NET 8 版本。
本教學課程說明如何建置和執行 WPF Blazor 應用程式。 您將學習如何:
- 建立 WPF Blazor 應用程式專案
- 將 Razor 元件新增至此專案
- 在 Windows 上執行此應用程式
必要條件
- 支援的平台 (WPF 文件)
- 包含 .NET 桌面開發工作負載的 Visual Studio 2022
Visual Studio 工作負載
如果未安裝 .NET 桌面開發工作負載,請使用 Visual Studio 安裝程式來安裝工作負載。 如需詳細資訊,請參閱修改 Visual Studio 工作負載、元件和語言套件。
建立 WPF Blazor 專案
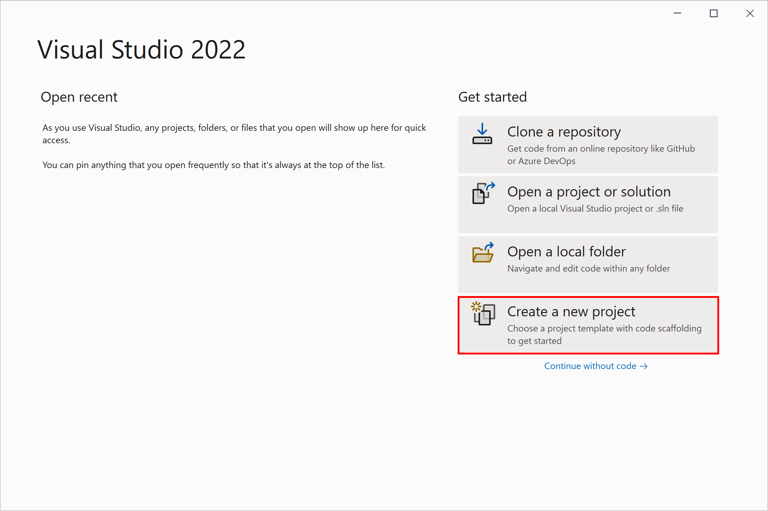
啟動 Visual Studio。 在 [開始視窗] 中,選取 [建立新專案]:
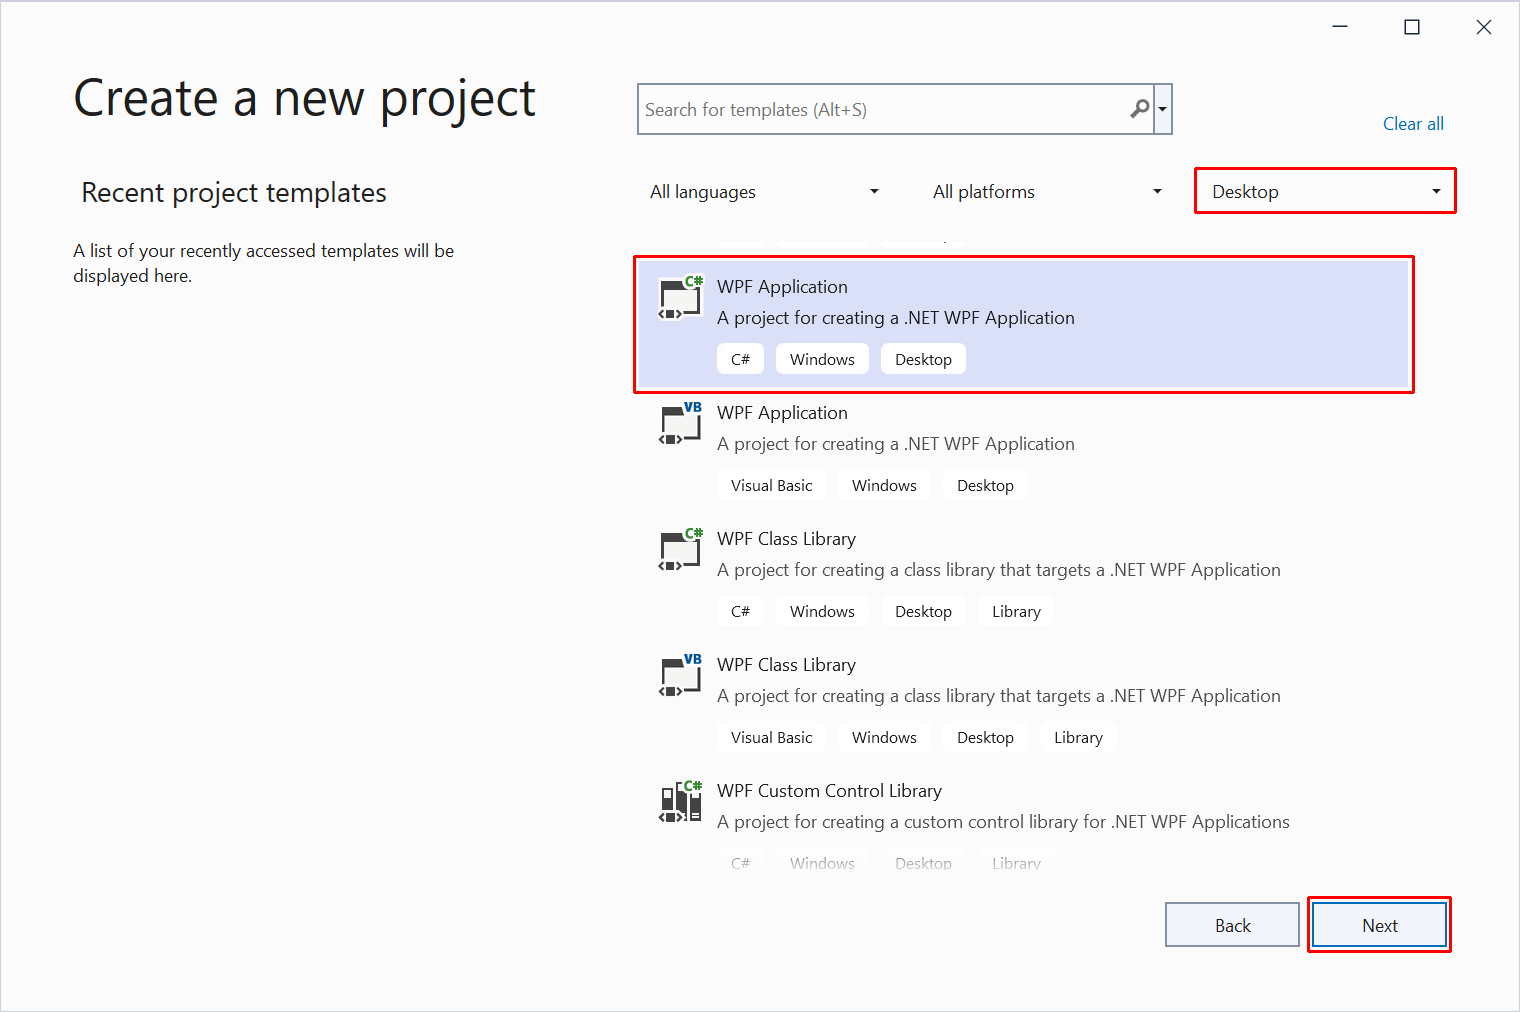
在 [建立新專案] 對話方塊中,將 [專案類型] 下拉式清單篩選為 [桌面]。 選取 WPF 應用程式的 C# 專案範本,然後選取 [下一步] 按鈕:
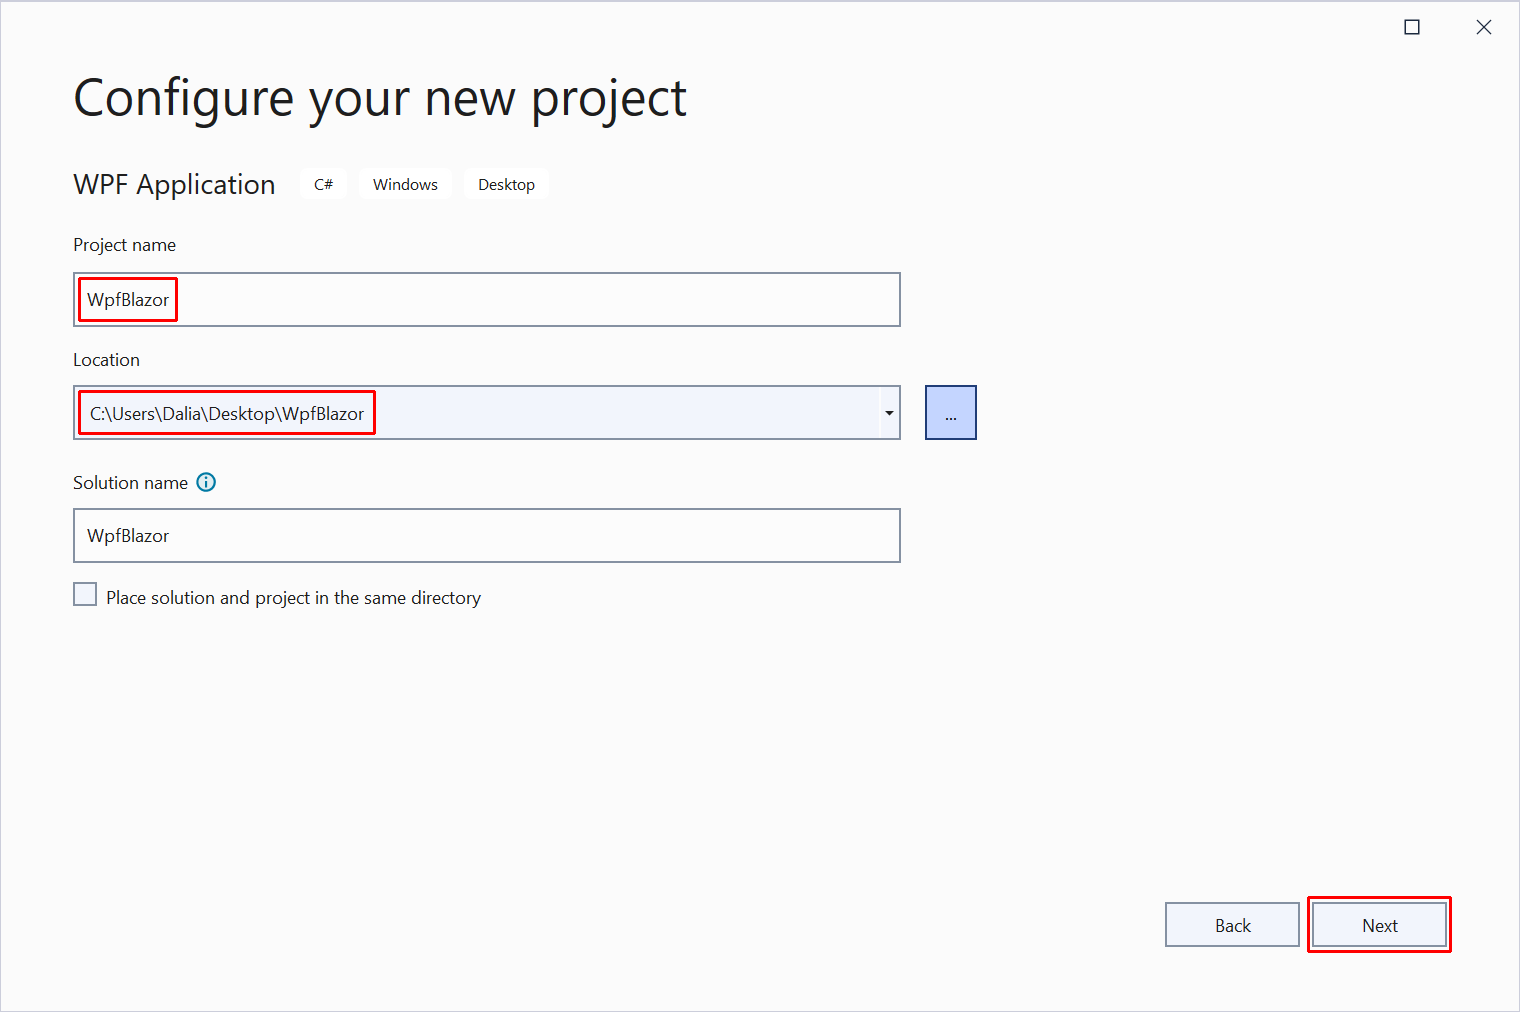
在 [設定新專案] 對話方塊中:
- 將 [專案名稱] 設為 WpfBlazor。
- 為專案選擇適當的位置。
- 選取下一步按鈕。
在 [其他資訊] 對話方塊中,使用 [架構] 下拉式清單選取架構版本。 選取 [建立] 按鈕:
![WPF 專案的 [其他資訊] 對話方塊。](wpf/_static/additional-information.png?view=aspnetcore-6.0)
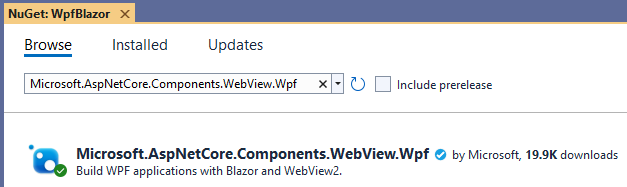
使用 NuGet 套件管理員安裝Microsoft.AspNetCore.Components.WebView.WpfNuGet 套件:
在 [方案總管] 中,以滑鼠右鍵按一下專案的名稱, WpfBlazor,然後選取 [編輯專案檔],以開啟專案檔 (WpfBlazor.csproj)。
在專案檔的頂端,將 SDL 變更為 Microsoft.NET.Sdk.Razor:
<Project Sdk="Microsoft.NET.Sdk.Razor">
在專案檔的現有 <PropertyGroup> 中,新增下列標記來設定應用程式的根命名空間,即本教學課程中的 WpfBlazor:
<RootNamespace>WpfBlazor</RootNamespace>
注意
設定專案根命名空間的上述指導是暫時的因應措施。 如需詳細資訊,請參閱 [Blazor][Wpf] 根命名空間相關問題 (dotnet/maui #5861)。
將您的變更儲存至專案屬性 (WpfBlazor.csproj)。
使用 Microsoft.AspNetCore.Components.Web 的 @using 指示詞,將 _Imports.razor 檔案新增至專案的根目錄。
_Imports.razor:
@using Microsoft.AspNetCore.Components.Web
儲存_Imports.razor檔案。
將 wwwroot 資料夾新增至專案。
將 index.html 檔案新增至具有下列標記的 wwwroot 資料夾。
wwwroot/index.html:
<!DOCTYPE html>
<html lang="en">

<head>
    <meta charset="utf-8" />
    <meta name="viewport" content="width=device-width, initial-scale=1.0" />
    <title>WpfBlazor</title>
    <base href="/" />
    <link href="css/bootstrap/bootstrap.min.css" rel="stylesheet" />
    <link href="css/app.css" rel="stylesheet" />
    <link href="WpfBlazor.styles.css" rel="stylesheet" />
</head>

<body>
    <div id="app">Loading...</div>

    <div id="blazor-error-ui" data-nosnippet>
        An unhandled error has occurred.
        <a href="" class="reload">Reload</a>
        <a class="dismiss">🗙</a>
    </div>
    <script src="_framework/blazor.webview.js"></script>
</body>

</html>
在 wwwroot 資料夾內,建立 css 資料夾。
將 app.css 樣式表單新增至具有下列內容的 wwwroot/css 資料夾。
wwwroot/css/app.css:
html, body {
    font-family: 'Helvetica Neue', Helvetica, Arial, sans-serif;
}

h1:focus {
    outline: none;
}

a, .btn-link {
    color: #0071c1;
}

.btn-primary {
    color: #fff;
    background-color: #1b6ec2;
    border-color: #1861ac;
}

.valid.modified:not([type=checkbox]) {
    outline: 1px solid #26b050;
}

.invalid {
    outline: 1px solid red;
}

.validation-message {
    color: red;
}

#blazor-error-ui {
    background: lightyellow;
    bottom: 0;
    box-shadow: 0 -1px 2px rgba(0, 0, 0, 0.2);
    display: none;
    left: 0;
    padding: 0.6rem 1.25rem 0.7rem 1.25rem;
    position: fixed;
    width: 100%;
    z-index: 1000;
}

    #blazor-error-ui .dismiss {
        cursor: pointer;
        position: absolute;
        right: 0.75rem;
        top: 0.5rem;
    }
在 wwwroot/css 資料夾內,建立 bootstrap 資料夾。 在 bootstrap 資料夾中,放置 bootstrap.min.css 的複本。 您可以從 Bootstrap 網站取得最新版的 bootstrap.min.css。 請遵循導覽列連結,前往 [文件]> [下載]。 無法在這裡提供直接連結,因為網站中的所有內容都在 URL 中設定版本。
將下列 Counter 元件新增至專案的根目錄,這是在 Blazor 專案範本中找到的預設 Counter 元件。
Counter.razor:
<h1>Counter</h1>

<p>Current count: @currentCount</p>

<button class="btn btn-primary" @onclick="IncrementCount">Click me</button>

@code {
    private int currentCount = 0;

    private void IncrementCount()
    {
        currentCount++;
    }
}
儲存 Counter 元件 (Counter.razor)。
如果 MainWindow 設計工具未開啟,請按兩下 [方案總管] 中的 MainWindow.xaml 檔案加以開啟。 在 MainWindow 設計工具中,將 XAML 程式碼取代為下列內容:
<Window x:Class="WpfBlazor.MainWindow"
        xmlns="http://schemas.microsoft.com/winfx/2006/xaml/presentation"
        xmlns:x="http://schemas.microsoft.com/winfx/2006/xaml"
        xmlns:d="http://schemas.microsoft.com/expression/blend/2008"
        xmlns:mc="http://schemas.openxmlformats.org/markup-compatibility/2006"
        xmlns:blazor="clr-namespace:Microsoft.AspNetCore.Components.WebView.Wpf;assembly=Microsoft.AspNetCore.Components.WebView.Wpf"
        xmlns:local="clr-namespace:WpfBlazor"
        mc:Ignorable="d"
        Title="MainWindow" Height="450" Width="800">
    <Grid>
        <blazor:BlazorWebView HostPage="wwwroot\index.html" Services="{DynamicResource services}">
            <blazor:BlazorWebView.RootComponents>
                <blazor:RootComponent Selector="#app" ComponentType="{x:Type local:Counter}" />
            </blazor:BlazorWebView.RootComponents>
        </blazor:BlazorWebView>
    </Grid>
</Window>
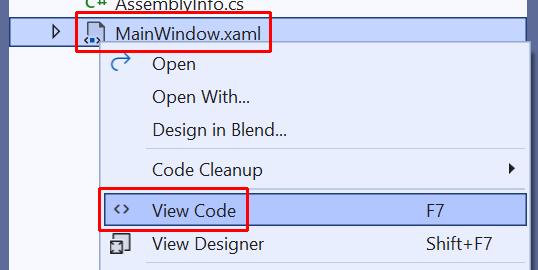
在 [方案總管] 中,以滑鼠右鍵按一下 MainWindow.xaml,並選取 [檢視程式碼]:
將命名空間 Microsoft.Extensions.DependencyInjection 新增至 MainWindow.xaml.cs 檔案的頂端:
using Microsoft.Extensions.DependencyInjection;
在 MainWindow 建構函式的 InitializeComponent 方法呼叫之後,新增下列程式碼:
var serviceCollection = new ServiceCollection();
serviceCollection.AddWpfBlazorWebView();
Resources.Add("services", serviceCollection.BuildServiceProvider());
注意
InitializeComponent 方法會在應用程式建置階段自動產生,並新增至呼叫類別的編譯物件。
MainWindow.xaml.cs 最終完整的 C# 程式碼,其中檔案範圍的命名空間和註解都已移除:
using System;
using System.Collections.Generic;
using System.Linq;
using System.Text;
using System.Threading.Tasks;
using System.Windows;
using System.Windows.Controls;
using System.Windows.Data;
using System.Windows.Documents;
using System.Windows.Input;
using System.Windows.Media;
using System.Windows.Media.Imaging;
using System.Windows.Navigation;
using System.Windows.Shapes;
using Microsoft.Extensions.DependencyInjection;

namespace WpfBlazor;

public partial class MainWindow : Window
{
    public MainWindow()
    {
        InitializeComponent();

        var serviceCollection = new ServiceCollection();
        serviceCollection.AddWpfBlazorWebView();
        Resources.Add("services", serviceCollection.BuildServiceProvider());
    }
}
執行應用程式
在 Visual Studio 工具列中選取 [開始] 按鈕:
![Visual Studio 工具列的 [開始] 按鈕。](wpf/_static/start-button.png?view=aspnetcore-6.0)
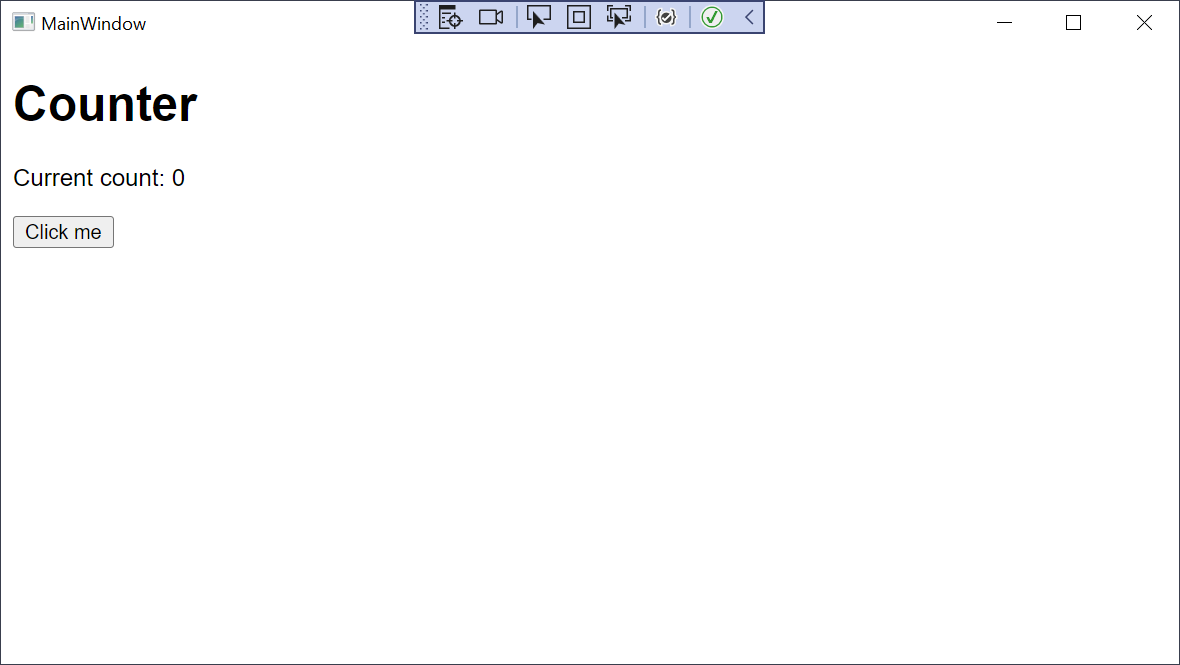
在 Windows 上執行應用程式:
下一步
在本教學課程中,您已了解如何:
- 建立 WPF Blazor 應用程式專案
- 將 Razor 元件新增至此專案
- 在 Windows 上執行此應用程式
深入了解 Blazor Hybrid 應用程式:
意見反應
即將登場:在 2024 年,我們將逐步淘汰 GitHub 問題作為內容的意見反應機制,並將它取代為新的意見反應系統。 如需詳細資訊,請參閱:https://aka.ms/ContentUserFeedback。
提交並檢視相關的意見反應