事件
作者 :Pranav Rastogi、 Rick Anderson、 Robert McMurray、 Suhas Joshi
本教學課程說明將現有應用程式Universal Providers建立的使用者和角色資料和使用者設定檔資料移轉至 ASP.NET 身分識別模型所需的步驟。 這裡所述的移轉使用者設定檔資料的方法也可以用於具有 SQL 成員資格的應用程式中。
透過發行Visual Studio 2013,ASP.NET 小組引進了新的 ASP.NET 身分識別系統,您可以在這裡深入瞭解該版本。 後續文章將 Web 應用程式從 SQL 成員資格移轉至新的身分識別系統,本文將說明將遵循提供者模型的現有應用程式移轉至新的身分識別模型的步驟。 本教學課程的重點主要在於移轉使用者設定檔資料,以順暢地將其連結至新的系統。 移轉使用者和角色資訊類似于 SQL 成員資格。 移轉設定檔資料所遵循的方法也可以用於具有 SQL 成員資格的應用程式。
例如,我們將從使用 Visual Studio 2012 建立的 Web 應用程式開始,該應用程式使用提供者模型。 接著,我們將新增設定檔管理的程式碼、註冊使用者、為使用者新增設定檔資料、移轉資料庫架構,然後將應用程式變更為使用身分識別系統進行使用者和角色管理。 為了測試移轉,使用 Universal Providers 建立的使用者應該能夠登入,而新的使用者應該能夠註冊。
注意
您可以在 找到完整的範例 https://github.com/suhasj/UniversalProviders-Identity-Migrations 。
開始進行移轉之前,讓我們先看看在提供者模型中儲存設定檔資料的體驗。 應用程式使用者的設定檔資料可以透過多種方式儲存,其中最常見的方式是使用隨附的內建設定檔提供者以及Universal Providers。 這些步驟包括
- 新增類別,其中包含用來儲存設定檔資料的屬性。
- 新增類別,以擴充 'ProfileBase' 並實作方法來取得使用者的上述設定檔資料。
- 在 web.config 檔案中使用預設設定檔提供者,並定義步驟 2 中宣告的類別,以用於存取設定檔資訊。
設定檔資訊會儲存為資料庫中 'Profiles' 資料表中的序列化 xml 和二進位資料。
移轉應用程式以使用新的 ASP.NET 身分識別系統之後,設定檔資訊會還原序列化,並儲存為使用者類別上的屬性。 然後,每個屬性都可以對應到使用者資料表中的資料行。 這裡的優點是,除了不需要在每次存取時序列化/還原序列化資料資訊之外,屬性還可以直接使用使用者類別來處理。
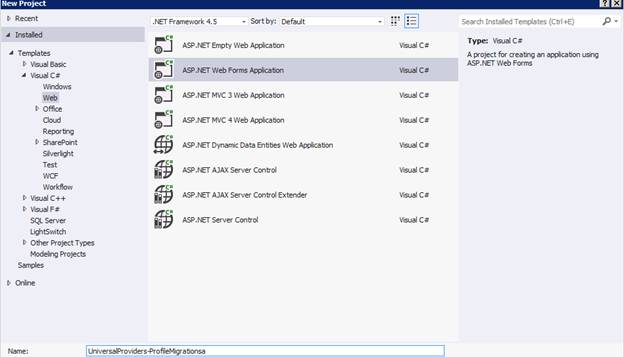
在 Visual Studio 2012 中建立新的 ASP.NET 4.5 Web Form 應用程式。 目前的範例會使用 Web Form 範本,但您也可以使用 MVC 應用程式。
建立新的資料夾 'Models' 以儲存設定檔資訊
例如,讓我們在設定檔中儲存使用者的生日、城市、高度和重量。 高度和權數會儲存為稱為 'PersonalStats' 的自訂類別。 若要儲存和擷取設定檔,我們需要擴充 'ProfileBase' 的類別。 讓我們建立新的類別 'AppProfile',以取得並儲存設定檔資訊。
public class ProfileInfo
{
    public ProfileInfo()
    {
        UserStats = new PersonalStats();
    }
    public DateTime? DateOfBirth { get; set; }
    public PersonalStats UserStats { get; set; }
    public string City { get; set; }
}

public class PersonalStats
{
    public int? Weight { get; set; }
    public int? Height { get; set; }
}

public class AppProfile : ProfileBase
{
    public ProfileInfo ProfileInfo
    {
        get { return (ProfileInfo)GetPropertyValue("ProfileInfo"); }
    }
    public static AppProfile GetProfile()
    {
        return (AppProfile)HttpContext.Current.Profile;
    }
    public static AppProfile GetProfile(string userName)
    {
        return (AppProfile)Create(userName);
    }
}
在 web.config 檔案中啟用設定檔。 輸入類別名稱,以用來儲存/擷取在步驟 3 中建立的使用者資訊。
<profile defaultProvider="DefaultProfileProvider" enabled="true"
    inherits="UniversalProviders_ProfileMigrations.Models.AppProfile">
  <providers>
    .....
  </providers>
</profile>
在 [帳戶] 資料夾中新增網頁,以從使用者取得設定檔資料並加以儲存。 以滑鼠右鍵按一下專案,然後選取 [新增專案]。 新增具有主版頁面 'AddProfileData.aspx' 的新 Webforms 頁面。 複製 'MainContent' 區段中的下列內容:
<h2> Add Profile Data for <%# User.Identity.Name %></h2>
<asp:Label Text="" ID="Result" runat="server" />
<div>
    Date of Birth:
    <asp:TextBox runat="server" ID="DateOfBirth"/>
</div>
<div>
    Weight:
    <asp:TextBox runat="server" ID="Weight"/>
</div>
<div>
    Height:
    <asp:TextBox runat="server" ID="Height"/>
</div>
<div>
    City:
    <asp:TextBox runat="server" ID="City"/>
</div>
<div>
    <asp:Button Text="Add Profile" ID="Add" OnClick="Add_Click" runat="server" />
</div>
在程式碼後置中新增下列程式碼:
protected void Add_Click(object sender, EventArgs e)
{
    AppProfile profile = AppProfile.GetProfile(User.Identity.Name);
    profile.ProfileInfo.DateOfBirth = DateTime.Parse(DateOfBirth.Text);
    profile.ProfileInfo.UserStats.Weight = Int32.Parse(Weight.Text);
    profile.ProfileInfo.UserStats.Height = Int32.Parse(Height.Text);
    profile.ProfileInfo.City = City.Text;
    profile.Save();
}
新增定義 AppProfile 類別以移除編譯錯誤的命名空間。
執行應用程式,並使用使用者名稱 'olduser' 建立新的使用者。流覽至 [AddProfileData] 頁面,並新增使用者的設定檔資訊。
![[新增設定檔資料] 頁面的螢幕擷取畫面,以新增使用者的設定檔資訊。](migrating-universal-provider-data-for-membership-and-user-profiles-to-aspnet-identity/_static/image2.png)
您可以使用 [伺服器總管] 視窗,確認資料是以序列化 xml 的形式儲存在 [設定檔] 資料表中。 在 Visual Studio 中,從 [檢視] 功能表選擇 [伺服器總管]。 web.config 檔案中 定義的資料庫應該有資料連線。 按一下資料連線會顯示不同的子類別。 展開 [資料表] 以顯示資料庫中的不同資料表,然後在 [設定檔] 上按一下滑鼠右鍵,然後選擇 [顯示資料表資料] 以檢視 [設定檔] 資料表中儲存的設定檔資料。
![[伺服器總管] 視窗的螢幕擷取畫面,其中顯示儲存在 [設定檔] 資料表中的資料。](migrating-universal-provider-data-for-membership-and-user-profiles-to-aspnet-identity/_static/image3.png)
![[設定檔] 資料表的螢幕擷取畫面。](migrating-universal-provider-data-for-membership-and-user-profiles-to-aspnet-identity/_static/image4.png)
若要讓現有的資料庫與身分識別系統搭配運作,我們需要更新 Identity 資料庫中的架構,以支援我們新增至原始資料庫的欄位。 這可以使用 SQL 腳本來建立新的資料表,並複製現有的資訊。 在 [伺服器總管] 視窗中,展開 [DefaultConnection] 以顯示資料表。 以滑鼠右鍵按一下 [資料表],然後選取 [新增查詢]
![選取 [新增查詢],以更新身分識別資料庫中架構的螢幕擷取畫面。](migrating-universal-provider-data-for-membership-and-user-profiles-to-aspnet-identity/_static/image5.png)
從 貼上 SQL 腳本 https://raw.github.com/suhasj/UniversalProviders-Identity-Migrations/master/Migration.txt 並加以執行。 如果重新整理 'DefaultConnection',我們可以看到已加入新的資料表。 您可以檢查資料表內的資料,以查看資訊是否已移轉。
![[已重新整理預設連線] 和 [新增資料表] 的螢幕擷取畫面。](migrating-universal-provider-data-for-membership-and-user-profiles-to-aspnet-identity/_static/image6.png)
安裝 ASP.NET 身分識別所需的 Nuget 套件:
- Microsoft.AspNet.Identity.EntityFramework
- Microsoft.AspNet.Identity.Owin
- Microsoft.Owin.Host.SystemWeb
- Microsoft.Owin.Security.Facebook
- Microsoft.Owin.Security.Google
- Microsoft.Owin.Security.MicrosoftAccount
- Microsoft.Owin.Security.Twitter
如需管理 Nuget 套件的詳細資訊,請參閱 這裡
若要使用資料表中的現有資料,我們需要建立模型類別,以對應回資料表,並在身分識別系統中連結它們。 作為身分識別合約的一部分,模型類別應該實作 Identity.Core dll 中定義的介面,也可以擴充 Microsoft.AspNet.Identity.EntityFramework 中這些介面的現有實作。 我們將使用角色、使用者登入和使用者宣告的現有類別。 我們需要針對我們的範例使用自訂使用者。 以滑鼠右鍵按一下專案,然後建立新的資料夾 'IdentityModels'。 新增 'User' 類別,如下所示:
using Microsoft.AspNet.Identity.EntityFramework;
using System;
using System.Collections.Generic;
using System.Linq;
using System.Web;
using UniversalProviders_ProfileMigrations.Models;

namespace UniversalProviders_Identity_Migrations
{
    public class User : IdentityUser
    {
        public User()
        {
            CreateDate = DateTime.UtcNow;
            IsApproved = false;
            LastLoginDate = DateTime.UtcNow;
            LastActivityDate = DateTime.UtcNow;
            LastPasswordChangedDate = DateTime.UtcNow;
            Profile = new ProfileInfo();
        }

        public System.Guid ApplicationId { get; set; }
        public bool IsAnonymous { get; set; }
        public System.DateTime? LastActivityDate { get; set; }
        public string Email { get; set; }
        public string PasswordQuestion { get; set; }
        public string PasswordAnswer { get; set; }
        public bool IsApproved { get; set; }
        public bool IsLockedOut { get; set; }
        public System.DateTime? CreateDate { get; set; }
        public System.DateTime? LastLoginDate { get; set; }
        public System.DateTime? LastPasswordChangedDate { get; set; }
        public System.DateTime? LastLockoutDate { get; set; }
        public int FailedPasswordAttemptCount { get; set; }
        public System.DateTime? FailedPasswordAttemptWindowStart { get; set; }
        public int FailedPasswordAnswerAttemptCount { get; set; }
        public System.DateTime? FailedPasswordAnswerAttemptWindowStart { get; set; }
        public string Comment { get; set; }
        public ProfileInfo Profile { get; set; }
    }
}
請注意,'ProfileInfo' 現在是使用者類別上的屬性。 因此,我們可以使用使用者類別直接處理設定檔資料。
從下載來源複製 IdentityModels 和 IdentityAccount 資料夾中的檔案 ( https://github.com/suhasj/UniversalProviders-Identity-Migrations/tree/master/UniversalProviders-Identity-Migrations ) 。 這些具有剩餘的模型類別,以及使用 ASP.NET 身分識別 API 進行使用者和角色管理所需的新頁面。 所使用的方法與 SQL 成員資格類似,您可以在 這裡找到詳細的說明。
如果應用程式使用 SQLite 作為其身分識別資料存放區,則不支援某些命令。 由於資料庫引擎的限制,
Alter命令會擲回下列例外狀況:「System.NotSupportedException:SQLite 不支援此移轉作業。」
作為因應措施,請在資料庫上執行 Code First 移轉來變更資料表。
如先前所述,我們需要還原序列化 Profiles 資料表中的 xml 資料,並將它儲存在 AspNetUsers 資料表的資料行中。 新資料行是在上一個步驟的 users 資料表中建立,因此,所有資料行都是以必要的資料填入這些資料行。 若要這樣做,我們將使用主控台應用程式執行一次,以填入 users 資料表中新建立的資料行。
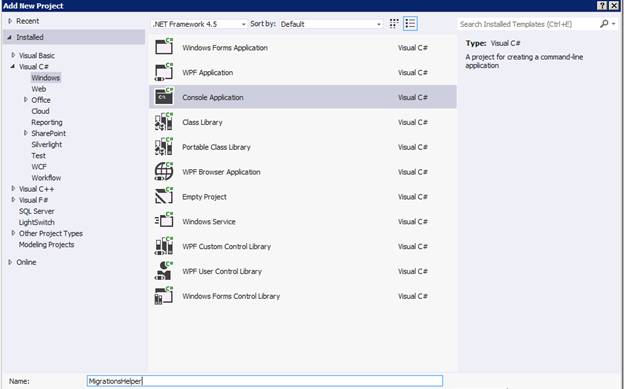
在結束的解決方案中建立新的主控台應用程式。
安裝最新版的 Entity Framework 套件。
將上面建立的 Web 應用程式新增為主控台應用程式的參考。 若要這樣做,請以滑鼠右鍵按一下 [專案],然後按一下 [新增參考],然後按一下 [方案],然後按一下專案,然後按一下 [確定]。
複製 Program.cs 類別中的下列程式碼。 此邏輯會讀取每個使用者的設定檔資料,並將其序列化為 'ProfileInfo' 物件,並將其儲存回資料庫。
public class Program
{
    var dbContext = new ApplicationDbContext();
    foreach (var profile in dbContext.Profiles)
    {
        var stringId = profile.UserId.ToString();
        var user = dbContext.Users.Where(x => x.Id == stringId).FirstOrDefault();
        Console.WriteLine("Adding Profile for user:" + user.UserName);
        var serializer = new XmlSerializer(typeof(ProfileInfo));
        var stringReader = new StringReader(profile.PropertyValueStrings);
        var profileData = serializer.Deserialize(stringReader) as ProfileInfo;
        if (profileData == null)
        {
            Console.WriteLine("Profile data deserialization error for user:" + user.UserName);
        }
        else
        {
            user.Profile = profileData;
        }
    }
    dbContext.SaveChanges();
}
使用的某些模型定義在 Web 應用程式專案的 'IdentityModels' 資料夾中,因此您必須包含對應的命名空間。
上述程式碼適用于先前步驟所建立之 Web 應用程式專案之 App_Data 資料夾中的資料庫檔案。 若要參考,請使用 Web 應用程式web.config中的連接字串,更新主控台應用程式的app.config檔案中的連接字串。 也提供 'AttachDbFilename' 屬性中的完整實體路徑。
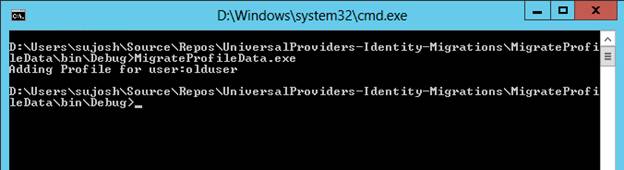
開啟命令提示字元,然後流覽至上述主控台應用程式的 bin 資料夾。 執行可執行檔並檢閱記錄輸出,如下圖所示。
在 [伺服器總管] 中開啟 'AspNetUsers' 資料表,並確認保存屬性的新資料行中的資料。 應該使用對應的屬性值來更新它們。
使用使用 ASP.NET Identity 實作的新增成員資格頁面,從舊資料庫登入使用者。 使用者應該能夠使用相同的認證登入。 嘗試其他功能,例如新增 OAuth、建立新使用者、變更密碼、新增角色、將使用者新增至角色等等。
應擷取並儲存在使用者資料表中的舊使用者和新使用者的設定檔資料。 不應該再參考舊的資料表。
本文說明移轉 Web 應用程式的程式,這些應用程式使用提供者模型來 ASP.NET 身分識別。 本文也概述移轉設定檔資料,讓使用者連結到身分識別系統。 請留下下列批註,以瞭解移轉應用程式時遇到的問題。
感謝 Rick Anderson 和 Robert McMurray 檢閱文章。