本文說明如何部署已安裝Key Vault 憑證的 Azure Stack Hub 虛擬機(VM)。
概述
憑證可用於許多案例,例如向 Active Directory 進行驗證,或加密 Web 流量。 您可以將憑證安全地儲存為 Azure Stack Hub 金鑰保存庫中的秘密。 使用 Azure Stack Hub Key Vault 的優點如下:
- 憑證不會在腳本、命令行歷程記錄或範本中公開。
- 憑證管理程式已簡化。
- 您可以控制存取憑證的金鑰。
流程描述
下列步驟說明將憑證推送至 VM 所需的程式:
- 建立金鑰保存庫機密。
- 更新 azuredeploy.parameters.json 檔案。
- 部署範本。
注意
如果您是透過 VPN 連線,則可以從 Azure Stack 開發工具套件 (ASDK) 或從外部用戶端使用這些步驟。
先決條件
- 您必須訂閱包含 Key Vault 服務的供應專案。
- 安裝適用於 Azure Stack Hub 的 PowerShell。
- 設定 Azure Stack Hub 使用者的 PowerShell 環境。
建立金鑰保存庫機密
下列腳本會以 .pfx 格式建立憑證、建立密鑰保存庫,並將憑證儲存在密鑰保存庫中做為秘密。 秘密的 contentType 必須設定為 pfx。
重要
建立金鑰保存庫時,您必須使用 -EnabledForDeployment 參數。 此參數可確保可從 Azure Resource Manager 樣本參考金鑰保存庫。
# Create a certificate in the .pfx format
New-SelfSignedCertificate `
  -certstorelocation cert:\LocalMachine\My `
  -dnsname contoso.microsoft.com

$pwd = ConvertTo-SecureString `
  -String "<Password used to export the certificate>" `
  -Force `
  -AsPlainText

Export-PfxCertificate `
  -cert "cert:\localMachine\my\<certificate thumbprint that was created in the previous step>" `
  -FilePath "<Fully qualified path to where the exported certificate can be stored>" `
  -Password $pwd

# Create a key vault and upload the certificate into the key vault as a secret
$vaultName = "contosovault"
$resourceGroup = "contosovaultrg"
$location = "local"
$secretName = "servicecert"
$fileName = "<Fully qualified path to where the exported certificate can be stored>"
$certPassword = "<Password used to export the certificate>"

$fileContentBytes = get-content $fileName `
  -Encoding Byte

$fileContentEncoded = [System.Convert]::ToBase64String($fileContentBytes)
$jsonObject = @"
{
"data": "$filecontentencoded",
"dataType" :"pfx",
"password": "$certPassword"
}
"@
$jsonObjectBytes = [System.Text.Encoding]::UTF8.GetBytes($jsonObject)
$jsonEncoded = [System.Convert]::ToBase64String($jsonObjectBytes)

New-AzResourceGroup `
  -Name $resourceGroup `
  -Location $location

New-AzKeyVault `
  -VaultName $vaultName `
  -ResourceGroupName $resourceGroup `
  -Location $location `
  -sku standard `
  -EnabledForDeployment

$secret = ConvertTo-SecureString `
  -String $jsonEncoded `
  -AsPlainText -Force

Set-AzureKeyVaultSecret `
  -VaultName $vaultName `
  -Name $secretName `
   -SecretValue $secret
當您執行此文稿時,輸出會包含秘密 URI。 請記下此 URI,因為您必須在推送憑證至 Windows Resource Manager 範本 中引用它。 將 vm-push-certificate-windows 範本資料夾下載到您的開發電腦。 此資料夾包含下列步驟中所需的 azuredeploy.json 和 azuredeploy.parameters.json 檔案。
根據您的環境值修改 azuredeploy.parameters.json 檔案。 重要參數是保存庫名稱、保存庫資源群組和秘密 URI(如先前腳本所產生的)。 下一節顯示參數檔案的範例。
更新 azuredeploy.parameters.json 檔案
使用 、秘密 URI、vaultName和其他參數,根據您的環境更新 VmName 檔案。 下列 JSON 檔案顯示樣本參數檔案的範例:
{
  "$schema": "https://schema.management.azure.com/schemas/2015-01-01/deploymentParameters.json#",
  "contentVersion": "1.0.0.0",
  "parameters": {
    "newStorageAccountName": {
      "value": "kvstorage01"
    },
    "vmName": {
      "value": "VM1"
    },
    "vmSize": {
      "value": "Standard_D1_v2"
    },
    "adminUserName": {
      "value": "demouser"
    },
    "adminPassword": {
      "value": "demouser@123"
    },
    "vaultName": {
      "value": "contosovault"
    },
    "vaultResourceGroup": {
      "value": "contosovaultrg"
    },
    "secretUrlWithVersion": {
      "value": "https://testkv001.vault.local.azurestack.external/secrets/testcert002/82afeeb84f4442329ce06593502e7840"
    }
  }
}
部署範本
使用下列 PowerShell 腳本部署範本:
# Deploy a Resource Manager template to create a VM and push the secret to it
New-AzResourceGroupDeployment `
  -Name KVDeployment `
  -ResourceGroupName $resourceGroup `
  -TemplateFile "<Fully qualified path to the azuredeploy.json file>" `
  -TemplateParameterFile "<Fully qualified path to the azuredeploy.parameters.json file>"
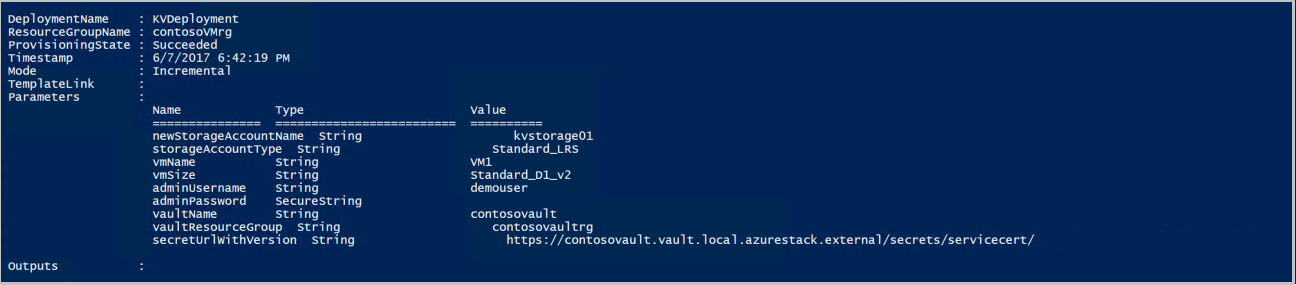
成功部署範本時,會顯示下列輸出:
Azure Stack Hub 會在部署期間將憑證推送至 VM。 憑證位置取決於 VM 的作系統:
- 在 Windows 中,憑證會新增至 LocalMachine 憑證位置,以及使用者提供的憑證存放區。
- 在 Linux 中,憑證會放在 /var/lib/waagent 目錄中,其中 X509 憑證檔案的檔名為 UppercaseThumbprint.crt,而私鑰的檔名為 UppercaseThumbprint.prv。
撤銷憑證
淘汰憑證是憑證管理程式的一部分。 您無法刪除舊版的憑證,但您可以使用 Set-AzureKeyVaultSecretAttribute Cmdlet 加以停用。
下列範例示範如何停用憑證。 針對 VaultName、Name和 Version 參數使用您自己的值。
Set-AzureKeyVaultSecretAttribute -VaultName contosovault -Name servicecert -Version e3391a126b65414f93f6f9806743a1f7 -Enable 0