這很重要
自 2025 年 5 月 1 日起,Azure AD B2C 將不再可供新客戶購買。 在我們的常見問題中深入瞭解。
開始之前,請使用此頁面頂端的 [選擇原則類型] 選取器,選擇您要設定的原則類型。 Azure Active Directory B2C 提供兩種方法來定義使用者如何與您的應用程式互動:透過預先定義的使用者流程,或透過完全可設定的自訂原則。 此文章中所需的步驟隨各方法而異。
調整 Azure Active Directory B2C(Azure AD B2C)呈現給顧客的品牌設計和使用者介面的自定義,可協助您在應用程式中提供順暢的用戶體驗。 這些體驗包括註冊、登入、配置檔編輯和密碼重設。 本文提供如何使用頁面範本和公司品牌自定義 Azure AD B2C 頁面的步驟。
小提示
若要在頁面範本、橫幅標誌、背景影像或背景色彩之外自定義使用者流程頁面的其他層面,請參閱如何使用 HTML 範本自定義 UI。
先決條件
- 建立使用者流程,讓使用者能夠註冊並登入您的應用程式。
- 註冊 Web 應用程式。
- 完成開始使用 Active Directory B2C 中的自定義原則中的步驟。 本教學課程會引導您更新自定義原則檔案,以使用您的 Azure AD B2C 租用戶設定。
- 註冊 Web 應用程式。
概觀
Azure AD B2C 提供數個內建範本,您可以選擇為使用者體驗頁面提供專業外觀。 這些頁面範本也可以使用 公司商標 功能,作為自定義的起點。
備註
傳統範本支援的瀏覽器包括目前和舊版 Internet Explorer、Microsoft Edge、Google Chrome、Mozilla Firefox 和 Safari。 遠洋藍和石板灰色範本可能具有較舊瀏覽器版本的有限支援,例如 Internet Explorer 11 和 10;建議您使用您想要支援的瀏覽器來測試應用程式。
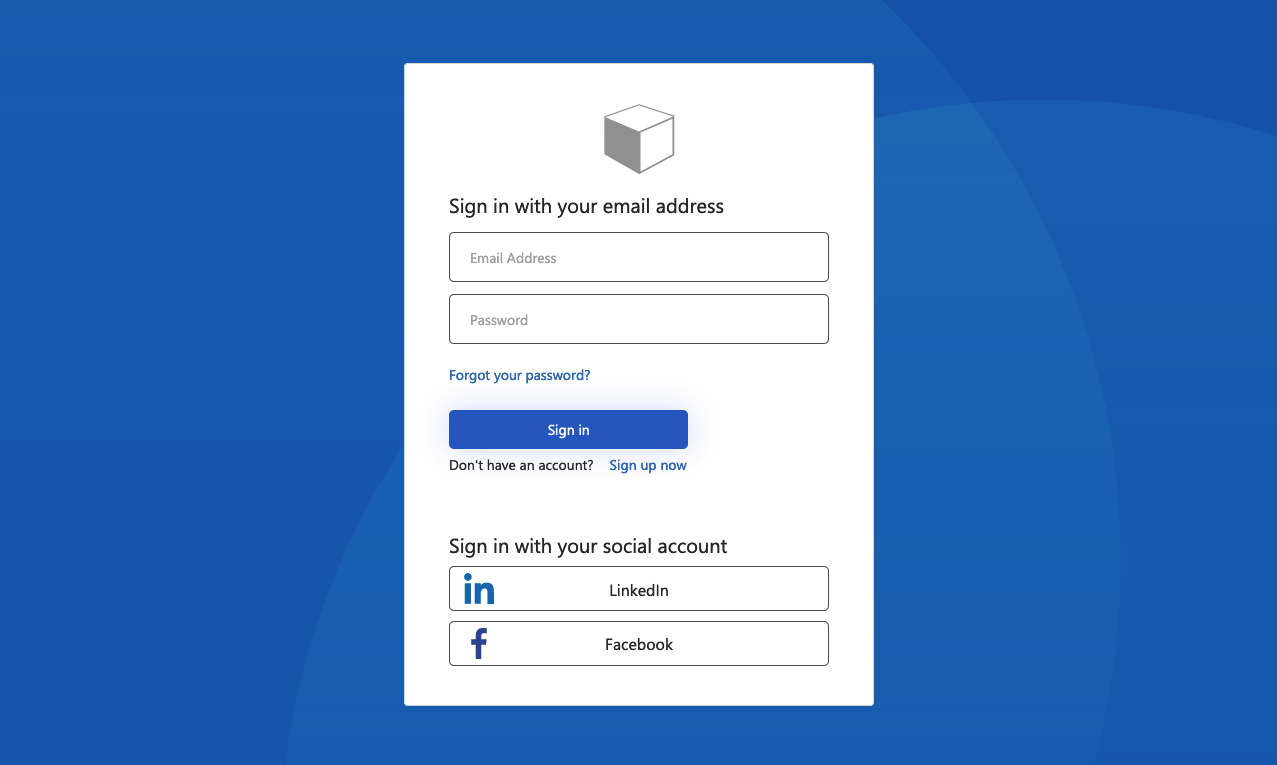
海洋藍
在註冊和登入頁面上呈現的 Ocean Blue 模板範例:
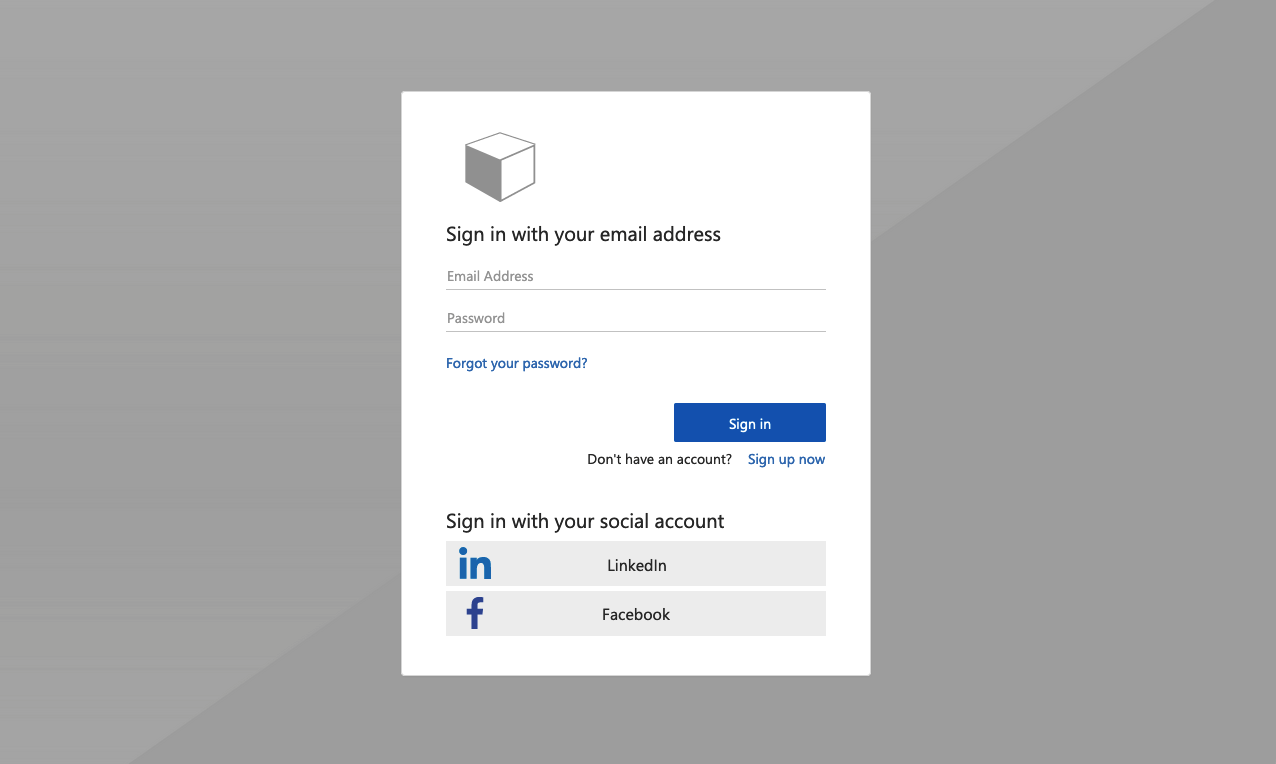
石板灰色
在註冊登入頁面上呈現的「Slate Gray」樣板範例:
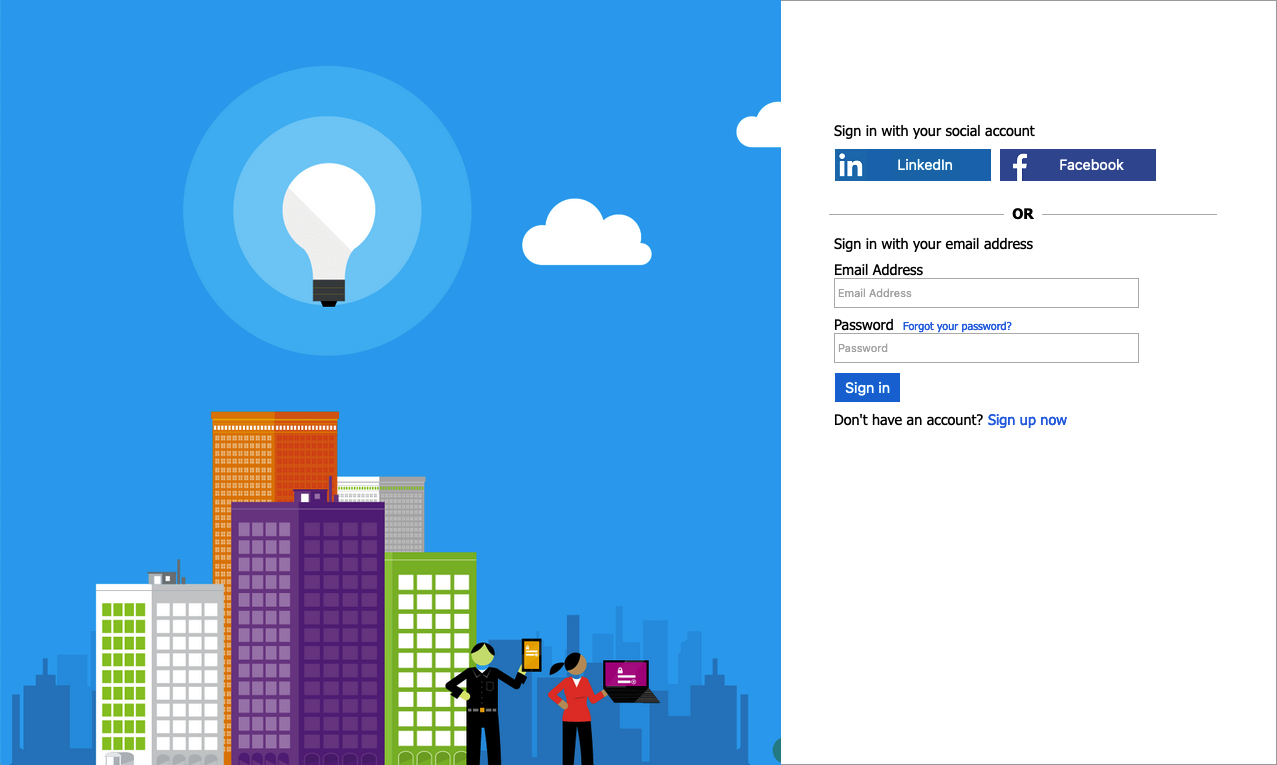
經典
在註冊登入頁面上呈現的傳統範本:
公司商標
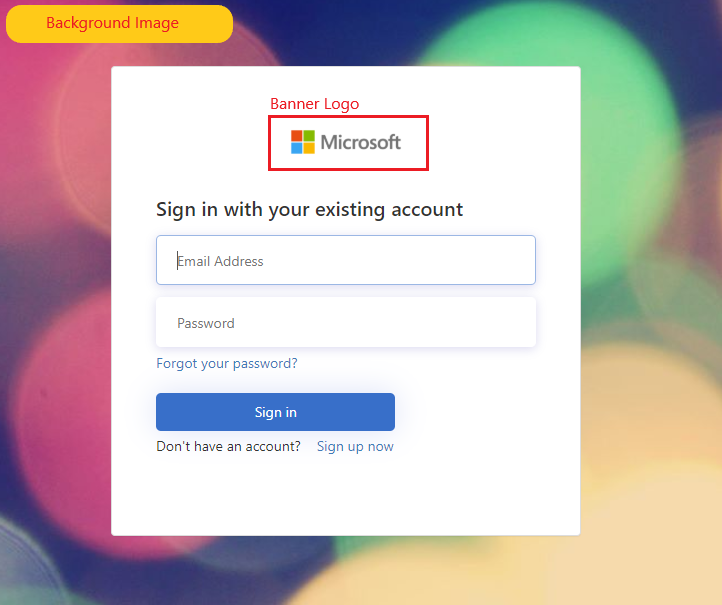
您可以使用Microsoft Entra ID 公司商標,使用橫幅標誌、背景影像和背景色彩自定義 Azure AD B2C 頁面。 公司商標包括註冊、登入、配置檔編輯和密碼重設。
下列範例顯示使用 Ocean Blue 範本的自定義標誌、背景影像 的註冊和登入 頁面:
選取頁面範本
- 登入 Azure 入口網站。
- 如果您有多個租用戶的存取權,請使用頂端功能表中的 [設定] 圖示,從 [目錄 + 訂用帳戶] 功能表切換至您的 Azure AD B2C 租用戶。
- 在 Azure 入口網站中,搜尋並選取 [Azure AD B2C]。
- 選取 [使用者流程]。
- 選取您想要自定義的使用者流程。
- 在左側功能表中的 [自定義 ] 下,選取 [版面配置 ],然後選取 [範本]。

當您選擇範本時,選取的範本會套用至使用者流程中的所有頁面。 每個頁面的 URI 會顯示在 [ 自訂頁面 URI] 字段中。
若要選取頁面範本,請設定LoadUri內容定義的 元素。 下列範例顯示內容定義識別碼和對應的 LoadUri。
海洋藍:
<ContentDefinitions>
  <ContentDefinition Id="api.error">
    <LoadUri>~/tenant/templates/AzureBlue/exception.cshtml</LoadUri>
  </ContentDefinition>
  <ContentDefinition Id="api.idpselections">
    <LoadUri>~/tenant/templates/AzureBlue/idpSelector.cshtml</LoadUri>
  </ContentDefinition>
  <ContentDefinition Id="api.idpselections.signup">
    <LoadUri>~/tenant/templates/AzureBlue/idpSelector.cshtml</LoadUri>
  </ContentDefinition>
  <ContentDefinition Id="api.signuporsignin">
    <LoadUri>~/tenant/templates/AzureBlue/unified.cshtml</LoadUri>
  </ContentDefinition>
  <ContentDefinition Id="api.selfasserted">
    <LoadUri>~/tenant/templates/AzureBlue/selfAsserted.cshtml</LoadUri>
  </ContentDefinition>
  <ContentDefinition Id="api.selfasserted.profileupdate">
    <LoadUri>~/tenant/templates/AzureBlue/selfAsserted.cshtml</LoadUri>
  </ContentDefinition>
  <ContentDefinition Id="api.localaccountsignup">
    <LoadUri>~/tenant/templates/AzureBlue/selfAsserted.cshtml</LoadUri>
  </ContentDefinition>
  <ContentDefinition Id="api.localaccountpasswordreset">
    <LoadUri>~/tenant/templates/AzureBlue/selfAsserted.cshtml</LoadUri>
  </ContentDefinition>
  <ContentDefinition Id="api.phonefactor">
    <LoadUri>~/tenant/templates/AzureBlue/multifactor-1.0.0.cshtml</LoadUri>
  </ContentDefinition>
</ContentDefinitions>
石板灰色:
<ContentDefinitions>
  <ContentDefinition Id="api.error">
    <LoadUri>~/tenant/templates/MSA/exception.cshtml</LoadUri>
  </ContentDefinition>
  <ContentDefinition Id="api.idpselections">
    <LoadUri>~/tenant/templates/MSA/idpSelector.cshtml</LoadUri>
  </ContentDefinition>
  <ContentDefinition Id="api.idpselections.signup">
    <LoadUri>~/tenant/templates/MSA/idpSelector.cshtml</LoadUri>
  </ContentDefinition>
  <ContentDefinition Id="api.signuporsignin">
    <LoadUri>~/tenant/templates/MSA/unified.cshtml</LoadUri>
  </ContentDefinition>
  <ContentDefinition Id="api.selfasserted">
    <LoadUri>~/tenant/templates/MSA/selfAsserted.cshtml</LoadUri>
  </ContentDefinition>
  <ContentDefinition Id="api.selfasserted.profileupdate">
    <LoadUri>~/tenant/templates/MSA/selfAsserted.cshtml</LoadUri>
  </ContentDefinition>
  <ContentDefinition Id="api.localaccountsignup">
    <LoadUri>~/tenant/templates/MSA/selfAsserted.cshtml</LoadUri>
  </ContentDefinition>
  <ContentDefinition Id="api.localaccountpasswordreset">
    <LoadUri>~/tenant/templates/MSA/selfAsserted.cshtml</LoadUri>
  </ContentDefinition>
  <ContentDefinition Id="api.phonefactor">
    <LoadUri>~/tenant/templates/MSA/multifactor-1.0.0.cshtml</LoadUri>
  </ContentDefinition>
</ContentDefinitions>
經典:
<ContentDefinitions>
  <ContentDefinition Id="api.error">
    <LoadUri>~/tenant/default/exception.cshtml</LoadUri>
  </ContentDefinition>
  <ContentDefinition Id="api.idpselections">
    <LoadUri>~/tenant/default/idpSelector.cshtml</LoadUri>
  </ContentDefinition>
  <ContentDefinition Id="api.idpselections.signup">
    <LoadUri>~/tenant/default/idpSelector.cshtml</LoadUri>
  </ContentDefinition>
  <ContentDefinition Id="api.signuporsignin">
    <LoadUri>~/tenant/default/unified.cshtml</LoadUri>
  </ContentDefinition>
  <ContentDefinition Id="api.selfasserted">
    <LoadUri>~/tenant/default/selfAsserted.cshtml</LoadUri>
  </ContentDefinition>
  <ContentDefinition Id="api.selfasserted.profileupdate">
    <LoadUri>~/tenant/default/selfAsserted.cshtml</LoadUri>
  </ContentDefinition>
  <ContentDefinition Id="api.localaccountsignup">
    <LoadUri>~/tenant/default/selfAsserted.cshtml</LoadUri>
  </ContentDefinition>
  <ContentDefinition Id="api.localaccountpasswordreset">
    <LoadUri>~/tenant/default/selfAsserted.cshtml</LoadUri>
  </ContentDefinition>
  <ContentDefinition Id="api.phonefactor">
    <LoadUri>~/tenant/default/multifactor-1.0.0.cshtml</LoadUri>
  </ContentDefinition>
</ContentDefinitions>
設定公司商標
若要自定義您的使用者流程頁面,您必須先在 Microsoft Entra ID 中設定公司商標,然後在 Azure AD B2C 的使用者流程中加以啟用。
首先,設定 公司商標內的橫幅標誌、背景影像和背景色彩。
- 登入 Azure 入口網站。
- 如果您有多個租用戶的存取權,請使用頂端功能表中的 [設定] 圖示,從 [目錄 + 訂用帳戶] 功能表切換至您的 Azure AD B2C 租用戶。
- 在 Azure 入口網站中,搜尋並選取 [Azure AD B2C]。
- 在 [管理] 下,選取 [公司商標]。
- 請遵循 將商標新增至您組織的 Microsoft Entra 登入頁面中的步驟。
當您在 Azure AD B2C 中設定公司商標時,請記住下列事項:
- Azure AD B2C 中的公司商標目前僅限於 背景影像、 橫幅標誌和 背景色彩 自定義。 不支援公司商標窗格中的其他屬性,例如 [ 進階設定]。
- 在您的使用者流程頁面中,背景色彩會在載入背景影像之前顯示。 建議您選擇最符合背景影像中色彩的背景色彩,以取得更順暢的載入體驗。
- 橫幅標誌會出現在起始註冊使用者流程時傳送給用戶的驗證電子郵件中。
在使用者流程頁面中啟用公司商標
設定公司商標之後,請在您的使用者流程中加以啟用。
- 在 Azure 入口網站的左側功能表中,選取 [Azure AD B2C]。
- 在 [原則] 底下,選取 [使用者流程][原則]。
- 選取您想要啟用公司品牌形象的使用者流程。 標準登入和標準配置檔編輯使用者流程類型不支援公司商標。
- 在 [自訂] 下,選取 [版面配置],然後選取您想要自訂的頁面。 例如,選取 [統一註冊或登入] 頁面。
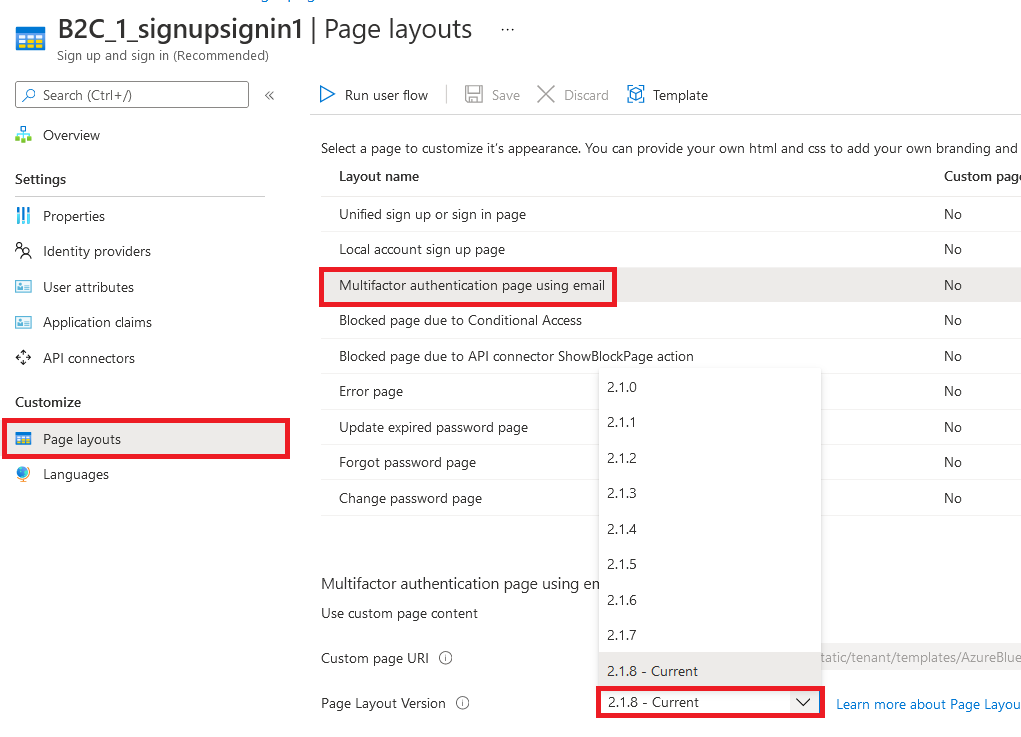
- 針對版面配置版本 (預覽),選擇1.2.0或以上的版本。
- 選取 [儲存]。
如果您想要為使用者流程中的所有頁面加上品牌,請在使用者流程中設定每個頁面的版面配置版本。
在自定義原則頁面中啟用公司商標
設定公司商標之後,請在您的自定義原則中加以啟用。 將頁面佈局版本與頁面contract版本配置於自定義原則中所有的內容定義。 值的格式必須包含contracturn:com:microsoft:aad:b2c:elements:contract:page-name:version。 若要在您的自定義原則中指定使用舊 DataUri 值的版面配置。 如需詳細資訊,請了解如何使用頁面版本來遷移至版面配置。
下列範例顯示內容定義及其對應的頁面合約,以及 Ocean Blue 頁面範本:
<ContentDefinitions>
  <ContentDefinition Id="api.error">
    <LoadUri>~/tenant/templates/AzureBlue/exception.cshtml</LoadUri>
    <DataUri>urn:com:microsoft:aad:b2c:elements:contract:globalexception:1.2.0</DataUri>
  </ContentDefinition>
  <ContentDefinition Id="api.idpselections">
    <LoadUri>~/tenant/templates/AzureBlue/idpSelector.cshtml</LoadUri>
    <DataUri>urn:com:microsoft:aad:b2c:elements:contract:providerselection:1.2.0</DataUri>
  </ContentDefinition>
  <ContentDefinition Id="api.idpselections.signup">
    <LoadUri>~/tenant/templates/AzureBlue/idpSelector.cshtml</LoadUri>
    <DataUri>urn:com:microsoft:aad:b2c:elements:contract:providerselection:1.2.0</DataUri>
  </ContentDefinition>
  <ContentDefinition Id="api.signuporsignin">
    <LoadUri>~/tenant/templates/AzureBlue/unified.cshtml</LoadUri>
    <DataUri>urn:com:microsoft:aad:b2c:elements:contract:unifiedssp:1.2.0</DataUri>
  </ContentDefinition>
  <ContentDefinition Id="api.selfasserted">
    <LoadUri>~/tenant/templates/AzureBlue/selfAsserted.cshtml</LoadUri>
    <DataUri>urn:com:microsoft:aad:b2c:elements:contract:selfasserted:1.2.0</DataUri>
  </ContentDefinition>
  <ContentDefinition Id="api.selfasserted.profileupdate">
     <LoadUri>~/tenant/templates/AzureBlue/selfAsserted.cshtml</LoadUri>
    <DataUri>urn:com:microsoft:aad:b2c:elements:contract:selfasserted:1.2.0</DataUri>
  </ContentDefinition>
  <ContentDefinition Id="api.localaccountsignup">
     <LoadUri>~/tenant/templates/AzureBlue/selfAsserted.cshtml</LoadUri>
    <DataUri>urn:com:microsoft:aad:b2c:elements:contract:selfasserted:1.2.0</DataUri>
  </ContentDefinition>
  <ContentDefinition Id="api.localaccountpasswordreset">
     <LoadUri>~/tenant/templates/AzureBlue/selfAsserted.cshtml</LoadUri>
    <DataUri>urn:com:microsoft:aad:b2c:elements:contract:selfasserted:1.2.0</DataUri>
  </ContentDefinition>
  <ContentDefinition Id="api.phonefactor">
    <LoadUri>~/tenant/templates/AzureBlue/multifactor-1.0.0.cshtml</LoadUri>
    <DataUri>urn:com:microsoft:aad:b2c:elements:contract:multifactor:1.2.0</DataUri>
  </ContentDefinition>
</ContentDefinitions>
重新排列註冊表單中的輸入欄位
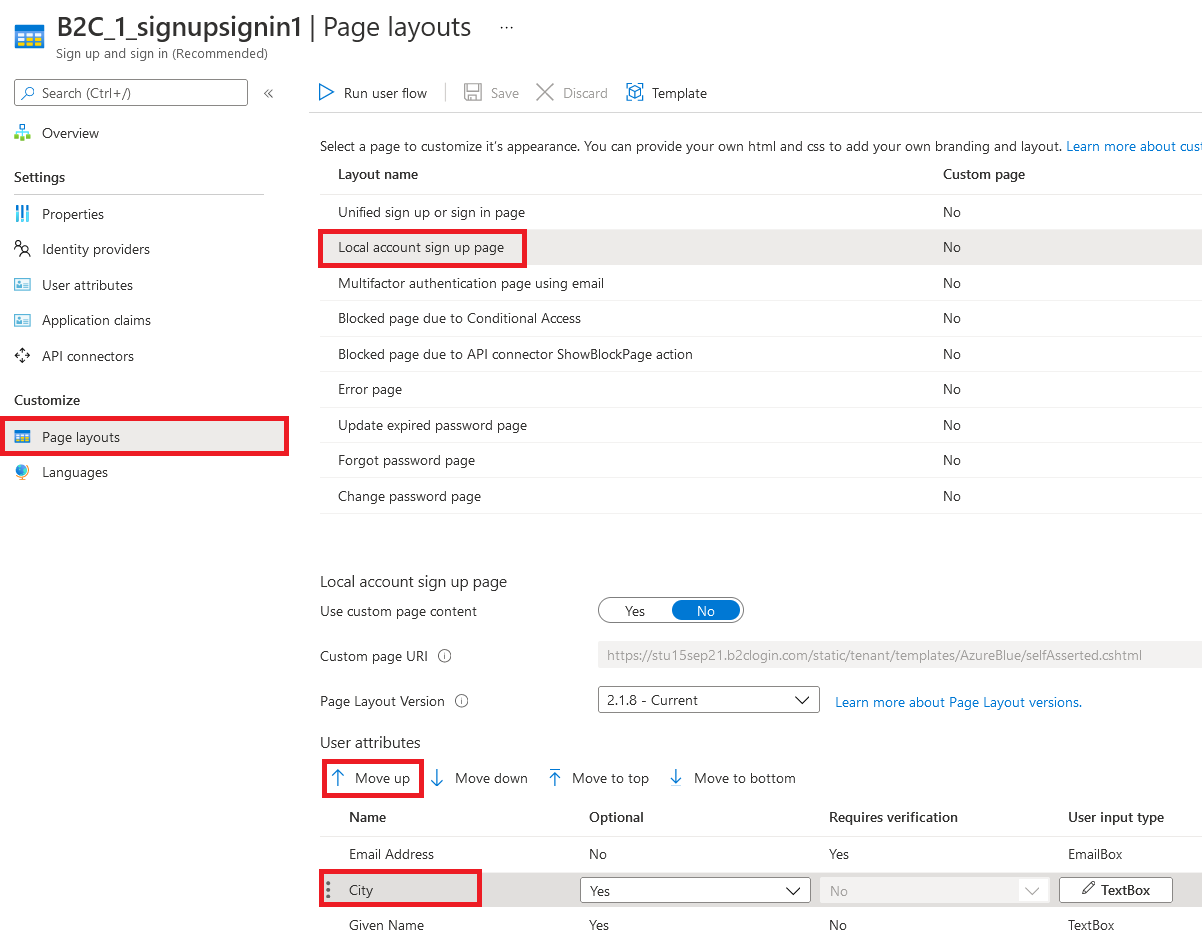
若要重新排列本機帳戶註冊頁面上的輸入欄位,請依照以下步驟操作:
- 登入 Azure 入口網站。
- 如果您有多個租用戶的存取權,請使用頂端功能表中的 [設定] 圖示,從 [目錄 + 訂用帳戶] 功能表切換至您的 Azure AD B2C 租用戶。
- 在 Azure 入口網站中,搜尋並選取 [Azure AD B2C]。
- 在左側功能表中,選取 [使用者流程]。
- 選取您想要重新排列其輸入字段的使用者流程(僅適用於本機帳戶)。
- 在左側功能表中,選取 [版面配置]
- 在表格中,選取資料列 本機帳戶註冊頁面。
- 在 [使用者屬性] 底下,選取您要重新排列的輸入字段,然後拖曳(向上或向下)並使用 [上移 ] 或 [ 下 移] 控件來達到所需的順序。
- 在頁面頂端,選取 [儲存]。
相關內容
在 Azure Active Directory B2C 中自定義應用程式的使用者介面中,尋找如何自定義應用程式使用者介面的詳細資訊。