沈浸式閱讀程式是經過全面設計的工具,可實作經實證的技術以改善閱讀理解程度。
Azure AI 視覺讀取 API 可使用 Microsoft 最新的辨識模型來偵測影像中的文字內容,並將識別出來的文字轉換為電腦可讀取的字元資料流。
在本教學課程中,您將從頭開始建立 iOS 應用程式,並且使用沉浸式閱讀程式 SDK 整合讀取 API 與沉浸式閱讀程式。 本教學課程的完整工作範例可以在 GitHub 取得。
必要條件
- Azure 訂用帳戶。 您可以免費建立一個訂用帳戶。
- MacOS 和 Xcode。
- 為 Microsoft Entra 驗證所設定的沉浸式閱讀程式資源。 遵循這些指引來設定。
- Azure AI 視覺服務的訂閱。 在 Azure 入口網站中建立 Azure AI 視覺資源。
建立 Xcode 專案
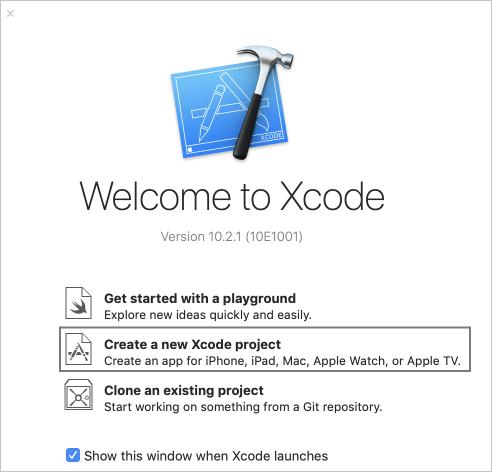
在 Xcode 中建立新的專案。
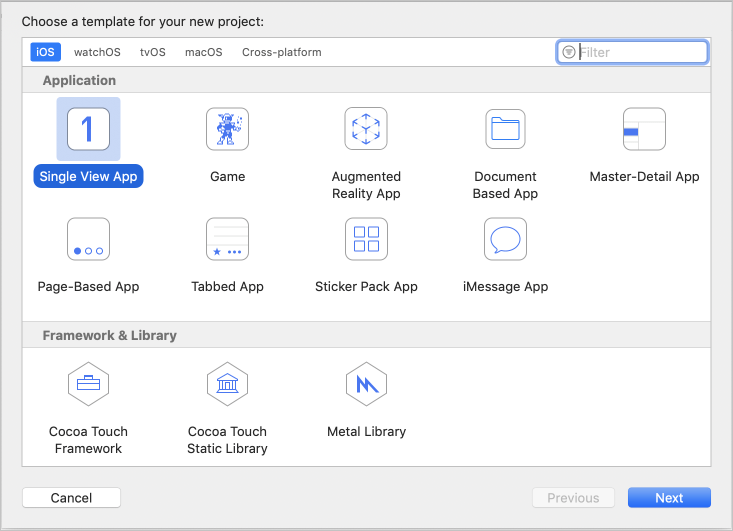
選擇 [單一檢視應用程式]。
取得 SDK CocoaPod
沈浸式閱讀程式 SDK 最簡單的使用方式是透過 CocoaPods。 若要透過 CocoaPods 安裝:
在 Xcode 專案的根目錄中執行
pod init,以建立 Podfile。藉由新增
pod 'immersive-reader-sdk', :path => 'https://github.com/microsoft/immersive-reader-sdk/tree/master/iOS/immersive-reader-sdk'將 CocoaPod 新增至 Podfile。 您的 Podfile 應該會顯示如下,並以您目標的名稱取代 picture-to-immersive-reader-swift:platform :ios, '9.0' target 'picture-to-immersive-reader-swift' do use_frameworks! # Pods for picture-to-immersive-reader-swift pod 'immersive-reader-sdk', :git => 'https://github.com/microsoft/immersive-reader-sdk.git' end在終端機中,於 Xcode 專案的目錄中執行命令
pod install,以安裝沈浸式閱讀程式 SDK Pod。將
import immersive_reader_sdk新增至所有需要參考 SDK 的檔案。確定是以開啟
.xcworkspace檔案 (而非.xcodeproj檔案) 的方式開啟專案。
取得 Microsoft Entra 驗證權杖
您需要必要條件一節的Microsoft Entra 驗證設定步驟中的一些值。 請回頭參考您從該工作階段儲存的文字檔。
TenantId     => Azure subscription TenantId
ClientId     => Microsoft Entra ApplicationId
ClientSecret => Microsoft Entra Application Service Principal password
Subdomain    => Immersive Reader resource subdomain (resource 'Name' if the resource was created in the Azure portal, or 'CustomSubDomain' option if the resource was created with Azure CLI PowerShell. Check the Azure portal for the subdomain on the Endpoint in the resource Overview page, for example, 'https://[SUBDOMAIN].cognitiveservices.azure.com/')
在包含 ViewController.swift 檔案的主要專案資料夾中,建立名為 Constants.swift 的 Swift 類別檔案。 在適用的情況下加入您的值,將類別取代為下列程式碼。 請將此檔案保存為僅存在於您電腦上的本機檔案,且切勿將此檔案認可到原始檔控制,因為其中包含不應公開的機密資料。 建議您不要將秘密保存在應用程式中。 改為使用後端服務來取得權杖,如此,秘密將可保存在應用程式和裝置以外。 後端 API 端點應在某種形式的驗證 (例如 OAuth) 後方受到保護,以防止未經授權的使用者取得權杖,而使用您的沈浸式閱讀程式服務和計費;該工作不在本教學課程的討論範圍內。
將應用程式設定為在沒有分鏡腳本的情況下執行
開啟 AppDelegate.swift,並將檔案取代為下列程式碼。
import UIKit

@UIApplicationMain
class AppDelegate: UIResponder, UIApplicationDelegate {

    var window: UIWindow?

    var navigationController: UINavigationController?

    func application(_ application: UIApplication, didFinishLaunchingWithOptions launchOptions: [UIApplication.LaunchOptionsKey: Any]?) -> Bool {
        // Override point for customization after application launch.

        window = UIWindow(frame: UIScreen.main.bounds)

        // Allow the app run without a storyboard
        if let window = window {
            let mainViewController = PictureLaunchViewController()
            navigationController = UINavigationController(rootViewController: mainViewController)
            window.rootViewController = navigationController
            window.makeKeyAndVisible()
        }
        return true
    }

    func applicationWillResignActive(_ application: UIApplication) {
        // Sent when the application is about to move from active to inactive state. This can occur for certain types of temporary interruptions (such as an incoming phone call or SMS message) or when the user quits the application and it begins the transition to the background state.
        // Use this method to pause ongoing tasks, disable timers, and invalidate graphics rendering callbacks. Games should use this method to pause the game.
    }

    func applicationDidEnterBackground(_ application: UIApplication) {
        // Use this method to release shared resources, save user data, invalidate timers, and store enough application state information to restore your application to its current state in case it is terminated later.
        // If your application supports background execution, this method is called instead of applicationWillTerminate: when the user quits.
    }

    func applicationWillEnterForeground(_ application: UIApplication) {
        // Called as part of the transition from the background to the active state; here you can undo many of the changes made on entering the background.
    }

    func applicationDidBecomeActive(_ application: UIApplication) {
        // Restart any tasks that were paused (or not yet started) while the application was inactive. If the application was previously in the background, optionally refresh the user interface.
    }

    func applicationWillTerminate(_ application: UIApplication) {
        // Called when the application is about to terminate. Save data if appropriate. See also applicationDidEnterBackground:.
    }

}
新增用來拍攝和上傳相片的功能
將 ViewController.swift 重新命名為 PictureLaunchViewController.swift,並將檔案取代為下列程式碼。
import UIKit
import immersive_reader_sdk

class PictureLaunchViewController: UIViewController, UINavigationControllerDelegate, UIImagePickerControllerDelegate {

    private var photoButton: UIButton!
    private var cameraButton: UIButton!
    private var titleText: UILabel!
    private var bodyText: UILabel!
    private var sampleContent: Content!
    private var sampleChunk: Chunk!
    private var sampleOptions: Options!
    private var imagePicker: UIImagePickerController!
    private var spinner: UIActivityIndicatorView!
    private var activityIndicatorBackground: UIView!
    private var textURL = "vision/v2.0/read/core/asyncBatchAnalyze";

    override func viewDidLoad() {
        super.viewDidLoad()

        view.backgroundColor = .white

        titleText = UILabel()
        titleText.text = "Picture to Immersive Reader with OCR"
        titleText.font = UIFont.boldSystemFont(ofSize: 32)
        titleText.textAlignment = .center
        titleText.lineBreakMode = .byWordWrapping
        titleText.numberOfLines = 0
        view.addSubview(titleText)

        bodyText = UILabel()
        bodyText.text = "Capture or upload a photo of handprinted text on a piece of paper, handwriting, typed text, text on a computer screen, writing on a white board and many more, and watch it be presented to you in the Immersive Reader!"
        bodyText.font = UIFont.systemFont(ofSize: 18)
        bodyText.lineBreakMode = .byWordWrapping
        bodyText.numberOfLines = 0
        let screenSize = self.view.frame.height
        if screenSize <= 667 {
            // Font size for smaller iPhones.
            bodyText.font = bodyText.font.withSize(16)

        } else if screenSize <= 812.0 {
            // Font size for medium iPhones.
            bodyText.font = bodyText.font.withSize(18)

        } else if screenSize <= 896  {
            // Font size for larger iPhones.
            bodyText.font = bodyText.font.withSize(20)

        } else {
            // Font size for iPads.
            bodyText.font = bodyText.font.withSize(26)
        }
        view.addSubview(bodyText)

        photoButton = UIButton()
        photoButton.backgroundColor = .darkGray
        photoButton.contentEdgeInsets = UIEdgeInsets(top: 10, left: 5, bottom: 10, right: 5)
        photoButton.layer.cornerRadius = 5
        photoButton.setTitleColor(.white, for: .normal)
        photoButton.setTitle("Choose Photo from Library", for: .normal)
        photoButton.titleLabel?.font = UIFont.systemFont(ofSize: 18, weight: .bold)
        photoButton.addTarget(self, action: #selector(selectPhotoButton(sender:)), for: .touchUpInside)
        view.addSubview(photoButton)

        cameraButton = UIButton()
        cameraButton.backgroundColor = .darkGray
        cameraButton.contentEdgeInsets = UIEdgeInsets(top: 10, left: 5, bottom: 10, right: 5)
        cameraButton.layer.cornerRadius = 5
        cameraButton.setTitleColor(.white, for: .normal)
        cameraButton.setTitle("Take Photo", for: .normal)
        cameraButton.titleLabel?.font = UIFont.systemFont(ofSize: 18, weight: .bold)
        cameraButton.addTarget(self, action: #selector(takePhotoButton(sender:)), for: .touchUpInside)
        view.addSubview(cameraButton)

        activityIndicatorBackground = UIView()
        activityIndicatorBackground.backgroundColor = UIColor.black
        activityIndicatorBackground.alpha = 0
        view.addSubview(activityIndicatorBackground)
        view.bringSubviewToFront(_: activityIndicatorBackground)

        spinner = UIActivityIndicatorView(style: .whiteLarge)
        view.addSubview(spinner)

        let layoutGuide = view.safeAreaLayoutGuide

        titleText.translatesAutoresizingMaskIntoConstraints = false
        titleText.topAnchor.constraint(equalTo: layoutGuide.topAnchor, constant: 25).isActive = true
        titleText.leadingAnchor.constraint(equalTo: layoutGuide.leadingAnchor, constant: 20).isActive = true
        titleText.trailingAnchor.constraint(equalTo: layoutGuide.trailingAnchor, constant: -20).isActive = true

        bodyText.translatesAutoresizingMaskIntoConstraints = false
        bodyText.topAnchor.constraint(equalTo: titleText.bottomAnchor, constant: 35).isActive = true
        bodyText.leadingAnchor.constraint(equalTo: layoutGuide.leadingAnchor, constant: 20).isActive = true
        bodyText.trailingAnchor.constraint(equalTo: layoutGuide.trailingAnchor, constant: -20).isActive = true

        cameraButton.translatesAutoresizingMaskIntoConstraints = false
        if screenSize > 896  {
            // Constraints for iPads.
            cameraButton.heightAnchor.constraint(equalToConstant: 150).isActive = true
            cameraButton.leadingAnchor.constraint(equalTo: layoutGuide.leadingAnchor, constant: 60).isActive = true
            cameraButton.trailingAnchor.constraint(equalTo: layoutGuide.trailingAnchor, constant: -60).isActive = true
            cameraButton.topAnchor.constraint(equalTo: bodyText.bottomAnchor, constant: 150).isActive = true
        } else {
            // Constraints for iPhones.
            cameraButton.heightAnchor.constraint(equalToConstant: 100).isActive = true
            cameraButton.leadingAnchor.constraint(equalTo: layoutGuide.leadingAnchor, constant: 30).isActive = true
            cameraButton.trailingAnchor.constraint(equalTo: layoutGuide.trailingAnchor, constant: -30).isActive = true
            cameraButton.topAnchor.constraint(equalTo: bodyText.bottomAnchor, constant: 100).isActive = true
        }
        cameraButton.bottomAnchor.constraint(equalTo: photoButton.topAnchor, constant: -40).isActive = true

        photoButton.translatesAutoresizingMaskIntoConstraints = false
        if screenSize > 896  {
            // Constraints for iPads.
            photoButton.heightAnchor.constraint(equalToConstant: 150).isActive = true
            photoButton.leadingAnchor.constraint(equalTo: layoutGuide.leadingAnchor, constant: 60).isActive = true
            photoButton.trailingAnchor.constraint(equalTo: layoutGuide.trailingAnchor, constant: -60).isActive = true
        } else {
            // Constraints for iPhones.
            photoButton.heightAnchor.constraint(equalToConstant: 100).isActive = true
            photoButton.leadingAnchor.constraint(equalTo: layoutGuide.leadingAnchor, constant: 30).isActive = true
            photoButton.trailingAnchor.constraint(equalTo: layoutGuide.trailingAnchor, constant: -30).isActive = true
        }

        spinner.translatesAutoresizingMaskIntoConstraints = false
        spinner.centerXAnchor.constraint(equalTo: view.centerXAnchor).isActive = true
        spinner.centerYAnchor.constraint(equalTo: view.centerYAnchor).isActive = true

        activityIndicatorBackground.translatesAutoresizingMaskIntoConstraints = false
        activityIndicatorBackground.topAnchor.constraint(equalTo: layoutGuide.topAnchor).isActive = true
        activityIndicatorBackground.bottomAnchor.constraint(equalTo: layoutGuide.bottomAnchor).isActive = true
        activityIndicatorBackground.leadingAnchor.constraint(equalTo: layoutGuide.leadingAnchor).isActive = true
        activityIndicatorBackground.trailingAnchor.constraint(equalTo: layoutGuide.trailingAnchor).isActive = true

        // Create content and options.
        sampleChunk = Chunk(content: bodyText.text!, lang: nil, mimeType: nil)
        sampleContent = Content(title: titleText.text!, chunks: [sampleChunk])
        sampleOptions = Options(uiLang: nil, timeout: nil, uiZIndex: nil)
    }

    @IBAction func selectPhotoButton(sender: AnyObject) {
            // Launch the photo picker.
            imagePicker =  UIImagePickerController()
            imagePicker.delegate = self
            self.imagePicker.sourceType = .photoLibrary
            self.imagePicker.allowsEditing = true
            self.present(self.imagePicker, animated: true, completion: nil)
            self.photoButton.isEnabled = true
    }

    @IBAction func takePhotoButton(sender: AnyObject) {
        if !UIImagePickerController.isSourceTypeAvailable(.camera) {
            // If there is no camera on the device, disable the button
            self.cameraButton.backgroundColor = .gray
            self.cameraButton.isEnabled = true

        } else {
            // Launch the camera.
            imagePicker =  UIImagePickerController()
            imagePicker.delegate = self
            self.imagePicker.sourceType = .camera
            self.present(self.imagePicker, animated: true, completion: nil)
            self.cameraButton.isEnabled = true
        }
    }

    func imagePickerController(_ picker: UIImagePickerController, didFinishPickingMediaWithInfo info: [UIImagePickerController.InfoKey : Any]) {
        imagePicker.dismiss(animated: true, completion: nil)
        photoButton.isEnabled = false
        cameraButton.isEnabled = false
        self.spinner.startAnimating()
        activityIndicatorBackground.alpha = 0.6

        // Retrieve the image.
        let image = (info[.originalImage] as? UIImage)!

        // Retrieve the byte array from image.
        let imageByteArray = image.jpegData(compressionQuality: 1.0)

        // Call the getTextFromImage function passing in the image the user takes or chooses.
        getTextFromImage(subscriptionKey: Constants.computerVisionSubscriptionKey, getTextUrl: Constants.computerVisionEndPoint + textURL, pngImage: imageByteArray!, onSuccess: { cognitiveText in
            print("cognitive text is: \(cognitiveText)")
            DispatchQueue.main.async {
                self.photoButton.isEnabled = true
                self.cameraButton.isEnabled = true
            }

            // Create content and options with the text from the image.
            let sampleImageChunk = Chunk(content: cognitiveText, lang: nil, mimeType: nil)
            let sampleImageContent = Content(title: "Text from image", chunks: [sampleImageChunk])
            let sampleImageOptions = Options(uiLang: nil, timeout: nil, uiZIndex: nil)

            // Callback to get token for Immersive Reader.
            self.getToken(onSuccess: {cognitiveToken in

                DispatchQueue.main.async {

                    launchImmersiveReader(navController: self.navigationController!, token: cognitiveToken, subdomain: Constants.subdomain, content: sampleImageContent, options: sampleImageOptions, onSuccess: {
                        self.spinner.stopAnimating()
                        self.activityIndicatorBackground.alpha = 0
                        self.photoButton.isEnabled = true
                        self.cameraButton.isEnabled = true

                    }, onFailure: { error in
                        print("An error occurred launching the Immersive Reader: \(error)")
                        self.spinner.stopAnimating()
                        self.activityIndicatorBackground.alpha = 0
                        self.photoButton.isEnabled = true
                        self.cameraButton.isEnabled = true

                    })
                }

            }, onFailure: { error in
                DispatchQueue.main.async {
                    self.photoButton.isEnabled = true
                    self.cameraButton.isEnabled = true

                }
                print("An error occurred retrieving the token: \(error)")
            })

        }, onFailure: { error in
            DispatchQueue.main.async {
                self.photoButton.isEnabled = true
                self.cameraButton.isEnabled = true
            }

        })
    }

    /// Retrieves the token for the Immersive Reader using Microsoft Entra authentication
    ///
    /// - Parameters:
    ///     -onSuccess: A closure that gets called when the token is successfully received using Microsoft Entra authentication.
    ///     -theToken: The token for the Immersive Reader received using Microsoft Entra authentication.
    ///     -onFailure: A closure that gets called when the token fails to be obtained from the Microsoft Entra authentication.
    ///     -theError: The error that occurred when the token fails to be obtained from the Microsoft Entra authentication.
    func getToken(onSuccess: @escaping (_ theToken: String) -> Void, onFailure: @escaping ( _ theError: String) -> Void) {

        let tokenForm = "grant_type=client_credentials&resource=https://cognitiveservices.azure.com/&client_id=" + Constants.clientId + "&client_secret=" + Constants.clientSecret
        let tokenUrl = "https://login.windows.net/" + Constants.tenantId + "/oauth2/token"

        var responseTokenString: String = "0"

        let url = URL(string: tokenUrl)!
        var request = URLRequest(url: url)
        request.httpBody = tokenForm.data(using: .utf8)
        request.httpMethod = "POST"

        let task = URLSession.shared.dataTask(with: request) { data, response, error in
            guard let data = data,
                let response = response as? HTTPURLResponse,
                // Check for networking errors.
                error == nil else {
                    print("error", error ?? "Unknown error")
                    onFailure("Error")
                    return
            }

            // Check for http errors.
            guard (200 ... 299) ~= response.statusCode else {
                print("statusCode should be 2xx, but is \(response.statusCode)")
                print("response = \(response)")
                onFailure(String(response.statusCode))
                return
            }

            let responseString = String(data: data, encoding: .utf8)
            print("responseString = \(String(describing: responseString!))")

            let jsonResponse = try? JSONSerialization.jsonObject(with: data, options: [])
            guard let jsonDictonary = jsonResponse as? [String: Any] else {
                onFailure("Error parsing JSON response.")
                return
            }
            guard let responseToken = jsonDictonary["access_token"] as? String else {
                onFailure("Error retrieving token from JSON response.")
                return
            }
            responseTokenString = responseToken
            onSuccess(responseTokenString)
        }

        task.resume()
    }

    /// Returns the text string after it has been extracted from an Image input.
    ///
    /// - Parameters:
    ///     -subscriptionKey: The Azure subscription key.
    ///     -pngImage: Image data in PNG format.
    /// - Returns: a string of text representing the
    func getTextFromImage(subscriptionKey: String, getTextUrl: String, pngImage: Data, onSuccess: @escaping (_ theToken: String) -> Void, onFailure: @escaping ( _ theError: String) -> Void) {

        let url = URL(string: getTextUrl)!
        var request = URLRequest(url: url)
        request.setValue(subscriptionKey, forHTTPHeaderField: "Ocp-Apim-Subscription-Key")
        request.setValue("application/octet-stream", forHTTPHeaderField: "Content-Type")

        // Two REST API calls are required to extract text. The first call is to submit the image for processing, and the next call is to retrieve the text found in the image.

        // Set the body to the image in byte array format.
        request.httpBody = pngImage

        request.httpMethod = "POST"

        let task = URLSession.shared.dataTask(with: request) { data, response, error in
            guard let data = data,
                let response = response as? HTTPURLResponse,
                // Check for networking errors.
                error == nil else {
                    print("error", error ?? "Unknown error")
                    onFailure("Error")
                    return
            }

            // Check for http errors.
            guard (200 ... 299) ~= response.statusCode else {
                print("statusCode should be 2xx, but is \(response.statusCode)")
                print("response = \(response)")
                onFailure(String(response.statusCode))
                return
            }

            let responseString = String(data: data, encoding: .utf8)
            print("responseString = \(String(describing: responseString!))")

            // Send the second call to the API. The first API call returns operationLocation which stores the URI for the second REST API call.
            let operationLocation = response.allHeaderFields["Operation-Location"] as? String

            if (operationLocation == nil) {
                print("Error retrieving operation location")
                return
            }

            // Wait 10 seconds for text recognition to be available as suggested by the Text API documentation.
            print("Text submitted. Waiting 10 seconds to retrieve the recognized text.")
            sleep(10)

            // HTTP GET request with the operationLocation url to retrieve the text.
            let getTextUrl = URL(string: operationLocation!)!
            var getTextRequest = URLRequest(url: getTextUrl)
            getTextRequest.setValue(subscriptionKey, forHTTPHeaderField: "Ocp-Apim-Subscription-Key")
            getTextRequest.httpMethod = "GET"

            // Send the GET request to retrieve the text.
            let taskGetText = URLSession.shared.dataTask(with: getTextRequest) { data, response, error in
                guard let data = data,
                    let response = response as? HTTPURLResponse,
                    // Check for networking errors.
                    error == nil else {
                        print("error", error ?? "Unknown error")
                        onFailure("Error")
                        return
                }

                // Check for http errors.
                guard (200 ... 299) ~= response.statusCode else {
                    print("statusCode should be 2xx, but is \(response.statusCode)")
                    print("response = \(response)")
                    onFailure(String(response.statusCode))
                    return
                }

                // Decode the JSON data into an object.
                let customDecoding = try! JSONDecoder().decode(TextApiResponse.self, from: data)

                // Loop through the lines to get all lines of text and concatenate them together.
                var textFromImage = ""
                for textLine in customDecoding.recognitionResults[0].lines {
                    textFromImage = textFromImage + textLine.text + " "
                }

                onSuccess(textFromImage)
            }
            taskGetText.resume()

        }

        task.resume()
    }

    // Structs used for decoding the Text API JSON response.
    struct TextApiResponse: Codable {
        let status: String
        let recognitionResults: [RecognitionResult]
    }

    struct RecognitionResult: Codable {
        let page: Int
        let clockwiseOrientation: Double
        let width, height: Int
        let unit: String
        let lines: [Line]
    }

    struct Line: Codable {
        let boundingBox: [Int]
        let text: String
        let words: [Word]
    }

    struct Word: Codable {
        let boundingBox: [Int]
        let text: String
        let confidence: String?
    }

}
建置並執行應用程式
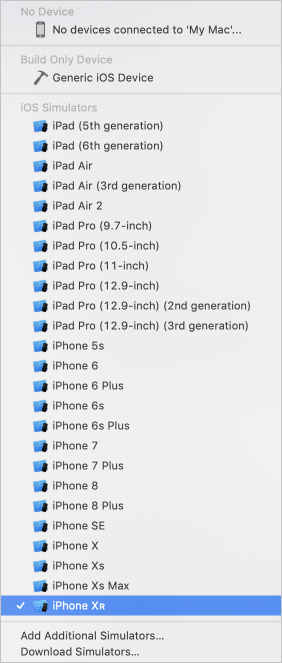
藉由選取模擬器或裝置目標,在 Xcode 中設定封存配置。

在 Xcode 中,按 Ctrl+R,或選取 [播放] 按鈕以執行專案。 應用程式應該會在指定的模擬器或裝置上啟動。
在您的應用程式中,您應該會看到:
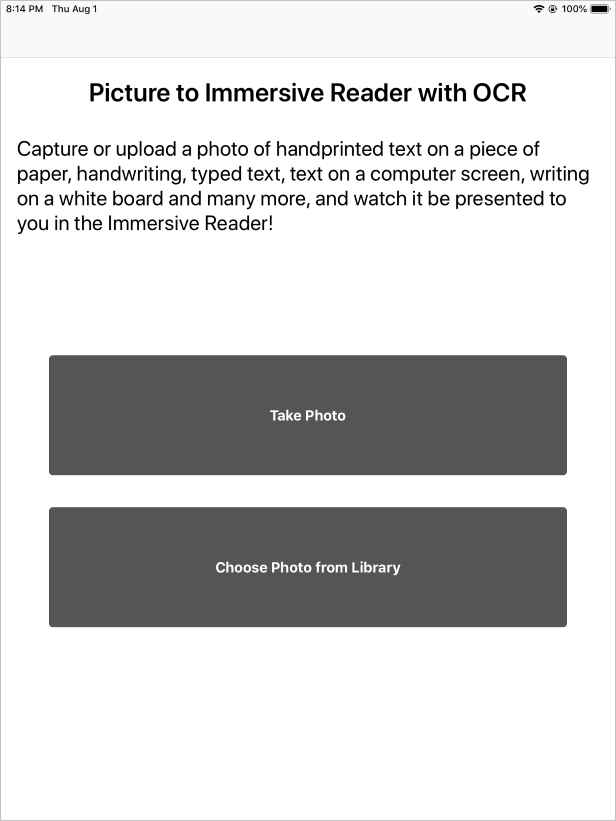
按下 [拍攝相片] 按鈕或 [從媒體櫃選擇相片] 按鈕來拍攝或上傳文字相片。 沉浸式閱讀程序接著會啟動並顯示相片中的文字。
