快速入門:部署 ASP.NET Web 應用程式
注意
從 2024 年 6 月 1 日起,所有新建立的 App Service 應用程式都可以選擇使用命名慣例 <app-name>-<random-hash>.<region>.azurewebsites.net 來產生唯一的預設主機名稱。 現有的應用程式名稱將保持不變。
範例: myapp-ds27dh7271aah175.westus-01.azurewebsites.net
如需詳細資料,請參閱 App Service 資源的唯一預設主機名稱 (英文)。
在此快速入門中,您將了解如何建立第一個 ASP.NET Web 應用程式,並將其部署至 Azure App Service。 App Service 支援各種版本的 .NET 應用程式,並提供可高度調整且自我修補的虛擬主機服務。 ASP.NET Web 應用程式是跨平台的應用程式,可以裝載在 Linux 或 Windows 上。 當您完成時,您會有一個 Azure 資源群組,其中包含 App Service 主控方案和已部署 Web 應用程式的 App Service。
或者,您也可以將 ASP.NET Web 應用程式部署為 App Service 中 Windows 或 Linux 容器的一部分。
提示
在 Visual Studio、Visual Studio Code 和 Azure 入口網站步驟中尋找 GitHub Copilot 提示。
注意
尚不支援使用 MSBuild 或SCM_DO_BUILD,使用 Windows App Service 建置 .NET 9 (STS) 應用程式。 這些組建案例的支援將會在初始 GA 日期之後,以及到 2024 年 12 月 4 日為止。 完全支援透過Visual Studio、Visual Studio Code、GitHub Actions 和 Azure DevOps 建置 App Service 外部的部署。
必要條件
- 具有有效訂用帳戶的 Azure 帳戶。 免費建立帳戶。
- Visual Studio 2022 和 ASP.NET 與 Web 開發工作負載。
- (選擇性) 若要嘗試 GitHub Copilot,一個 GitHub Copilot 帳戶。 有 30 天免費試用版可用。
若您已安裝 Visual Studio 2022:
- 選取 [說明]>[檢查更新],在 Visual Studio 中安裝最新的更新。
- 選取 [工具]>[取得工具和功能] 以新增工作負載。
- 具有有效訂用帳戶的 Azure 帳戶。 免費建立帳戶。
- Visual Studio Code \(英文\)。
- Azure Tools 延伸模組。
- 最新的 .NET 8.0 SDK。
- (選擇性) 若要嘗試 GitHub Copilot,一個 GitHub Copilot 帳戶。 有 30 天免費試用版可用。
- 具有有效訂用帳戶的 Azure 帳戶。 免費建立帳戶。
- Azure CLI。
- 最新的 .NET 8.0 SDK。
- (選擇性) 若要嘗試 GitHub Copilot,一個 GitHub Copilot 帳戶。 有 30 天免費試用版可用。
- 具有有效訂用帳戶的 Azure 帳戶。 免費建立帳戶。
- Azure PowerShell。
- 最新的 .NET 8.0 SDK。
- 具有有效訂用帳戶的 Azure 帳戶。 免費建立帳戶。
- Azure Developer CLI
- 最新的 .NET 8.0 SDK。
1.建立 ASP.NET Web 應用程式
1.初始化 ASP.NET Web 應用程式範本
開啟 Visual Studio,然後選取 [建立新專案]。
在 [建立新專案] 中,尋找並選取 [ASP.NET Core Web 應用程式 (Razor Pages)],然後選取 [下一步]。
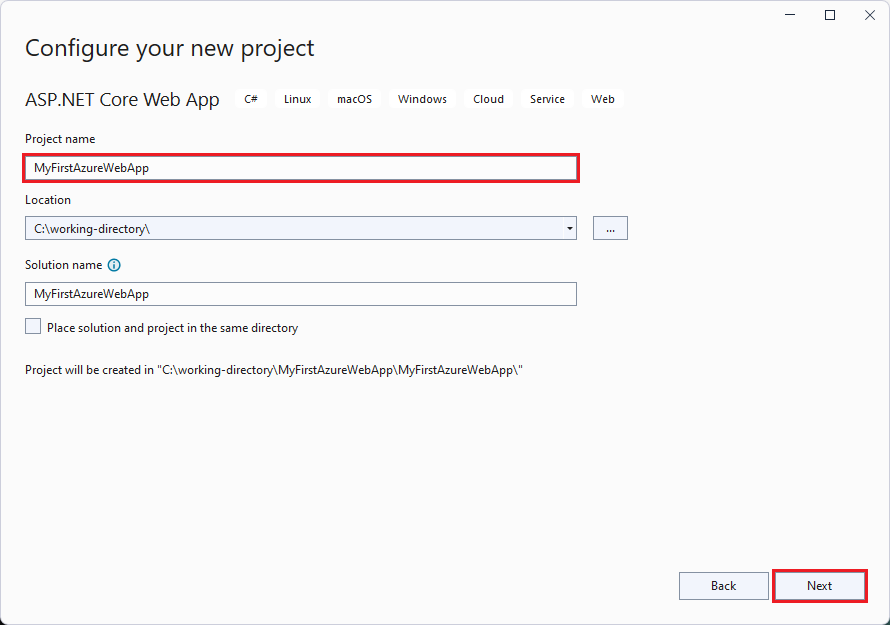
在 [設定新專案] 中,將應用程式命名為 MyFirstAzureWebApp,然後選取 [下一步]。
選取 [.NET 8.0 (長期支援)]。
確定將 [驗證類型] 設定為 [無]。 選取 建立。

從 Visual Studio 功能表中,選取 [偵錯]>[啟動但不偵錯] 以在本機執行 Web 應用程式。 如果出現訊息要求您信任自我簽署憑證,請選取 [是]。


提示
如果您有 GitHub Copilot 帳戶,請嘗試取得適用於 Visual Studio 的 GitHub Copilot 功能。
將您電腦上的終端機視窗開啟至工作目錄。 使用
dotnet new webapp命令建立新的 .NET Web 應用程式,然後將目錄變更為新建立的應用程式。dotnet new webapp -n MyFirstAzureWebApp --framework net8.0 cd MyFirstAzureWebApp從相同的終端機工作階段中,使用
dotnet run命令在本機執行應用程式。dotnet run --urls=https://localhost:5001/開啟網頁瀏覽器,然後巡覽至位於
https://localhost:5001的應用程式。您會看到頁面顯示範本 ASP.NET Core 8.0 Web 應用程式。
在此步驟中,您將派生要部署的示範專案。
- 移至 .NET 8.0 範例應用程式。
- 選取 GitHub 頁面右上方的 [派生] 按鈕。
- 選取 [擁有者],並保留預設 [存放庫名稱]。
- 選取 [建立派生]。
本快速入門使用 Azure Developer CLI (azd) 來建立 Azure 資源,並在其中部署程式碼。 如需 Azure Developer CLI 的詳細資訊,請瀏覽文件或訓練路徑。
使用下列步驟,擷取並初始化 ASP.NET Core Web 應用程式範本:
將您電腦上的終端機視窗開啟至空的工作目錄。 使用
azd init命令初始化azd範本。azd init --template https://github.com/Azure-Samples/quickstart-deploy-aspnet-core-app-service.git當系統提示您輸入環境名稱時,請輸入
dev。從相同的終端機工作階段中,使用
dotnet run命令在本機執行應用程式。 使用--project參數來指定azd範本的src目錄,也就是應用程式程式碼的所在位置。dotnet run --project src --urls=https://localhost:5001/開啟網頁瀏覽器,然後瀏覽至位於
https://localhost:5001的應用程式。 頁面會顯示 ASP.NET Core 8.0 Web 應用程式範本。
2.發佈 Web 應用程式
請遵循下列步驟來建立您的 App Service 資源,並發佈您的專案:
在 [方案總管] 中,以滑鼠右鍵按一下 [MyFirstAzureWebApp] 專案,然後選取 [發佈]。
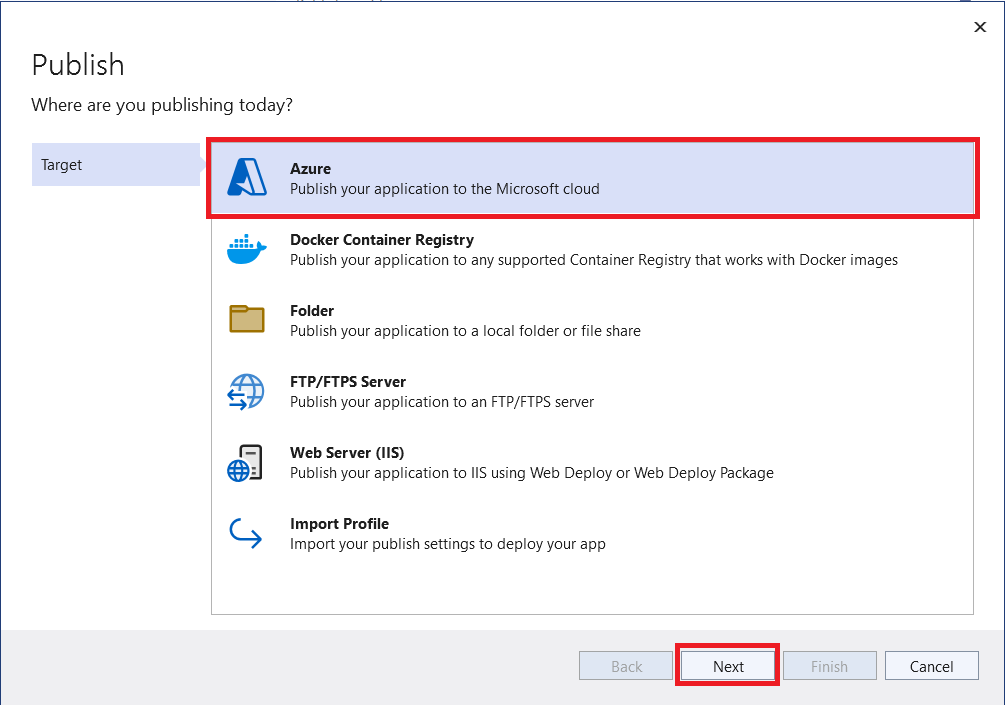
在 [發佈] 中選取 [Azure],然後選取 [下一步]。
選擇 [特定目標],Azure App Service (Linux) 或 Azure App Servuce (Windows)。 然後選取下一步。
重要
以 ASP.NET Framework 4.8 為目標時,請使用 Azure App Service (Windows)。
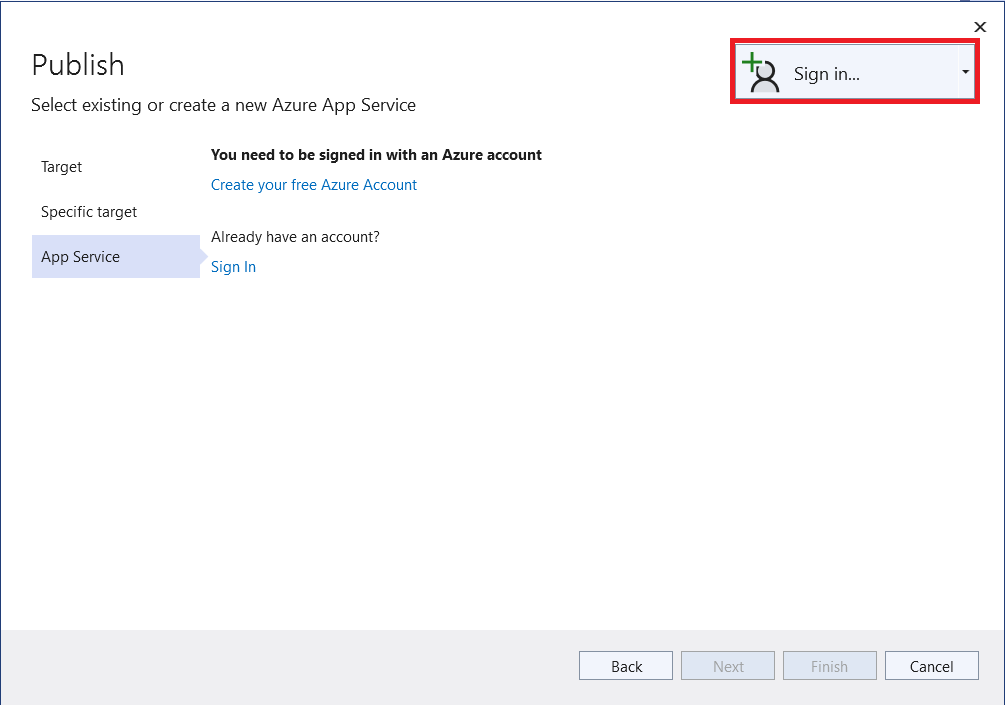
您的選項取決於您是否已登入 Azure,以及是否已將 Visual Studio 帳戶連結至 Azure 帳戶。 選取 [新增帳戶] 或 [登入] 來登入 Azure 訂用帳戶。 若您已經登入,請選取要使用的帳戶。
在 [App Service 執行個體] 右側,選取 [+]。
![Visual Studio 的螢幕擷取畫面 - [新增 App Service 應用程式] 對話方塊。](media/quickstart-dotnetcore/publish-new-app-service.png)
針對 [訂用帳戶],請接受列出的訂用帳戶,或從下拉式清單中選取一個新的訂用帳戶。
在 [資源群組] 中選取 [新增]。 在 [新增資源群組名稱] 中,輸入 myResourceGroup,然後選取 [確定]。
在 [主控方案] 中選取 [新增]。
在 [主控方案: 建立新項目] 對話方塊中,輸入下表中指定的值:
設定 建議的值 描述 主控方案 MyFirstAzureWebAppPlan App Service 方案的名稱。 地點 西歐 裝載 Web 應用程式的資料中心。 大小 選擇最低層。 定價層定義裝載功能。 在 [名稱] 中,輸入唯一的應用程式名稱 (只包含
a-z、A-Z、0-9和-等有效字元)。 您可以接受自動產生的唯一名稱。 Web 應用程式的 URL 是http://<app-name>.azurewebsites.net,其中<app-name>是您的應用程式名稱。選取 [建立] 以建立 Azure 資源。
![Visual Studio 的螢幕擷取畫面 - [建立應用程式資源] 對話方塊。](media/quickstart-dotnetcore/web-app-name.png)
一旦精靈完成,就會為您建立 Azure 資源,然後您就可以開始發佈您的 ASP.NET Core 專案。
在 [發佈] 對話方塊中,確定已選取新的 App Service 應用程式,然後依序選取 [完成] 和 [關閉]。 Visual Studio 會針對選取的 App Service 應用程式來為您建立發行設定檔。
在 [發佈] 頁面中,選取 [發佈]。 若您看到警示訊息,請選取 [繼續]。
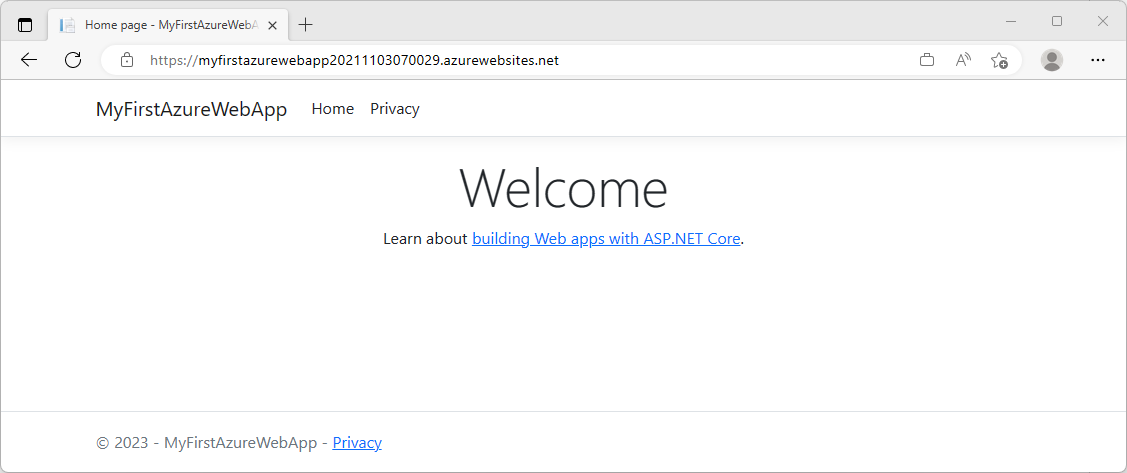
Visual Studio 會建立和封裝應用程式,並將其發佈至 Azure,然後在預設瀏覽器中啟動應用程式。
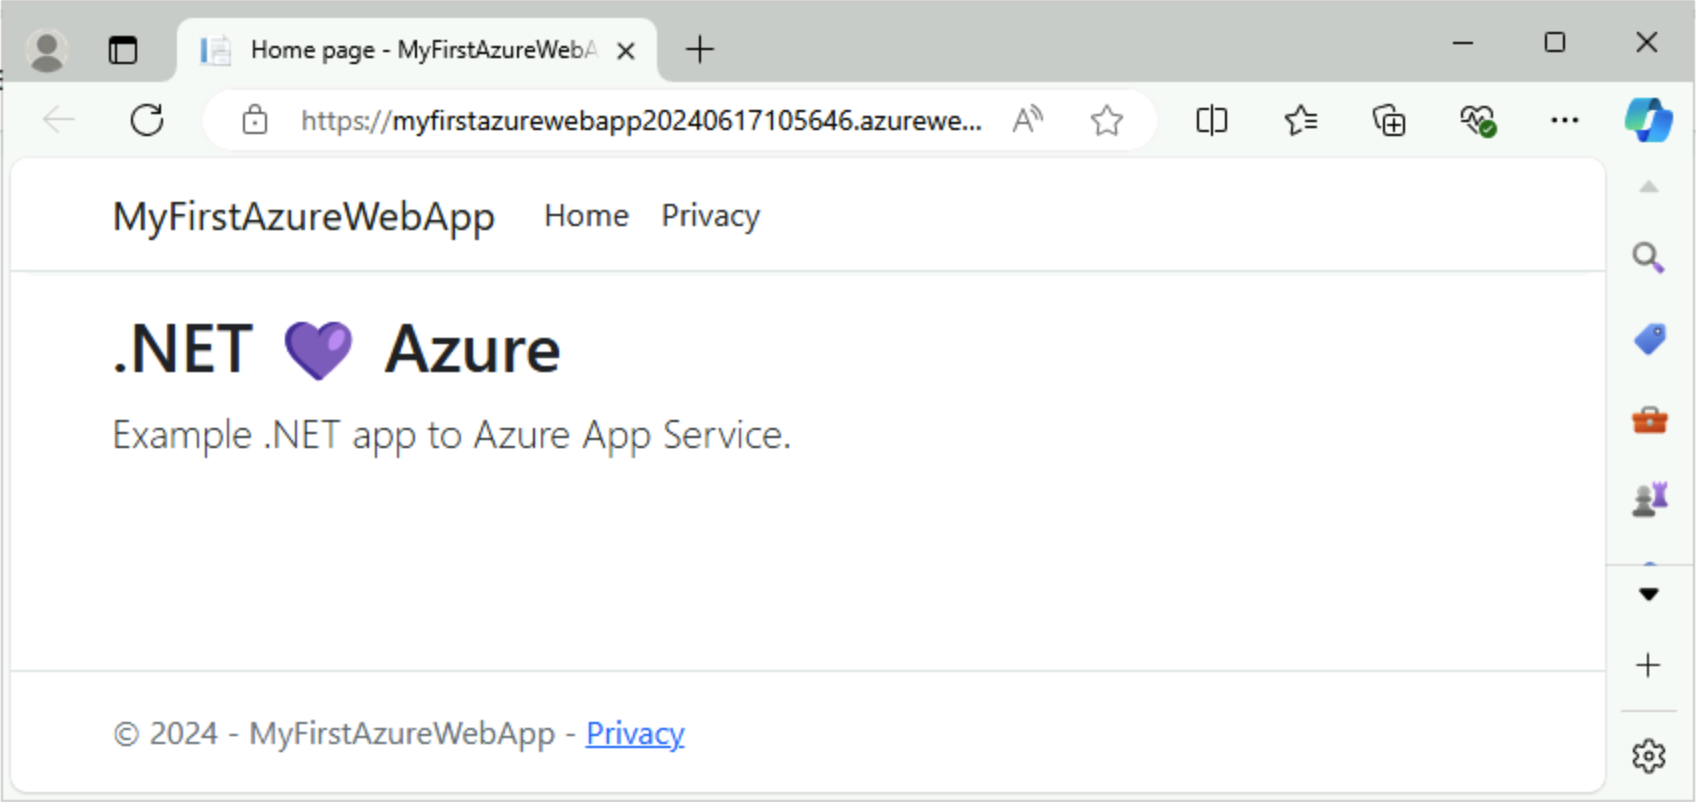
頁面會顯示 ASP.NET Core 8.0 Web 應用程式。


![Visual Studio 的螢幕擷取畫面 - [新增 App Service 應用程式] 對話方塊。](media/quickstart-dotnetcore/publish-new-app-service.png#lightbox)
![Visual Studio 的螢幕擷取畫面 - [建立應用程式資源] 對話方塊。](media/quickstart-dotnetcore/web-app-name.png#lightbox)


從專案的根目錄開啟 Visual Studio Code。
code .如果系統提示,請選取 [是,我相信建立者]。
提示
如果您有 GitHub Copilot 帳戶,請嘗試取得適用於 Visual Studio Code 的 GitHub Copilot 功能。
在 Visual Studio Code 中,選取 [檢視]>[命令選擇區],以開啟 命令選擇區。
搜尋並選取 [Azure App Service:建立新的 Web 應用程式 (進階)]。
如下所示地回應提示:
- 如果出現提示,登入您的 Azure 帳戶。
- 選取您的 [訂用帳戶]。
- 選取 [建立新的 Web 應用程式...進階]。
- 針對 [Enter a globally unique name] \(輸入全域唯一名稱\),請使用所有 Azure 中的唯一名稱 (有效字元為
a-z、0-9與-)。 良好的模式是使用您的公司名稱和應用程式識別碼的組合。 - 選取 [建立新的資源群組],然後提供
myResourceGroup之類的名稱。 - 系統提示您 [選取執行階段堆疊]時,請選取 [.NET 8 (LTS)]。
- 選取作業系統 (Windows 或 Linux)。
- 選取與您接近的位置。
- 選取 [建立新的 App Service 方案]、提供名稱,然後選取 [免費][F1] 定價層。
- 針對 Application Insights 資源選取 [暫時略過]。
- 出現提示時,請選取 [部署]。
- 選取 [MyFirstAzureWebApp] 作為要部署的資料夾。
- 出現提示時,請選取 [新增設定]。
在快顯 [一律將工作區 "MyFirstAzureWebApp" 部署至 <app-name>] 中,選取 [是],以便每次您在該工作區中時,Visual Studio Code 都會部署至相同的App Service應用程式。
發佈完成時,請在通知中選取 [Browse Website] \(瀏覽網站\),然後在收到提示時選取 [開啟]。
頁面會顯示 ASP.NET Core 8.0 Web 應用程式。
使用
az login命令登入您的 Azure 帳戶,並遵循下列提示:az login- 若無法辨識
az命令,請確定您已安裝 Azure CLI,如先決條件中所述。
- 若無法辨識
直接使用
az webapp up命令,在您的本機 MyFirstAzureWebApp 目錄中部署程式碼:az webapp up --sku F1 --name <app-name> --os-type <os>- 以 Azure 中的唯一名稱 (有效字元為
a-z、0-9和-) 取代<app-name>。 良好的模式是使用您的公司名稱和應用程式識別碼的組合。 - 自
--sku F1變數會在免費定價層上建立 Web 應用程式。 省略這個引數並使用進階層,如此會產生每小時成本。 - 以
linux或windows取代<os>。 - 您可以選擇性地加入引數
--location <location-name>,其中<location-name>是可用的 Azure 區域。 您可執行az account list-locations命令,擷取 Azure 帳戶的允許區域清單。
此命令可能需要幾分鐘才能完成。 執行時,此命令會提供建立資源群組、App Service 方案、裝載應用程式、設定記錄,然後執行 ZIP 部署的相關訊息。 然後,其會顯示具有應用程式 URL 的訊息:
You can launch the app at http://<app-name>.azurewebsites.net- 以 Azure 中的唯一名稱 (有效字元為
開啟網頁瀏覽器,然後巡覽至 URL:
頁面會顯示 ASP.NET Core 8.0 Web 應用程式。
注意
針對在 Windows 裝載平台上建立應用程式,建議使用 Azure PowerShell。 若要在 Linux 上建立應用程式,請使用不同的工具,例如 Azure CLI。
使用
Connect-AzAccount命令登入您的 Azure 帳戶,並遵循下列提示:Connect-AzAccount
使用 New-AzWebApp 命令建立新的應用程式:
New-AzWebApp -ResourceGroupName myResourceGroup -Name <app-name> -Location westeurope- 以 Azure 中的唯一名稱 (有效字元為
a-z、0-9和-) 取代<app-name>。 貴公司名稱和應用程式識別碼的組合是良好的模式。 - 您可以選擇性地包含參數
-Location <location-name>,其中<location-name>是可用的 Azure 區域。 您可執行Get-AzLocation命令,擷取 Azure 帳戶的允許區域清單。
此命令可能需要幾分鐘才能完成。 執行時,此命令會建立資源群組、App Service 方案與 App Service 資源。
- 以 Azure 中的唯一名稱 (有效字元為
從應用程式根資料夾中,使用
dotnet publish命令準備本機 MyFirstAzureWebApp 應用程式以進行部署:dotnet publish --configuration Release變更為發行目錄,並從內容建立 zip 檔案:
cd bin\Release\net8.0\publish
Compress-Archive -Path * -DestinationPath deploy.zip
使用 Publish-AzWebApp 命令將 zip 檔案發佈至 Azure 應用程式:
Publish-AzWebApp -ResourceGroupName myResourceGroup -Name <app-name> -ArchivePath (Get-Item .\deploy.zip).FullName -Force注意
-ArchivePath需要 zip 檔案的完整路徑。開啟網頁瀏覽器,然後巡覽至 URL:
頁面會顯示 ASP.NET Core 8.0 Web 應用程式。
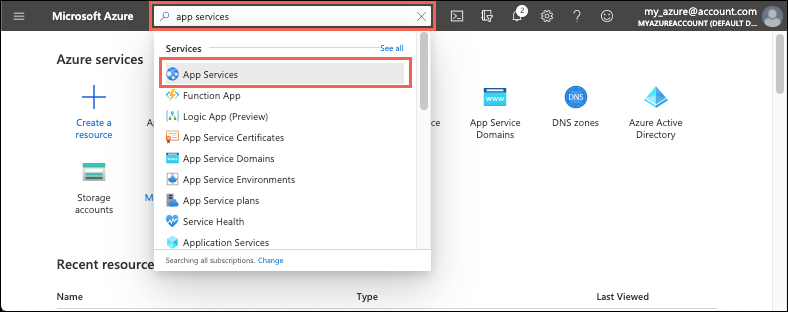
在搜尋中輸入應用程式服務。 在 [服務] 下,選取 [App Service]。

在 [App Service] 頁面中,選取 [建立] > [Web 應用程式]。
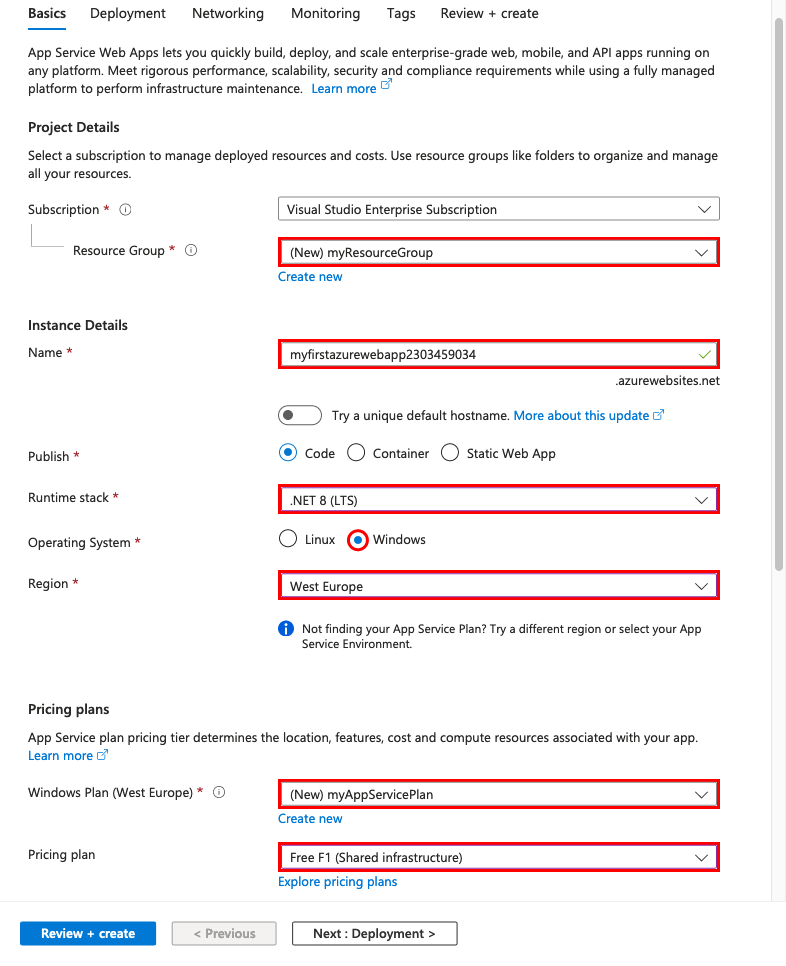
在 [基本] 索引標籤中:
- 在 [資源群組] 下,選取 [新建]。 輸入 myResourceGroup 作為名稱。
- 在 [名稱] 下,輸入 Web 應用程式的全域唯一名稱。
- 在 [發佈] 下,選取 [程式碼]。
- 在 [執行階段堆疊] 下,選取 [.NET 8 (LTS)]。
- 在 [作業系統] 下,選取 [Windows]。 如果您選取 [Linux],則無法在下一個步驟中設定 GitHub 部署,但在 [部署中心] 頁面中建立應用程式之後,仍可進行。
- 選取您要提供應用程式的來源 [區域]。
- 在 [App Service 方案] 下方,選取 [新建],然後輸入 [myAppServicePlan] 作為名稱。
- 在 [定價方案] 下方選取 [免費 F1]。
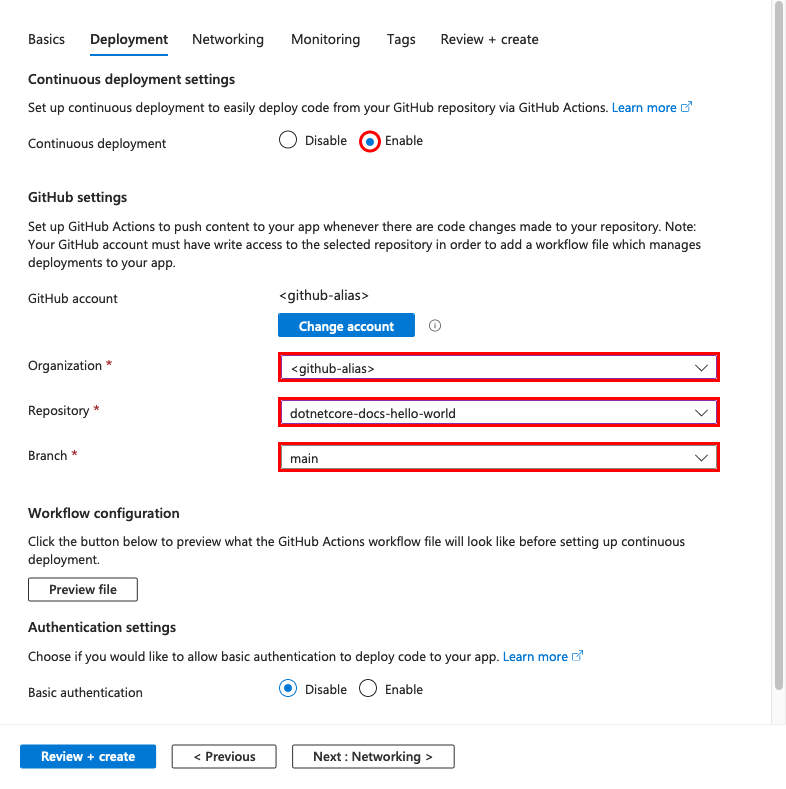
選取頁面頂端的 [部署] 索引標籤
在 [GitHub Actions 設定] 下方,將 [持續部署] 設為 [啟用]。
在 [GitHub Actions 詳細資料] 下,使用您的 GitHub 帳戶進行驗證,然後選取下列選項:
- 針對 [組織],選取您已在其中派生示範專案的組織。
- 針對 [存放庫], 選取 dotnetcore-docs-hello-world 專案。
- 針對 [分支],選取 [主要]。
注意
根據預設,建立精靈會停用基本驗證,並使用使用者指派的身分識別建立 GitHub Actions 部署。 如果您在資源建立期間收到權限錯誤,則您的 Azure 帳戶可能沒有足夠的權限。 您可以稍後使用 Azure 系統管理員為您產生的身分識別來設定 GitHub Actions 部署,也可以改為啟用基本驗證。
選取頁面底部的 [檢閱 + 建立] 按鈕。
驗證執行之後,請選取頁面底部的 [建立] 按鈕。
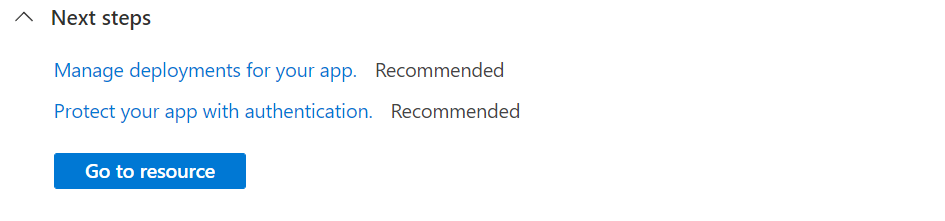
當部署完成時,選取 [前往資源]。
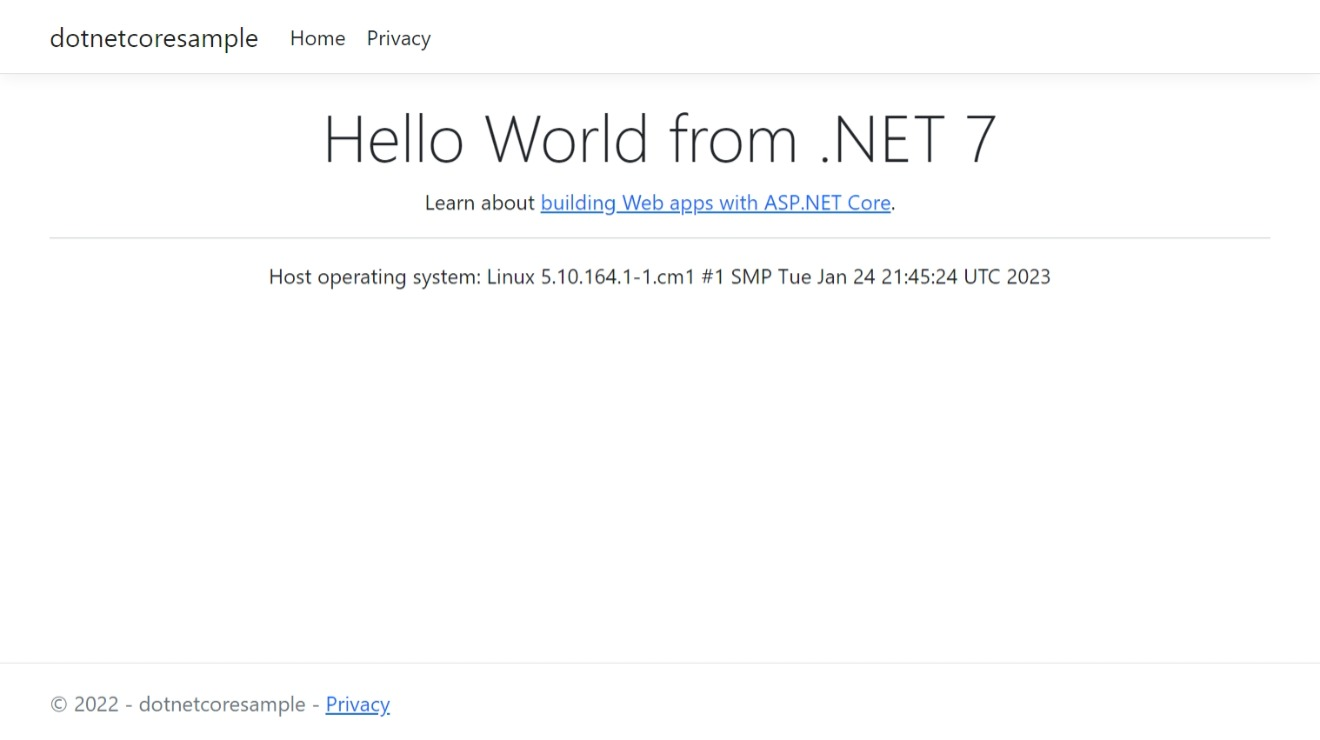
使用網頁瀏覽器瀏覽至已部署的應用程式 (URL 為
http://<app-name>.azurewebsites.net)。 如果您看到「您的 Web 應用程式正在執行並等候您的內容」訊息,GitHub 部署仍在執行中。 等候幾分鐘然後重新整理頁面。


AZD 樣本所含的檔案會產生應用程式在 App Service 中執行所需的下列資源:
- 新的資源群組,以包含此服務的所有 Azure 資源。
- 新的 App Service 方案會指定用來裝載應用程式的 Web 伺服器陣列位置、大小和功能。
- 新的 App Service 應用程式執行個體可執行已部署的應用程式。
使用
azd auth login命令登入您的 Azure 帳戶,並遵循下列提示:azd auth login使用
azd up命令建立 Azure 資源並部署您的應用程式:azd upazd up命令可能需要幾分鐘才能完成。azd up會使用專案中的 Bicep 檔案來建立資源群組、App Service 方案及裝載應用程式。 它也會執行某些設定,例如啟用記錄並部署已編譯的應用程式程式碼。 執行時,此命令會提供佈建和部署程序的相關資訊,包括 Azure 中部署的連結。 完成時,此命令也會顯示部署應用程式的連結。開啟網頁瀏覽器,然後巡覽至 URL:
頁面會顯示 ASP.NET Core 8.0 Web 應用程式。

3.更新應用程式並重新部署
您將會變更 Index.cshtml 並重新部署以查看變更。 在 .NET 8.0 範本中,其位於 [Pages] 資料夾中。 在 .NET Framework 4.8 範本中,其位於 [Views/Home] 資料夾中。 請遵循下列步驟來更新和重新部署您的 Web 應用程式:
在 [方案總管] 的專案下,開啟 Index.cshtml。
使用下列程式碼取代第一個
<div>項目:<div class="jumbotron"> <h1>.NET 💜 Azure</h1> <p class="lead">Example .NET app to Azure App Service.</p> </div>提示
在 Visual Studio 中啟用 GitHub Copilot 後,請嘗試下列各項:
- 選取
<div>元素,然後輸入 Alt+/。 - 詢問 Copilot:「對表示 .NET 💜 Azure 的啟動程序卡片進行變更」。
儲存您的變更。
- 選取
若要重新部署至 Azure,請在 [方案總管] 中,以滑鼠右鍵按一下 MyFirstAzureWebApp 專案,然後選取 [發佈]。
在 [發佈] 摘要頁面中,選取 [發佈]。
發佈完成時,Visual Studio 會啟動瀏覽器以前往 Web 應用程式的 URL。
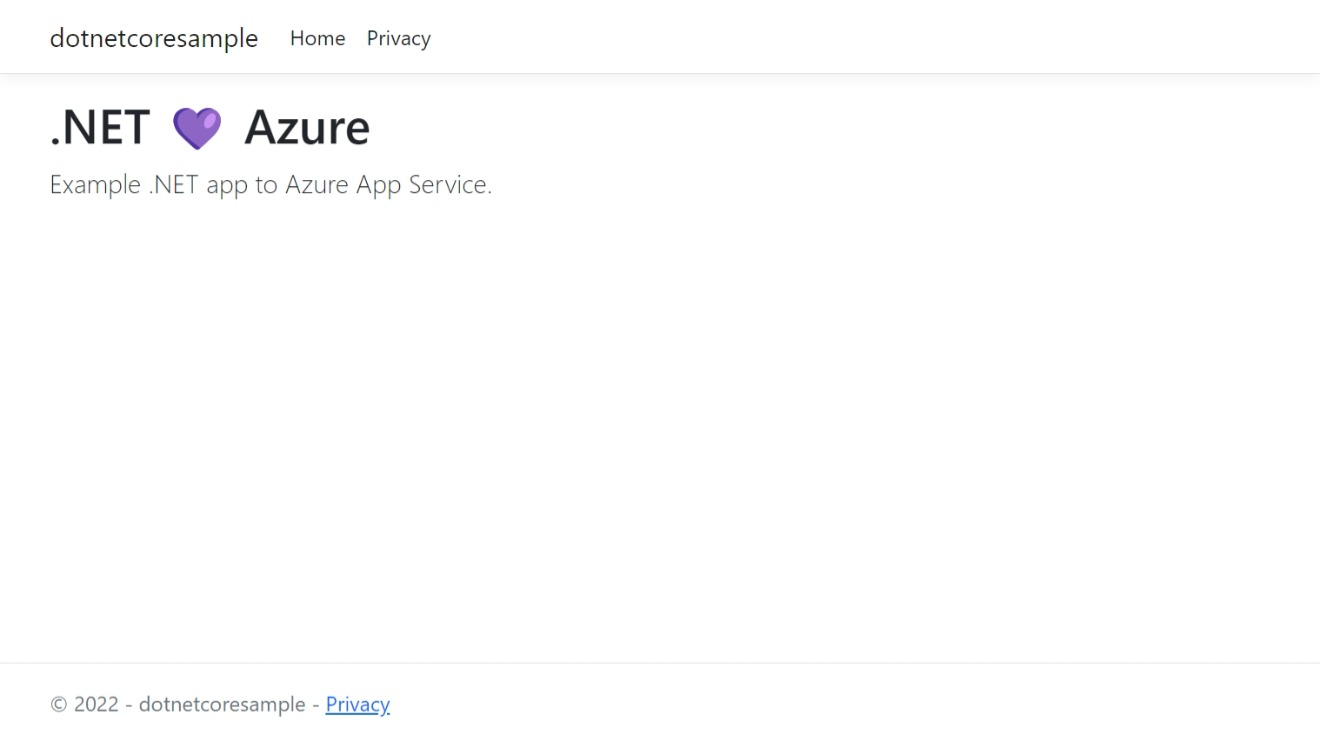
頁面會顯示已更新的 ASP.NET Core 8.0 Web 應用程式。

開啟 Pages/Index.cshtml。
使用下列程式碼取代第一個
<div>項目:<div class="jumbotron"> <h1>.NET 💜 Azure</h1> <p class="lead">Example .NET app to Azure App Service.</p> </div>提示
使用 GitHub Copilot 來試試看:
- 選取整個
<div>元素,然後按一下 。
。 - 詢問 Copilot:「對表示 .NET 💜 Azure 的啟動程序卡片進行變更」。
儲存您的變更。
- 選取整個
在 Visual Studio Code 中,開啟命令選擇區,Ctrl+Shift+P。
搜尋並選取 [Azure App Service: Deploy to Web App] \(Azure App Service:部署至 Web 應用程式\)。
選取您稍早使用的訂用帳戶和 Web 應用程式。
出現提示時,請選取 [部署]。
發佈完成之後,請在通知中選取 [瀏覽網站]。
頁面會顯示已更新的 ASP.NET Core 8.0 Web 應用程式。
提示
若要查看 Visual Studio Code 與 GitHub Copilot 如何協助改善 Web 開發體驗,請參閱 Visual Studio Code 步驟。
在本機目錄中,開啟 Pages/Index.cshtml 檔案。 取代第一個 <div> 項目:
<div class="jumbotron">
    <h1>.NET 💜 Azure</h1>
    <p class="lead">Example .NET app to Azure App Service.</p>
</div>
儲存您的變更,然後再次使用 az webapp up 命令,將 <os> 取代為 linux 或 windows,重新部署應用程式。
az webapp up --os-type <os>
此命令會使用在 .azure/config 檔案中本機快取的值,包括應用程式名稱、資源群組和 App Service 方案。
部署完成後,切換回在「瀏覽至應用程式」步驟中開啟的瀏覽器視窗,然後按 [重新整理]。
頁面會顯示已更新的 ASP.NET Core 8.0 Web 應用程式。

在本機目錄中,開啟 Pages/Index.cshtml 檔案。 取代第一個
<div>項目:<div class="jumbotron"> <h1>.NET 💜 Azure</h1> <p class="lead">Example .NET app to Azure App Service.</p> </div>從應用程式根資料夾中,使用
dotnet publish命令準備本機 MyFirstAzureWebApp 應用程式以進行部署:dotnet publish --configuration Release變更為發行目錄,並從內容建立 zip 檔案:
cd bin\Release\net8.0\publish Compress-Archive -Path * -DestinationPath deploy.zip使用 Publish-AzWebApp 命令將 zip 檔案發佈至 Azure 應用程式:
Publish-AzWebApp -ResourceGroupName myResourceGroup -Name <app-name> -ArchivePath (Get-Item .\deploy.zip).FullName -Force注意
-ArchivePath需要 zip 檔案的完整路徑。部署完成後,切換回在「瀏覽至應用程式」步驟中開啟的瀏覽器視窗,然後按 [重新整理]。
頁面會顯示已更新的 ASP.NET Core 8.0 Web 應用程式。
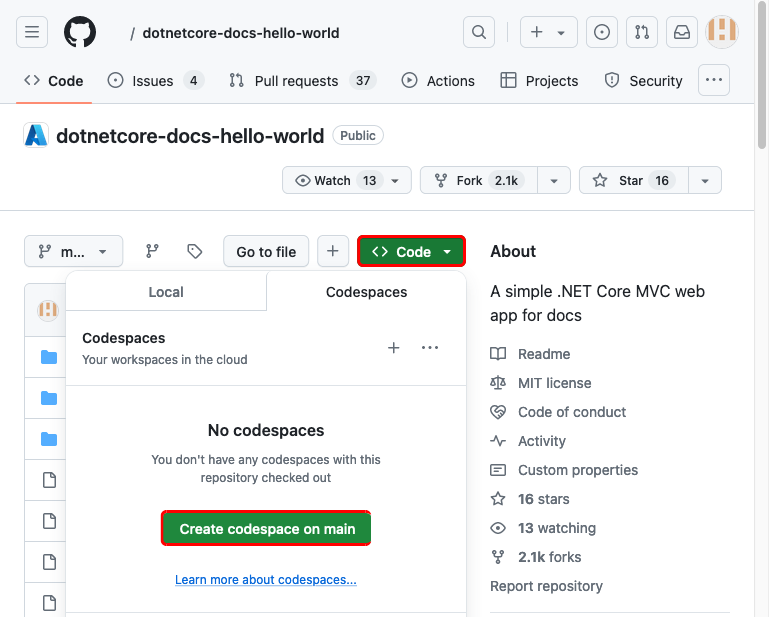
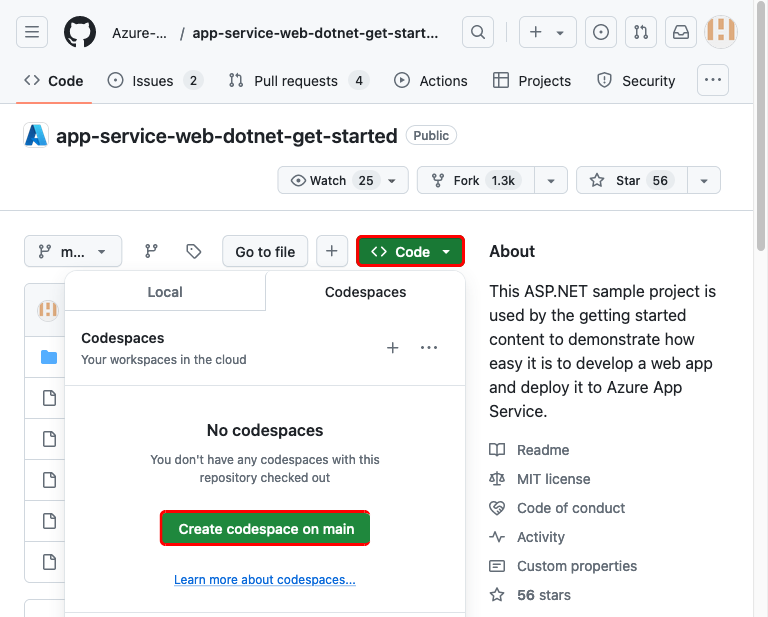
瀏覽至範例程式碼的 GitHub 分支。
在存放庫頁面上,選取 [程式碼] > [在主要上建立 codespace],以建立 codespace。
提示
如果您有 GitHub Copilot 帳戶,請嘗試在您的 codespace 中取得 GitHub Copilot 功能。
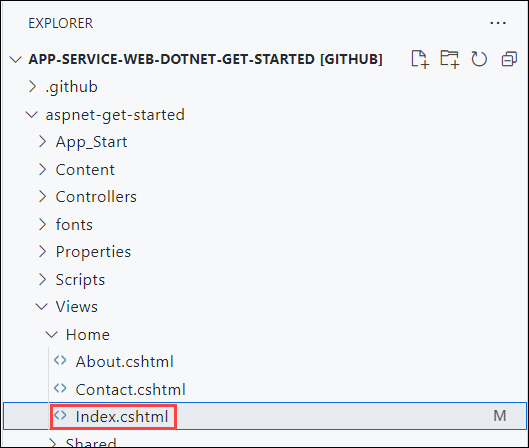
編輯 Index.cshtml。
Index.cshtml 位於
Pages資料夾中。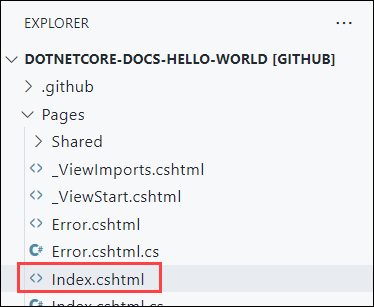
使用下列程式碼取代第一個
<div>項目:<div class="jumbotron"> <h1>.NET 💜 Azure</h1> <p class="lead">Example .NET app to Azure App Service.</p> </div>變更會自動儲存。
提示
使用 GitHub Copilot 來試試看:
- 選取整個
<div>元素,然後按一下。 - 詢問 Copilot:「對表示 .NET 💜 Azure 的啟動程序卡片進行變更」。
- 選取整個
從 [原始檔控制] 功能表中,輸入認可訊息,例如
Modify homepage。 然後,選取 [認可],然後選取 [是] 來確認暫存變更。提示
選取訊息方塊中的
,讓 GitHub Copilot 為您建立認可訊息。選取 [同步變更 1],然後選取 [確定] 來確認。
需要幾分鐘的時間讓部署執行。 若要檢視進度,請瀏覽至
https://github.com/<your-github-alias>/dotnetcore-docs-hello-world/actions。返回在瀏覽至應用程式步驟期間開啟的瀏覽器視窗,然後重新整理頁面。
頁面會顯示已更新的 ASP.NET Core 8.0 Web 應用程式。
![瀏覽器中的 Visual Studio Code 的螢幕擷取畫面,其中 [原始檔控制] 面板具有認可訊息 'We love Azure',並醒目提示 [認可並推送] 按鈕。](media/quickstart-dotnetcore/visual-studio-code-in-browser-commit-push-dotnetcore.png)
![瀏覽器中的 Visual Studio Code 的螢幕擷取畫面,其中 [原始檔控制] 面板具有認可訊息 'We love Azure',並醒目提示 [認可並推送] 按鈕。](media/quickstart-dotnetcore/visual-studio-code-in-browser-commit-push-dotnet-framework.png)


在本機目錄中,開啟 src/Pages/Index.cshtml 檔案。 取代第一個 <div> 項目:
<div class="jumbotron">
    <h1>.NET 💜 Azure</h1>
    <p class="lead">Example .NET app to Azure App Service.</p>
</div>
儲存您的變更,然後再次使用 azd up 命令重新部署應用程式:
azd up
這次 azd up 會略過佈建資源步驟,而且只會重新部署您的程式碼,因為 Bicep 檔案沒有變更。
部署完成後,瀏覽器會開啟至已更新的 ASP.NET Core 8.0 Web 應用程式。
4.管理 Azure 應用程式
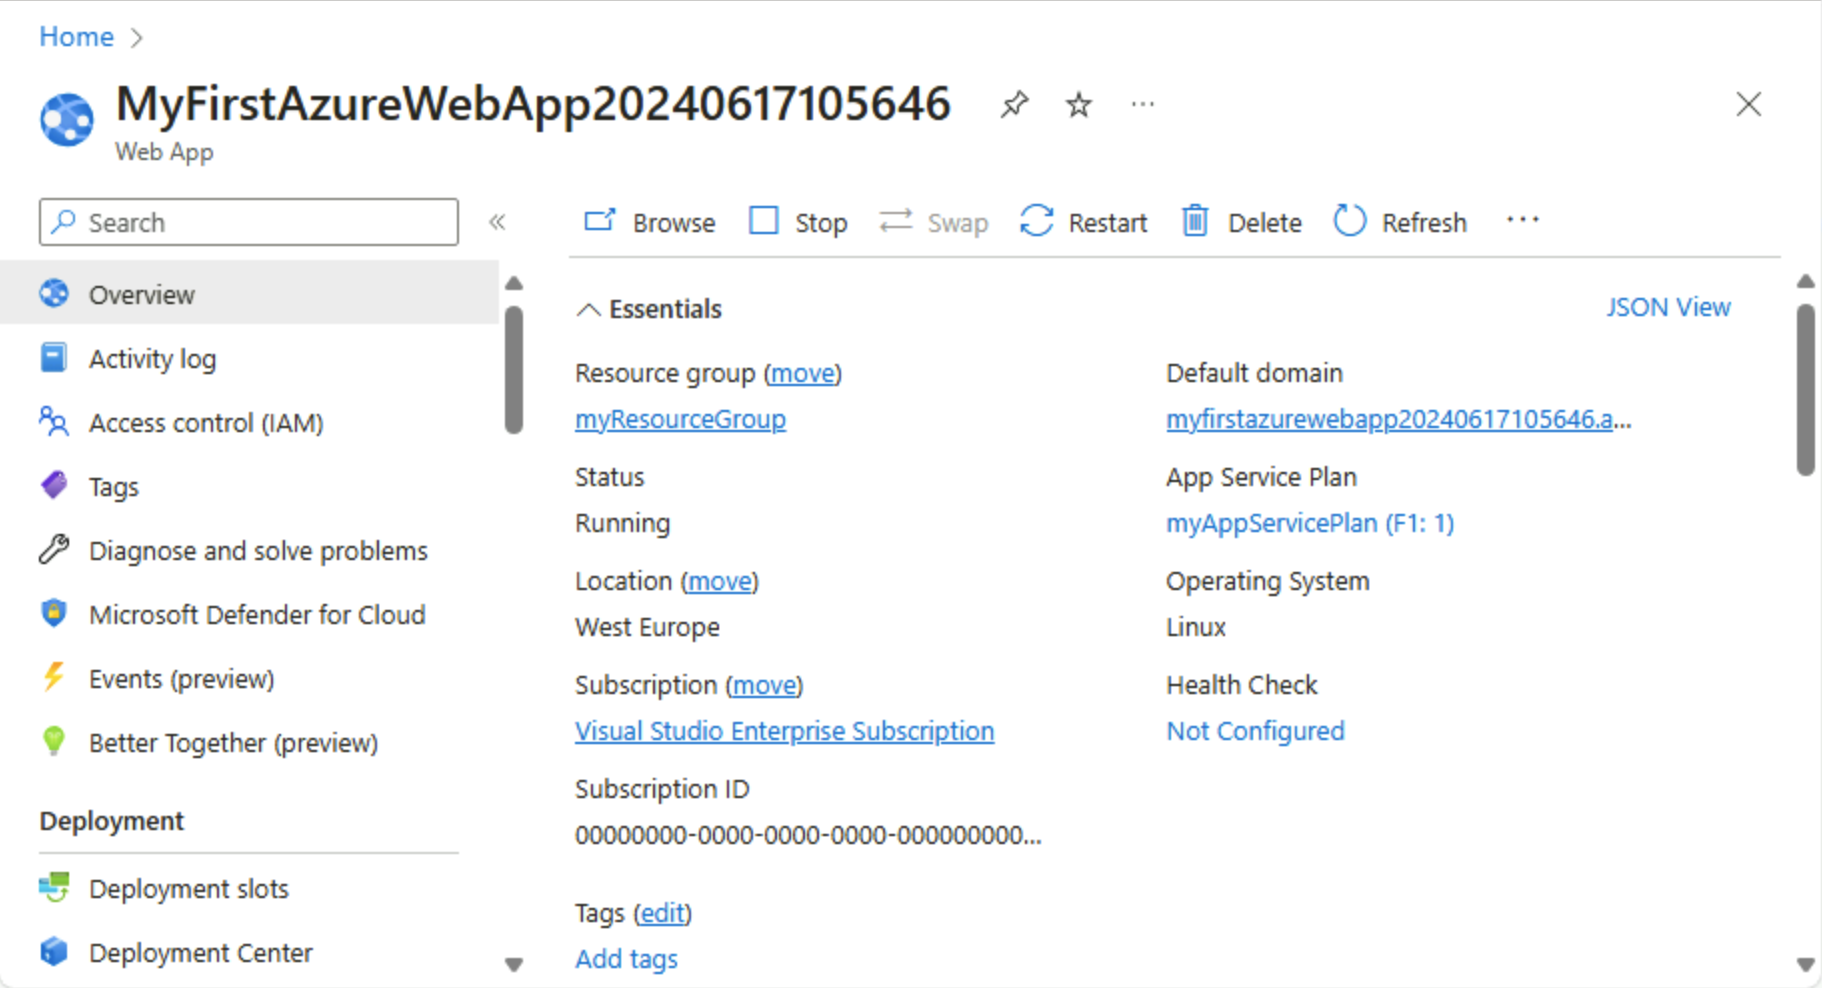
若要管理 Web 應用程式,請移至 Azure 入口網站,然後搜尋並選取 [應用程式服務]。
在 [應用程式服務] 頁面上,選取您的 Web 應用程式名稱。
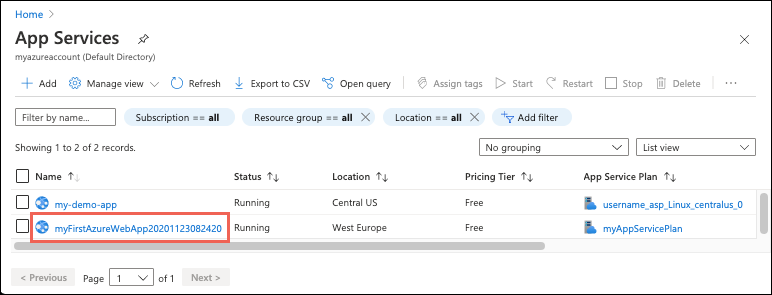
Web 應用程式的概觀頁面,其中包含瀏覽、停止、啟動、重新啟動和刪除等基本管理選項。 左側功能表提供的頁面可用來進一步設定您的應用程式。
清除資源
在上述步驟中,您已建立資源群組中的 Azure 資源。 如果您預期未來不需要這些資源,則可以藉由刪除資源群組予以刪除。
- 從 Azure 入口網站中的 Web 應用程式概觀頁面,選取資源群組底下的 myResourceGroup 連結。
- 在 [資源群組] 頁面上,確定所列出資源是您想要刪除的資源。
- 選取 [刪除資源群組],在文字方塊中輸入 myResourceGroup,然後選取 [刪除]。
- 請選取 [刪除] 以再次確認。
清除資源
在上述步驟中,您已建立資源群組中的 Azure 資源。 如果您預期未來不需要這些資源,則可以藉由刪除資源群組予以刪除。
- 從 Azure 入口網站中的 Web 應用程式概觀頁面,選取資源群組底下的 myResourceGroup 連結。
- 在 [資源群組] 頁面上,確定所列出資源是您想要刪除的資源。
- 選取 [刪除資源群組],在文字方塊中輸入 myResourceGroup,然後選取 [刪除]。
- 請選取 [刪除] 以再次確認。
在上述步驟中,您已建立資源群組中的 Azure 資源。 如果您在未來不需要這些資源,請在 Cloud Shell 中執行下列命令,刪除資源群組:
az group delete
為了方便起見,您稍早在此專案中執行的 az webapp up 命令,會在您從這個專案執行 az 命令時,將資源群組名稱儲存為預設值。
清除資源
在上述步驟中,您已建立資源群組中的 Azure 資源。 若您預期未來不需要使用這些資源,請執行下列 PowerShell 命令來刪除資源群組:
Remove-AzResourceGroup -Name myResourceGroup
此命令可能會花一分鐘執行。
清除資源
在上述步驟中,您已建立資源群組中的 Azure 資源。 如果您預期未來不需要這些資源,則可以藉由刪除資源群組予以刪除。
- 從 Azure 入口網站中的 Web 應用程式概觀頁面,選取資源群組底下的 myResourceGroup 連結。
- 在 [資源群組] 頁面上,確定所列出資源是您想要刪除的資源。
- 選取 [刪除資源群組],在文字方塊中輸入 myResourceGroup,然後選取 [刪除]。
- 請選取 [刪除] 以再次確認。
下一步
請前往下一篇文章,了解如何建立 .NET Core 應用程式,並將其連線到 SQL Database: