在本教學課程中,您將整合 Azure OpenAI 與 Java Spring Boot 應用程式,並將其部署至 Azure App Service,以建置智慧型手機 AI 應用程式。 您將建立 Spring Boot 控制器,以將查詢傳送至 Azure OpenAI,並將回應傳送至瀏覽器。
小提示
雖然本教學課程使用 Spring Boot,但使用 Azure OpenAI 建置聊天應用程式的核心概念適用於任何 Java Web 應用程式。 如果您在 App Service 上使用不同的裝載選項,例如 Tomcat 或 JBoss EAP,您可以調整此處顯示的驗證模式和 Azure SDK 使用方式,以配合您慣用的架構。
在本教學課程中,您將瞭解如何:
- 建立 Azure OpenAI 資源並部署語言模型。
- 建置連線至 Azure OpenAI 的 Spring Boot 應用程式。
- 使用相依性插入來設定 Azure OpenAI 用戶端。
- 將應用程式部署至 Azure App Service。
- 在開發環境和 Azure 中實作無密碼安全驗證。
先決條件
1.建立 Azure OpenAI 資源
在這個章節中,你會使用 GitHub Codespaces 中的 Azure CLI 來建立 Azure OpenAI 資源。
用你的 GitHub 帳號登入 GitHub Codespaces 。
選擇「在空白圖塊中使用此範本」以建立新的空白碼空間。
在 Codespace 終端機安裝 Azure CLI。
curl -sL https://aka.ms/InstallAzureCLIDeb | sudo bash登入您的 Azure 帳戶。
az login請遵循終端機中的指示進行驗證。
設定環境變數時,請提供資源群組名稱和 Azure OpenAI 服務,並設定適當的 Azure 區域作為你的位置。
export RESOURCE_GROUP="<group-name>"
export OPENAI_SERVICE_NAME="<azure-openai-name>"
export APPSERVICE_NAME="<app-name>"
export LOCATION="<azure-region>"
這很重要
地點取決於所選模型在區域的可用性。 模型與 部署類型的 可用性在 Azure 區域與計費層級間有所不同。 本教學使用
gpt-4o-mini,該格式在多個地區的標準部署類型下可用。在選擇地點前,請參考 模型摘要與區域可用性表 ,以確認您偏好區域的模型支援。
建立一個資源群組和一個 Azure OpenAI 資源,並設定自訂網域,然後新增一個
gpt-4o-mini模型:# Resource group az group create --name $RESOURCE_GROUP --location $LOCATION # Azure OpenAI resource az cognitiveservices account create \ --name $OPENAI_SERVICE_NAME \ --resource-group $RESOURCE_GROUP \ --location $LOCATION \ --custom-domain $OPENAI_SERVICE_NAME \ --kind OpenAI \ --sku s0 # gpt-4o-mini model az cognitiveservices account deployment create \ --name $OPENAI_SERVICE_NAME \ --resource-group $RESOURCE_GROUP \ --deployment-name gpt-4o-mini \ --model-name gpt-4o-mini \ --model-version 2024-07-18 \ --model-format OpenAI \ --sku-name Standard \ --sku-capacity 1 # Cognitive Services OpenAI User role that lets the signed in Azure user read models from Azure OpenAI az role assignment create \ --assignee $(az ad signed-in-user show --query id -o tsv) \ --role "Cognitive Services OpenAI User" \ --scope /subscriptions/$(az account show --query id -o tsv)/resourceGroups/$RESOURCE_GROUP/providers/Microsoft.CognitiveServices/accounts/$OPENAI_SERVICE_NAME
現在你有了 Azure OpenAI 資源,就可以建立一個網頁應用程式來與它互動。
2.建立及設定 Spring Boot Web 應用程式
在您的 Codespace 終端機中,將 Spring Boot REST 範例複製到工作區,並嘗試第一次執行它。
git clone https://github.com/rd-1-2022/rest-service .
mvn spring-boot:run
您應該會在 GitHub Codespaces 中看到通知,指出應用程式可在特定埠使用。 選取 [在瀏覽器中開啟 ] 以在新瀏覽器索引標籤中啟動應用程式。當您看到白色標籤錯誤頁面時,Spring Boot 應用程式正在運作。
回到 Codespace 終端機,使用 Ctrl+C 停止應用程式。
開啟 pom.xml 並新增下列相依性:
<dependency> <groupId>org.springframework.boot</groupId> <artifactId>spring-boot-starter-thymeleaf</artifactId> </dependency> <dependency> <groupId>com.azure</groupId> <artifactId>azure-ai-openai</artifactId> <version>1.0.0-beta.16</version> </dependency> <dependency> <groupId>com.azure</groupId> <artifactId>azure-core</artifactId> <version>1.55.3</version> </dependency> <dependency> <groupId>com.azure</groupId> <artifactId>azure-identity</artifactId> <version>1.16.0</version> <scope>compile</scope> </dependency>在與Application.java相同的目錄中(src/main/java/com/example/restservice)新增名為 ChatController.java 的 Java 檔案,並將下列內容複製到其中:
package com.example.restservice;

import java.util.ArrayList;
import java.util.List;

import org.springframework.beans.factory.annotation.Value;
import org.springframework.context.annotation.Bean;
import org.springframework.context.annotation.Configuration;
import org.springframework.stereotype.Controller;
import org.springframework.ui.Model;
import org.springframework.web.bind.annotation.RequestMapping;
import org.springframework.web.bind.annotation.RequestMethod;
import org.springframework.web.bind.annotation.RequestParam;

import com.azure.ai.openai.OpenAIAsyncClient;
import com.azure.ai.openai.models.ChatChoice;
import com.azure.ai.openai.models.ChatCompletionsOptions;
import com.azure.ai.openai.models.ChatRequestMessage;
import com.azure.ai.openai.models.ChatRequestUserMessage;
import com.azure.ai.openai.models.ChatResponseMessage;
import com.azure.core.credential.TokenCredential;
import com.azure.identity.DefaultAzureCredentialBuilder;

@Configuration
class AzureConfig {
    // Reads the endpoint from environment variable AZURE_OPENAI_ENDPOINT
    @Value("${azure.openai.endpoint}")
    private String openAiEndpoint;

    // Provides a credential for local dev and production
    @Bean
    public TokenCredential tokenCredential() {
        return new DefaultAzureCredentialBuilder().build();
    }

    // Configures the OpenAIAsyncClient bean
    @Bean
    public OpenAIAsyncClient openAIClient(TokenCredential tokenCredential) {
        return new com.azure.ai.openai.OpenAIClientBuilder()
                .endpoint(openAiEndpoint)
                .credential(tokenCredential)
                .buildAsyncClient();
    }
}

@Controller
public class ChatController {
    private final OpenAIAsyncClient openAIClient;

    // Inject the OpenAIAsyncClient bean
    public ChatController(OpenAIAsyncClient openAIClient) {
        this.openAIClient = openAIClient;
    }

    @RequestMapping(value = "/", method = RequestMethod.GET)
    public String chatFormOrWithMessage(Model model, @RequestParam(value = "userMessage", required = false) String userMessage) {
        String aiResponse = null;
        if (userMessage != null && !userMessage.isBlank()) {

            // Create a list of chat messages
            List<ChatRequestMessage> chatMessages = new ArrayList<>();
            chatMessages.add(new ChatRequestUserMessage(userMessage));

            // Send the chat completion request
            String deploymentName = "gpt-4o-mini";
            StringBuilder serverResponse = new StringBuilder();
            var chatCompletions = openAIClient.getChatCompletions(
                deploymentName,
                new ChatCompletionsOptions(chatMessages)
            ).block();
            if (chatCompletions != null) {
                for (ChatChoice choice : chatCompletions.getChoices()) {
                    ChatResponseMessage message = choice.getMessage();
                    serverResponse.append(message.getContent());
                }
            }
            aiResponse = serverResponse.toString();
        }
        model.addAttribute("aiResponse", aiResponse);
        return "chat";
    }
}
小提示
為了將本教學課程中的檔案降到最低,程式代碼會結合一個檔案中的 Spring
@Configuration和@Controller類別。 在生產環境中,您通常會將設定和商業規則分開,以便維護。在 src/main/resources 底下,建立 範本 目錄,然後新增一個名為 chat.html 的檔案,內容如下,以供聊天介面使用:
<!DOCTYPE html>
<html xmlns:th="http://www.thymeleaf.org">
<head>
    <meta charset="UTF-8">
    <title>Azure OpenAI Chat</title>
    <link href="https://cdn.jsdelivr.net/npm/bootstrap@5.3.3/dist/css/bootstrap.min.css" rel="stylesheet">
</head>
<body>
<div class="container py-4">
    <h2 class="mb-4">Azure OpenAI Chat</h2>
    <form action="/" method="get" class="d-flex mb-3">
        <input name="userMessage" class="form-control me-2" type="text" placeholder="Type your message..." autocomplete="off" required />
        <button class="btn btn-primary" type="submit">Send</button>
    </form>
    <div class="mb-3">
        <div th:if="${aiResponse}" class="alert alert-info">AI: <span th:text="${aiResponse}"></span></div>
    </div>
</div>
</body>
</html>
在終端機中,擷取您的 OpenAI 端點:
az cognitiveservices account show \
  --name $OPENAI_SERVICE_NAME \
  --resource-group $RESOURCE_GROUP \
  --query properties.endpoint \
  --output tsv
再次執行應用程式,方法是從 CLI 輸出新增
AZURE_OPENAI_ENDPOINT及其值:AZURE_OPENAI_ENDPOINT=<output-from-previous-cli-command> mvn spring-boot:run選取 [在瀏覽器中開啟 ] 以在新瀏覽器索引標籤中啟動應用程式。
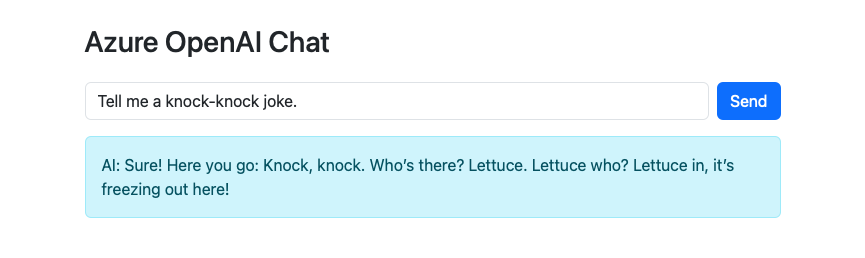
在文字框輸入訊息並選擇 發送,給應用程式幾秒鐘回覆 Azure OpenAI 的訊息。
應用程式會使用 DefaultAzureCredential,其會自動使用您的 Azure CLI 登入使用者進行令牌驗證。 在本教學課程稍後,您將將 Web 應用程式部署至 Azure App Service,並將其設定為使用受控識別安全地連線到 Azure OpenAI 資源。 程序代碼中的相同 DefaultAzureCredential 可以偵測受控識別,並將其用於驗證。 不需要額外的程序代碼。
3.部署至 Azure App Service 並設定 OpenAI 連線
既然您的應用程式在本機運作,讓我們將其部署至 Azure App Service,並使用受控識別設定 Azure OpenAI 的服務連線。
使用 Maven 建立部署套件。
mvn clean package首先,使用 Azure CLI 命令
az webapp up將您的應用程式部署至 Azure App Service。 這個指令會建立新的 Web 應用程式,並將程式代碼部署到其中:az webapp up \ --resource-group $RESOURCE_GROUP \ --location $LOCATION \ --name $APPSERVICE_NAME \ --plan $APPSERVICE_NAME \ --sku B1 \ --runtime "JAVA:21" \ --os-type Linux \ --track-status false此命令可能需要幾分鐘才能完成。 它會在與 OpenAI 資源相同的資源群組中建立新的 Web 應用程式。
部署應用程式之後,請使用受控識別,在 Web 應用程式與 Azure OpenAI 資源之間建立服務連線:
az webapp connection create cognitiveservices \
  --resource-group $RESOURCE_GROUP \
  --name $APPSERVICE_NAME \
  --target-resource-group $RESOURCE_GROUP \
  --account $OPENAI_SERVICE_NAME \
  --system-identity
此命令會建立 Web 應用程式與 Azure OpenAI 資源之間的連線,方法是:
- 為 Web 應用程式產生系統指派的受控識別。
- 將認知服務 OpenAI 參與者角色新增至 Azure OpenAI 資源的受控識別。
- 將
AZURE_OPENAI_ENDPOINT應用程式設定新增至 Web 應用程式。
在瀏覽器中開啟已部署的 Web 應用程式。
az webapp browse在文本框中輸入訊息,然後選取 [傳送],然後為應用程式提供幾秒鐘的時間,以回復來自 Azure OpenAI 的訊息。
您的應用程式現在已部署並連線至具有受控識別的 Azure OpenAI。 請注意,它是透過 AZURE_OPENAI_ENDPOINT 插入來存取 應用程式設定。
常見問題
-
為什麼範例會針對 OpenAI 用戶端使用
@Configuration和 Spring beans? - 如果我想要連線到 OpenAI 而不是 Azure OpenAI,該怎麼辦?
- 我可以改為使用 API 金鑰連線到 Azure OpenAI 嗎?
- DefaultAzureCredential 如何在本教學課程中運作?
為什麼範例會針對 OpenAI 用戶端使用 @Configuration 和 Spring beans?
針對 OpenAIAsyncClient 使用 Spring Bean 以確保:
- Spring 會載入並插入所有組態屬性(例如端點)。
- 認證和用戶端會在應用程式內容完全初始化之後建立。
- 使用相依性插入,這是 Spring 應用程式中的標準和最強固模式。
異步用戶端更強固,尤其是在搭配 Azure CLI 驗證使用 DefaultAzureCredential 時。 在某些本機開發案例中,同步 OpenAIClient 可能會遇到權杖擷取問題。 使用異步用戶端可避免這些問題,而且是建議的方法。
如果我想要連線到 OpenAI 而不是 Azure OpenAI,該怎麼辦?
若要改為連線到 OpenAI,請使用下列程式代碼:
OpenAIClient client = new OpenAIClientBuilder()
    .credential(new KeyCredential(<openai-api-key>))
    .buildClient();
如需詳細資訊,請參閱 OpenAI API 驗證。
在 App Service 中使用連線密碼時,您應該使用 Key Vault 參考 ,而不是將秘密直接儲存在程式碼基底中。 這可確保敏感性資訊保持安全且集中管理。
我可以改為使用 API 金鑰連線到 Azure OpenAI 嗎?
是,您可以使用 API 金鑰來連線到 Azure OpenAI,而不是受控識別。 Azure OpenAI SDK 和語意核心支援此方法。
- 如需搭配語意核心使用 API 金鑰的詳細資料:語意核心 C# 快速入門。
- 如需搭配 Azure OpenAI 用戶端程式庫使用 API 金鑰的詳細資訊,請參閱快速入門:使用 Azure OpenAI 服務的聊天功能開始。
在 App Service 中使用連線密碼時,您應該使用 Key Vault 參考 ,而不是將秘密直接儲存在程式碼基底中。 這可確保敏感性資訊保持安全且集中管理。
DefaultAzureCredential 如何在本教學課程中運作?
藉 DefaultAzureCredential 由自動選取最佳的可用驗證方法,簡化驗證:
-
在本機開發期間:執行
az login之後,它會使用本機 Azure CLI 認證。 - 部署至 Azure App Service 時:它會使用應用程式的受控識別進行安全、無密碼的驗證。
這種方法可讓您的程式代碼在本機和雲端環境中安全地順暢地執行,而不需要修改。