在本快速入門中,您將在 Azure 應用程式組態中建立功能旗標,並使用它來動態控制 Python 應用程式,以建立端到端的功能管理實作。
功能管理支援會擴充應用程式設定中的動態設定功能。 本快速入門中的這些範例是基於動態組態教學課程中介紹的 Python 應用程式建置的。 在繼續之前,請先完成本快速入門和教學課程,以使用動態組態來建立 Python 應用程式。
此程式庫不相依於任何 Azure 程式庫。 它們會透過其 Python 組態提供者來與應用程式組態無縫整合。
先決條件
- 具有有效訂用帳戶的 Azure 帳戶。 建立免費帳戶。
- 應用程式組態存放區,如 建立存放區的教學課程所示。
- Python 3.8 或更新版本 - 如需在 Windows 上設定 Python 的詳細資訊,請參閱 Windows 上的 Python 文件,否則請參閱 Python 下載。
- azure-appconfiguration-provider 程式庫 1.2.0 或更新版本。
新增功能旗標
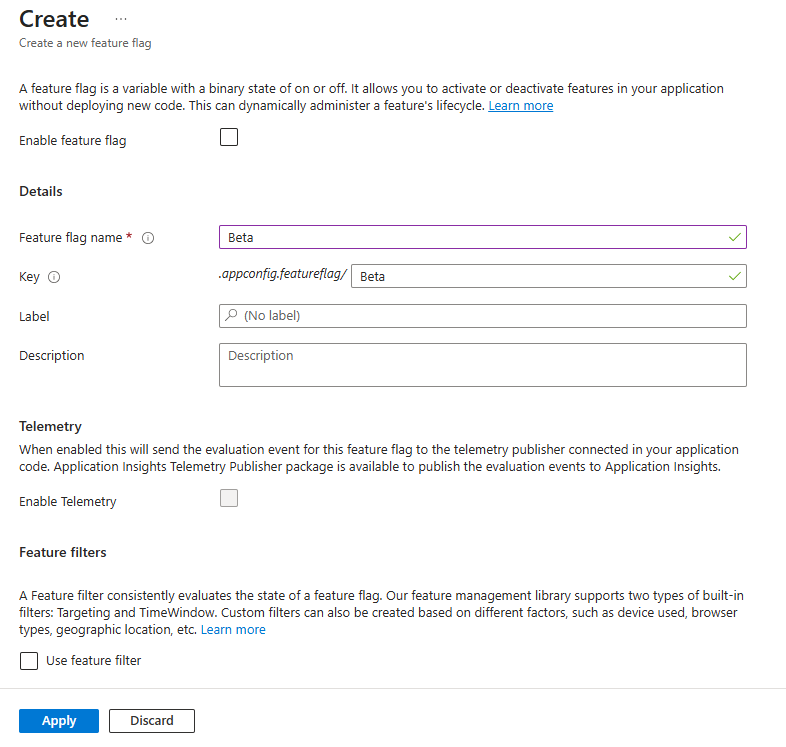
將名為 Beta 的功能旗標新增至應用程式組態存放區,並保留標籤和描述的預設值。 如需如何使用 Azure 入口網站或 CLI 將功能旗標新增至存放區的詳細資訊,請移至建立功能旗標。 在此階段,應取消勾選 [啟用功能旗標] 核取方塊。
主控台應用程式
使用
pip install命令來安裝功能管理。pip install featuremanagement建立一個名為
app.py的新 Python 檔案並新增以下程式碼:from featuremanagement import FeatureManager from azure.identity import InteractiveBrowserCredential from azure.appconfiguration.provider import load import os from time import sleep endpoint = os.environ["APP_CONFIGURATION_ENDPOINT"] # Connecting to Azure App Configuration using an endpoint # credential is used to authenticate the client, the InteractiveBrowserCredential is used for this sample. It will open a browser window to authenticate the user. For all credential options see [credential classes](https://github.com/Azure/azure-sdk-for-python/tree/main/sdk/identity/azure-identity#credential-classes). # feature_flag_enabled makes it so that the provider will load feature flags from Azure App Configuration # feature_flag_refresh_enabled makes it so that the provider will refresh feature flags from Azure App Configuration, when the refresh operation is triggered config = load(endpoint=endpoint, credential=InteractiveBrowserCredential(), feature_flag_enabled=True, feature_flag_refresh_enabled=True) feature_manager = FeatureManager(config) # Is always false print("Beta is ", feature_manager.is_enabled("Beta")) while not feature_manager.is_enabled("Beta"): sleep(5) config.refresh() print("Beta is ", feature_manager.is_enabled("Beta"))
啟動應用程式時,將開啟一個瀏覽器視窗以對使用者進行驗證。 使用者必須至少擁有 App Configuration Data Reader 角色才能存取應用程式組態存放區,如需詳細資訊,請參閱應用程式組態角色。
設定一個名為 APP_CONFIGURATION_ENDPOINT 的環境變數,並將其設定為應用程式組態存放區的端點。 在命令列執行下列命令,然後重新啟動命令提示字元,讓變更生效:
若要使用 Windows 命令提示字元在本機建置並執行應用程式,請執行下列命令:
setx APP_CONFIGURATION_ENDPOINT "<endpoint-of-your-app-configuration-store>"重新啟動命令提示字元,讓變更生效。 透過列印環境變數的值來驗證其是否設定正確。
執行 Python 應用程式。
python app.py在應用程式組態入口網站中,選取 [功能管理員],然後使用 [已啟用] 資料行中的切換開關,將 Beta 功能旗標的狀態變更為 [開啟]。
Key State Beta 另一 大約 30 秒 (提供者的重新整理間隔) 後,應用程式將列印以下內容:
Beta is True
Web 應用程式
以下範例顯示如何使用具有動態重新整理功能的 Azure 應用程式組態來更新現有的 Web 應用程式,同時還可以使用功能旗標。 如需如何針對組態值使用動態重新整理的更詳細範例,請參閱 Python 動態組態。 在繼續之前,請確定您已在應用程式組態存放區中啟用了 Beta 功能旗標。
在 app.py 中,設定 Azure 應用程式組態的載入方法以額外載入功能旗標,並啟用功能旗標的重新整理。
from featuremanagement import FeatureManager

...

global azure_app_config, feature_manager
# Connecting to Azure App Configuration using an endpoint
# credential is used to authenticate the client, the InteractiveBrowserCredential is used for this sample. It will open a browser window to authenticate the user. For all credential options see [credential classes](https://github.com/Azure/azure-sdk-for-python/tree/main/sdk/identity/azure-identity#credential-classes).
# feature_flag_enabled makes it so that the provider will load feature flags from Azure App Configuration
# feature_flag_refresh_enabled makes it so that the provider will refresh feature flags from Azure App Configuration, when the refresh operation is triggered
azure_app_config = load(endpoint=endpoint, credential=InteractiveBrowserCredential(),
                        refresh_on=[WatchKey("sentinel")],
                        on_refresh_success=on_refresh_success,
                        refresh_interval=10, # Default value is 30 seconds, shortened for this sample
                        feature_flag_enabled=True,
                        feature_flag_refresh_enabled=True,
                    )
feature_manager = FeatureManager(config)
同時更新您的路由以檢查更新的功能旗標。
@app.route("/")
def index():
    ...
    context["message"] = azure_app_config.get("message")
    context["beta"] = feature_manager.is_enabled("Beta")
    ...
更新您的範本 index.html 以使用新的功能旗標。
...

<body>
  <main>
    <div>
      <h1>{{message}}</h1>
      {% if beta %}
      <h2>Beta is enabled</h2>
      {% endif %}
    </div>
  </main>
</body>
更新並執行應用程式之後,您可以看到功能旗標的實際作用,其中 Beta is enabled 訊息將出現在頁面上,但前提是該功能旗標已在應用程式組態存放區中啟用。
![啟用了 [啟用功能旗標 Beta] 的螢幕擷取畫面。](media/manage-feature-flags/beta-enabled.png)
您可以在這裡找到完整的範例專案。
每當這些端點觸發時,就可以執行重新整理檢查,以確保使用最新的組態值。 如果重新整理間隔尚未經過或重新整理正在進行中,則檢查可以立即傳回資料。
當重新整理完成時,所有值都會立即更新,因此組態一律在物件內保持一致。
清除資源
如果您不想繼續使用本文中建立的資源,請刪除在此處建立的資源群組,以避免產生費用。
重要事項
刪除資源群組是無法回復的動作。 資源群組和其中的所有資源都將被永久刪除。 請確定您不會誤刪錯誤的資源群組或資源。 如果您是在包含需保留其他資源的資源群組內部,建立本文的資源,則可以從每個資源各自的窗格中個別刪除每個資源,而不必刪除整個資源群組。
- 登入 Azure 入口網站,然後選取 [資源群組]。
- 在 [依名稱篩選] 方塊中,輸入您資源群組的名稱。
- 在結果清單中,選取資源群組名稱以查看概觀。
- 選取 [刪除資源群組]。
- 系統將會要求您確認是否刪除資源群組。 輸入您資源群組的名稱以進行確認,然後選取 [刪除]。
不久後,系統便會刪除該資源群組及其所有的資源。
後續步驟
在本快速入門中,您已建立新的應用程式組態存放區,並透過功能管理程式庫用它來管理 Python 應用程式中的功能。