自動化監測,也稱為運行時間監視,是啟用 Application Insights 以進行 Azure App 服務的最簡單方式,不需更改程式代碼或進行進階設定。 根據您的特定案例,評估您是否需要透過 手動檢測進行更進階的監視。
啟用 Application Insights
重要
如果同時偵測到自動檢測監視和手動 SDK 型檢測,則只會接受手動檢測設定。 這樣的安排可防止傳送重複資料。 若要深入瞭解,請參閱 針對 Application Insights 與 Azure App Service 的整合進行疑難排解。
Azure 入口網站中的自動檢測
在 App Service 的左側導覽功能表中選取 [Application Insights ],然後選取 [ 啟用]。
![螢幕擷取畫面顯示已選取 [啟用] 的 Application Insights 索引標籤。](media/codeless-app-service/enable.png)
建立新的資源,或選取此應用程式現有的 Application Insights 資源。
附註
當您選取 [確定] 來建立新資源時,系統會提示您 [套用監視設定]。 選取 [繼續] 會將新的 Application Insights 資源連結到應用程式服務。 應用程式服務接著會重新啟動。
![螢幕擷取畫面顯示 [變更資源] 下拉式清單。](media/codeless-app-service/change-resource.png)
在指定要使用的資源之後,您可以選擇要如何讓 Application Insights 收集每個應用程式平台的資料。 ASP.NET Core 集合選項為建議或停用。
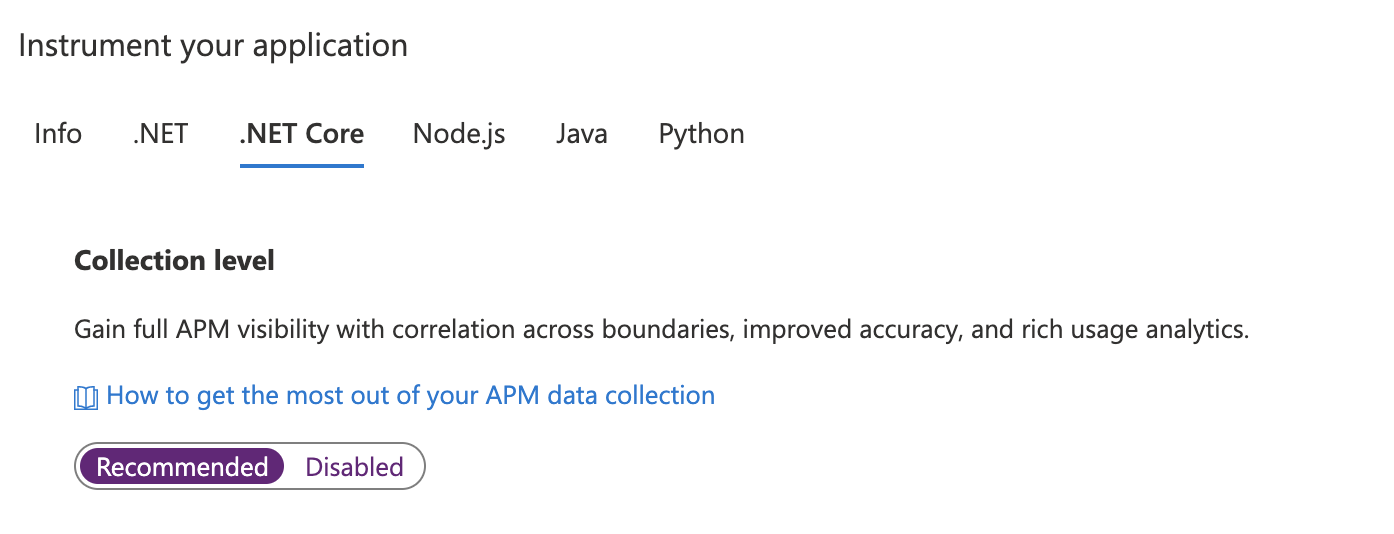
![顯示已選取 [建立新資源] 的 Application Insights 網站延伸模組頁面的螢幕擷取畫面。](media/codeless-app-service/instrument-net.png)

手動升級監視擴充功能/代理程式
從 2.8.9 版和更新版本進行升級
從 2.8.9 版的升級會自動進行,無須執行任何其他動作。 新的監控位元會在背景中傳送至目標應用服務,並在應用程式重新啟動時啟用。
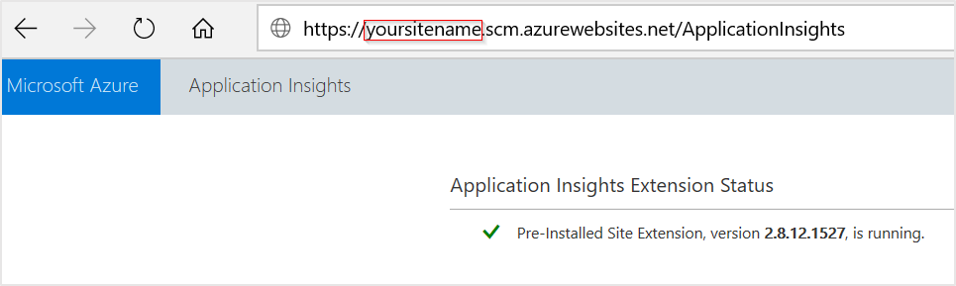
若要確認您正在執行的擴充功能版本,請移至 https://yoursitename.scm.azurewebsites.net/ApplicationInsights。
從 1.0.0 版至 2.6.5 版進行升級
從 2.8.9 版開始,會使用預先安裝的網站延伸模組。 如果您使用舊版,可以透過下列兩種方式之一進行更新:
透過 Azure 入口網站 啟用來升級:即使您已安裝 App Service 的 Application Insights 擴充功能,UI 仍只會顯示 [啟用] 按鈕。 在幕後,舊的私人網站延伸模組會遭到移除。
-
- 進行應用程式設定,來啟用預先安裝的網站延伸模組
ApplicationInsightsAgent。 如需詳細資訊,請參閱透過 PowerShell 啟用。 - 手動為 Azure App Service 移除名為 Application Insights 延伸模組的私人網站延伸模組。
- 進行應用程式設定,來啟用預先安裝的網站延伸模組
如果升級是從 2.5.1 之前的版本完成,請檢查 ApplicationInsights DLL 是否已從應用程式 bin 資料夾移除。 如需詳細資訊,請參閱 針對 Application Insights 與 Azure App Service 的整合進行疑難排解。

設定監視擴充功能/代理程式
我們目前不提供選項來設定 ASP.NET Core 的監視擴充功能。

啟用用戶端監視
ASP.NET Core 應用程式中的 [Recommended] 集合會預設啟用用戶端監控,無論應用程式設定 APPINSIGHTS_JAVASCRIPT_ENABLED 是否存在。
如果您想要停用用戶端監視:
選取 [設定]>[組態]。
在 [應用程式設定] 底下,使用下列資訊建立 [新增應用程式設定]:
-
名稱:
APPINSIGHTS_JAVASCRIPT_ENABLED -
值:
false
-
名稱:
儲存設定。 重新啟動您的應用程式。
自動監視
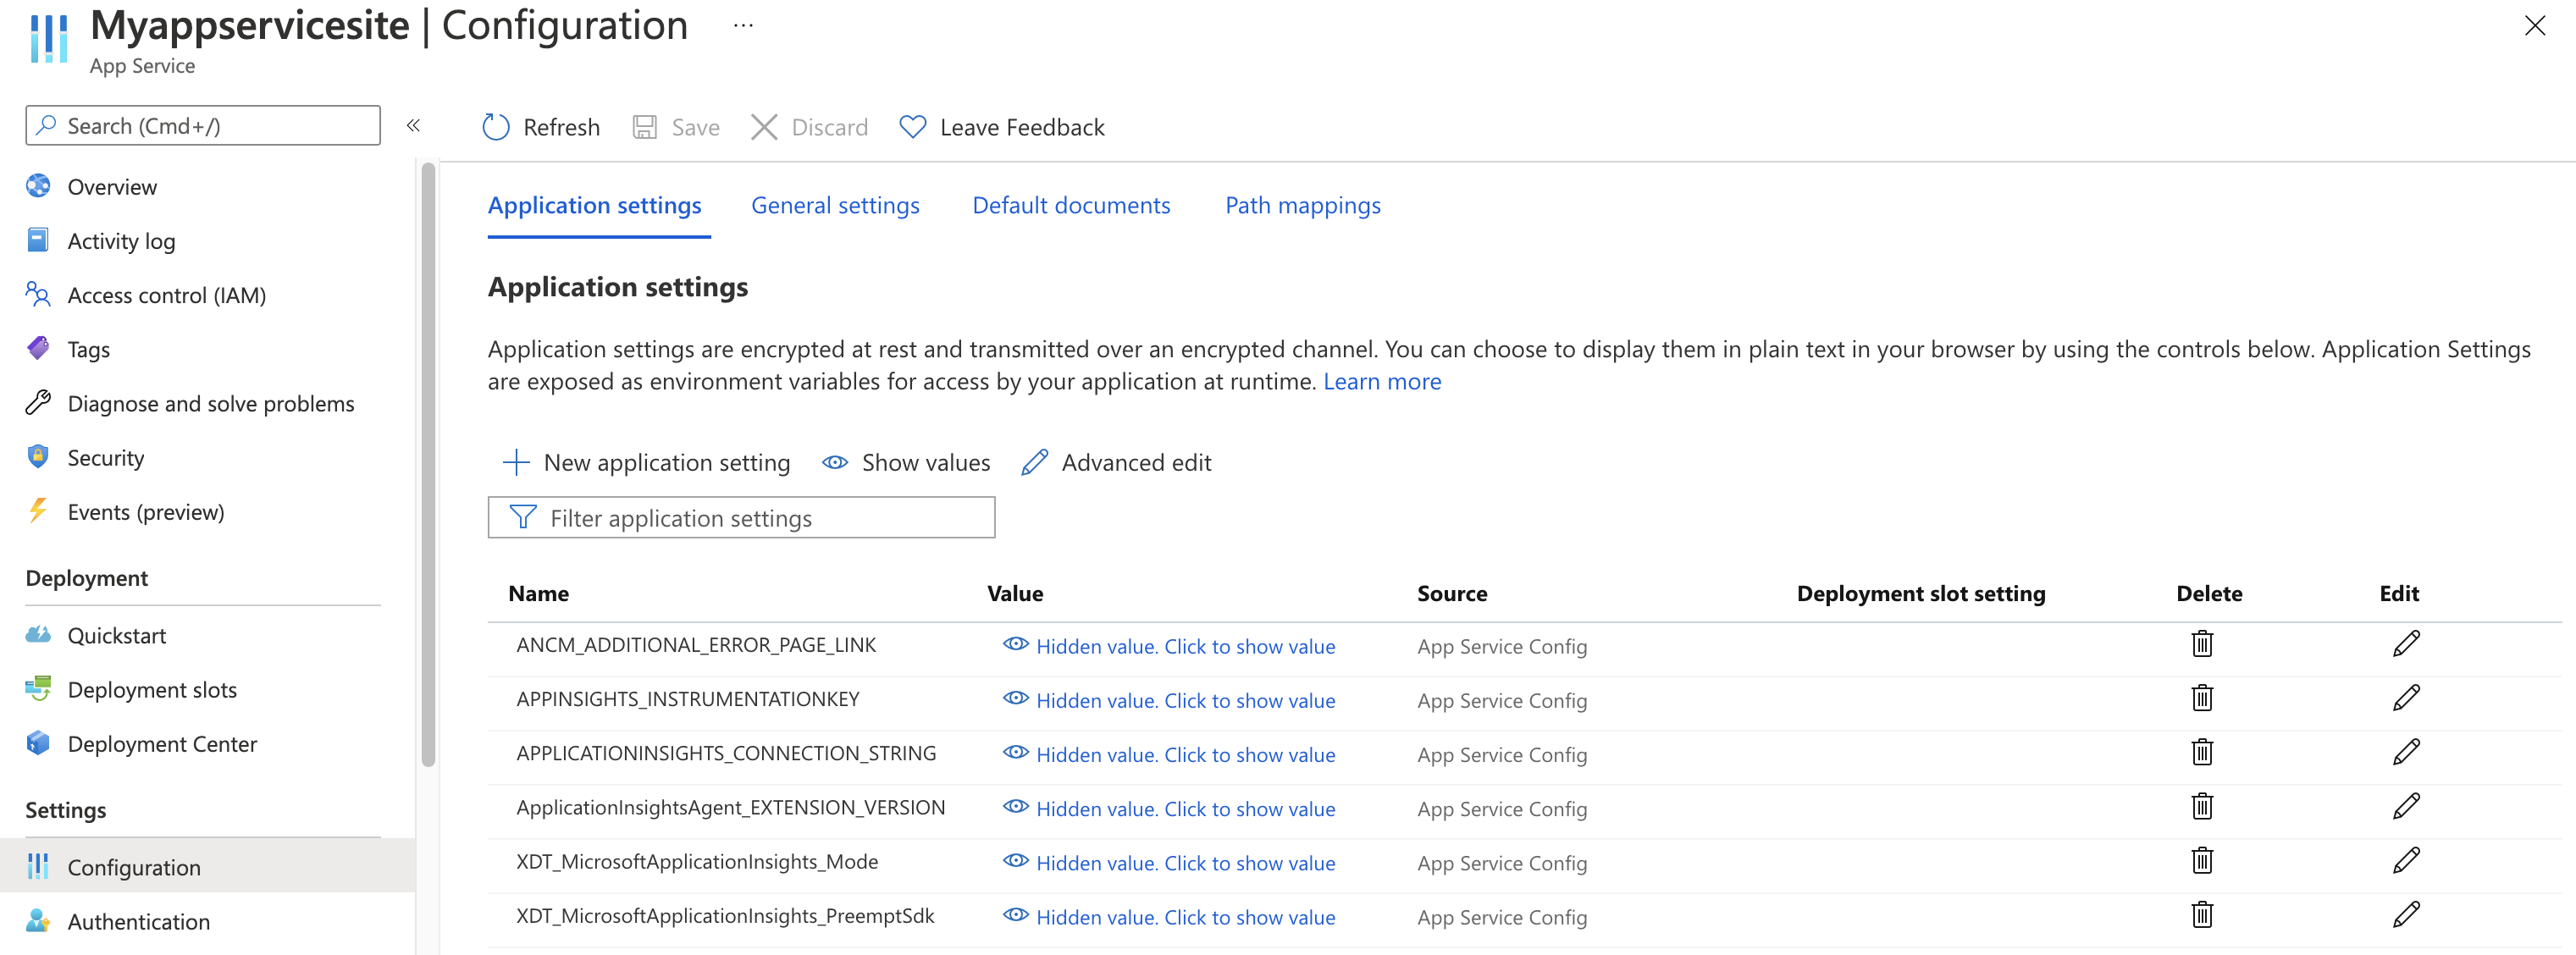
若要使用 Application Insights 啟用遙測收集,只需要設定下列應用程式設定:
應用程式設定定義
| 應用程式設定名稱 | 定義 | 值 |
|---|---|---|
| ApplicationInsightsAgent_EXTENSION_VERSION | 主要延伸模組,用於控制執行階段監視。 |
~2適用於 Windows 或~3 適用於 Linux |
| XDT_MicrosoftApplicationInsights_Mode | 在預設模式中只會啟用基本功能,以確保最佳效能。 |
disabled 或 recommended。 |
| XDT_MicrosoftApplicationInsights_PreemptSdk | 僅適用於 ASP.NET Core 應用程式。 啟用與 Application Insights SDK 的互操作功能。 將延伸模組與 SDK 並排載入,並使用其來傳送遙測。 (停用 Application Insights SDK。) | 1 |
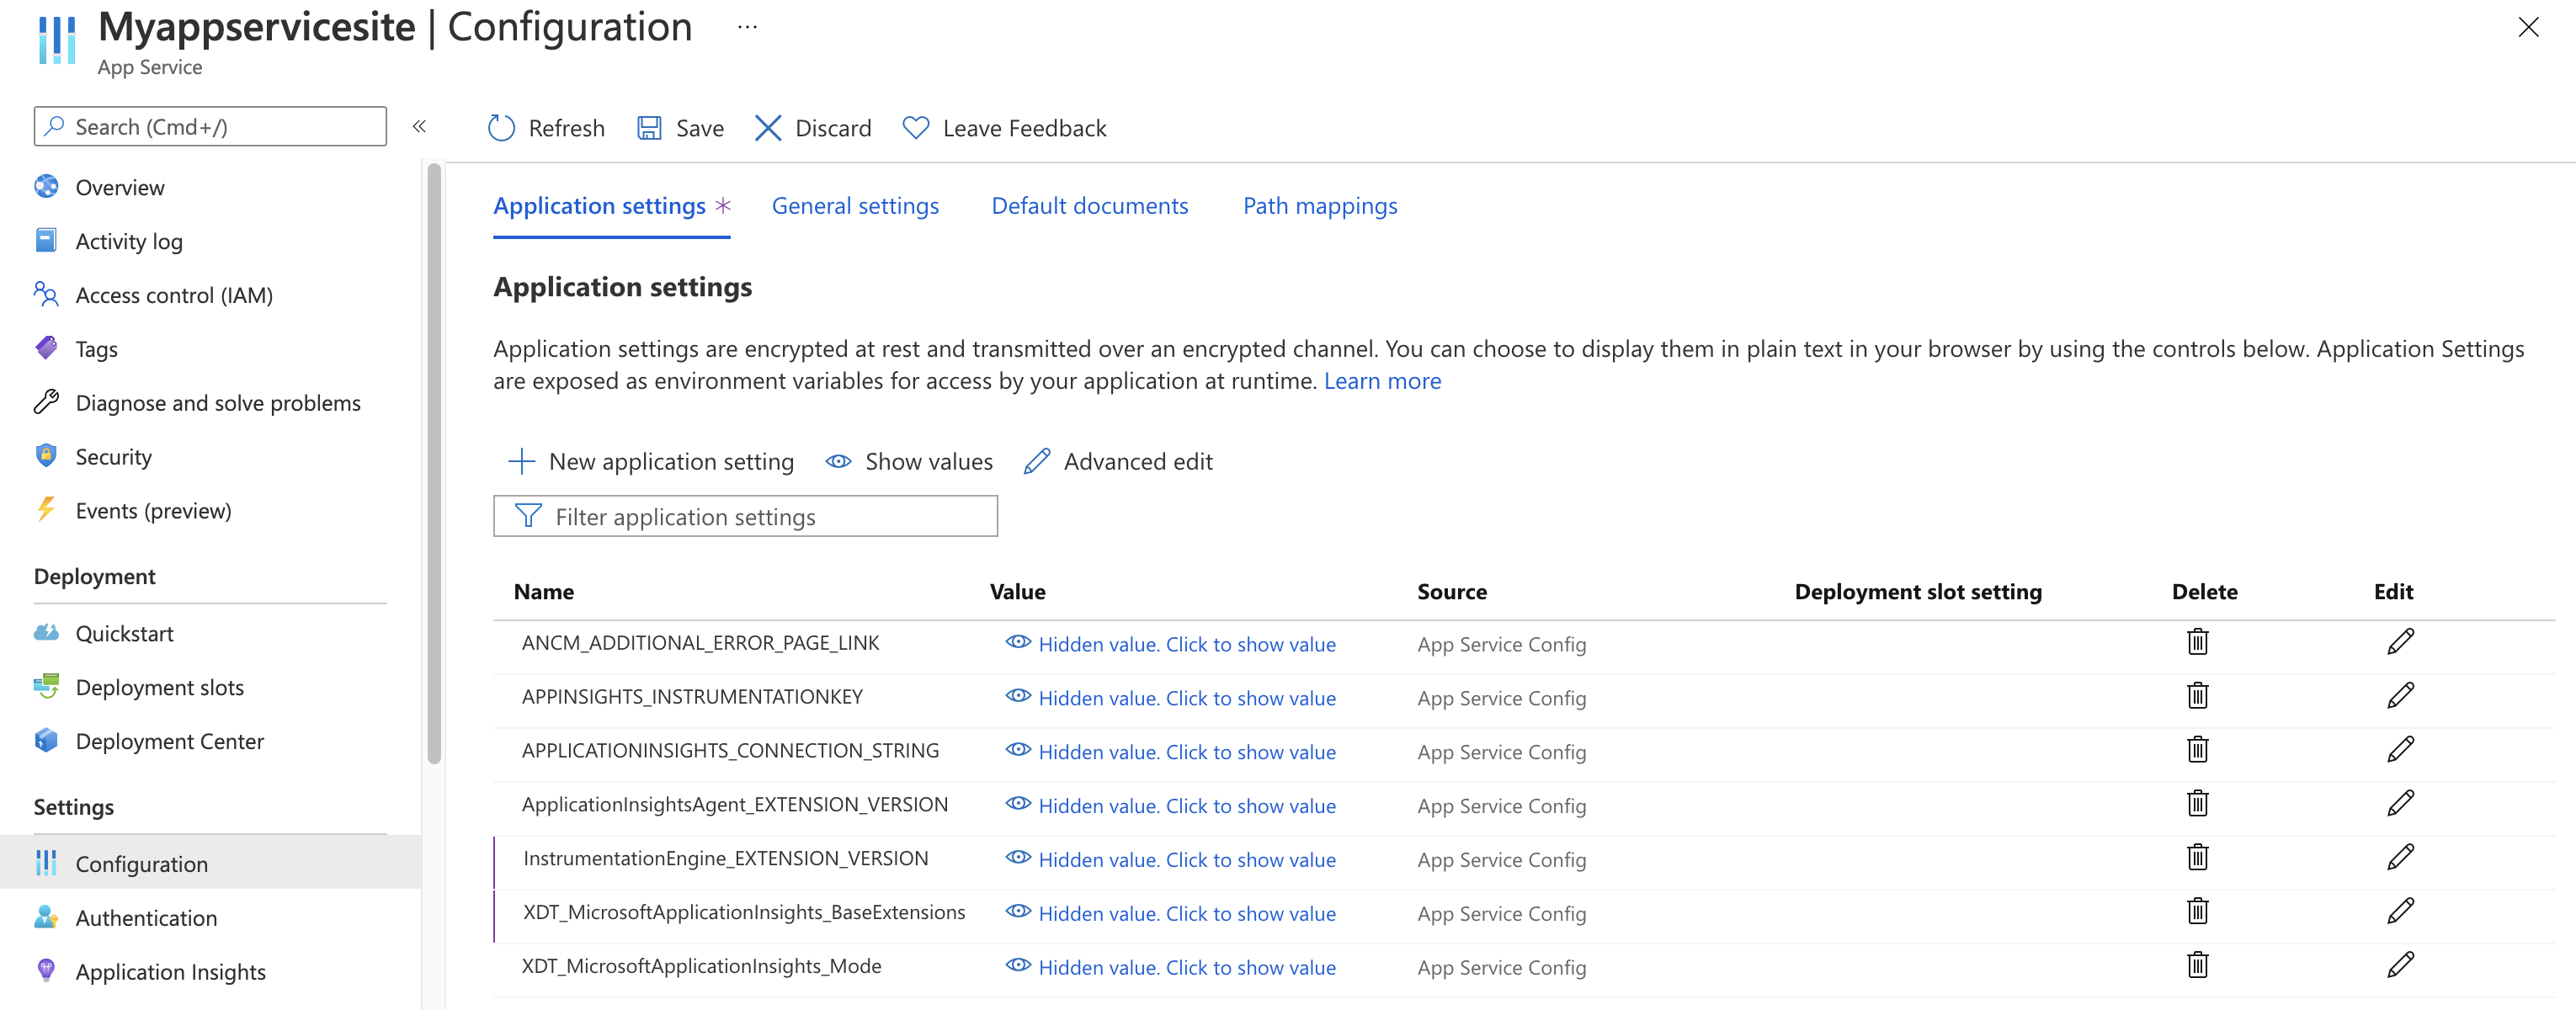
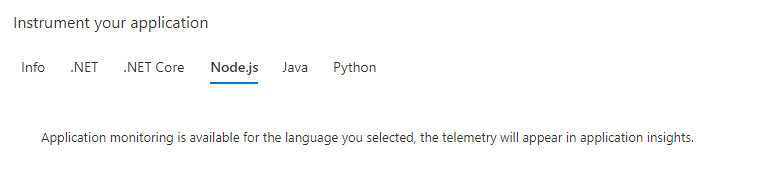
![螢幕擷取畫面:App Service 的 [應用程式設定] 與可用的 Application Insights 設定。](media/codeless-app-service/application-settings-java.png)
![螢幕擷取畫面:App Service 的 [應用程式設定] 與可用的 Application Insights 設定。](media/codeless-app-service/application-settings-nodejs.png)
![螢幕擷取畫面:App Service 的 [應用程式設定] 與可用的 Application Insights 設定。](media/codeless-app-service/application-settings-python.png#lightbox)
使用 Azure Resource Manager 的 App Service 應用程式設定
您可以使用 Azure Resource Manager 範本,來管理和設定 Azure App Service 的應用程式設定。 當您使用 Resource Manager 自動化部署新的 App Service 資源,或修改現有資源的設定時,可以使用此方法。
App Service 資源的應用程式設定 JSON 基本結構:
      "resources": [
        {
          "name": "appsettings",
          "type": "config",
          "apiVersion": "2015-08-01",
          "dependsOn": [
            "[resourceId('Microsoft.Web/sites', variables('webSiteName'))]"
          ],
          "tags": {
            "displayName": "Application Insights Settings"
          },
          "properties": {
            "key1": "value1",
            "key2": "value2"
          }
        }
      ]
自動建立 Application Insights 資源並連結到您新建立的 App Service 資源
若要使用預設 Application Insights 設定來建立 Resource Manager 範本,請開始該流程,就像您要建立已啟用 Application Insights 的新 Web 應用程式。
在 Azure 入口網站中,使用所需的資訊建立新的 Web 應用程式資源。 在 [監視器 + 安全] 索引標籤上啟用 Application Insights。
移至 [ 檢閱 + 建立],然後選取 [ 下載自動化的範本]。 此選項會產生已設定所有必要設定的最新 Resource Manager 範本。


附註
下列範例範本適用於在 Windows 上執行的 .NET 8 (LTS) 應用程式。 它會使用佔位元 my-monitored-web-app 表示應用程式的名稱和 aaaa0a0a-bb1b-cc2c-dd3d-eeeeee4e4e4e 表示訂用帳戶標識碼。
不建議直接複製和使用。 相反地,請根據上述指示產生您自己的範本。
展開以檢視範例範本
{
    "$schema": "http://schema.management.azure.com/schemas/2015-01-01/deploymentTemplate.json#",
    "contentVersion": "1.0.0.0",
    "parameters": {
        "subscriptionId": {
            "type": "string"
        },
        "resourceGroupName": {
            "type": "string"
        },
        "name": {
            "type": "string"
        },
        "location": {
            "type": "string"
        },
        "hostingPlanName": {
            "type": "string"
        },
        "serverFarmResourceGroup": {
            "type": "string"
        },
        "alwaysOn": {
            "type": "bool"
        },
        "ftpsState": {
            "type": "string"
        },
        "autoGeneratedDomainNameLabelScope": {
            "type": "string"
        },
        "sku": {
            "type": "string"
        },
        "skuCode": {
            "type": "string"
        },
        "workerSize": {
            "type": "string"
        },
        "workerSizeId": {
            "type": "string"
        },
        "numberOfWorkers": {
            "type": "string"
        },
        "currentStack": {
            "type": "string"
        },
        "phpVersion": {
            "type": "string"
        },
        "netFrameworkVersion": {
            "type": "string"
        }
    },
    "variables": {},
    "resources": [
        {
            "apiVersion": "2022-03-01",
            "name": "[parameters('name')]",
            "type": "Microsoft.Web/sites",
            "location": "[parameters('location')]",
            "tags": null,
            "dependsOn": [
                "microsoft.insights/components/my-monitored-web-app",
                "[concat('Microsoft.Web/serverfarms/', parameters('hostingPlanName'))]"
            ],
            "properties": {
                "name": "[parameters('name')]",
                "siteConfig": {
                    "appSettings": [
                        {
                            "name": "APPLICATIONINSIGHTS_CONNECTION_STRING",
                            "value": "[reference('microsoft.insights/components/my-monitored-web-app', '2015-05-01').ConnectionString]"
                        },
                        {
                            "name": "ApplicationInsightsAgent_EXTENSION_VERSION",
                            "value": "~2"
                        },
                        {
                            "name": "XDT_MicrosoftApplicationInsights_Mode",
                            "value": "default"
                        }
                    ],
                    "metadata": [
                        {
                            "name": "CURRENT_STACK",
                            "value": "[parameters('currentStack')]"
                        }
                    ],
                    "phpVersion": "[parameters('phpVersion')]",
                    "netFrameworkVersion": "[parameters('netFrameworkVersion')]",
                    "alwaysOn": "[parameters('alwaysOn')]",
                    "ftpsState": "[parameters('ftpsState')]"
                },
                "serverFarmId": "[concat('/subscriptions/', parameters('subscriptionId'),'/resourcegroups/', parameters('serverFarmResourceGroup'), '/providers/Microsoft.Web/serverfarms/', parameters('hostingPlanName'))]",
                "clientAffinityEnabled": true,
                "virtualNetworkSubnetId": null,
                "httpsOnly": true,
                "publicNetworkAccess": "Enabled",
                "autoGeneratedDomainNameLabelScope": "[parameters('autoGeneratedDomainNameLabelScope')]"
            },
            "resources": [
                {
                    "type": "Microsoft.Web/sites/basicPublishingCredentialsPolicies",
                    "apiVersion": "2022-09-01",
                    "name": "[concat(parameters('name'), '/scm')]",
                    "properties": {
                        "allow": true
                    },
                    "dependsOn": [
                        "[resourceId('Microsoft.Web/Sites', parameters('name'))]"
                    ]
                },
                {
                    "type": "Microsoft.Web/sites/basicPublishingCredentialsPolicies",
                    "apiVersion": "2022-09-01",
                    "name": "[concat(parameters('name'), '/ftp')]",
                    "properties": {
                        "allow": true
                    },
                    "dependsOn": [
                        "[resourceId('Microsoft.Web/Sites', parameters('name'))]"
                    ]
                }
            ]
        },
        {
            "apiVersion": "2018-11-01",
            "name": "[parameters('hostingPlanName')]",
            "type": "Microsoft.Web/serverfarms",
            "location": "[parameters('location')]",
            "kind": "",
            "tags": null,
            "dependsOn": [],
            "properties": {
                "name": "[parameters('hostingPlanName')]",
                "workerSize": "[parameters('workerSize')]",
                "workerSizeId": "[parameters('workerSizeId')]",
                "numberOfWorkers": "[parameters('numberOfWorkers')]",
                "zoneRedundant": false
            },
            "sku": {
                "Tier": "[parameters('sku')]",
                "Name": "[parameters('skuCode')]"
            }
        },
        {
            "apiVersion": "2020-02-02-preview",
            "name": "my-monitored-web-app",
            "type": "microsoft.insights/components",
            "location": "centralus",
            "tags": null,
            "dependsOn": [
                "newWorkspaceTemplate"
            ],
            "properties": {
                "ApplicationId": "[parameters('name')]",
                "Request_Source": "IbizaWebAppExtensionCreate",
                "Flow_Type": "Redfield",
                "Application_Type": "web",
                "WorkspaceResourceId": "/subscriptions/aaaa0a0a-bb1b-cc2c-dd3d-eeeeee4e4e4e/resourceGroups/DefaultResourceGroup-CUS/providers/Microsoft.OperationalInsights/workspaces/DefaultWorkspace-aaaa0a0a-bb1b-cc2c-dd3d-eeeeee4e4e4e-CUS"
            }
        },
        {
            "type": "Microsoft.Resources/deployments",
            "apiVersion": "2021-04-01",
            "name": "newWorkspaceTemplate",
            "resourceGroup": "DefaultResourceGroup-CUS",
            "subscriptionId": "[parameters('subscriptionId')]",
            "properties": {
                "mode": "Incremental",
                "template": {
                    "$schema": "https://schema.management.azure.com/schemas/2015-01-01/deploymentTemplate.json#",
                    "contentVersion": "1.0.0.0",
                    "parameters": {},
                    "variables": {},
                    "resources": [
                        {
                            "apiVersion": "2020-08-01",
                            "name": "DefaultWorkspace-aaaa0a0a-bb1b-cc2c-dd3d-eeeeee4e4e4e-CUS",
                            "type": "Microsoft.OperationalInsights/workspaces",
                            "location": "centralus",
                            "properties": {}
                        }
                    ]
                }
            }
        }
    ]
}
透過 PowerShell 啟用
若要透過 PowerShell 啟用應用程式監視,只需變更底層應用程式設定。 下列範例會針對資源群組 my-monitored-web-app 中,名為 my-resource-group 的網站啟用應用程式監視。 它會設定要傳送至 InstrumentationKey=012345678-abcd-ef01-2345-6789abcd 連接字串的數據。
附註
建議您使用 Azure Az PowerShell 模組來與 Azure 互動。 若要開始使用,請參閱安裝 Azure PowerShell。 若要了解如何移轉至 Az PowerShell 模組,請參閱將 Azure PowerShell 從 AzureRM 移轉至 Az。
附註
若為 Windows,請將 ApplicationInsightsAgent_EXTENSION_VERSION 設定為 ~2。
針對 Linux,將 ApplicationInsightsAgent_EXTENSION_VERSION 設定為 ~3。
$app = Get-AzWebApp -ResourceGroupName "my-resource-group" -Name "my-monitored-web-app" -ErrorAction Stop
$newAppSettings = @{} # Case-insensitive hash map
$app.SiteConfig.AppSettings | %{$newAppSettings[$_.Name] = $_.Value} # Preserve non-Application-Insights application settings.
$newAppSettings["APPLICATIONINSIGHTS_CONNECTION_STRING"] = "InstrumentationKey=aaaa0a0a-bb1b-cc2c-dd3d-eeeeee4e4e4e"; # Set the Application Insights connection string
$newAppSettings["ApplicationInsightsAgent_EXTENSION_VERSION"] = "~3"; # Enable the ApplicationInsightsAgent.
$app = Set-AzWebApp -AppSettings $newAppSettings -ResourceGroupName $app.ResourceGroup -Name $app.Name -ErrorAction Stop
疑難排解
請參閱專用的疑難排解文章。
下一步
- 檢閱常見問題(FAQ): Azure App Service for .NET、Node.js、Python 和 Java 應用程式的監視常見問題。
- 在即時應用程式上啟用 .NET 分析器以用於 Azure App 服務應用程式。
- 啟用 Azure 診斷 傳送至 Application Insights。
- 監視服務健康狀態計量,確保您的服務可用且回應正常。
- 每當發生作業事件或計量超過臨界值時,接收警示通知。
- 設定應用程式的可用性測試 。