使用 Azure Marketplace 映射為您的 Azure Stack Edge Pro GPU 建立 VM 映射
警告
這篇文章參考 CentOS,這是接近生命週期結束 (EOL) 狀態的 Linux 發行版本。 請據以考慮您的使用方式和規劃。 如需詳細資訊,請參閱 CentOS 生命週期結束指引。
適用於: Azure Stack Edge Pro - GPUAzure Stack Edge Pro 2Azure Stack Edge Pro RAzure Stack Edge Mini R
若要在 Azure Stack Edge Pro GPU 裝置上部署 VM,您必須建立可用來建立 VM 的 VM 映像。 本文說明從 Azure Marketplace 映射開始建立 VM 映射所需的步驟。 然後,您可以使用此 VM 映射,在 Azure Stack Edge Pro GPU 裝置上部署 VM。
VM 映像工作流程
下列步驟說明使用 Azure Marketplace 工作流程的 VM 映射工作流程:
- 連線 Azure Cloud Shell 或已安裝 Azure CLI 的用戶端。
- 搜尋 Azure Marketplace 並識別您慣用的映像。
- 從 Marketplace 映射建立新的受控磁碟。
- 將 VHD 從受控磁碟匯出至 Azure 儲存體 帳戶。
- 清除受控磁碟。
如需詳細資訊,請移至 使用 Azure PowerShell 在 Azure Stack Edge Pro 裝置上部署 VM。
必要條件
在您可以針對 Azure Stack Edge 使用 Azure Marketplace 映射之前,請確定您已透過下列任一種方式連線到 Azure。
在 Azure Cloud Shell 中使用 Bash 環境。 如需詳細資訊,請參閱 Azure Cloud Shell 中的 Bash 快速入門。

若要在本地執行 CLI 參考命令,請安裝 Azure CLI。 若您在 Windows 或 macOS 上執行,請考慮在 Docker 容器中執行 Azure CLI。 如需詳細資訊,請參閱〈如何在 Docker 容器中執行 Azure CLI〉。
如果您使用的是本機安裝,請使用 az login 命令,透過 Azure CLI 來登入。 請遵循您終端機上顯示的步驟,完成驗證程序。 如需其他登入選項,請參閱使用 Azure CLI 登入。
出現提示時,請在第一次使用時安裝 Azure CLI 延伸模組。 如需擴充功能詳細資訊,請參閱使用 Azure CLI 擴充功能。
執行 az version 以尋找已安裝的版本和相依程式庫。 若要升級至最新版本,請執行 az upgrade。
搜尋 Azure Marketplace 映像
您現在將識別您想要使用的特定 Azure Marketplace 映射。 Azure Marketplace 裝載數千個 VM 映射。
若要尋找符合搜尋準則的一些最常用的 Marketplace 映射,請執行下列命令。
az vm image list --all [--publisher <Publisher>] [--offer <Offer>] [--sku <SKU>]
最後三個旗標是選擇性的,但排除它們會傳回長清單。
一些範例查詢包括:
#Returns all images of type "Windows Server"
az vm image list --all --publisher "MicrosoftWindowsserver" --offer "WindowsServer"

#Returns all Windows Server 2019 Datacenter images from West US published by Microsoft
az vm image list --all --location "westus" --publisher "MicrosoftWindowsserver" --offer "WindowsServer" --sku "2019-Datacenter"

#Returns all VM images from a publisher
az vm image list --all --publisher "Canonical"
以下是查詢特定發行者、供應專案和 SKU 的 VM 映射時的範例輸出。
PS /home/user> az vm image list --all --publisher "Canonical" --offer "UbuntuServer" --sku "12.04.4-LTS"
[
  {
    "offer": "UbuntuServer",
    "publisher": "Canonical",
    "sku": "12.04.4-LTS",
    "urn": "Canonical:UbuntuServer:12.04.4-LTS:12.04.201402270",
    "version": "12.04.201402270"
  },
  {
    "offer": "UbuntuServer",
    "publisher": "Canonical",
    "sku": "12.04.4-LTS",
    "urn": "Canonical:UbuntuServer:12.04.4-LTS:12.04.201404080",
    "version": "12.04.201404080"
  },
  {
    "offer": "UbuntuServer",
    "publisher": "Canonical",
    "sku": "12.04.4-LTS",
    "urn": "Canonical:UbuntuServer:12.04.4-LTS:12.04.201404280",
    "version": "12.04.201404280"
  },
  {
    "offer": "UbuntuServer",
    "publisher": "Canonical",
    "sku": "12.04.4-LTS",
    "urn": "Canonical:UbuntuServer:12.04.4-LTS:12.04.201405140",
    "version": "12.04.201405140"
  },
  {
    "offer": "UbuntuServer",
    "publisher": "Canonical",
    "sku": "12.04.4-LTS",
    "urn": "Canonical:UbuntuServer:12.04.4-LTS:12.04.201406060",
    "version": "12.04.201406060"
  },
  {
    "offer": "UbuntuServer",
    "publisher": "Canonical",
    "sku": "12.04.4-LTS",
    "urn": "Canonical:UbuntuServer:12.04.4-LTS:12.04.201406190",
    "version": "12.04.201406190"
  },
  {
    "offer": "UbuntuServer",
    "publisher": "Canonical",
    "sku": "12.04.4-LTS",
    "urn": "Canonical:UbuntuServer:12.04.4-LTS:12.04.201407020",
    "version": "12.04.201407020"
  },
  {
    "offer": "UbuntuServer",
    "publisher": "Canonical",
    "sku": "12.04.4-LTS",
    "urn": "Canonical:UbuntuServer:12.04.4-LTS:12.04.201407170",
    "version": "12.04.201407170"
  }
]
PS /home/user>
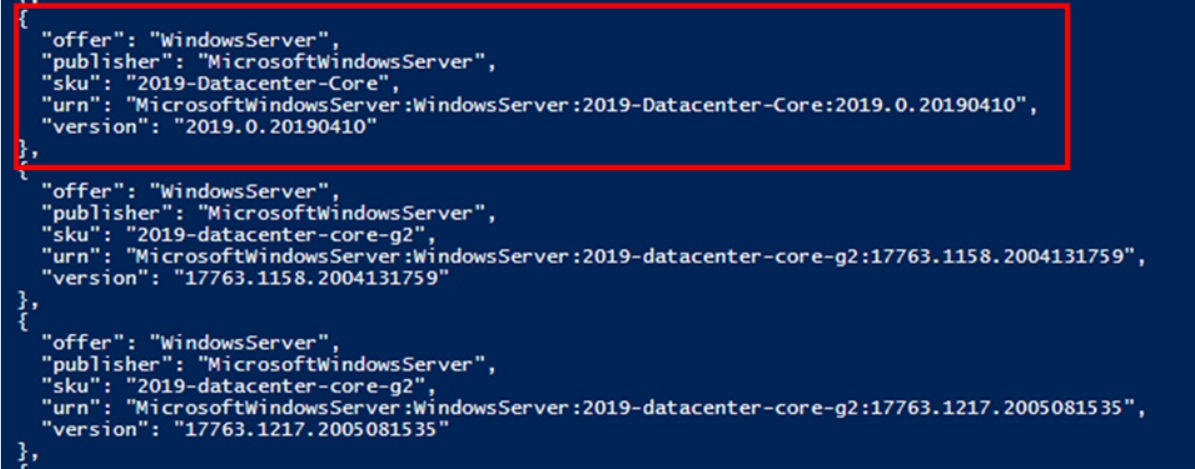
在此範例中,我們將選取 Windows Server 2019 Datacenter Core 版本 2019.0.20190410。 我們將依其通用資源編號來識別此影像(“URN”)。
常用的 Marketplace 映射
以下是一些最常使用之影像的 URN 列表。 如果您只想要特定作業系統的最新版本,則可以將版本號碼取代為 URN 中的「最新」。 例如,“MicrosoftWindowsServer:WindowsServer:2019-Datacenter:Latest”。
| OS | SKU | 版本 | 甕 |
|---|---|---|---|
| Windows Server | 2019 Datacenter | 17763.1879.2104091832 | MicrosoftWindowsServer:WindowsServer:2019-Datacenter:17763.1879.2104091832 |
| Windows Server | 2019 Datacenter (30 GB 小型磁碟) | 17763.1879.2104091832 | MicrosoftWindowsServer:WindowsServer:2019-Datacenter-smalldisk:17763.1879.2104091832 |
| Windows Server | 2019 Datacenter Core | 17763.1879.2104091832 | MicrosoftWindowsServer:WindowsServer:2019-Datacenter-Core:17763.1879.2104091832 |
| Windows Server | 2019 Datacenter Core (30 GB 小型磁碟) | 17763.1879.2104091832 | MicrosoftWindowsServer:WindowsServer:2019-Datacenter-Core-smalldisk:17763.1879.2104091832 |
| Windows 桌面 | Windows 10 20H2 專業版 | 19042.928.2104091209 | MicrosoftWindowsDesktop:Windows-10:20h2-pro:19042.928.2104091209 |
| Ubuntu Server | 標準 Ubuntu Server 18.04 LTS | 18.04.202002180 | Canonical:UbuntuServer:18.04-LTS:18.04.202002180 |
| Ubuntu Server | 標準 Ubuntu Server 16.04 LTS | 16.04.202104160 | Canonical:UbuntuServer:16.04-LTS:16.04.202104160 |
| CentOS | CentOS 8.1 | 8.1.2020062400 | OpenLogic:CentOS:8_1:8.1.2020062400 |
| CentOS | CentOS 7.7 | 7.7.2020062400 | OpenLogic:CentOS:7.7:7.7.2020062400 |
從 Marketplace 映射建立新的受控磁碟
從您選擇的 Marketplace 映像建立 Azure 受控磁碟。
設定部分參數。
$urn = <URN of the Marketplace image> #Example: “MicrosoftWindowsServer:WindowsServer:2019-Datacenter:Latest”
$diskName = <disk name> #Name for new disk to be created
$diskRG = <resource group> #Resource group that contains the new disk
建立磁碟併產生SAS存取URL。
az disk create -g $diskRG -n $diskName --image-reference $urn
$sas = az disk grant-access --duration-in-seconds 36000 --access-level Read --name $diskName --resource-group $diskRG
$diskAccessSAS = ($sas | ConvertFrom-Json)[0].accessSas
範例輸出如下:
PS /home/user> $urn = “MicrosoftWindowsServer:WindowsServer:2019-Datacenter:Latest”
PS /home/user> $diskName = "newmanageddisk1"
PS /home/user> $diskRG = "newrgmd1"
PS /home/user> az disk create -g $diskRG -n $diskName --image-reference $urn
{
  "burstingEnabled": null,
  "creationData": {
    "createOption": "FromImage",
    "galleryImageReference": null,
    "imageReference": {
      "id": "/Subscriptions/db4e2fdb-6d80-4e6e-b7cd-736098270664/Providers/Microsoft.Compute/Locations/eastus/Publishers/MicrosoftWindowsServer/ArtifactTypes/VMImage/Offers/WindowsServer/Skus/2019-Datacenter/Versions/17763.1935.2105080716",
      "lun": null
    },
    "logicalSectorSize": null,
    "sourceResourceId": null,
    "sourceUniqueId": null,
    "sourceUri": null,
    "storageAccountId": null,
    "uploadSizeBytes": null
  },
  "diskAccessId": null,
  "diskIopsReadOnly": null,
  "diskIopsReadWrite": 500,
  "diskMBpsReadOnly": null,
  "diskMBpsReadWrite": 100,
  "diskSizeBytes": 136367308800,
  "diskSizeGb": 127,
  "diskState": "Unattached",
  "encryption": {
    "diskEncryptionSetId": null,
    "type": "EncryptionAtRestWithPlatformKey"
  },
  "encryptionSettingsCollection": null,
  "extendedLocation": null,
  "hyperVGeneration": "V1",
  "id": "/subscriptions/db4e2fdb-6d80-4e6e-b7cd-736098270664/resourceGroups/newrgmd1/providers/Microsoft.Compute/disks/NewManagedDisk1",
  "location": "eastus",
  "managedBy": null,
  "managedByExtended": null,
  "maxShares": null,
  "name": "NewManagedDisk1",
  "networkAccessPolicy": "AllowAll",
  "osType": "Windows",
  "propertyUpdatesInProgress": null,
  "provisioningState": "Succeeded",
  "purchasePlan": null,
  "resourceGroup": "newrgmd1",
  "securityProfile": null,
  "shareInfo": null,
  "sku": {
    "name": "Premium_LRS",
    "tier": "Premium"
  },
  "supportsHibernation": null,
  "tags": {},
  "tier": "P10",
  "timeCreated": "2021-06-08T00:39:34.205982+00:00",
  "type": "Microsoft.Compute/disks",
  "uniqueId": "1a649ad4-3b95-471e-89ef-1d2ed1f51525",
  "zones": null
}

PS /home/user> $sas = az disk grant-access --duration-in-seconds 36000 --access-level Read --name $diskName --resource-group $diskRG
PS /home/user>  $diskAccessSAS = ($sas | ConvertFrom-Json)[0].accessSas
PS /home/user>
將 VHD 從受控磁碟導出至 Azure 儲存體
此步驟會將 VHD 從受控磁碟匯出至您慣用的 Azure Blob 儲存器帳戶。 此 VHD 接著可用來在 Azure Stack Edge 上建立 VM 映像。
設定將複製 VHD 的目的地記憶體帳戶。
$storageAccountName = <destination storage account name>
$containerName = <destination container name>
$destBlobName = <blobname.vhd> #Blob that will be created, including .vhd extension
$storageAccountKey = <storage account key>
將 VHD 複製到目的地記憶體帳戶。
$destContext = New-AzureStorageContext -StorageAccountName $storageAccountName -StorageAccountKey $storageAccountKey
Start-AzureStorageBlobCopy -AbsoluteUri $diskAccessSAS -DestContainer $containerName -DestContext $destContext -DestBlob $destBlobName
VHD 複本需要幾分鐘的時間才能完成。 請確定複製已完成,再執行下列命令。 狀態欄位會在完成時顯示「成功」。
Get-AzureStorageBlobCopyState –Container $containerName –Context $destContext -Blob $destBlobName
範例輸出如下:
PS /home/user> $storageAccountName = "edgeazurevmeus"
PS /home/user> $containerName = "azurevmmp"
PS /home/user> $destBlobName = "newblobmp.vhd"
PS /home/user> $storageAccountKey = "n9sCytWLdTBz0F4Sco9SkPGWp6BJBtf7BJBk79msf1PfxJGQdqSfu6TboZWZ10xyZdc4y+Att08cC9B79jB0YA=="

PS /home/user> $destContext = New-AzureStorageContext -StorageAccountName $storageAccountName -StorageAccountKey $storageAccountKey
PS /home/user> Start-AzureStorageBlobCopy -AbsoluteUri $diskAccessSAS -DestContainer $containerName -DestContext $destContext -DestBlob $destBlobName

   AccountName: edgeazurevmeus, ContainerName: azurevmmp

Name                 BlobType  Length          ContentType                    LastModified         AccessTier SnapshotTime                 IsDeleted  VersionId
----                 --------  ------          -----------                    ------------         ---------- ------------                 ---------  ---------
newblobmp.vhd        PageBlob  -1                                             2021-06-08 00:50:10Z                                         False

PS /home/user> Get-AzureStorageBlobCopyState –Container $containerName –Context $destContext -Blob $destBlobName

CopyId                  : 24a1e3f5-886a-490d-9dd7-562bb4acff58
CompletionTime          :
Status                  : Pending
Source                  : https://md-lfn221fppr2c.blob.core.windows.net/d4tb2hp5ff2q/abcd?sv=2018-03-28&sr=b&si=4f588db1-9aac-44d9-9607-35497cc08a7f
BytesCopied             : 696254464
TotalBytes              : 136367309312
StatusDescription       :
DestinationSnapshotTime :

PS /home/user> Get-AzureStorageBlobCopyState –Container $containerName –Context $destContext -Blob $destBlobName

CopyId                  : 24a1e3f5-886a-490d-9dd7-562bb4acff58
CompletionTime          : 6/8/2021 12:57:26 AM +00:00
Status                  : Success
Source                  : https://md-lfn221fppr2c.blob.core.windows.net/d4tb2hp5ff2q/abcd?sv=2018-03-28&sr=b&si=4f588db1-9aac-44d9-9607-35497cc08a7f
BytesCopied             : 136367309312
TotalBytes              : 136367309312
StatusDescription       :
DestinationSnapshotTime :
清除受控磁碟
若要刪除您所建立的受控磁碟,請遵循下列步驟:
az disk revoke-access --name $diskName --resource-group $diskRG
az disk delete --name $diskName --resource-group $diskRG --yes
刪除需要幾分鐘的時間才能完成。
下一步
意見反應
即將登場:在 2024 年,我們將逐步淘汰 GitHub 問題作為內容的意見反應機制,並將它取代為新的意見反應系統。 如需詳細資訊,請參閱:https://aka.ms/ContentUserFeedback。
提交並檢視相關的意見反應