注意
本文件涵蓋工作區模型登錄。 Azure Databricks 建議在 Unity 目錄中使用模型。 Unity 目錄中的模型提供集中式模型治理、跨工作區存取、譜系和部署。 工作區模型註冊表將會遭棄用。
此範例描述如何使用工作區模型登錄來組建機器學習應用程式,以預測風力發電廠的每日電力輸出。 下列範例顯示如何:
- 使用 MLflow 追蹤並記錄模型
- 將模型註冊到模型註冊庫
- 描述模型並執行模型版本階段的轉換
- 整合已註冊的模型與生產應用程式
- 在模型登錄中搜尋和探索模型
- 封存和刪除模型
本文描述如何使用 MLflow 追蹤和 MLflow 模型登錄UI 和 API 執行這些步驟。
如需使用 MLflow 追蹤和登錄 API 執行所有這些步驟的 Notebook,請參閱模型登錄範例 Notebook。
載入資料集、訓練模型,並使用 MLflow Tracking 進行追蹤
在模型登錄中登錄模型之前,您必須先在實驗執行期間訓練和記錄模型。 本節描述如何載入風力發電場資料集、訓練模型,以及將訓練執行記錄至 MLflow。
載入資料集
下列程式碼會載入資料集,其中包含美國風力發電場的天氣資料和電力輸出資訊。 該資料集包含每六小時取樣一次的 wind direction、wind speed 和 air temperature 特徵 (00:00 一次、08:00 一次和 16:00 一次),以及數年來的每日總電力輸出 (power)(GR)。
import pandas as pd
wind_farm_data = pd.read_csv("https://github.com/dbczumar/model-registry-demo-notebook/raw/master/dataset/windfarm_data.csv", index_col=0)

def get_training_data():
  training_data = pd.DataFrame(wind_farm_data["2014-01-01":"2018-01-01"])
  X = training_data.drop(columns="power")
  y = training_data["power"]
  return X, y

def get_validation_data():
  validation_data = pd.DataFrame(wind_farm_data["2018-01-01":"2019-01-01"])
  X = validation_data.drop(columns="power")
  y = validation_data["power"]
  return X, y

def get_weather_and_forecast():
  format_date = lambda pd_date : pd_date.date().strftime("%Y-%m-%d")
  today = pd.Timestamp('today').normalize()
  week_ago = today - pd.Timedelta(days=5)
  week_later = today + pd.Timedelta(days=5)

  past_power_output = pd.DataFrame(wind_farm_data)[format_date(week_ago):format_date(today)]
  weather_and_forecast = pd.DataFrame(wind_farm_data)[format_date(week_ago):format_date(week_later)]
  if len(weather_and_forecast) < 10:
    past_power_output = pd.DataFrame(wind_farm_data).iloc[-10:-5]
    weather_and_forecast = pd.DataFrame(wind_farm_data).iloc[-10:]

  return weather_and_forecast.drop(columns="power"), past_power_output["power"]
訓練模型
下列程式碼會使用 TensorFlow Keras 訓練神經網路,根據資料集中的天氣特徵來預測電源輸出。 MLflow 可用來追蹤模型的超參數、效能計量、原始程式碼和成品。
def train_keras_model(X, y):
  import tensorflow.keras
  from tensorflow.keras.models import Sequential
  from tensorflow.keras.layers import Dense

  model = Sequential()
  model.add(Dense(100, input_shape=(X_train.shape[-1],), activation="relu", name="hidden_layer"))
  model.add(Dense(1))
  model.compile(loss="mse", optimizer="adam")

  model.fit(X_train, y_train, epochs=100, batch_size=64, validation_split=.2)
  return model

import mlflow

X_train, y_train = get_training_data()

with mlflow.start_run():
  # Automatically capture the model's parameters, metrics, artifacts,
  # and source code with the `autolog()` function
  mlflow.tensorflow.autolog()

  train_keras_model(X_train, y_train)
  run_id = mlflow.active_run().info.run_id
使用 MLflow UI 登錄和管理模型
本節內容:
建立新的已註冊模型
請按一下在 Azure Databricks 筆記本右側邊欄中的,導航到 MLflow 實驗運行側邊欄。

尋找對應至 TensorFlow Keras 模型訓練工作階段的 MLflow Run,然後按下 檢視執行詳細資料 圖示,並在 MLflow 執行 UI 中開啟。
在 MLflow UI 中,向下捲動至 [Artifacts] 區段,然後按下名為 [模型] 的目錄。 按下出現的 [登錄模型] 按鈕。

從下拉功能表中選取 [建立新模型],然後輸入下列模型名稱:
power-forecasting-model。按一下 [註冊]。 這會註冊名為
power-forecasting-model的新模型,並建立新的模型版本:Version 1。
幾分鐘後,MLflow UI 會顯示新註冊模型的連結。 請依照此連結,在 MLflow 模型登錄 UI 中開啟新的模型版本。
探索模型註冊使用者介面
MLflow 模型登錄 UI 中的模型版本頁面提供關於已註冊預測模型之 Version 1 的資訊,包括其作者、建立時間和其目前階段。

模型版本頁面也提供 [來源執行] 連結,這會開啟 MLflow Run,用來在 MLflow Run UI 中建立模型。 您可以從 MLflow Run UI 存取 來源 筆記本連結,以檢視用來訓練模型的 Azure Databricks 筆記本快照。


若要瀏覽回 MLflow 模型登錄,請按下側邊欄的 ![]() [模型]。
[模型]。
所產生的 MLflow 模型登錄首頁會顯示 Azure Databricks 工作區中所有已註冊模型的清單,包括其版本和階段。
按下 power-forecasting-model 連結以開啟已註冊的模型頁面,其中會顯示所有版本的預測模型。
新增模型描述
您可以將描述新增至已註冊的模型和模型版本。 已註冊的模型描述適用於記錄套用至多個模型版本的資訊 (例如,模型問題和資料集的一般概觀)。 模型版本描述對於詳細描述特定模型版本的唯一屬性很有用(例如,用來開發模型的方法和演算法)。
將高階描述新增至已註冊的電源預測模型。 按下
 圖示並輸入下列描述:
This model forecasts the power output of a wind farm based on weather data. The weather data consists of three features: wind speed, wind direction, and air temperature.
按一下 儲存。
從已註冊的模型頁面按下 [第 1 版] 連結,以瀏覽回模型版本頁面。
按下
圖示並輸入下列描述:This model version was built using TensorFlow Keras. It is a feed-forward neural network with one hidden layer.
按一下 儲存。
轉換模型版本
MLflow 模型登錄會定義數個模型階段:無、預備、生產和 Archived。 每個階段都有獨特的意義。 例如,預備適用於模型測試,而生產適用於已完成測試或檢閱流程,以及已部署至應用程式的模型。
按下 [階段] 按鈕,即可顯示可用模型階段,以及可用階段轉換選項的清單。
選取 [轉換至 - >生產],然後在階段轉換確認視窗中按下 [確認],將模型轉換為生產環境。

將模型版本轉換至生產環境之後,目前的階段會顯示在 UI 中,並將一個項目新增至活動記錄以反映轉換。


MLflow 模型登錄可讓多個模型版本共用相同的階段。 依階段參考模型時,模型登錄會使用最新的模型版本 (具有最大版本 ID 的模型版本)。 已註冊的模型頁面會顯示特定模型的所有版本。

使用 MLflow API 登錄和管理模型
本節內容:
以程式設計方式定義模型的名稱
現在模型已註冊並轉換為生產環境,您可以使用 MLflow 程式設計 API 來參考。 定義已註冊模型的名稱,如下所示:
model_name = "power-forecasting-model"
註冊模型
model_name = get_model_name()

import mlflow

# The default path where the MLflow autologging function stores the TensorFlow Keras model
artifact_path = "model"
model_uri = "runs:/{run_id}/{artifact_path}".format(run_id=run_id, artifact_path=artifact_path)

model_details = mlflow.register_model(model_uri=model_uri, name=model_name)

import time
from mlflow.tracking.client import MlflowClient
from mlflow.entities.model_registry.model_version_status import ModelVersionStatus

# Wait until the model is ready
def wait_until_ready(model_name, model_version):
  client = MlflowClient()
  for _ in range(10):
    model_version_details = client.get_model_version(
      name=model_name,
      version=model_version,
    )
    status = ModelVersionStatus.from_string(model_version_details.status)
    print("Model status: %s" % ModelVersionStatus.to_string(status))
    if status == ModelVersionStatus.READY:
      break
    time.sleep(1)

wait_until_ready(model_details.name, model_details.version)
使用 API 新增模型和模型版本描述
from mlflow.tracking.client import MlflowClient

client = MlflowClient()
client.update_registered_model(
  name=model_details.name,
  description="This model forecasts the power output of a wind farm based on weather data. The weather data consists of three features: wind speed, wind direction, and air temperature."
)

client.update_model_version(
  name=model_details.name,
  version=model_details.version,
  description="This model version was built using TensorFlow Keras. It is a feed-forward neural network with one hidden layer."
)
使用 API 轉換模型版本並擷取詳細資料
client.transition_model_version_stage(
  name=model_details.name,
  version=model_details.version,
  stage='production',
)
model_version_details = client.get_model_version(
  name=model_details.name,
  version=model_details.version,
)
print("The current model stage is: '{stage}'".format(stage=model_version_details.current_stage))

latest_version_info = client.get_latest_versions(model_name, stages=["production"])
latest_production_version = latest_version_info[0].version
print("The latest production version of the model '%s' is '%s'." % (model_name, latest_production_version))
使用 API 載入已註冊模型的版本
MLflow 模型元件會定義函式,以從數個機器學習架構載入模型。 例如,mlflow.tensorflow.load_model() 可用來載入以 MLflow 格式儲存的 TensorFlow 模型,而 mlflow.sklearn.load_model() 可用來載入以 MLflow 格式儲存的 scikit-learn 模型。
這些函數可以從 MLflow 模型登錄載入模型。
import mlflow.pyfunc

model_version_uri = "models:/{model_name}/1".format(model_name=model_name)

print("Loading registered model version from URI: '{model_uri}'".format(model_uri=model_version_uri))
model_version_1 = mlflow.pyfunc.load_model(model_version_uri)

model_production_uri = "models:/{model_name}/production".format(model_name=model_name)

print("Loading registered model version from URI: '{model_uri}'".format(model_uri=model_production_uri))
model_production = mlflow.pyfunc.load_model(model_production_uri)
使用生產模型預測電力輸出
在本節中,生產模型是用來評估風力發電廠的天氣預報資料。
forecast_power() 應用程式會從指定的階段載入最新版的預測模型,並用它來預測未來五天的電力生產。
def plot(model_name, model_stage, model_version, power_predictions, past_power_output):
  import pandas as pd
  import matplotlib.dates as mdates
  from matplotlib import pyplot as plt
  index = power_predictions.index
  fig = plt.figure(figsize=(11, 7))
  ax = fig.add_subplot(111)
  ax.set_xlabel("Date", size=20, labelpad=20)
  ax.set_ylabel("Power\noutput\n(MW)", size=20, labelpad=60, rotation=0)
  ax.tick_params(axis='both', which='major', labelsize=17)
  ax.xaxis.set_major_formatter(mdates.DateFormatter('%m/%d'))
  ax.plot(index[:len(past_power_output)], past_power_output, label="True", color="red", alpha=0.5, linewidth=4)
  ax.plot(index, power_predictions.squeeze(), "--", label="Predicted by '%s'\nin stage '%s' (Version %d)" % (model_name, model_stage, model_version), color="blue", linewidth=3)
  ax.set_ylim(ymin=0, ymax=max(3500, int(max(power_predictions.values) * 1.3)))
  ax.legend(fontsize=14)
  plt.title("Wind farm power output and projections", size=24, pad=20)
  plt.tight_layout()
  display(plt.show())

def forecast_power(model_name, model_stage):
  from mlflow.tracking.client import MlflowClient
  client = MlflowClient()
  model_version = client.get_latest_versions(model_name, stages=[model_stage])[0].version
  model_uri = "models:/{model_name}/{model_stage}".format(model_name=model_name, model_stage=model_stage)
  model = mlflow.pyfunc.load_model(model_uri)
  weather_data, past_power_output = get_weather_and_forecast()
  power_predictions = pd.DataFrame(model.predict(weather_data))
  power_predictions.index = pd.to_datetime(weather_data.index)
  print(power_predictions)
  plot(model_name, model_stage, int(model_version), power_predictions, past_power_output)
建立新的模型版本
舊版機器學習技術也適用於電力預測。 下列程式碼會使用 scikit-learn 來訓練隨機森林模型,並透過 mlflow.sklearn.log_model() 函數在 MLflow 模型登錄中註冊。
import mlflow.sklearn
from sklearn.ensemble import RandomForestRegressor
from sklearn.metrics import mean_squared_error

with mlflow.start_run():
  n_estimators = 300
  mlflow.log_param("n_estimators", n_estimators)

  rand_forest = RandomForestRegressor(n_estimators=n_estimators)
  rand_forest.fit(X_train, y_train)

  val_x, val_y = get_validation_data()
  mse = mean_squared_error(rand_forest.predict(val_x), val_y)
  print("Validation MSE: %d" % mse)
  mlflow.log_metric("mse", mse)

  # Specify the `registered_model_name` parameter of the `mlflow.sklearn.log_model()`
  # function to register the model with the MLflow Model Registry. This automatically
  # creates a new model version
  mlflow.sklearn.log_model(
    sk_model=rand_forest,
    artifact_path="sklearn-model",
    registered_model_name=model_name,
  )
使用 MLflow 模型登錄搜尋擷取新的模型版本 ID
from mlflow.tracking.client import MlflowClient
client = MlflowClient()

model_version_infos = client.search_model_versions("name = '%s'" % model_name)
new_model_version = max([model_version_info.version for model_version_info in model_version_infos])

wait_until_ready(model_name, new_model_version)
將描述新增至新的模型版本
client.update_model_version(
  name=model_name,
  version=new_model_version,
  description="This model version is a random forest containing 100 decision trees that was trained in scikit-learn."
)
將新的模型版本遷移到過渡環境,並測試該模型。
在將模型部署至生產應用程式之前,最好是在預備環境中測試模型。 下列程式碼會將新的模型版本轉換為預備版本,並評估其效能。
client.transition_model_version_stage(
  name=model_name,
  version=new_model_version,
  stage="Staging",
)

forecast_power(model_name, "Staging")
將新的模型版本部署至生產環境
確認新模型版本在預備環境中執行良好之後,下列程式碼會將模型轉換為生產環境,並使用與預測電源輸出生產模型區段完全相同的應用程式程式碼,以產生電源預測。
client.transition_model_version_stage(
  name=model_name,
  version=new_model_version,
  stage="production",
)

forecast_power(model_name, "production")
生產階段現在有兩個模型版本的預測模型:在 Keras 中訓練的版本,以及在 scikit-learn 中訓練的版本。

注意
依階段參考模型時,MLflow 模型模型登錄會自動使用最新的生產版本。 這可讓您更新生產模型,而不需要變更任何應用程式程式碼。
封存和刪除模型
當不再使用模型版本時,您可以將其封存或刪除。 您也可以刪除整個已註冊的模型;此動作會移除所有相關的模型版本。
電力預測模型的封存 Version 1
因為電源預測模型的 Version 1 已經不再使用,所以將其封存。 您可以在 MLflow 模型登錄 UI 或透過 MLflow API 封存模型。
在 MLflow UI 中封存 Version 1
若要封存電源預測模型的 Version 1:
在 MLflow 模型登錄 UI 中開啟其對應的模型版本頁面:

按下 [階段] 按鈕,選擇 [轉換至 -> 封存]:
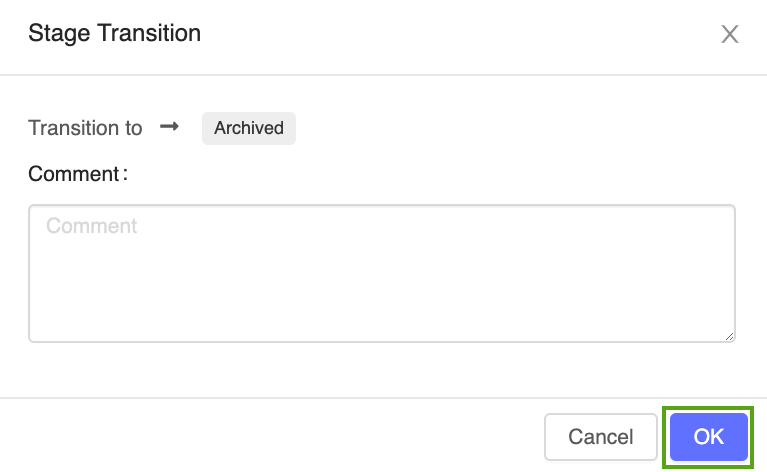
在階段轉換確認視窗中按 [確定]。

使用 MLflow API 封存 Version 1
下列程式碼會使用 MlflowClient.update_model_version() 函數來封存電源預測模型的 Version 1。
from mlflow.tracking.client import MlflowClient

client = MlflowClient()
client.transition_model_version_stage(
  name=model_name,
  version=1,
  stage="Archived",
)
刪除電源預測模型的 Version 1
您也可以使用 MLflow UI 或 MLflow API 來刪除模型版本。
警告
模型版本刪除是永久性且無法復原。
在 MLflow UI 中刪除 Version 1
若要刪除電源預測模型的 Version 1:
在 MLflow 模型登錄 UI 中開啟其對應的模型版本頁面。

選取版本識別碼旁邊的下拉式箭頭,然後按下 [刪除]。
使用 MLflow API 刪除 Version 1
client.delete_model_version(
   name=model_name,
   version=1,
)
使用 MLflow API 刪除該模型
您必須先將所有剩餘的模型版本階段轉換為 [無] 或 [封存]。
from mlflow.tracking.client import MlflowClient

client = MlflowClient()
client.transition_model_version_stage(
  name=model_name,
  version=2,
  stage="Archived",
)
client.delete_registered_model(name=model_name)