教學課程:安裝適用於 IoT 的 Defender 微代理程式
本快速入門將協助您了解如何安裝及驗證適用於 IoT 的 Defender 微代理程式。
在本教學課程中,您將了解如何:
- 下載並安裝微代理程式
- 驗證微代理程式
- 驗證安裝
- 測試系統
- 安裝特定微代理程式版本
必要條件
下載並安裝微代理程式
視您的設定而定,必須安裝適當的 Microsoft 套件。
若要新增適用的 Microsoft 套件存放庫:
下載符合您裝置作業系統的存放庫設定。
針對 Ubuntu 18.04:
curl https://packages.microsoft.com/config/ubuntu/18.04/multiarch/prod.list > ./microsoft-prod.list針對 Ubuntu 20.04:
curl https://packages.microsoft.com/config/ubuntu/20.04/prod.list > ./microsoft-prod.list針對 Debian 9 (AMD64 和 ARM64):
curl https://packages.microsoft.com/config/debian/stretch/multiarch/prod.list > ./microsoft-prod.list
使用下列命令,將存放庫設定複製到
sources.list.d目錄:sudo cp ./microsoft-prod.list /etc/apt/sources.list.d/使用下列命令,安裝 Microsoft GPG 公開金鑰:
curl https://packages.microsoft.com/keys/microsoft.asc | gpg --dearmor > microsoft.gpg
sudo cp ./microsoft.gpg /etc/apt/trusted.gpg.d/
請確定您已使用下列命令更新 apt:
sudo apt-get update使用下列命令,在 Debian 或 Ubuntu 型 Linux 發行版本上安裝適用於 IoT 的 Defender 微代理程式套件:
sudo apt-get install defender-iot-micro-agent
通過 Proxy 連線
此程序描述如何透過 Proxy 將適用於 IoT 的 Defender 微代理程式連線到 IoT 中樞。
若要透過 Proxy 設定連線:
在微代理程式電腦上,建立包含下列內容的
/etc/defender_iot_micro_agent/conf.json檔案:{ "IothubModule_ProxyConfig": "<proxy_ipv4>,<port>,<username>,<password>", "IothubModule_TransportProtocol": "MQTT_WebSocket_Protocol" }使用者和密碼欄位都是選擇性欄位。 如果您不需要它們,請改用下列語法:
{
    "IothubModule_ProxyConfig": "<proxy_ipv4>,<port>",
    "IothubModule_TransportProtocol": "MQTT_WebSocket_Protocol"
}
刪除位於 /var/lib/defender_iot_micro_agent/cache.json的任何快取檔案。
重新啟動微代理程式。 請執行:
sudo systemctl restart defender-iot-micro-agent.service
新增 AMQP 通訊協定支援
此程序描述支援 AMQP 通訊協定所需的額外步驟。
若要新增 AMQP 通訊協定支援:
在微代理程式電腦上,開啟
/etc/defender_iot_micro_agent/conf.json檔案並新增下列內容:{ "IothubModule_TransportProtocol": "AMQP_Protocol" }刪除位於 /var/lib/defender_iot_micro_agent/cache.json的任何快取檔案。
重新啟動微代理程式。 請執行:
sudo systemctl restart defender-iot-micro-agent.service
若要新增透過 Web 通訊端的 AMQP 通訊協定支援:
在微代理程式電腦上,開啟
/etc/defender_iot_micro_agent/conf.json檔案並新增下列內容:{ "IothubModule_TransportProtocol": "AMQP_WebSocket_Protocol" }刪除位於 /var/lib/defender_iot_micro_agent/cache.json的任何快取檔案。
重新啟動微代理程式。 請執行:
sudo systemctl restart defender-iot-micro-agent.service
代理程式會使用此通訊協定,並在連接埠 443 上與 IoT 中樞通訊。 此通訊協定支援 HTTP Proxy 設定,如果 Proxy 也已設定,則與 Proxy 通訊的連接埠將會如 Proxy 設定中所定義。
驗證微代理程式
兩個可用來驗證適用於 IoT 的 Defender 微代理程式選項:
使用模組 ID 連接字串進行驗證
您必須從 DefenderIoTMicroAgent 模組 ID 詳細資料複製模組 ID 連接字串。
若要複製模組 ID 的連接字串:
瀏覽至 [IoT 中樞]>
Your hub> [裝置管理]> [裝置]。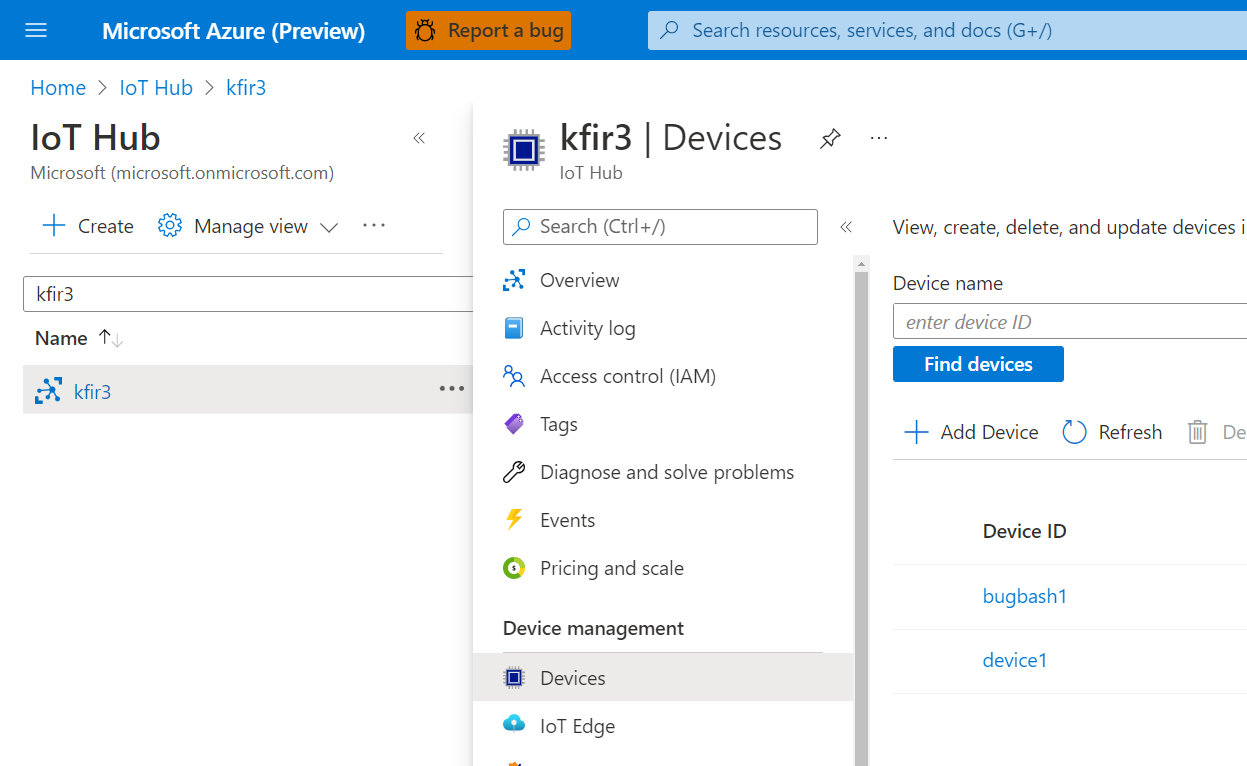
從 [裝置識別碼] 清單中選取一個裝置。
選取 [模組 ID] 索引標籤。
從該裝置相關聯的模組 ID 清單中,選與 [DefenderIotMicroAgent] 模組。
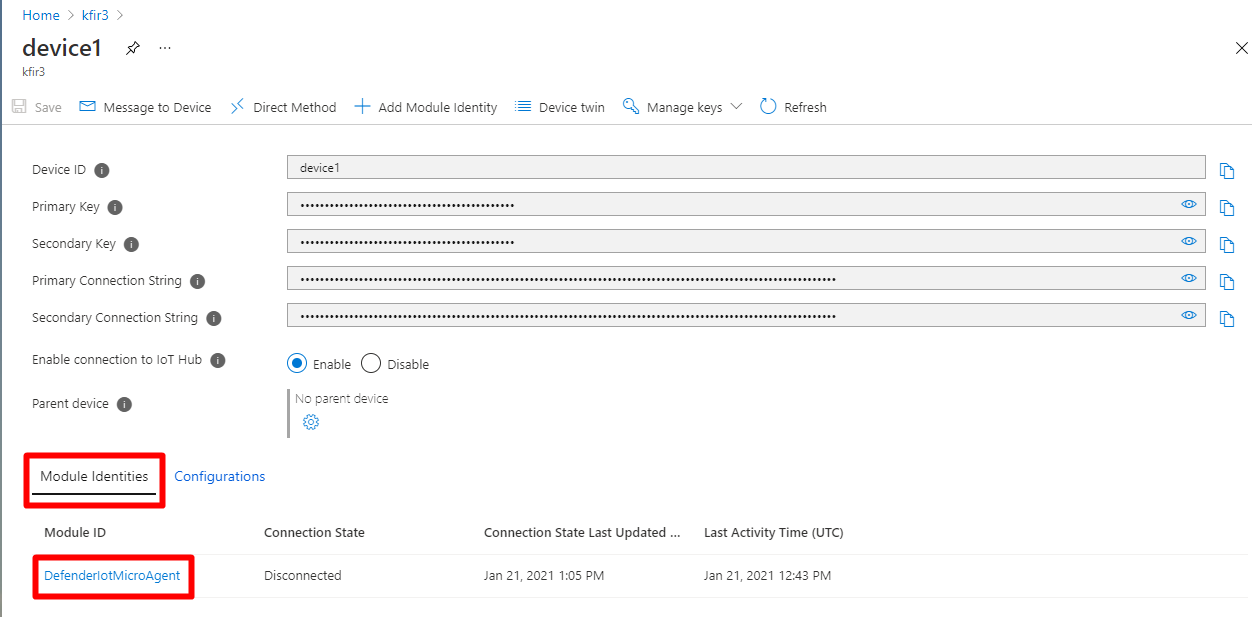
選取 [複製] 按鈕,複製連接字串 (主索引鍵)。

輸入下列命令,在適用於 IoT 的 Defender 代理程式目錄
/etc/defender_iot_micro_agent路徑中,建立名為connection_string.txt且包含 utf-8 編碼連接字串的檔案:sudo bash -c 'echo "<connection string>" > /etc/defender_iot_micro_agent/connection_string.txt'connection_string.txt應位於下列路徑位置/etc/defender_iot_micro_agent/connection_string.txt。注意
連接字串包含可直接存取模組本身的金鑰,因此包含只供根使用者使用及讀取的敏感性資訊。
使用此命令重新啟動服務:
sudo systemctl restart defender-iot-micro-agent.service
使用憑證進行驗證
若要使用憑證進行驗證:
依照這些指示取得憑證。
將憑證的 PEM 編碼公開部分和
/etc/defender_iot_micro_agent中的私密金鑰,放置於名稱為certificate_public.pem和certificate_private.pem的檔案。將適當的連接字串放在
connection_string.txt檔案內。 該連接字串看起來應該像這樣:HostName=<the host name of the iot hub>;DeviceId=<the id of the device>;ModuleId=<the id of the module>;x509=true此字串會向適用於 IoT 的 Defender 代理程式發出警示,提醒要提供憑證以進行驗證。
使用以下命令重新啟動服務:
sudo systemctl restart defender-iot-micro-agent.service
驗證安裝
驗證您的安裝:
使用下列命令,確定微代理程式可正常執行:
systemctl status defender-iot-micro-agent.service確定服務是
active,而且程序的運作時間適當,藉此確認服務穩定運作。
測試系統
您可以在裝置上建立觸發程序檔案,以測試系統。 觸發程序檔案會執行代理程式中的基準掃描,可偵測出違反基準的檔案。
使用下列命令在檔案系統上建立一個檔案:
sudo touch /tmp/DefenderForIoTOSBaselineTrigger.txt請確定 Log Analytics 工作區已連結至 IoT 中樞。 如需詳細資訊,請參閱建立 Log Analytics 工作區。
使用下列命令重新啟動代理程式:
sudo systemctl restart defender-iot-micro-agent.service
允許建議出現在中樞上最多一個小時。
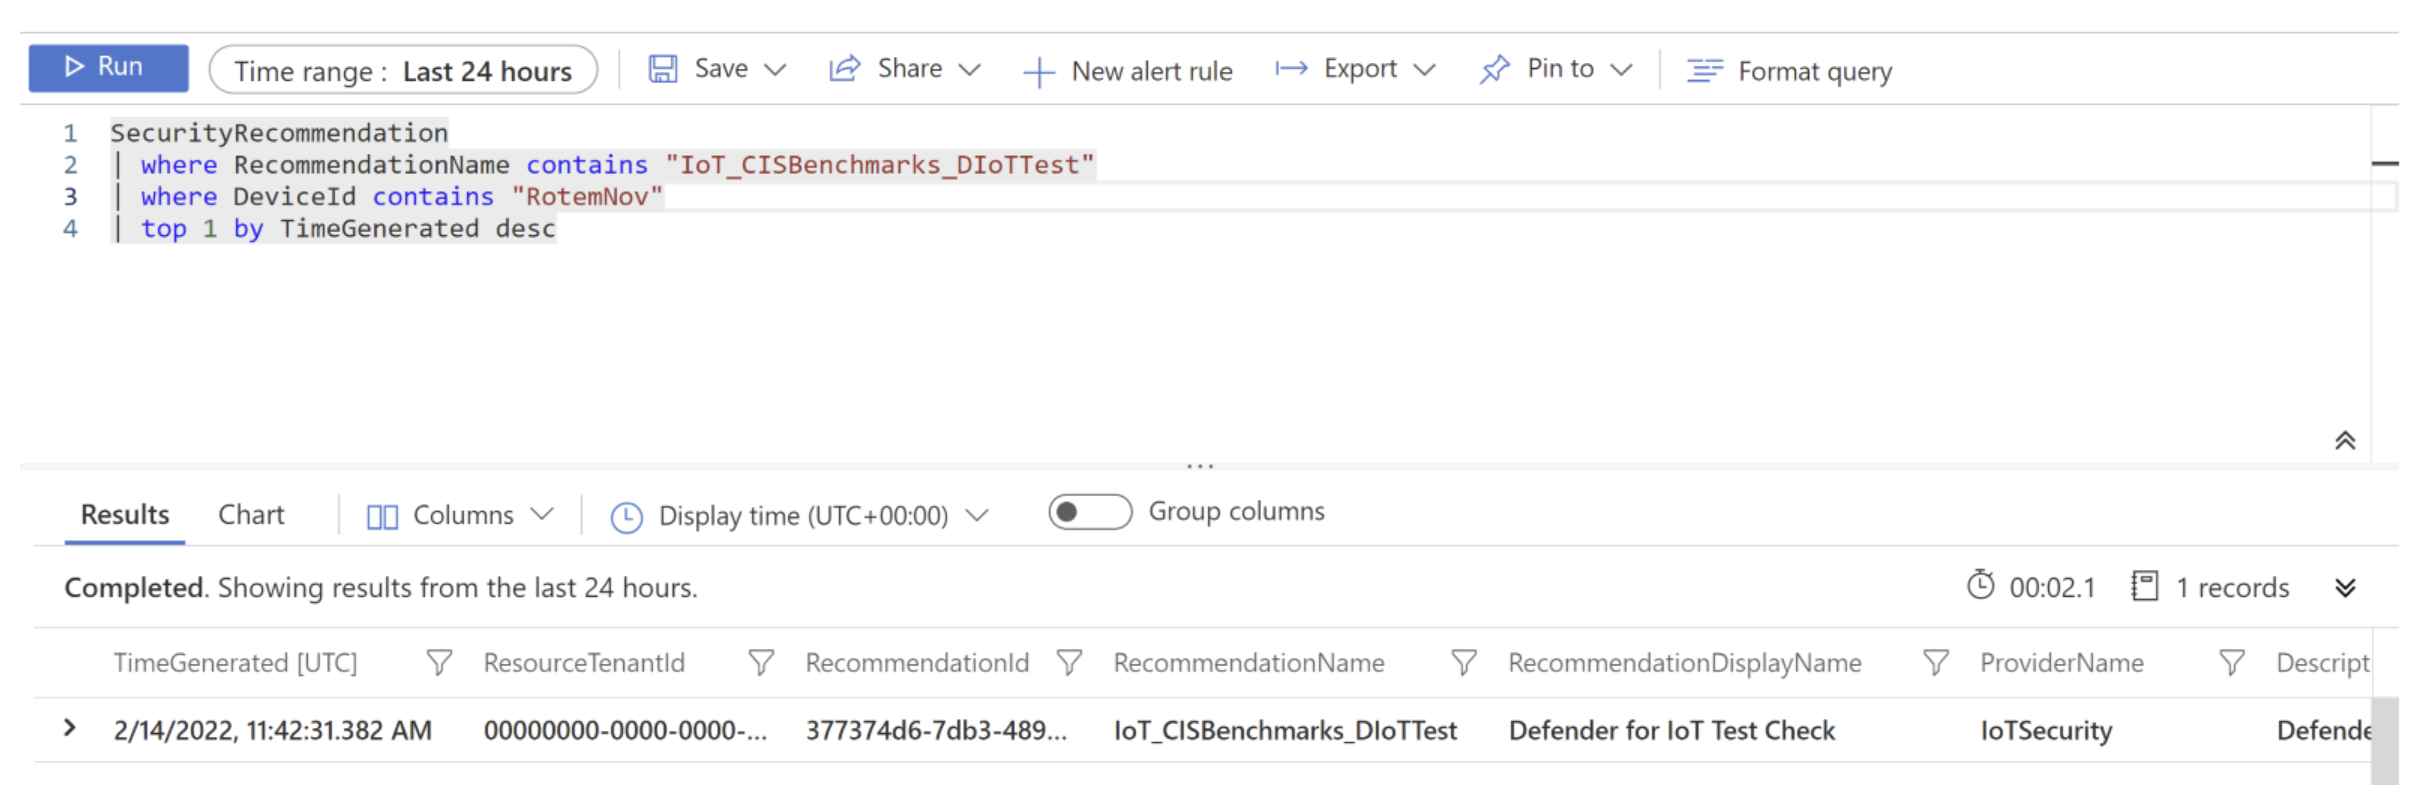
系統會建立名為 'IoT_CISBenchmarks_DIoTTest' 的基準建議。 您可以從 Log Analytics 查詢這項建議,如下所示:
SecurityRecommendation

| where RecommendationName contains "IoT_CISBenchmarks_DIoTTest"

| where DeviceId contains "<device-id>"

| top 1 by TimeGenerated desc
例如:
安裝特定微代理程式版本
您可以使用特定命令來安裝特定版本的微代理程式。
若要安裝適用於 IoT 的 Defender 微代理程式特定版本:
開啟終端機。
執行以下命令:
sudo apt-get install defender-iot-micro-agent=<version>
清除資源
沒有需要清除的資源。