Azure DevOps 服務 |Azure DevOps Server |Azure DevOps Server 2022 |Azure DevOps Server 2020
小部件在擴展框架中作為貢獻來實現。 單一擴充套件可以包含多個小工具功能。 本文說明如何建立提供一或多個小工具的擴充功能。
提示
請參閱使用 Azure DevOps 擴充功能 SDK 開發擴充功能的最新文件。
提示
如果您要啟動新的 Azure DevOps 延伸模組,請先嘗試這些維護的範例集合,它們可與目前的產品組建搭配使用,並涵蓋新式案例 (例如,在提取要求頁面上新增索引標籤) 。
- Azure DevOps 延伸模組範例 (GitHub) — 示範常見延伸模組模式的精簡入門範例: https://github.com/microsoft/azure-devops-extension-sample
- Azure DevOps 延伸模組範例 (舊版集合和貢獻指南) — 安裝以檢查 UI 目標,或檢視來源: https://marketplace.visualstudio.com/items/ms-samples.samples-contributions-guide 和 https://github.com/Microsoft/vso-extension-samples/tree/master/contributions-guide
- Microsoft Learn 範例(瀏覽 Azure DevOps 範例)— Microsoft 文件中精選的最新範例:/samples/browse/?terms=azure%20devops%20extension
如果範例在您的組織中無法運作,請將它安裝到個人或測試組織中,並將擴充功能資訊清單的目標識別碼和 API 版本與現有的文件進行比較。如需參考和 API,請參見:
必要條件
| 要求 | 描述 |
|---|---|
| 程序設計知識 | 擁有開發小工具所需的 JavaScript、HTML 和 CSS 知識 |
| Azure DevOps 組織 | 建立組織 |
| 文字編輯器 | 我們會使用 Visual Studio Code 進行教學課程 |
| Node.js | 最新版本的 Node.js |
| 跨平臺 CLI | 使用 tfx-cli 來打包延伸模組 使用下列方式安裝: npm i -g tfx-cli |
| 項目目錄 | 完成本教學課程之後,具有此結構的主目錄:|--- README.md|--- sdk |--- node_modules |--- scripts |--- VSS.SDK.min.js|--- img |--- logo.png|--- scripts|--- hello-world.html // html page for your widget|--- vss-extension.json // extension manifest |
教學課程概觀
本教學課程會透過三個漸進式範例來教導小工具開發:
| 部分 | 專注 | 您學到什麼 |
|---|---|---|
| 第 1 部分:Hello World | 基本小工具建立 | 建立顯示文字的小工具 |
| 第 2 部分:REST API 整合 | Azure DevOps API 呼叫 | 新增 REST API 功能以擷取和顯示數據 |
| 第3部分:小工具設定 | 使用者自定義 | 實作小工具的組態選項 |
提示
如果您偏好直接跳至工作範例,隨附的範例 (請參閱先前的附註) 會顯示一組您可以封裝和發佈的小工具。
開始之前,請先檢閱我們提供 的基本小工具樣式 和結構指引。
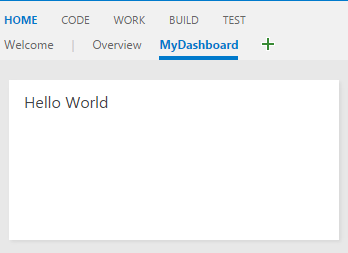
第 1 部分:Hello World
使用 JavaScript 建立顯示 「Hello World」 的基本小工具。 此基礎示範核心小工具開發概念。
步驟 1:安裝用戶端 SDK
VSS SDK 可讓您的 Widget 與 Azure DevOps 通訊。 使用 npm 安裝它:
npm install vss-web-extension-sdk
將 VSS.SDK.min.js 檔案從 vss-web-extension-sdk/lib 複製到您的 home/sdk/scripts 資料夾。
如需更多 SDK 檔,請參閱 用戶端 SDK GitHub 頁面。
步驟 2:建立 HTML 結構
在您的項目目錄中建立 hello-world.html 。 此檔案包含小工具的配置及所需腳本的參照。
<!DOCTYPE html>
<html>
    <head>
        <script src="sdk/scripts/VSS.SDK.min.js"></script>
    </head>
    <body>
        <div class="widget">
            <h2 class="title"></h2>
        </div>
    </body>
</html>
小工具會在 iframe 中執行,因此除了 <script> 和 <link>,架構會忽略大部分的 HTML 頁首元素。
步驟 3:新增 Widget JavaScript
若要實作小工具功能,請將此腳本新增至 <head> HTML 檔案的 區段:
<script type="text/javascript">
    VSS.init({
        explicitNotifyLoaded: true,
        usePlatformStyles: true
    });

    VSS.require(["AzureDevOps/Dashboards/WidgetHelpers"], function (WidgetHelpers) {
        WidgetHelpers.IncludeWidgetStyles();
        VSS.register("HelloWorldWidget", function () {
            return {
                load: function (widgetSettings) {
                    var $title = $('h2.title');
                    $title.text('Hello World');

                    return WidgetHelpers.WidgetStatusHelper.Success();
                }
            };
        });
        VSS.notifyLoadSucceeded();
    });
</script>
主要 JavaScript 元件
| 功能 | 目標 |
|---|---|
VSS.init() |
初始化 Widget 與 Azure DevOps 之間的通訊 |
VSS.require() |
載入必要的 SDK 函式庫和小工具輔助程式 |
VSS.register() |
使用唯一識別碼註冊您的小工具 |
WidgetHelpers.IncludeWidgetStyles() |
套用預設的 Azure DevOps 樣式 |
VSS.notifyLoadSucceeded() |
通知框架載入已成功完成 |
這很重要
中的 VSS.register() 小工具名稱必須符合 id 延伸模組指令清單中的 (步驟 5)。
步驟 4:新增擴充功能映射
建立擴充功能所需的圖片:
-
擴充功能標誌:98x98像素的影像,名為
logo.png的,位於img資料夾中 -
小工具目錄圖示:位於
CatalogIcon.png資料夾中,名為img的98x98像素影像。 -
小工具預覽:在
preview.png資料夾中名為img的 330x160 像素影像。
當使用者流覽可用的擴充功能時,這些影像會顯示在 Marketplace 和 Widget 目錄中。
步驟 5:建立延伸模組指令清單
在專案的根目錄中建立 vss-extension.json 。 此檔案會定義延伸模組的元資料和貢獻:
{
    "manifestVersion": 1,
    "id": "azure-devops-extensions-myExtensions",
    "version": "1.0.0",
    "name": "My First Set of Widgets",
    "description": "Samples containing different widgets extending dashboards",
    "publisher": "fabrikam",
    "categories": ["Azure Boards"],
    "targets": [
        {
            "id": "Microsoft.VisualStudio.Services"
        }
    ],
    "icons": {
        "default": "img/logo.png"
    },
    "contributions": [
        {
            "id": "HelloWorldWidget",
            "type": "ms.vss-dashboards-web.widget",
            "targets": [
                "ms.vss-dashboards-web.widget-catalog"
            ],
            "properties": {
                "name": "Hello World Widget",
                "description": "My first widget",
                "catalogIconUrl": "img/CatalogIcon.png",
                "previewImageUrl": "img/preview.png",
                "uri": "hello-world.html",
                "supportedSizes": [
                    {
                        "rowSpan": 1,
                        "columnSpan": 2
                    }
                ],
                "supportedScopes": ["project_team"]
            }
        }
    ],
    "files": [
        {
            "path": "hello-world.html",
            "addressable": true
        },
        {
            "path": "sdk/scripts",
            "addressable": true
        },
        {
            "path": "img",
            "addressable": true
        }
    ]
}
這很重要
將 "publisher": "fabrikam" 替換為實際的發行者名稱。 瞭解如何 建立發行者。
基本清單屬性
| 章節 | 目標 |
|---|---|
| 基本資訊 | 延伸模組名稱、版本、描述和發行者 |
| 圖示 | 延伸模組視覺資產的路徑 |
| 貢獻 | 小工具定義,包括識別碼、類型和屬性 |
| 檔案 | 要包含在擴充套件中的所有檔案 |
如需完整的指令清單檔,請參閱 延伸模組指令清單參考。
步驟 6:封裝和發佈您的擴充功能
封裝您的延伸模組,並將其發佈至 Visual Studio Marketplace。
安裝封裝工具
npm i -g tfx-cli
建立延伸模組套件
從您的項目目錄,執行:
tfx extension create --manifest-globs vss-extension.json
此動作會建立 .vsix 檔案,其中包含已封裝的擴充功能。
設定發行者
- 移至 Visual Studio Marketplace 發佈入口網站。
- 如果您沒有發行者,請登入並建立發行者。
- 選擇一個唯一的發行者識別碼(此識別碼將用於您的內容清單檔案)。
-
vss-extension.json更新為使用您的發行者名稱,而非「fabrikam」。
上傳您的延伸模組
- 在發佈入口網站中,選取 [上傳新的擴充功能]。
- 選擇您的
.vsix檔案並加以上傳。 - 與 Azure DevOps 組織共用延伸模組。
或者,使用命令列:
tfx extension publish --manifest-globs vss-extension.json --share-with yourOrganization
提示
使用 --rev-version 在更新現有的擴充功能時自動遞增版本號碼。
步驟 7:安裝及測試您的小工具
若要測試,請將您的小工具新增至控制面板:
- 移至您的 Azure DevOps 專案:
https://dev.azure.com/{Your_Organization}/{Your_Project}。 - 移至 [總覽]>[儀表板]。
- 選擇新增小工具。
- 在目錄中尋找您的小工具,然後選取 [ 新增]。
您的「Hello World」 小工具會出現在儀錶板上,並顯示您設定的文字。
下一個步驟:繼續進行 第 2 部分 ,以瞭解如何將 Azure DevOps REST API 整合到您的小工具中。
第 2 部分:使用 Azure DevOps REST API 的 Hello World
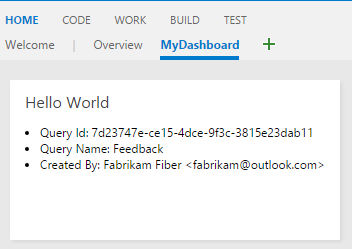
擴充您的小工具,以使用 REST API 與 Azure DevOps 資料互動。 此範例示範如何擷取查詢資訊,並在小工具中動態顯示它。
在此部分中,使用 工作項目追蹤 REST API 來擷取現有查詢的相關信息,並在 「Hello World」 文字下方顯示查詢詳細數據。
步驟 1:建立增強的 HTML 檔案
建立以上一個範例為基礎的新小工具檔案。 複製 hello-world.html 並將重新命名為 hello-world2.html。 您的項目結構包含:
|--- README.md
|--- node_modules
|--- sdk/
    |--- scripts/
        |--- VSS.SDK.min.js
|--- img/
    |--- logo.png
|--- scripts/
|--- hello-world.html               // Part 1 widget
|--- hello-world2.html              // Part 2 widget (new)
|--- vss-extension.json             // Extension manifest
更新 Widget HTML 結構
請對 hello-world2.html 進行下列變更:
-
新增查詢數據的容器:包含可顯示查詢資訊的新
<div>元素。 -
更新小工具識別碼:將小工具名稱
HelloWorldWidget從 變更為HelloWorldWidget2,以取得唯一識別。
<!DOCTYPE html>
<html>
    <head>
        <script src="sdk/scripts/VSS.SDK.min.js"></script>
        <script type="text/javascript">
            VSS.init({
                explicitNotifyLoaded: true,
                usePlatformStyles: true
            });

            VSS.require(["AzureDevOps/Dashboards/WidgetHelpers"], function (WidgetHelpers) {
                WidgetHelpers.IncludeWidgetStyles();
                VSS.register("HelloWorldWidget2", function () {
                    return {
                        load: function (widgetSettings) {
                            var $title = $('h2.title');
                            $title.text('Hello World');

                            return WidgetHelpers.WidgetStatusHelper.Success();
                        }
                    }
                });
                VSS.notifyLoadSucceeded();
            });
        </script>
    </head>
    <body>
        <div class="widget">
            <h2 class="title"></h2>
            <div id="query-info-container"></div>
        </div>
    </body>
</html>
步驟 2:設定 API 訪問許可權
進行 REST API 呼叫之前,請在擴充功能指令清單中設定必要的許可權。
新增工作範圍
範圍vso.work 提供工作項目和查詢的唯讀存取權。 將此範圍新增至您的 vss-extension.json:
{
    "scopes": [
        "vso.work"
    ]
}
完整的清單檔案範例
如需具有其他屬性的完整清單文件,請建構如下:
{
    "name": "example-widget",
    "publisher": "example-publisher",
    "version": "1.0.0",
    "scopes": [
        "vso.work"
    ]
}
這很重要
範圍限制:不支持在發佈后新增或變更範圍。 如果您已經發佈擴充功能,您必須先從 Marketplace 中移除它。 移至 Visual Studio Marketplace 發佈入口網站,尋找您的延伸模組,然後選取 [移除]。
步驟 3:實作 REST API 整合
Azure DevOps 會透過 SDK 提供 JavaScript REST 用戶端連結庫。 這些連結庫會包裝 AJAX 呼叫,並將 API 回應對應至可使用的物件。
更新小工具 JavaScript
在VSS.require中取代hello-world2.html呼叫,以包含工作項目追蹤 REST 用戶端:
VSS.require(["AzureDevOps/Dashboards/WidgetHelpers", "AzureDevOps/WorkItemTracking/RestClient"],
    function (WidgetHelpers, WorkItemTrackingRestClient) {
        WidgetHelpers.IncludeWidgetStyles();
        VSS.register("HelloWorldWidget2", function () {
            var projectId = VSS.getWebContext().project.id;

            var getQueryInfo = function (widgetSettings) {
                // Get a WIT client to make REST calls to Azure DevOps Services
                return WorkItemTrackingRestClient.getClient().getQuery(projectId, "Shared Queries/Feedback")
                    .then(function (query) {
                        // Process query data (implemented in Step 4)

                        return WidgetHelpers.WidgetStatusHelper.Success();
                    }, function (error) {
                        return WidgetHelpers.WidgetStatusHelper.Failure(error.message);
                    });
            }

            return {
                load: function (widgetSettings) {
                    // Set your title
                    var $title = $('h2.title');
                    $title.text('Hello World');

                    return getQueryInfo(widgetSettings);
                }
            }
        });
        VSS.notifyLoadSucceeded();
    });
重要實作詳細數據
| 元件 | 目標 |
|---|---|
WorkItemTrackingRestClient.getClient() |
取得工作項目追蹤 REST API 用戶端的實例 |
getQuery() |
擷取封裝在 Promise 中的查詢資訊 |
WidgetStatusHelper.Failure() |
提供一致的錯誤處理以應對小工具故障 |
projectId |
API 呼叫所需的目前項目內容 |
提示
自訂查詢路徑:如果您沒有「共用查詢」中的「意見反應」查詢,請將 "Shared Queries/Feedback" 替換成您專案中任何查詢的路徑。
步驟 4:顯示 API 回應數據
藉由處理 REST API 回應,在小工具中渲染查詢資訊。
新增查詢數據呈現
將// Process query data 註解替換成這個實作:
// Create a list with query details
var $list = $('<ul>');
$list.append($('<li>').text("Query ID: " + query.id));
$list.append($('<li>').text("Query Name: " + query.name));
$list.append($('<li>').text("Created By: " + (query.createdBy ? query.createdBy.displayName : "<unknown>")));

// Append the list to the query-info-container
var $container = $('#query-info-container');
$container.empty();
$container.append($list);
方法getQuery()Contracts.QueryHierarchyItem傳回具備查詢元數據屬性的物件。 本範例會顯示 「Hello World」 文字下方的三個主要資訊片段。
完整運作中範例
您的最終 hello-world2.html 檔案看起來應該像這樣:
<!DOCTYPE html>
<html>
<head>
    <script src="sdk/scripts/VSS.SDK.min.js"></script>
    <script type="text/javascript">
        VSS.init({
            explicitNotifyLoaded: true,
            usePlatformStyles: true
        });

        VSS.require(["AzureDevOps/Dashboards/WidgetHelpers", "AzureDevOps/WorkItemTracking/RestClient"],
            function (WidgetHelpers, WorkItemTrackingRestClient) {
                WidgetHelpers.IncludeWidgetStyles();
                VSS.register("HelloWorldWidget2", function () {
                    var projectId = VSS.getWebContext().project.id;

                    var getQueryInfo = function (widgetSettings) {
                        // Get a WIT client to make REST calls to Azure DevOps Services
                        return WorkItemTrackingRestClient.getClient().getQuery(projectId, "Shared Queries/Feedback")
                            .then(function (query) {
                                // Create a list with query details
                                var $list = $('<ul>');
                                $list.append($('<li>').text("Query ID: " + query.id));
                                $list.append($('<li>').text("Query Name: " + query.name));
                                $list.append($('<li>').text("Created By: " + (query.createdBy ? query.createdBy.displayName : "<unknown>")));

                                // Append the list to the query-info-container
                                var $container = $('#query-info-container');
                                $container.empty();
                                $container.append($list);

                                // Use the widget helper and return success as Widget Status
                                return WidgetHelpers.WidgetStatusHelper.Success();
                            }, function (error) {
                                // Use the widget helper and return failure as Widget Status
                                return WidgetHelpers.WidgetStatusHelper.Failure(error.message);
                            });
                    }

                    return {
                        load: function (widgetSettings) {
                            // Set your title
                            var $title = $('h2.title');
                            $title.text('Hello World');

                            return getQueryInfo(widgetSettings);
                        }
                    }
                });
            VSS.notifyLoadSucceeded();
        });
    </script>

</head>
<body>
    <div class="widget">
        <h2 class="title"></h2>
        <div id="query-info-container"></div>
    </div>
</body>
</html>
步驟 5:更新擴充功能指令清單
若要在 Widget 目錄中顯示它,請將新的小工具新增至延伸模組的清單檔。
新增第二個 Widget 貢獻
更新 vss-extension.json 以包含已啟用 REST API 的 Widget。 將此貢獻新增至 contributions 陣列:
{
    "contributions": [
        // ...existing HelloWorldWidget contribution...,
        {
            "id": "HelloWorldWidget2",
            "type": "ms.vss-dashboards-web.widget",
            "targets": [
                "ms.vss-dashboards-web.widget-catalog"
            ],
            "properties": {
                "name": "Hello World Widget 2 (with API)",
                "description": "My second widget",
                "previewImageUrl": "img/preview2.png",
                "uri": "hello-world2.html",
                "supportedSizes": [
                    {
                        "rowSpan": 1,
                        "columnSpan": 2
                    }
                ],
                "supportedScopes": ["project_team"]
            }
        }
    ],
    "files": [
        {
            "path": "hello-world.html",
            "addressable": true
        },
        {
            "path": "hello-world2.html",
            "addressable": true
        },
        {
            "path": "sdk/scripts",
            "addressable": true
        },
        {
            "path": "img",
            "addressable": true
        }
    ],
    "scopes": [
        "vso.work"
    ]
}
提示
預覽影像:建立 preview2.png 影像(330x160 像素),並將它放在 img 資料夾中,向用戶顯示您的小工具在目錄中的外觀。
步驟 6:封裝、發佈和共用
封裝、發佈及共用您的延伸模組。 如果您已經發行擴充功能,您可以重新封裝並直接在 Marketplace 中更新。
步驟 7:測試您的 REST API 元件
若要檢視運作中的 REST API 整合,請將新的小工具新增至儀錶板:
- 移至您的 Azure DevOps 專案:
https://dev.azure.com/{Your_Organization}/{Your_Project}。 - 選取 概觀>。
- 選擇新增小工具。
- 尋找 “Hello World Widget 2 (含 API)”,然後選取 [ 新增]。
增強的 Widget 會顯示來自 Azure DevOps 專案的 「Hello World」 文字和實時查詢資訊。
後續步驟:繼續進行 第 3 部分 ,以新增組態選項,讓使用者自定義要顯示的查詢。
第3部分:設定 Hello World
在第 2 部分 的基礎上,加入用戶設定功能到您的小工具。 建立組態介面,讓使用者使用即時預覽功能來選取要顯示的查詢,而不是硬式編碼查詢路徑。
此部分示範如何建立可設定的小工具,讓使用者可在設定期間提供即時意見反應時自定義其特定需求。
![[概觀儀錶板] 小工具依據變更的實時預覽螢幕截圖。](../media/add-dashboard-widget/sample-configuration.png?view=azure-devops)
步驟 1:建立組態檔
小工具組態與小工具本身共用許多相似之處,兩者都使用相同的SDK、HTML 結構和 JavaScript 模式,但在延伸模塊架構中有不同的用途。
設定專案結構
若要支援小工具組態,請建立兩個新的檔案:
- 複製
hello-world2.html並將其重新命名為hello-world3.html,您的可設定小工具。 - 建立名為
configuration.html的新檔案,以處理組態介面。
您的項目結構包含:
|--- README.md
|--- sdk/
    |--- node_modules
    |--- scripts/
        |--- VSS.SDK.min.js
|--- img/
    |--- logo.png
|--- scripts/
|--- configuration.html              // New: Configuration interface
|--- hello-world.html               // Part 1: Basic widget
|--- hello-world2.html              // Part 2: REST API widget
|--- hello-world3.html              // Part 3: Configurable widget (new)
|--- vss-extension.json             // Extension manifest
建立組態介面
將此 HTML 結構新增至 configuration.html,這會建立選擇查詢的下拉式清單選取器:
<!DOCTYPE html>
<html xmlns="http://www.w3.org/1999/xhtml">
    <head>
        <script src="sdk/scripts/VSS.SDK.min.js"></script>
    </head>
    <body>
        <div class="container">
            <fieldset>
                <label class="label">Query: </label>
                <select id="query-path-dropdown" style="margin-top:10px">
                    <option value="" selected disabled hidden>Please select a query</option>
                    <option value="Shared Queries/Feedback">Shared Queries/Feedback</option>
                    <option value="Shared Queries/My Bugs">Shared Queries/My Bugs</option>
                    <option value="Shared Queries/My Tasks">Shared Queries/My Tasks</option>
                </select>
            </fieldset>
        </div>
    </body>
</html>
步驟 2:實作設定 JavaScript
設定 JavaScript 遵循與小工具相同的初始化模式,但實作 IWidgetConfiguration 合約,而不是基本 IWidget 合約。
新增組態邏輯
將此腳本插入至 <head> 的 configuration.html 區段:
<script type="text/javascript">
    VSS.init({
        explicitNotifyLoaded: true,
        usePlatformStyles: true
    });

    VSS.require(["AzureDevOps/Dashboards/WidgetHelpers"], function (WidgetHelpers) {
        VSS.register("HelloWorldWidget.Configuration", function () {
            var $queryDropdown = $("#query-path-dropdown");

            return {
                load: function (widgetSettings, widgetConfigurationContext) {
                    var settings = JSON.parse(widgetSettings.customSettings.data);
                    if (settings && settings.queryPath) {
                         $queryDropdown.val(settings.queryPath);
                     }

                    return WidgetHelpers.WidgetStatusHelper.Success();
                },
                onSave: function() {
                    var customSettings = {
                        data: JSON.stringify({
                                queryPath: $queryDropdown.val()
                            })
                    };
                    return WidgetHelpers.WidgetConfigurationSave.Valid(customSettings);
                }
            }
        });
        VSS.notifyLoadSucceeded();
    });
</script>
設定合約詳情
合約 IWidgetConfiguration 需要下列重要功能:
| 功能 | 目標 | 呼叫時 |
|---|---|---|
load() |
使用現有的設定初始化組態 UI | 設定對話框開啟時 |
onSave() |
串行化使用者輸入並驗證設定 | 當使用者選取 [儲存] 時 |
提示
數據串行化:此範例會使用 JSON 來串行化設定。 小工具會透過 widgetSettings.customSettings.data 存取這些設定,並且必須據以反序列化這些設定。
步驟 3:啟用即時預覽功能
即時預覽可讓使用者在修改組態設定時立即看到小工具變更,在儲存之前提供立即的意見反應。
實作變更通知
若要啟用即時預覽,請在函式中 load 新增此事件處理程式:
$queryDropdown.on("change", function () {
    var customSettings = {
       data: JSON.stringify({
               queryPath: $queryDropdown.val()
           })
    };
    var eventName = WidgetHelpers.WidgetEvent.ConfigurationChange;
    var eventArgs = WidgetHelpers.WidgetEvent.Args(customSettings);
    widgetConfigurationContext.notify(eventName, eventArgs);
});
完成組態檔
您的最終版本 configuration.html 應該看起來像這樣:
<!DOCTYPE html>
<html xmlns="http://www.w3.org/1999/xhtml">
    <head>
        <script src="sdk/scripts/VSS.SDK.min.js"></script>
        <script type="text/javascript">
            VSS.init({
                explicitNotifyLoaded: true,
                usePlatformStyles: true
            });

            VSS.require(["AzureDevOps/Dashboards/WidgetHelpers"], function (WidgetHelpers) {
                VSS.register("HelloWorldWidget.Configuration", function () {
                    var $queryDropdown = $("#query-path-dropdown");

                    return {
                        load: function (widgetSettings, widgetConfigurationContext) {
                            var settings = JSON.parse(widgetSettings.customSettings.data);
                            if (settings && settings.queryPath) {
                                 $queryDropdown.val(settings.queryPath);
                             }

                             $queryDropdown.on("change", function () {
                                 var customSettings = {data: JSON.stringify({queryPath: $queryDropdown.val()})};
                                 var eventName = WidgetHelpers.WidgetEvent.ConfigurationChange;
                                 var eventArgs = WidgetHelpers.WidgetEvent.Args(customSettings);
                                 widgetConfigurationContext.notify(eventName, eventArgs);
                             });

                            return WidgetHelpers.WidgetStatusHelper.Success();
                        },
                        onSave: function() {
                            var customSettings = {data: JSON.stringify({queryPath: $queryDropdown.val()})};
                            return WidgetHelpers.WidgetConfigurationSave.Valid(customSettings);
                        }
                    }
                });
                VSS.notifyLoadSucceeded();
            });
        </script>
    </head>
    <body>
        <div class="container">
            <fieldset>
                <label class="label">Query: </label>
                <select id="query-path-dropdown" style="margin-top:10px">
                    <option value="" selected disabled hidden>Please select a query</option>
                    <option value="Shared Queries/Feedback">Shared Queries/Feedback</option>
                    <option value="Shared Queries/My Bugs">Shared Queries/My Bugs</option>
                    <option value="Shared Queries/My Tasks">Shared Queries/My Tasks</option>
                </select>
            </fieldset>
        </div>
    </body>
</html>
這很重要
開啟 [儲存] 按鈕:架構至少需要一個設定變更通知才能啟用 [ 儲存 ] 按鈕。 變更事件處理程式可確保當用戶選取選項時,就會發生此動作。
步驟 4:讓小工具可設定
將您的元件從第 2 部分轉換為使用組態資料,而非硬編的值。 此步驟需要實作 IConfigurableWidget 合約。
更新小工具註冊
在hello-world3.html中,進行下列變更:
-
更新小工具識別碼:從
HelloWorldWidget2變更為HelloWorldWidget3。 -
新增重載函式:實作
IConfigurableWidget合約。
return {
    load: function (widgetSettings) {
        // Set your title
        var $title = $('h2.title');
        $title.text('Hello World');

        return getQueryInfo(widgetSettings);
    },
    reload: function (widgetSettings) {
        return getQueryInfo(widgetSettings);
    }
}
處理組態數據
更新 函 getQueryInfo 式以使用組態設定,而不是硬式編碼的查詢路徑:
var settings = JSON.parse(widgetSettings.customSettings.data);
if (!settings || !settings.queryPath) {
    var $container = $('#query-info-container');
    $container.empty();
    $container.text("Please configure a query path to display data.");

    return WidgetHelpers.WidgetStatusHelper.Success();
}
Widget 生命周期差異
| 功能 | 目標 | 使用方針 |
|---|---|---|
load() |
初始元件渲染和一次性設定 | 大量作業、資源初始化 |
reload() |
使用新的組態更新小工具 | 輕量型更新,數據重新整理 |
提示
效能優化:使用 load() 處理只需要執行一次的昂貴操作,並在設定變更時使用 reload() 進行快速更新。
(選擇性)新增燈箱以取得詳細資訊
儀錶板元件的空間有限,因此很難顯示詳細資訊。 燈箱提供優雅的解決方案,透過在模態覆蓋層中顯示詳細數據,而不需離開儀表板。
為什麼要在小工具中使用燈箱?
| 優點 | 描述 |
|---|---|
| 空間效率 | 提供詳細檢視時保持小工具精簡 |
| 使用者體驗 | 在顯示更多資訊時保持儀錶板的上下文 |
| 漸進式洩漏 | 在小工具中顯示摘要數據,詳細資訊可按需取得。 |
| 回應式設計 | 適應不同的螢幕大小和小工具組態 |
實作可點選的元素
更新查詢資料的呈現,以包含可點選的元素來觸發 lightbox。
// Create a list with clickable query details
var $list = $('<ul class="query-summary">');
$list.append($('<li>').text("Query ID: " + query.id));
$list.append($('<li>').text("Query Name: " + query.name));
$list.append($('<li>').text("Created By: " + (query.createdBy ? query.createdBy.displayName : "<unknown>"));

// Add a clickable element to open detailed view
var $detailsLink = $('<button class="details-link">View Details</button>');
$detailsLink.on('click', function() {
    showQueryDetails(query);
});

// Append to the container
var $container = $('#query-info-container');
$container.empty();
$container.append($list);
$container.append($detailsLink);
建立燈箱功能
將此 Lightbox 實作新增至您的 Widget JavaScript:
function showQueryDetails(query) {
// Create lightbox overlay
var $overlay = $('<div class="lightbox-overlay">');
var $lightbox = $('<div class="lightbox-content">');
// Add close button
var $closeBtn = $('<button class="lightbox-close">×</button>');
$closeBtn.on('click', function() {
$overlay.remove();
});
// Create detailed content
var $content = $('<div class="query-details">');
$content.append($('<h3>').text(query.name || 'Query Details'));
$content.append($('<p>').html('<strong>ID:</strong> ' + query.id));
$content.append($('<p>').html('<strong>Path:</strong> ' + query.path));
$content.append($('<p>').html('<strong>Created:</strong> ' + (query.createdDate ? new Date(query.createdDate).toLocaleDateString() : 'Unknown')));
$content.append($('<p>').html('<strong>Modified:</strong> ' + (query.lastModifiedDate ? new Date(query.lastModifiedDate).toLocaleDateString() : 'Unknown')));
$content.append($('<p>').html('<strong>Created By:</strong> ' + (query.createdBy ? query.createdBy.displayName : 'Unknown')));
$content.append($('<p>').html('<strong>Modified By:</strong> ' + (query.lastModifiedBy ? query.lastModifiedBy.displayName : 'Unknown')));
if (query.queryType) {
$content.append($('<p>').html('<strong>Type:</strong> ' + query.queryType));
}
// Assemble lightbox
$lightbox.append($closeBtn);
$lightbox.append($content);
$overlay.append($lightbox);
// Add to document and show
$('body').append($overlay);
// Close on overlay click
$overlay.on('click', function(e) {
if (e.target === $overlay[0]) {
$overlay.remove();
}
});
// Close on Escape key
$(document).on('keydown.lightbox', function(e) {
if (e.keyCode === 27) { // Escape key
$overlay.remove();
$(document).off('keydown.lightbox');
}
});
}
新增 Lightbox 樣式
在小工具 HTML <head> 區段中包含 Lightbox 的 CSS 樣式:
<style>
.query-summary {
    list-style: none;
    padding: 0;
    margin: 10px 0;
}

.query-summary li {
    padding: 2px 0;
    font-size: 12px;
}

.details-link {
    background: #0078d4;
    color: white;
    border: none;
    padding: 4px 8px;
    font-size: 11px;
    cursor: pointer;
    border-radius: 2px;
    margin-top: 8px;
}

.details-link:hover {
    background: #106ebe;
}

.lightbox-overlay {
    position: fixed;
    top: 0;
    left: 0;
    width: 100%;
    height: 100%;
    background: rgba(0, 0, 0, 0.7);
    z-index: 10000;
    display: flex;
    align-items: center;
    justify-content: center;
}

.lightbox-content {
    background: white;
    border-radius: 4px;
    padding: 20px;
    max-width: 500px;
    max-height: 80vh;
    overflow-y: auto;
    position: relative;
    box-shadow: 0 4px 12px rgba(0, 0, 0, 0.3);
}

.lightbox-close {
    position: absolute;
    top: 10px;
    right: 15px;
    background: none;
    border: none;
    font-size: 24px;
    cursor: pointer;
    color: #666;
    line-height: 1;
}

.lightbox-close:hover {
    color: #000;
}

.query-details h3 {
    margin-top: 0;
    color: #323130;
}

.query-details p {
    margin: 8px 0;
    font-size: 14px;
    line-height: 1.4;
}
</style>
增強式小工具實作
具有 Lightbox 功能的完整強化組件:
<!DOCTYPE html>
<html>
<head>
    <script src="sdk/scripts/VSS.SDK.min.js"></script>
    <style>
        /* Lightbox styles from above */
        .query-summary {
            list-style: none;
            padding: 0;
            margin: 10px 0;
        }

        .query-summary li {
            padding: 2px 0;
            font-size: 12px;
        }

        .details-link {
            background: #0078d4;
            color: white;
            border: none;
            padding: 4px 8px;
            font-size: 11px;
            cursor: pointer;
            border-radius: 2px;
            margin-top: 8px;
        }

        .details-link:hover {
            background: #106ebe;
        }

        .lightbox-overlay {
            position: fixed;
            top: 0;
            left: 0;
            width: 100%;
            height: 100%;
            background: rgba(0, 0, 0, 0.7);
            z-index: 10000;
            display: flex;
            align-items: center;
            justify-content: center;
        }

        .lightbox-content {
            background: white;
            border-radius: 4px;
            padding: 20px;
            max-width: 500px;
            max-height: 80vh;
            overflow-y: auto;
            position: relative;
            box-shadow: 0 4px 12px rgba(0, 0, 0, 0.3);
        }

        .lightbox-close {
            position: absolute;
            top: 10px;
            right: 15px;
            background: none;
            border: none;
            font-size: 24px;
            cursor: pointer;
            color: #666;
            line-height: 1;
        }

        .lightbox-close:hover {
            color: #000;
        }

        .query-details h3 {
            margin-top: 0;
            color: #323130;
        }

        .query-details p {
            margin: 8px 0;
            font-size: 14px;
            line-height: 1.4;
        }
    </style>
    <script type="text/javascript">
        VSS.init({
            explicitNotifyLoaded: true,
            usePlatformStyles: true
        });

        VSS.require(["AzureDevOps/Dashboards/WidgetHelpers", "AzureDevOps/WorkItemTracking/RestClient"],
            function (WidgetHelpers, WorkItemTrackingRestClient) {
                WidgetHelpers.IncludeWidgetStyles();

                function showQueryDetails(query) {
                    // Lightbox implementation from above
                }

                VSS.register("HelloWorldWidget2", function () {
                    var projectId = VSS.getWebContext().project.id;

                    var getQueryInfo = function (widgetSettings) {
                        return WorkItemTrackingRestClient.getClient().getQuery(projectId, "Shared Queries/Feedback")
                            .then(function (query) {
                                // Enhanced display with lightbox trigger
                                var $list = $('<ul class="query-summary">');
                                $list.append($('<li>').text("Query ID: " + query.id));
                                $list.append($('<li>').text("Query Name: " + query.name));
                                $list.append($('<li>').text("Created By: " + (query.createdBy ? query.createdBy.displayName : "<unknown>")));

                                var $detailsLink = $('<button class="details-link">View Details</button>');
                                $detailsLink.on('click', function() {
                                    showQueryDetails(query);
                                });

                                var $container = $('#query-info-container');
                                $container.empty();
                                $container.append($list);
                                $container.append($detailsLink);

                                return WidgetHelpers.WidgetStatusHelper.Success();
                            }, function (error) {
                                return WidgetHelpers.WidgetStatusHelper.Failure(error.message);
                            });
                    }

                    return {
                        load: function (widgetSettings) {
                            // Set your title
                            var $title = $('h2.title');
                            $title.text('Hello World');

                            return getQueryInfo(widgetSettings);
                        }
                    }
                });
            VSS.notifyLoadSucceeded();
        });
    </script>
</head>
<body>
    <div class="widget">
        <h2 class="title"></h2>
        <div id="query-info-container"></div>
    </div>
</body>
</html>
輔助功能考慮:請確定您的燈箱支持鍵盤操作,並包含適合螢幕閱讀器的標籤。 使用 Azure DevOps 的內建輔助功能功能進行測試。
這很重要
效能:Lightbox 應該會快速載入。 只有在 lightbox 開啟時,才考慮延遲載入詳細數據,而不是預先擷取所有數據。
步驟 5:設定擴充功能指令清單
在擴充功能 manifest 中登錄可配置的小工具及其配置介面。
新增小工具與組態貢獻
更新 vss-extension.json 以包含兩個新的貢獻:
{
    "contributions": [
        {
             "id": "HelloWorldWidget3",
             "type": "ms.vss-dashboards-web.widget",
             "targets": [
                 "ms.vss-dashboards-web.widget-catalog",
                 "fabrikam.azuredevops-extensions-myExtensions.HelloWorldWidget.Configuration"
             ],
             "properties": {
                 "name": "Hello World Widget 3 (with config)",
                 "description": "My third widget",
                 "previewImageUrl": "img/preview3.png",
                 "uri": "hello-world3.html",
                 "supportedSizes": [
                    {
                        "rowSpan": 1,
                        "columnSpan": 2
                    },
                    {
                        "rowSpan": 2,
                        "columnSpan": 2
                    }
                 ],
                 "supportedScopes": ["project_team"]
             }
         },
         {
             "id": "HelloWorldWidget.Configuration",
             "type": "ms.vss-dashboards-web.widget-configuration",
             "targets": [ "ms.vss-dashboards-web.widget-configuration" ],
             "properties": {
                 "name": "HelloWorldWidget Configuration",
                 "description": "Configures HelloWorldWidget",
                 "uri": "configuration.html"
             }
         }
    ],
    "files": [
        {
            "path": "hello-world.html", "addressable": true
        },
        {
            "path": "hello-world2.html", "addressable": true
        },
        {
            "path": "hello-world3.html", "addressable": true
        },
        {
            "path": "configuration.html", "addressable": true
        },
        {
            "path": "sdk/scripts", "addressable": true
        },
        {
            "path": "img", "addressable": true
        }
    ]
}
設定貢獻需求
| 屬性 | 目標 | 必填值 |
|---|---|---|
type |
將貢獻識別為小工具配置設定 | ms.vss-dashboards-web.widget-configuration |
targets |
配置出現的位置 | ms.vss-dashboards-web.widget-configuration |
uri |
組態 HTML 檔案的路徑 | 您的組態檔路徑 |
小工具目標模式
針對可設定的小工具,targets 陣列必須包含配置的參考:
<publisher>.<extension-id>.<configuration-id>
警告
設定按鈕可見度:如果小工具未正確鎖定其設定貢獻,則 [ 設定 ] 按鈕不會出現。 確認發行者和延伸模組名稱完全符合您的指令清單。
步驟 6:封裝、發佈和共用
使用組態功能部署增強的擴充功能。
如果是您的第一次發佈,請遵循 步驟 6:套件、發佈和共用。 針對現有的擴充功能,請直接在 Marketplace 中重新封裝和更新。
步驟 7:測試可設定的小工具
藉由新增和設定您的小工具,體驗完整的設定工作流程。
將小工具新增至儀錶板
- 移至
https://dev.azure.com/{Your_Organization}/{Your_Project}。 - 移至 [總覽]>[儀表板]。
- 選擇新增小工具。
- 尋找 「Hello World Widget 3 (含設定)」,然後選取 [ 新增]。
組態提示會顯示,因為小工具需要設定:

設定小工具
透過任一方法存取組態:
- 小工具功能表:將滑鼠停留在小工具上方,選取省略號 (\),然後選取 [ 設定]
- 儀錶板編輯模式:選取儀錶板上的 [ 編輯 ],然後在小工具上選取 [設定] 按鈕
組態面板會在中心開啟,並顯示即時預覽。 從下拉式清單中選取查詢以查看立即更新,然後選取 [ 儲存 ] 以套用變更。
步驟 8:新增進階組態選項
使用更多內建的設定功能擴充您的小工具,例如自訂名稱和大小。
啟用名稱和大小設定
Azure DevOps 提供兩個開箱即用的可設定功能:
| 特徵 / 功能 | 資訊清單屬性 | 目標 |
|---|---|---|
| 自定義名稱 | isNameConfigurable: true |
用戶可以覆寫預設小工具名稱 |
| 多種尺寸 | 多個 supportedSizes 項目 |
用戶可以調整小工具的大小 |
增強清單文件範例
{
    "contributions": [
        {
             "id": "HelloWorldWidget3",
             "type": "ms.vss-dashboards-web.widget",
             "targets": [
                 "ms.vss-dashboards-web.widget-catalog",
                 "fabrikam.azuredevops-extensions-myExtensions.HelloWorldWidget.Configuration"
             ],
             "properties": {
                 "name": "Hello World Widget 3 (with config)",
                 "description": "My third widget",
                 "previewImageUrl": "img/preview3.png",
                 "uri": "hello-world3.html",
                 "isNameConfigurable": true,
                 "supportedSizes": [
                    {
                        "rowSpan": 1,
                        "columnSpan": 2
                    },
                    {
                        "rowSpan": 2,
                        "columnSpan": 2
                    }
                 ],
                 "supportedScopes": ["project_team"]
             }
         }
    ]
}
顯示已設定的名稱
若要顯示自訂小工具名稱,請更新您的小工具以使用 widgetSettings.name:
return {
    load: function (widgetSettings) {
        // Display configured name instead of hard-coded text
        var $title = $('h2.title');
        $title.text(widgetSettings.name);

        return getQueryInfo(widgetSettings);
    },
    reload: function (widgetSettings) {
        // Update name during configuration changes
        var $title = $('h2.title');
        $title.text(widgetSettings.name);

        return getQueryInfo(widgetSettings);
    }
}
更新擴充功能之後,您可以同時設定小工具名稱和大小:

祝賀! 您已建立完整的可設定 Azure DevOps 儀錶板小工具,其中包含即時預覽功能和使用者自定義選項。