Azure DevOps 服務 |Azure DevOps Server |Azure DevOps Server 2022
拉取請求(PR)工作流程允許開發人員從同儕和自動化工具獲得程式碼的反饋。 非Microsoft工具和服務也可以使用PR 狀態 API參與PR工作流程。 本文會引導您使用 Azure Functions 建立自定義分支原則,以驗證 Azure DevOps Git 存放庫中的 PR。 即使工作負載成長,Azure Functions 也不需要布建和維護伺服器。 它們提供高度可靠性和安全性的完全受控計算平臺。
如需瞭解有關PR狀態的更多資訊,請參閱 使用拉取請求狀態來自訂和擴展拉取請求工作流程。
先決條件
| 類別 | 需求 |
|---|---|
| 組織 | Azure DevOps 中具有 Git 存放庫的 組織。 |
| Azure 函式 | Azure Function,它會實作與 Azure DevOps 整合的無伺服器事件驅動解決方案,以建立自定義分支原則並將 PR 驗證自動化。 |
| 服務鉤子 | 設定拉取請求事件的服務鉤子,以在拉取請求變更時通知您的 Azure 函式。 |
| 驗證 | Microsoft Entra ID 令牌 使用 Code (status) 範圍,以獲得變更 PR 狀態的許可權。 如需詳細資訊,請參閱 Microsoft Entra 驗證。 |
建立基本的 Azure 函式以接聽 Azure Repos 事件
建立您的第一個 Azure 函式。 然後,修改範例中的程式代碼,看起來像下列程序代碼:
using System;
using System.Net;
using System.Net.Http;
using System.Net.Http.Headers;
using System.Text;
using Newtonsoft.Json;

public static async Task<HttpResponseMessage> Run(HttpRequestMessage req, TraceWriter log)
{
    try
    {
        log.Info("Service Hook Received.");

        // Get request body
        dynamic data = await req.Content.ReadAsAsync<object>();

        log.Info("Data Received: " + data.ToString());

        // Get the pull request object from the service hooks payload
        dynamic jObject = JsonConvert.DeserializeObject(data.ToString());

        // Get the pull request id
        int pullRequestId;
        if (!Int32.TryParse(jObject.resource.pullRequestId.ToString(), out pullRequestId))
        {
            log.Info("Failed to parse the pull request id from the service hooks payload.");
        };

        // Get the pull request title
        string pullRequestTitle = jObject.resource.title;

        log.Info("Service Hook Received for PR: " + pullRequestId + " " + pullRequestTitle);

        return req.CreateResponse(HttpStatusCode.OK);
    }
    catch (Exception ex)
    {
        log.Info(ex.ToString());
        return req.CreateResponse(HttpStatusCode.InternalServerError);
    }
}
設定PR事件的服務攔截
服務勾點是 Azure DevOps 功能,可在發生特定事件時警示外部服務。 在此範例中,為 PR 事件設定服務勾點,您的 Azure 函式會在提取要求變更時收到通知。 若要在提取要求變更時接收 POST 要求,請使用 Azure 函式 URL 提供服務連結。
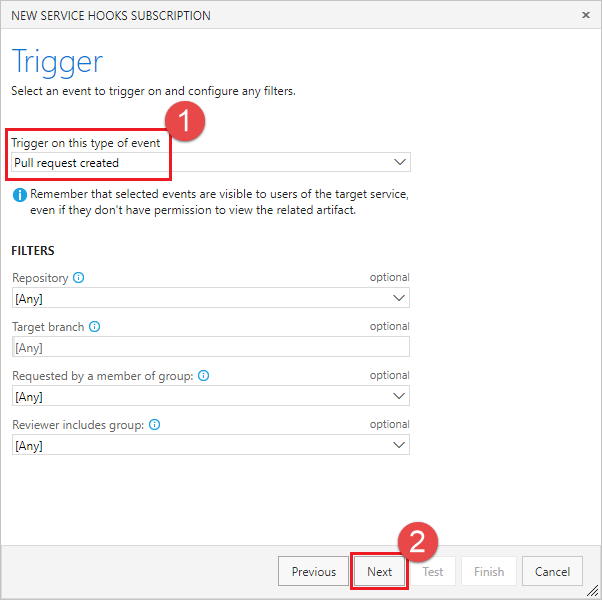
在此範例中,請設定兩個服務勾點。 第一個是針對 拉取請求建立 事件,第二個是針對 拉取請求更新 事件。
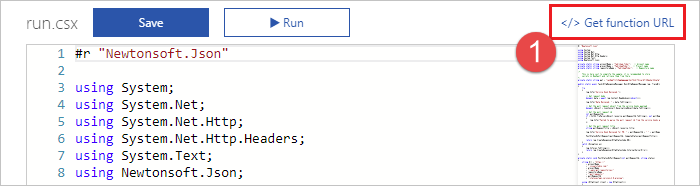
在 Azure 函式視圖中,按一下 取得函式 URL,然後從 Azure 入口網站複製該 URL。

流覽至 Azure DevOps 中的專案,例如
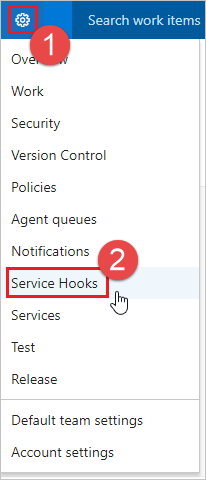
https://dev.azure.com/<your organization>/<your project name>從導覽功能表中,將滑鼠停留在 齒輪 上,然後選取 [Service Hooks]。
如果這是您的第一個服務掛鉤,請選擇 [+ 創建訂用帳戶]。
![選取工具列中的 [建立新的訂用帳戶]](media/create-pr-status-server/service-hooks-create-first-service-hook.png?view=azure-devops)
如果您已設定其他服務攔截,請選取綠色加
(+)來建立新的服務攔截訂用帳戶。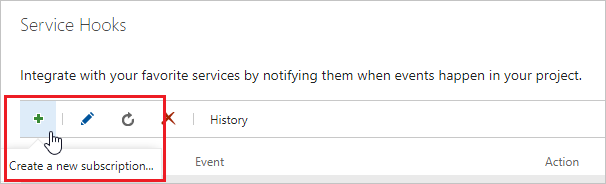
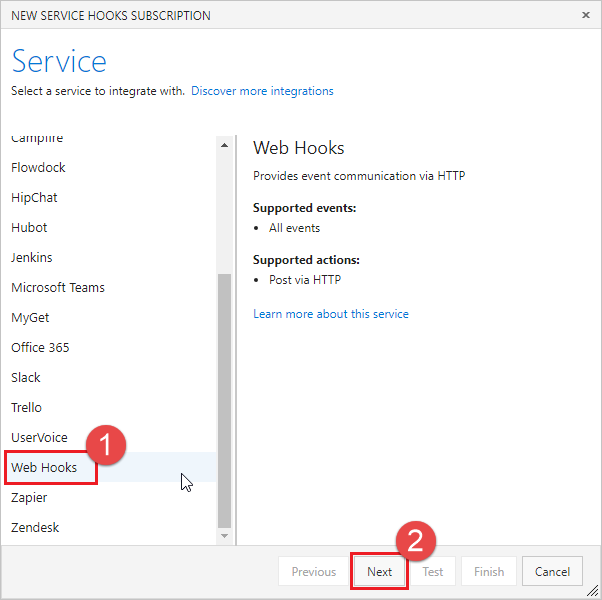
在 [新增服務掛鈎訂閱] 對話框中,從服務列表中選取 [Web Hooks],然後選取 [下一步]。
從事件觸發程式清單中選取 [已建立 提取要求],然後選取 [下一步]。
在 [動作] 頁面中,於 [URL] 方塊中輸入您在步驟 1 中複製的 URL。 選取 [測試],以將測試事件傳送至您的伺服器。
![輸入 URL,然後選取 [測試] 以測試服務勾點](media/create-pr-status-server-with-azure-functions/service-hooks-action.png?view=azure-devops)
在 Azure 函式記錄視窗中,您會看到一個傳入的
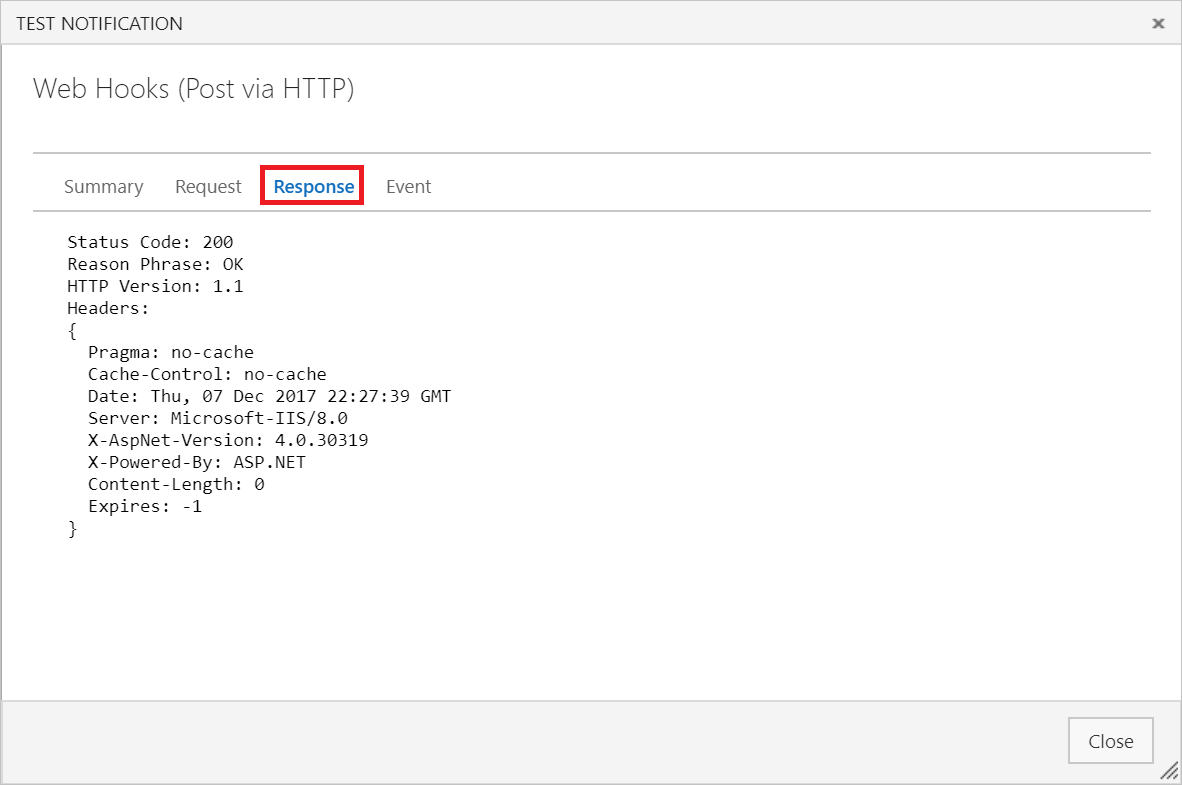
POST並返回200 OK,這表示您的函式收到了服務攔截事件。HTTP Requests ------------- POST / 200 OK在 [測試通知] 視窗中,選取 [回應] 索引標籤以查看伺服器回應的詳細數據。 您應該會看到來自伺服器的回應。
關閉 [測試通知] 視窗,然後選取 [完成] 以建立服務掛鉤。
再次執行步驟 2-8,但這次設定 提取要求更新 事件。
這很重要
務必執行上述步驟兩次,並為 拉取請求建立 事件和 拉取請求更新 事件建立服務勾點。
建立提取要求,以確認您的 Azure 函式正在接收通知。
將狀態張貼至 PR
現在,您的伺服器可以在建立新的拉取請求(PR)時接收服務掛鉤事件,請將它更新,以將狀態回傳至拉取請求(PR)。 您可以使用服務鉤子所傳送的 JSON 負載,來判斷要在您的 PR 上設定的狀態。
更新 Azure 函式的程式代碼,類似於下列範例。
請務必使用您的組織名稱、專案名稱、存放庫名稱和Microsoft Entra ID 令牌來更新程序代碼。 若要擁有變更 PR 狀態的許可權,令牌需要 vso.code_status 範圍,您可以透過Microsoft Entra 驗證取得。
這很重要
此範例程式代碼會將令牌儲存在程式碼中,以簡化範例。 建議您在 Azure Key Vault 中儲存秘密,並使用受控識別從該處擷取秘密,以提高安全性。
此範例會檢查 PR 標題,以判斷使用者是否透過在標題中添加 WIP 來表示 PR 是進行中的工作。 如果是,範例程式代碼會變更發佈到 PR 的狀態。 將 Azure 函數中的程式代碼替換為以下程式代碼,以更新回傳至 PR 的狀態。
using System;
using System.Net;
using System.Net.Http;
using System.Net.Http.Headers;
using System.Text;
using Newtonsoft.Json;

private static string organizationName = "[Organization Name]";  // Organization name
private static string projectName      = "[Project Name]";       // Project name
private static string repositoryName   = "[Repo Name]";          // Repository name

/*
    This is here just to simplify the sample, it is recommended to store
    secrets in Azure Key Vault and retrieve them using managed identity.
*/
private static string accessToken = "[MICROSOFT_ENTRA_TOKEN]";

public static async Task<HttpResponseMessage> Run(HttpRequestMessage req, TraceWriter log)
{
    try
    {
        log.Info("Service Hook Received.");

        // Get request body
        dynamic data = await req.Content.ReadAsAsync<object>();

        log.Info("Data Received: " + data.ToString());

        // Get the pull request object from the service hooks payload
        dynamic jObject = JsonConvert.DeserializeObject(data.ToString());

        // Get the pull request id
        int pullRequestId;
        if (!Int32.TryParse(jObject.resource.pullRequestId.ToString(), out pullRequestId))
        {
            log.Info("Failed to parse the pull request id from the service hooks payload.");
        };

        // Get the pull request title
        string pullRequestTitle = jObject.resource.title;

        log.Info("Service Hook Received for PR: " + pullRequestId + " " + pullRequestTitle);

        PostStatusOnPullRequest(pullRequestId, ComputeStatus(pullRequestTitle));

        return req.CreateResponse(HttpStatusCode.OK);
    }
    catch (Exception ex)
    {
        log.Info(ex.ToString());
        return req.CreateResponse(HttpStatusCode.InternalServerError);
    }
}

private static void PostStatusOnPullRequest(int pullRequestId, string status)
{
    string Url = string.Format(
        @"https://dev.azure.com/{0}/{1}/_apis/git/repositories/{2}/pullrequests/{3}/statuses?api-version=4.1",
        organizationName,
        projectName,
        repositoryName,
        pullRequestId);

    using (HttpClient client = new HttpClient())
    {
        client.DefaultRequestHeaders.Accept.Add(new MediaTypeWithQualityHeaderValue("application/json"));
        client.DefaultRequestHeaders.Authorization = new AuthenticationHeaderValue("Bearer", accessToken);

        var method = new HttpMethod("POST");
        var request = new HttpRequestMessage(method, Url)
        {
            Content = new StringContent(status, Encoding.UTF8, "application/json")
        };

        using (HttpResponseMessage response = client.SendAsync(request).Result)
        {
            response.EnsureSuccessStatusCode();
        }
    }
}

private static string ComputeStatus(string pullRequestTitle)
{
    string state = "succeeded";
    string description = "Ready for review";

    if (pullRequestTitle.ToLower().Contains("wip"))
    {
        state = "pending";
        description = "Work in progress";
    }

    return JsonConvert.SerializeObject(
        new
        {
            State = state,
            Description = description,
            TargetUrl = "https://visualstudio.microsoft.com",

            Context = new
            {
                Name = "PullRequest-WIT-App",
                Genre = "pr-azure-function-ci"
            }
        });
}
建立新的PR並測試狀態伺服器
既然您的伺服器正在執行並接聽服務攔截通知,請建立提取要求以進行測試。
請從檔案視圖開始。 編輯儲存庫中的 readme.md 檔案(如果您沒有 readme.md,則編輯任何其他檔案)。
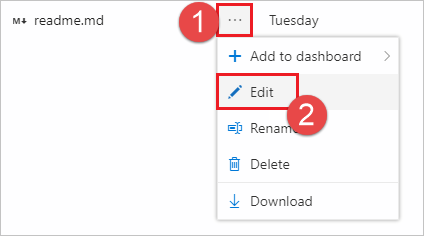
進行編輯並提交到版本庫。
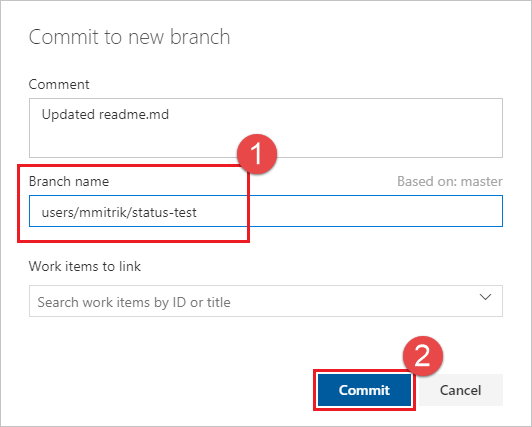
 選取提交
選取提交請務必將變更認可至新的分支,以便在下一個步驟中建立 PR。
選取 建立提取要求 連結。
![從建議列選取 [建立提取要求]](media/create-pr-status-server/create-pr.png?view=azure-devops)
在標題中新增 WIP,以測試應用程式的功能。 選取 建立 來建立 PR。
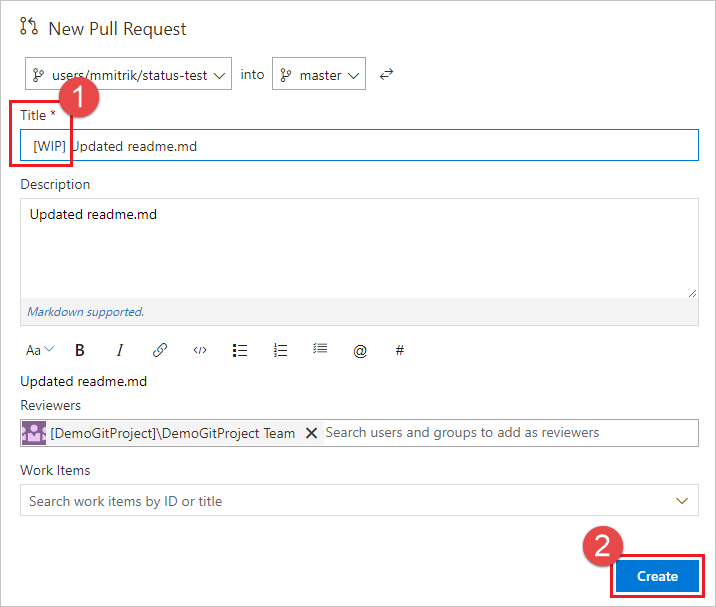
建立PR之後,狀態區段會顯示工作進行中,並連結至負載中指定的URL。
![[狀態] 區段包含 [進行中] 條目。](media/create-pr-status-server/pr-with-status.png?view=azure-devops)
更新PR標題,並移除WIP文字,且注意狀態將從進行中 變更為準備檢閱。