使用受控識別來存取 Azure Key Vault 憑證
Microsoft Entra ID 所提供的受控識別可讓您的 Azure Front Door 實例安全地存取其他Microsoft Entra 受保護的資源,例如 Azure 金鑰保存庫,而不需要管理認證。 如需詳細資訊,請參閱什麼是適用於 Azure 資源的受控識別?。
注意
Azure Front Door 中的受控識別支援僅限於存取 Azure 金鑰保存庫。 它無法用來從 Front Door 向 Blob 記憶體或 Web Apps 等來源進行驗證。
啟用 Azure Front Door 的受控識別,並將必要的許可權授與 Azure 金鑰保存庫 之後,Front Door 會使用受控識別來存取憑證。 如果沒有這些許可權,自定義憑證自動調整和新增憑證會失敗。 如果停用受控識別,Azure Front Door 會還原為使用原始設定的 Microsoft Entra 應用程式,不建議這麼做,且未來將會淘汰。
Azure Front Door 支援兩種類型的受控識別:
- 系統指派的身分識別:此身分識別會系結至您的服務,並在刪除服務時刪除。 每個服務只能有一個系統指派的身分識別。
- 使用者指派的身分識別:這是可指派給您服務的獨立 Azure 資源。 每個服務都可以有多個使用者指派的身分識別。
受控識別專屬於裝載 Azure 訂用帳戶的 Microsoft Entra 租用戶。 如果訂用帳戶移至不同的目錄,您必須重新建立並重新設定身分識別。
您可以使用角色型訪問控制 (RBAC) 或存取原則來設定 Azure 金鑰保存庫 存取。
必要條件
設定 Azure Front Door 的受控識別之前,請確定您有 Azure Front Door Standard 或 Premium 配置檔。 若要建立新的配置檔,請參閱 建立 Azure Front Door。
啟用受控識別
流覽至您現有的 Azure Front Door 配置檔。 選取左側功能表中 [安全性] 底下的 [身分識別]。
選擇 [ 系統指派 ] 或 [使用者指派的 受控識別]。
系統指派 - 系結至 Azure Front Door 配置檔生命週期的受控識別,用來存取 Azure 金鑰保存庫。
使用者指派 - 具有本身生命周期的獨立受控識別資源,用來向 Azure 金鑰保存庫 進行驗證。
系統指派
將 [狀態] 切換為 [開啟],然後選取 [儲存]。
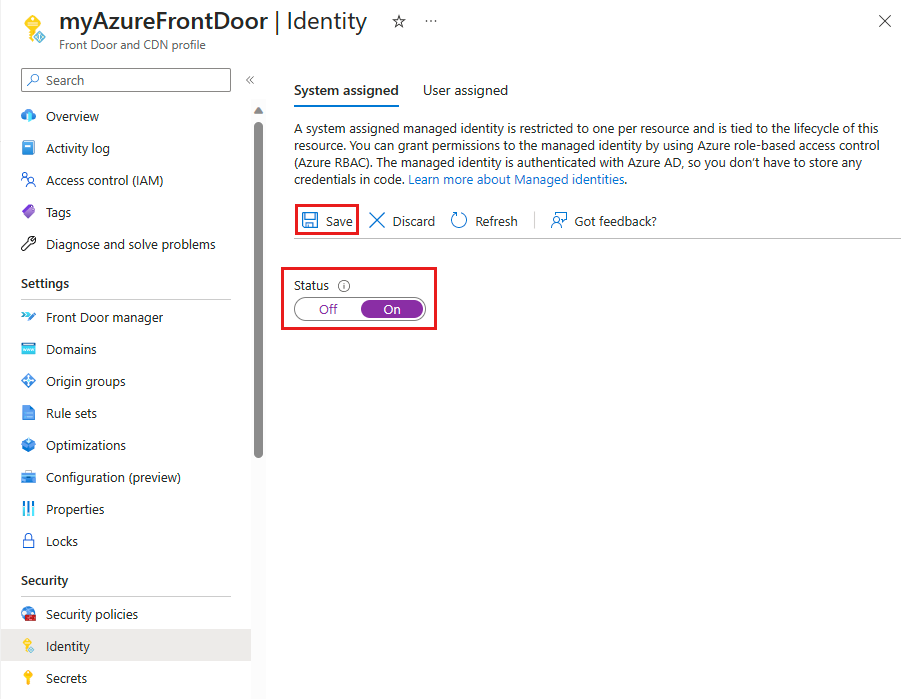
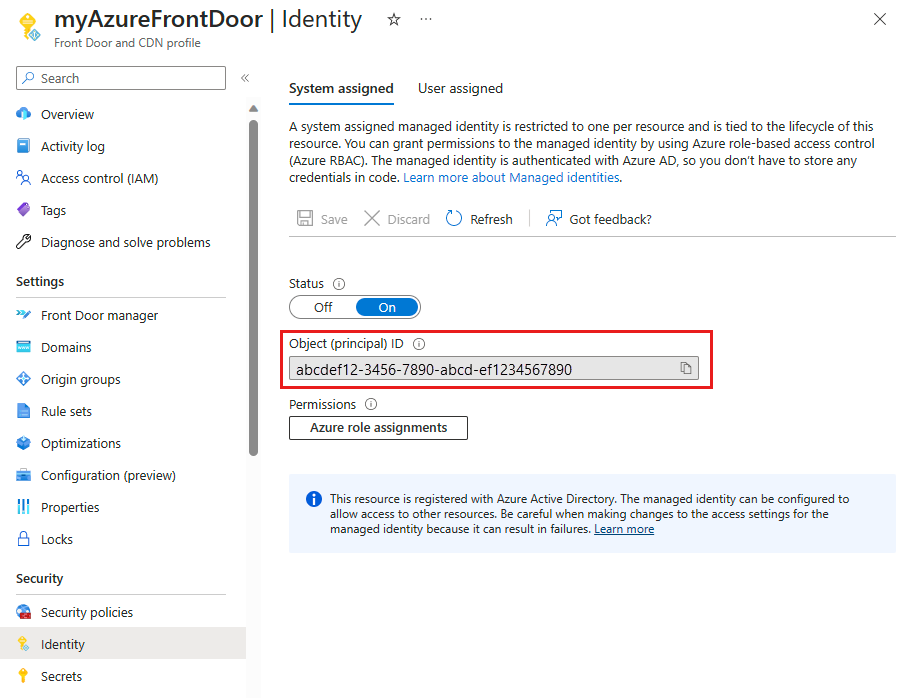
在系統提示時選取 [ 是 ],確認建立 Front Door 配置文件的系統受控識別。
建立並使用 Microsoft Entra ID 註冊之後,請使用 [物件] (principal) 標識符,將 Azure 金鑰保存庫 的存取權授與 Azure Front Door。
使用者指派
若要使用使用者指派的受控識別,您必須已建立一個。 如需建立新身分識別的指示,請參閱 建立使用者指派的受控識別。
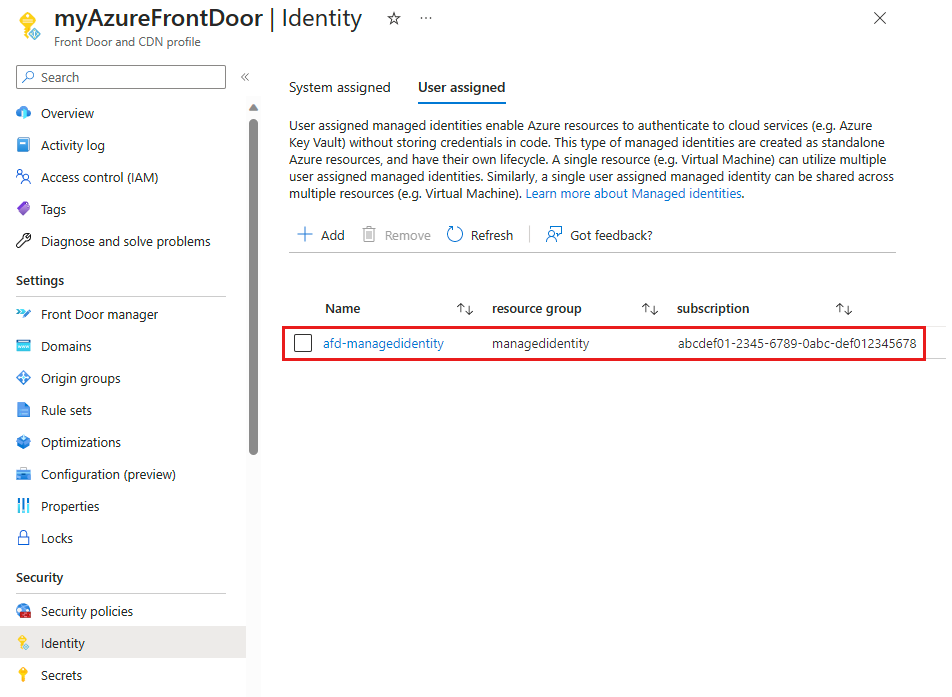
在 [ 使用者指派] 索引 標籤中,選取 [+ 新增 ] 以新增使用者指派的受控識別。
搜尋並選取使用者指派的受控識別。 然後選取 [ 新增 ] 將其附加至 Azure Front Door 配置檔。
選取的使用者指派受控識別名稱會出現在 Azure Front Door 配置檔中。
設定 Key Vault 存取
您可以使用下列其中一種方法來設定 Azure 金鑰保存庫 存取:
- 角色型訪問控制 (RBAC) - 使用 Azure Resource Manager 提供更細緻的訪問控制。
- 存取原則 - 使用原生 Azure 金鑰保存庫 訪問控制。
如需詳細資訊,請參閱 Azure 角色型存取控制 (Azure RBAC) 與存取原則。
角色型存取控制 (RBAC)
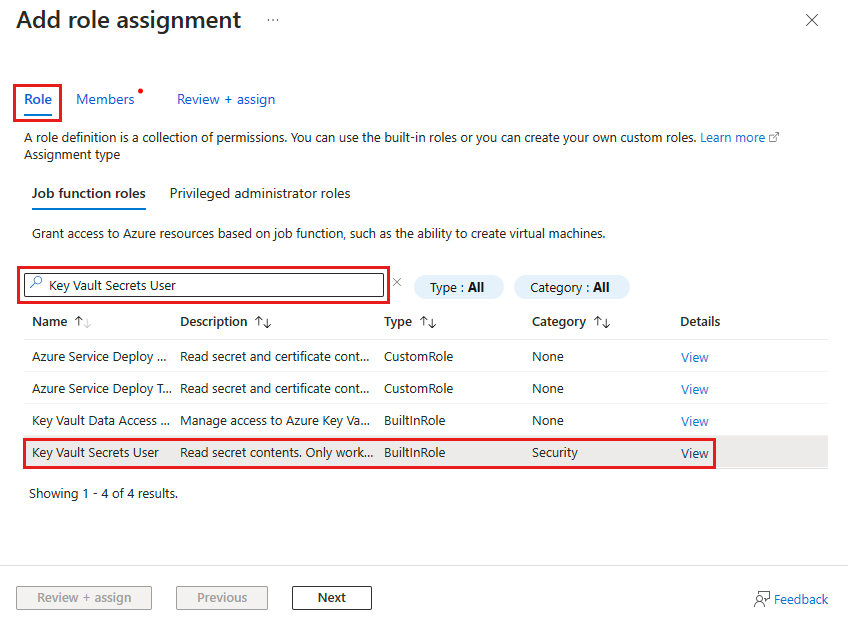
巡覽至您的 Azure Key Vault。 從 [設定] 功能選取 [訪問控制],然後選取 [+ 新增],然後選擇 [新增角色指派]。
在 [新增角色指派] 頁面上,搜尋 [金鑰保存庫 秘密使用者],然後從搜尋結果中選取它。
移至 [ 成員] 索引標籤,選取 [受控識別],然後選取 [ + 選取成員]。
選擇與 Azure Front Door 相關聯的系統指派或使用者指派的受控識別,然後選取 [選取]。
選取 [檢閱 + 指派] 以完成角色指派。
存取原則
巡覽至您的 Azure Key Vault。 在 [設定] 底下,選取 [存取原則],然後選取 [+ 建立]。
在 [建立存取原則] 頁面上,移至 [許可權] 索引卷標。在 [秘密許可權] 底下,選取 [列出] 和 [取得]。 然後選取 [下一步 ] 以繼續進行主體索引標籤。
在 [ 主體 ] 索引標籤上 ,輸入系統指派受控識別的物件(主體) 標識碼,或 使用者指派的受控識別名稱 。 然後,選取 [檢閱 + 建立]。 系統會自動選取 [Azure Front Door] 時略過 [ 應用程式 ] 索引卷標。
![螢幕擷取畫面:Key Vault 存取原則的 [主體] 索引標籤。](media/managed-identity/system-principal.png)
檢閱存取原則設定,然後選取 [ 建立] 以完成存取原則。
驗證存取權
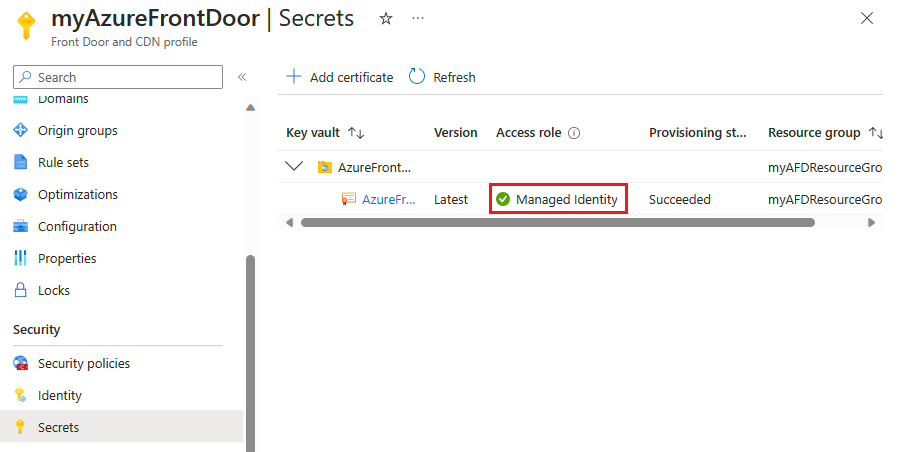
移至已啟用受控識別的 Azure Front Door 配置檔,然後選取 [安全性] 底下的 [秘密]。
確認 受控識別 出現在 Front Door 中所用憑證的 [存取角色 ] 資料行底下。 如果第一次設定受控識別,請將憑證新增至 Front Door 以查看此數據行。
下一步
- 深入了解端對端 TLS 加密。
- 了解如何在 Azure Front Door 自訂網域上設定 HTTPS。