使用 Microsoft Azure Machine Learning 延伸模組設定 Visual Studio Code 桌面
了解如何為您的機器學習工作流程設定 Azure Machine Learning Visual Studio Code 延伸模組。 您只需在使用 VS Code 桌面應用程式時,執行此設定。 如果您使用 VS Code for the Web,將會為您處理這個問題。
VS Code 的 Azure Machine Learning 延伸模組提供使用者介面,藉此可:
- 管理 Azure Machine Learning 資源 (實驗、虛擬機器、模型、部署等)
- 使用遠端計算執行個體在本機開發
- 將機器學習模型定型
- 在本機上進行機器學習實驗的偵錯
- 以結構描述為基礎的語言支援、自動完成和診斷規格檔案製作
必要條件
- Azure 訂閱。 如果您沒有訂用帳戶,請註冊以試用免費或付費版本的 Azure Machine Learning。
- Visual Studio Code \(英文\)。 如果沒有 Visual Studio Code,請安裝。
- Python
- (選擇性) 若要使用延伸模組建立資源,您需要安裝 CLI (v2)。 如需設定指示,請參閱安裝、設定和使用 CLI (v2)。
- 複製社群驅動存放庫
git clone https://github.com/Azure/azureml-examples.git --depth 1
安裝延伸模組
打開 Visual Studio Code。
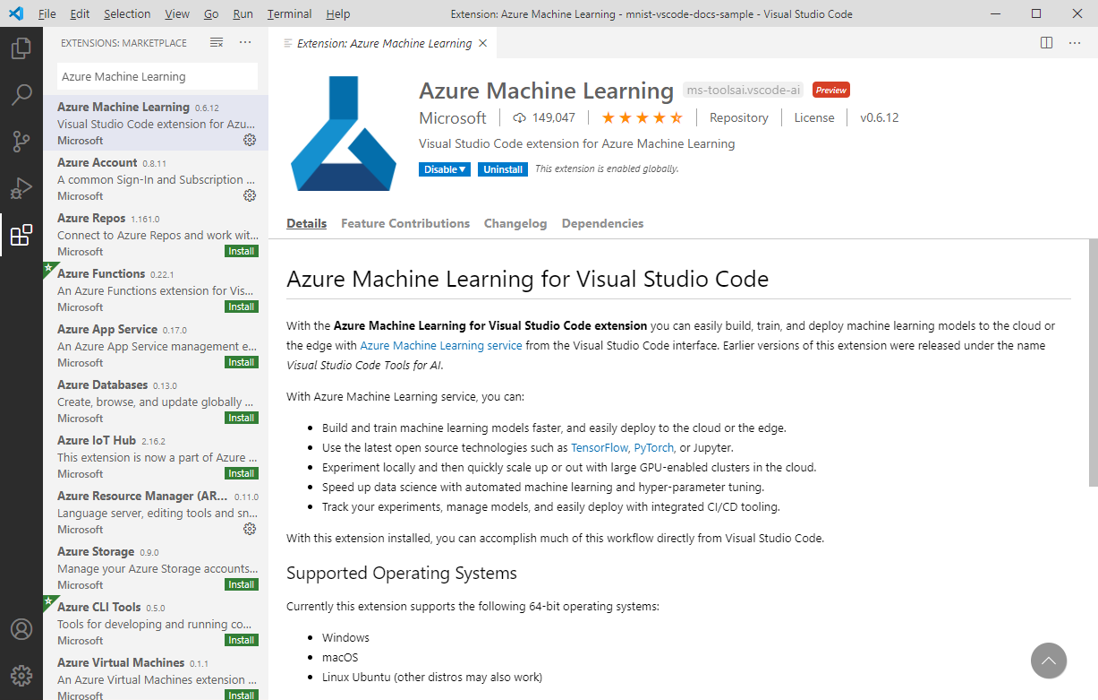
從 [活動列] 中選取 [擴充功能] 圖示,以開啟 [擴充功能] 檢視。
在 [延伸模組] 檢視搜尋列中,輸入「Azure Machine Learning」,然後選取第一個延伸模組。
選取 [安裝]。

注意
Azure Machine Learning VS Code 擴充功能預設會使用 CLI (v2)。 若要切換至 1.0 CLI,請將 Visual Studio Code 中的 azureML.CLI Compatibility Mode 設定設為 1.0。 如需在 Visual Studio 中修改設定的詳細資訊,請參閱使用者和工作區設定文件。
登入您的 Azure 帳戶
若要在 Azure 上佈建資源和作業工作負載,必須使用您的 Azure 帳戶登入資訊登入。 為了協助管理帳戶,Azure Machine Learning 會自動安裝 Azure 帳戶擴充功能。 請造訪下列網站,深入了解 Azure 帳戶擴充功能。
若要登入 Azure 帳戶,請選取 Visual Studio Code 狀態列右下角的 Azure:登入按鈕,開始執行登入流程。
選擇您的預設工作區
選擇預設 Azure Machine Learning 工作區會在製作 CLI (v2) YAML 規格檔案時,啟用下列功能:
- 結構描述驗證
- 自動完成
- 診斷
如果您沒有工作區,請建立一個。 如需詳細資訊,請參閱使用 VS Code 延伸模組來管理 Azure Machine Learning 資源。
若要選取預設工作區,請選取 Visual Studio Code 狀態列上的設定 Azure Machine Learning 工作區按鈕,然後依照提示設定工作區。
或者,在命令選擇區中使用 > Azure ML: Set Default Workspace 命令,並依照提示來設定您的工作區。
若要開啟命令選擇區,請在鍵盤上按 Command 和 P。 然後鍵入 > Azure ML: Set Default Workspace。