在 Azure 中的 Red Hat Enterprise Linux 上設定 Pacemaker
本文說明如何在 Red Hat Enterprise Server (RHEL) 上設定基本 Pacemaker 叢集。 這些指示涵蓋 RHEL 7、RHEL 8 和 RHEL 9。
必要條件
請先閱讀下列 SAP Note 和文件:
- SAP Note 1928533,其中包含:
- 支援部署 SAP 軟體的 Azure 虛擬機器 (VM) 大小的清單。
- Azure VM 大小的重要容量資訊。
- 支援的 SAP 軟體,以及作業系統 (OS) 與資料庫組合。
- Microsoft Azure 上 Windows 和 Linux 所需的 SAP 核心版本。
- SAP Note 2015553 列出 Azure 中 SAP 支援的 SAP 軟體部署先決條件。
- SAP 備註 2002167 建議用於 Red Hat Enterprise Linux 的作業系統設定。
- SAP 備註 3108316 建議用於 Red Hat Enterprise Linux 9.x 的作業系統設定。
- SAP 附註 2009879 提供適用於 Red Hat Enterprise Linux 的 SAP HANA 方針。
- SAP 附註 3108302 提供適用於 Red Hat Enterprise Linux 9.x 的 SAP Hana 方針。
- SAP Note 2178632 包含在 Azure 中針對 SAP 回報的所有監視計量詳細資訊。
- SAP Note 2191498 包含 Azure 中 Linux 所需的 SAP Host Agent 版本。
- SAP Note 2243692 包含 Azure 中 Linux 上的 SAP 授權相關資訊。
- SAP 附註 1999351 包含適用於 SAP 的 Azure 增強型監視延伸模組的其他疑難排解資訊。
- SAP Community WIKI 包含 Linux 所需的所有 SAP Note。
- 適用於 SAP on Linux 的 Azure 虛擬機器規劃和實作
- 適用於 SAP on Linux 的 Azure 虛擬機器部署 (本文)
- 適用於 SAP on Linux 的 Azure 虛擬機器 DBMS 部署
- Pacemaker 叢集中的 SAP Hana 系統複寫
- 一般 RHEL 文件:
- 高可用性 (HA) 附加元件概觀 (英文)
- 高可用性附加元件管理 (英文)
- 高可用性附加元件參考 (英文)
- RHEL 高可用性叢集的支援原則:
sbd和fence_sbd
- Azure 專用 RHEL 文件:
叢集安裝
注意
Red Hat 不支援軟體模擬的看門狗。 Red Hat 不支援雲端平台上的 SBD。 如需詳細資訊,請參閱 RHEL 高可用性叢集的支援原則: sbd 和 fence_sbd。
在 Azure 上針對 Pacemaker RHEL 叢集唯一支援的隔離機制是 Azure 隔離代理程式。
重要
Microsoft Azure 標準支援原則未涵蓋跨越多個虛擬網路 (VNets)/子網路的 Pacemaker 叢集。
下列項目前面會加上:
- [A]:適用於所有節點
- [1]:僅適用於節點 1
- [2]:僅適用於節點 2
RHEL 7 和 RHEL 8/RHEL 9 之間的命令或設定差異會在文件中標示。
[A] 登錄。 此為選用步驟。 如果您使用已啟用 RHEL SAP 高可用性的映像,則不需要此步驟。
例如,如果您要在 RHEL 7 上部署,請登錄 VM,並將其連結至包含 RHEL 7 存放庫的集區。
sudo subscription-manager register
# List the available pools
sudo subscription-manager list --available --matches '*SAP*'
sudo subscription-manager attach --pool=<pool id>
當您將集區附加至 Azure Marketplace 隨用隨付 RHEL 映像時,您的 RHEL 使用量實際上會加倍計費。 您需支付隨用隨付映像的一次費用,一次用於您附加的集區中的 RHEL 權利。 為了減輕這種情況,Azure 現在提供自備訂用帳戶 RHEL 映像。 如需詳細資訊,請參閱 Red Hat Enterprise Linux 自備訂閱 Azure 映像
[A] 啟用 SAP 存放庫的 RHEL。 此為選用步驟。 如果您使用已啟用 RHEL SAP 高可用性的映像,則不需要此步驟。
若要在 RHEL 7 上安裝必要的封裝,請啟用下列存放庫:
sudo subscription-manager repos --disable "*"
sudo subscription-manager repos --enable=rhel-7-server-rpms
sudo subscription-manager repos --enable=rhel-ha-for-rhel-7-server-rpms
sudo subscription-manager repos --enable=rhel-sap-for-rhel-7-server-rpms
sudo subscription-manager repos --enable=rhel-ha-for-rhel-7-server-eus-rpms
[A] 安裝 RHEL 高可用性附加元件。
sudo yum install -y pcs pacemaker fence-agents-azure-arm nmap-ncat重要
我們建議使用下列 Azure 隔離代理程式版本 (或更新版本),在資源停止失敗或叢集節點無法再彼此通訊時,讓客戶得到更快速的容錯移轉時間的好處:
RHEL 7.7 或以上版本使用最新可用的隔離代理程式封裝版本。
RHEL 7.6.:fence-agents-4.2.1-11.el7_6.8
RHEL 7.5:fence-agents-4.0.11-86.el7_5.8
RHEL 7.4:fence-agents-4.0.11-66.el7_4.12
如需詳細資訊,請參閱 以 RHEL 高可用性叢集成員身分執行的 Azure VM 需要相當長時間完成隔離,或 VM 關機前隔離失敗/逾時。
重要
對於想要使用 Azure 資源受控識別,而不是隔離代理程式服務主體名稱的客戶,我們建議使用下列版本 (或更新版本) 的 Azure 隔離代理程式:
RHEL 8.4:fence-agents-4.2.1-54.el8。
RHEL 8.2:fence-agents-4.2.1-41.el8_2.4
RHEL 8.1:fence-agents-4.2.1-30.el8_1.4
RHEL 7.9:fence-agents-4.2.1-41.el7_9.4。
重要
在 RHEL 9 上,我們建議使用下列套件版本 (或更新版本),以避免 Azure 隔離代理程式發生問題:
fence-agents-4.10.0-20.el9_0.7
fence-agents-common-4.10.0-20.el9_0.6
ha-cloud-support-4.10.0-20.el9_0.6.x86_64.rpm
檢查 Azure 柵欄代理程式的版本。 如有必要,請將它更新為最低需求版本或更新版本。
# Check the version of the Azure Fence Agent
 sudo yum info fence-agents-azure-arm
重要
如果您需要更新 Azure 隔離代理程式,而且如果使用自訂角色,請務必更新自訂角色,以包含 powerOff 動作。 如需詳細資訊,請參閱 為隔離代理程式建立自訂角色。
如果您要在 RHEL 9 上部署,也請安裝用於雲端部署的資源代理程式。
sudo yum install -y resource-agents-cloud[A] 設定主機名稱解析。
您可以使用 DNS 伺服器,或修改所有節點上的
/etc/hosts檔案。 此範例說明如何使用/etc/hosts檔案。 請取代下列命令中的 IP 位址和主機名稱。重要
如果您在叢集設定中使用主機名稱,重要的是擁有可靠的主機名稱解析。 如果名稱無法使用,叢集通訊就會失敗,這可能會導致叢集容錯移轉延遲。
使用
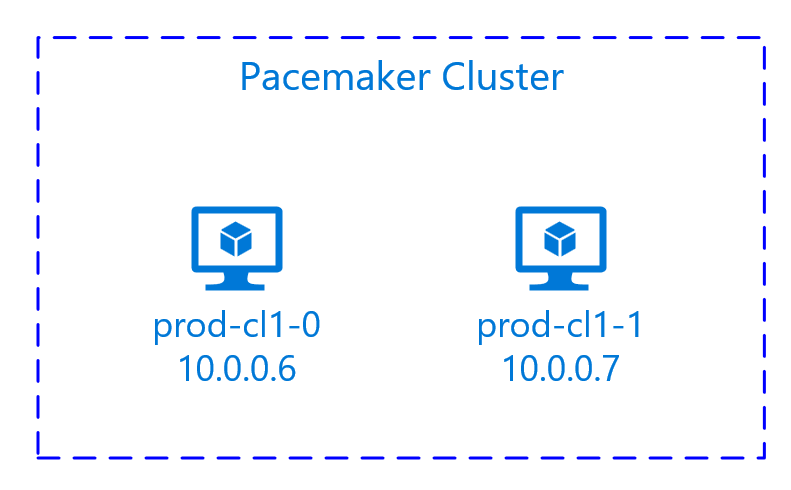
/etc/hosts的好處在於,您的叢集會變成不受 DNS 影響,而 DNS 也可能是單一失敗點。sudo vi /etc/hosts將下列幾行插入至
/etc/hosts。 變更 IP 位址和主機名稱以符合您的環境。# IP address of the first cluster node 10.0.0.6 prod-cl1-0 # IP address of the second cluster node 10.0.0.7 prod-cl1-1[A] 將
hacluster密碼變更為相同的密碼。sudo passwd hacluster[A] 新增 Pacemaker 防火牆規則。
新增下列防火牆規則至叢集節點間的所有叢集通訊。
sudo firewall-cmd --add-service=high-availability --permanent
sudo firewall-cmd --add-service=high-availability
[A] 啟用基本叢集服務。
執行下列命令,以啟用 Pacemaker 服務並加以啟動。
sudo systemctl start pcsd.service
sudo systemctl enable pcsd.service
[1] 建立 Pacemaker 叢集。
執行下列命令以驗證節點,並建立叢集。 將權杖設為 30000,以允許記憶體保留維修。 如需詳細資訊,請參閱這篇 Linux 文章。
如果要在 RHEL 7.x 上建置叢集,請使用下列命令:
sudo pcs cluster auth prod-cl1-0 prod-cl1-1 -u hacluster
sudo pcs cluster setup --name nw1-azr prod-cl1-0 prod-cl1-1 --token 30000
sudo pcs cluster start --all
如果要在 RHEL 8.x/RHEL 9.x 上建置叢集,請使用下列命令:
sudo pcs host auth prod-cl1-0 prod-cl1-1 -u hacluster
sudo pcs cluster setup nw1-azr prod-cl1-0 prod-cl1-1 totem token=30000
sudo pcs cluster start --all
透過執行下列命令來驗證叢集狀態:
# Run the following command until the status of both nodes is online
sudo pcs status

# Cluster name: nw1-azr
# WARNING: no stonith devices and stonith-enabled is not false
# Stack: corosync
# Current DC: prod-cl1-1 (version 1.1.18-11.el7_5.3-2b07d5c5a9) - partition with quorum
# Last updated: Fri Aug 17 09:18:24 2018
# Last change: Fri Aug 17 09:17:46 2018 by hacluster via crmd on prod-cl1-1
#
# 2 nodes configured
# 0 resources configured
#
# Online: [ prod-cl1-0 prod-cl1-1 ]
#
# No resources
#
# Daemon Status:
#   corosync: active/disabled
#   pacemaker: active/disabled
#   pcsd: active/enabled
[A] 設定預期的投票。
# Check the quorum votes
pcs quorum status

# If the quorum votes are not set to 2, execute the next command
sudo pcs quorum expected-votes 2
提示
如果您正在組建多節點叢集,即具有兩個以上節點的叢集,請勿將投票數設定為 2。
[1] 允許並行隔離動作。
sudo pcs property set concurrent-fencing=true
建立隔離裝置
隔離裝置會使用 Azure 資源的受控識別或服務主體來對 Azure 授權。
若要建立受控識別 (MSI),請為叢集中的每部 VM 建立系統指派的受控識別。 如果系統指派的受控識別已經存在,則會使用該識別。 目前請勿在 Pacemaker 使用使用者指派的受控識別。 在 RHEL 7.9 和 RHEL 8.x/RHEL 9.x 上支援以受控識別為基礎的隔離裝置。
[1] 為柵欄代理程式建立自訂角色
受控識別和服務主體預設沒有存取您的 Azure 資源的權限。 您需要為受控識別或服務主體提供權限來啟動和停止 (關閉) 叢集的所有虛擬機器。 如果您尚未建立自訂角色,您可以使用 PowerShell 或 Azure CLI 來建立它。
針對輸入檔使用下列內容。 您必須將內容調整為訂用帳戶,也就是將 xxxxxxxx-xxxx-xxxx-xxxx-xxxxxxxxxxxx 和 yyyyyyyy-yyyy-yyyy-yyyy-yyyyyyyyyyyy 取代為您的訂用帳戶標識碼。 如果您只有一個訂用帳戶,請在 AssignableScopes 中移除第二個項目。
{
      "Name": "Linux Fence Agent Role",
      "description": "Allows to power-off and start virtual machines",
      "assignableScopes": [
              "/subscriptions/xxxxxxxx-xxxx-xxxx-xxxx-xxxxxxxxxxxx",
              "/subscriptions/yyyyyyyy-yyyy-yyyy-yyyy-yyyyyyyyyyyy"
      ],
      "actions": [
              "Microsoft.Compute/*/read",
              "Microsoft.Compute/virtualMachines/powerOff/action",
              "Microsoft.Compute/virtualMachines/start/action"
      ],
      "notActions": [],
      "dataActions": [],
      "notDataActions": []
}
[A] 指派自訂角色
使用受控識別或服務主體。
將在上一節中建立的自訂角色 Linux Fence Agent Role 指派給叢集 VM 中的每個受控識別。 每個 VM 系統指派的受控識別都需要為每個叢集 VM 資源指派的角色。 如需詳細資訊,請參閱使用 Azure 入口網站為受控識別指派對資源的存取權。 確認每個 VM 的受控識別角色指派都包含所有叢集 VM。
重要
請注意,受控識別的授權指派和移除可能會延遲到生效為止。
[1] 建立隔離裝置
當您編輯虛擬機器的權限之後,就可以在叢集中設定隔離裝置。
sudo pcs property set stonith-timeout=900
注意
如果 RHEL 主機名稱和 Azure VM 名稱不相同,則 pcmk_host_map 選項是命令中唯一需要的。 以格式 hostname:vm-name 指定對應。
請參閱命令中的粗體區段。 如需詳細資訊,請參閱 我應該使用何種格式來指定節點對應至 pcmk_host_map 中的隔離裝置?(英文)。
針對 RHEL 7.x,使用下列命令來設定柵欄裝置:
sudo pcs stonith create rsc_st_azure fence_azure_arm msi=true resourceGroup="resource group" \
subscriptionId="subscription id" pcmk_host_map="prod-cl1-0:prod-cl1-0-vm-name;prod-cl1-1:prod-cl1-1-vm-name" \
power_timeout=240 pcmk_reboot_timeout=900 pcmk_monitor_timeout=120 pcmk_monitor_retries=4 pcmk_action_limit=3 pcmk_delay_max=15 \
op monitor interval=3600
針對 RHEL 8.X/9.x,使用下列命令來設定隔離裝置:
# Run following command if you are setting up fence agent on (two-node cluster and pacemaker version greater than 2.0.4-6.el8) OR (HANA scale out)
sudo pcs stonith create rsc_st_azure fence_azure_arm msi=true resourceGroup="resource group" \
subscriptionId="subscription id" pcmk_host_map="prod-cl1-0:prod-cl1-0-vm-name;prod-cl1-1:prod-cl1-1-vm-name" \
power_timeout=240 pcmk_reboot_timeout=900 pcmk_monitor_timeout=120 pcmk_monitor_retries=4 pcmk_action_limit=3 \
op monitor interval=3600

# Run following command if you are setting up fence agent on (two-node cluster and pacemaker version less than 2.0.4-6.el8)
sudo pcs stonith create rsc_st_azure fence_azure_arm msi=true resourceGroup="resource group" \
subscriptionId="subscription id" pcmk_host_map="prod-cl1-0:prod-cl1-0-vm-name;prod-cl1-1:prod-cl1-1-vm-name" \
power_timeout=240 pcmk_reboot_timeout=900 pcmk_monitor_timeout=120 pcmk_monitor_retries=4 pcmk_action_limit=3 pcmk_delay_max=15 \
op monitor interval=3600
如果您使用以服務主體設定為基礎的隔離裝置,請參閱 使用 Azure 隔離將 Pacemaker 叢集從 SPN 變更為 MSI,並了解如何轉換為受控識別設定。
提示
- 若要避免雙節點 Pacemaker 叢集中的隔離競爭,您可以設定
priority-fencing-delay叢集屬性。 若發生腦裂 (split-brain) 情況,此屬性會在隔離總資源優先順序較高的節點時出現額外的延遲。 如需詳細資訊,請參閱 Pacemaker 是否可以使用最少的執行資源來隔離叢集節點?。 - 屬性
priority-fencing-delay適用於 Pacemaker 2.0.4-6.el8 版或更新版本,且適用於雙節點叢集。 如果您設定priority-fencing-delay叢集屬性,則不需要設定pcmk_delay_max屬性。 但是,如果 Pacemaker 版本低於 2.0.4-6.el8,您需要設定pcmk_delay_max屬性。 - 如需如何設定
priority-fencing-delay叢集屬性的指示,請參閱個別的 SAP ASCS/ERS 和 SAP Hana 相應增加高可用性文件。
監視和隔離作業為還原序列化。 因此,如果有長時間執行的監視作業和同時隔離事件,因為已經在執行監視作業,所以叢集容錯移轉不會延遲。
[1] 啟用隔離裝置的使用
sudo pcs property set stonith-enabled=true
提示
Azure 隔離代理程式需要對公用端點的輸出連線。 如需可能解決方案的詳細資訊,請參閱 使用標準 ILB 的 VM 公用端點連線。
為 Azure 已排定事件設定 Pacemaker
Azure 提供已排定事件。 已排定事件會透過中繼資料服務傳送,並容許應用程式有準備這類事件的時間。
Pacemaker 資源代理程式 azure-events-az 監視已排程的 Azure 事件。 如果偵測到事件,且資源代理程式判斷另一個叢集節點可供使用,它就會設定叢集健康情況屬性。
為節點設定叢集健康情況屬性時,位置限制式會觸發,且名稱不是以 health- 開頭的所有資源都會從具有已排定事件的節點移轉。 在受影響的叢集節點沒有執行中的叢集資源之後,就會認可已排定事件,並可執行其動作,例如重新啟動。
[A] 確定已安裝
azure-events-az代理程式的套件,且為最新狀態。RHEL 8.x: sudo dnf info resource-agents RHEL 9.x: sudo dnf info resource-agents-cloud最低版本需求:
- RHEL 8.4:
resource-agents-4.1.1-90.13 - RHEL 8.6:
resource-agents-4.9.0-16.9 - RHEL 8.8:
resource-agents-4.9.0-40.1 - RHEL 9.0:
resource-agents-cloud-4.10.0-9.6 - RHEL 9.2 和更新版本:
resource-agents-cloud-4.10.0-34.1
- RHEL 8.4:
[1] 在 Pacemaker 中設定資源。
#Place the cluster in maintenance mode
sudo pcs property set maintenance-mode=true
[1] 設定 Pacemaker 叢集健康情況節點策略和限制式。
sudo pcs property set node-health-strategy=custom
sudo pcs constraint location 'regexp%!health-.*' \
rule score-attribute='#health-azure' \
defined '#uname'
重要
除了後續步驟中所述的資源之外,請勿在叢集中定義以
health-開頭的任何其他資源。[1] 設定叢集屬性的初始值。 針對每個叢集節點和向外延展環境執行,包括多數製造商 VM。
sudo crm_attribute --node prod-cl1-0 --name '#health-azure' --update 0
sudo crm_attribute --node prod-cl1-1 --name '#health-azure' --update 0
[1] 在 Pacemaker 中設定資源。 請確定資源開頭為
health-azure。sudo pcs resource create health-azure-events \ ocf:heartbeat:azure-events-az \ op monitor interval=10s timeout=240s \ op start timeout=10s start-delay=90s sudo pcs resource clone health-azure-events allow-unhealthy-nodes=true failure-timeout=120s將 Pacemaker 叢集置於維護模式之外。
sudo pcs property set maintenance-mode=false清除啟用期間的任何錯誤,並確認所有叢集節點上
health-azure-events資源都已成功啟動。sudo pcs resource cleanup已排定事件的第一次查詢執行最多可能需要兩分鐘的時間。 使用已排定事件的 Pacemaker 測試,可以使用叢集 VM 的重新啟動或重新部署動作。 如需詳細資訊,請參閱排定的訊息。
選擇性隔離設定
提示
只有在您想要設定特殊隔離裝置 fence_kdump 時,才適用本節。
如果您需要收集 VM 內的診斷資訊,根據隔離代理程式 fence_kdump 設定另一個隔離裝置可能會很有用。 fence_kdump 代理程式可以偵測節點進入 kdump 損毀修復,並允許損毀修復服務在叫用其他隔離方法之前完成修復。 請注意,fence_kdump 不是傳統隔離機制的替代項目,例如使用 Azure VM 時的 Azure 隔離代理程式。
重要
請注意,當 fence_kdump 設定為第一層隔離裝置時,其會在隔離作業中導致延遲,並且分別地在應用程式資源容錯移轉中延遲。
如果成功偵測到損毀傾印,隔離將會延遲到損毀修復服務完成為止。 如果失敗的節點無法連線或未回應,則隔離將會依決定的時間、已設定的反覆運算次數和 fence_kdump 逾時而延遲。 如需詳細資訊,請參閱 如何在 Red Hat Pacemaker 叢集中設定 fence_kdump? (英文)。
建議的 fence_kdump 逾時可能需要針對特定環境加以調整。
建議只在需要收集 VM 內的診斷時設定 fence_kdump 隔離,並一律與傳統隔離方法搭配,例如 Azure 隔離代理程式。
下列 Red Hat KB 文章包含設定 fence_kdump 隔離的重要資訊:
- 如何在 Red Hat Pacemaker 叢集中設定 fence_kdump?(英文)。
- 如何使用 Pacemaker 在 RHEL 叢集中設定/管理隔離層級(英文)。
- 請參閱 在使用 kexec-tools 2.0.14 之前版本之 RHEL 6 或 7 高可用性叢集中的 fence_kdump 發生「X 秒後逾時」失敗(英文)。
- 如需如何變更預設逾時的資訊,請參閱 如何設定 kdump 以搭配 RHEL 6、7、8 高可用性附加元件使用? (英文)。
- 如需如何在使用
fence_kdump時減少容錯移轉延遲的資訊,請參閱 新增 fence_kdump 設定時是否可以減少預期的容錯移轉延遲?(英文)。
除了 Azure 隔離代理程式設定之外,請執行下列選用步驟來新增 fence_kdump 作為第一層隔離設定。
[A] 確認
kdump為作用中且已設定。systemctl is-active kdump # Expected result # active[A] 安裝
fence_kdump柵欄代理程式。yum install fence-agents-kdump[1] 在叢集中建立
fence_kdump隔離裝置。pcs stonith create rsc_st_kdump fence_kdump pcmk_reboot_action="off" pcmk_host_list="prod-cl1-0 prod-cl1-1" timeout=30[1] 設定隔離層級以讓
fence_kdump隔離機制先執行。pcs stonith create rsc_st_kdump fence_kdump pcmk_reboot_action="off" pcmk_host_list="prod-cl1-0 prod-cl1-1" pcs stonith level add 1 prod-cl1-0 rsc_st_kdump pcs stonith level add 1 prod-cl1-1 rsc_st_kdump pcs stonith level add 2 prod-cl1-0 rsc_st_azure pcs stonith level add 2 prod-cl1-1 rsc_st_azure # Check the fencing level configuration pcs stonith level # Example output # Target: prod-cl1-0 # Level 1 - rsc_st_kdump # Level 2 - rsc_st_azure # Target: prod-cl1-1 # Level 1 - rsc_st_kdump # Level 2 - rsc_st_azure[A] 透過防火牆允許
fence_kdump的必要連接埠。firewall-cmd --add-port=7410/udp firewall-cmd --add-port=7410/udp --permanent[A] 確定
initramfs影像檔包含fence_kdump和hosts檔案。 如需詳細資訊,請參閱 如何在 Red Hat Pacemaker 叢集中設定 fence_kdump? (英文)。lsinitrd /boot/initramfs-$(uname -r)kdump.img | egrep "fence|hosts" # Example output # -rw-r--r-- 1 root root 208 Jun 7 21:42 etc/hosts # -rwxr-xr-x 1 root root 15560 Jun 17 14:59 usr/libexec/fence_kdump_send[A] 執行
/etc/kdump.conf中的fence_kdump_nodes設定,以避免針對某些kexec-tools版本的fence_kdump逾時失敗。 如需詳細資訊,請參閱 fence_kdump在 fence_kdump_nodes 未指定使用 kexec-tools 2.0.15 版或以上版本時逾時 (英文),以及 在使用 kexec-tools 2.0.14 之前版本的 RHEL 6 或 7 高可用性叢集中的 fence_kdump 出現「X 秒後逾時」失敗 (英文)。 這裡顯示兩個節點叢集的範例設定。 在/etc/kdump.conf中進行變更之後,必須重新產生 kdump 映像。 若要重新產生,請重新啟動kdump服務。vi /etc/kdump.conf # On node prod-cl1-0 make sure the following line is added fence_kdump_nodes prod-cl1-1 # On node prod-cl1-1 make sure the following line is added fence_kdump_nodes prod-cl1-0 # Restart the service on each node systemctl restart kdump透過損毀節點來測試設定。 如需詳細資訊,請參閱 如何在 Red Hat Pacemaker 叢集中設定 fence_kdump? (英文)。
重要
如果叢集已用於生產力用途,請據以規劃測試,因為損毀節點會對應用程式造成影響。
echo c > /proc/sysrq-trigger
下一步
- 請參閱適用於 SAP 的 Azure 虛擬機器規劃和實作。
- 請參閱適用於 SAP 的 Azure 虛擬機器部署。
- 請參閱適用於 SAP 的 Azure 虛擬機器 DBMS 部署。
- 若要了解如何建立高可用性並為 Azure VM 上的 SAP HANA 規劃災害復原,請參閱 Azure 虛擬機器上 SAP Hana 的高可用性。
意見反應
即將登場:在 2024 年,我們將逐步淘汰 GitHub 問題作為內容的意見反應機制,並將它取代為新的意見反應系統。 如需詳細資訊,請參閱:https://aka.ms/ContentUserFeedback。
提交並檢視相關的意見反應