請遵循下列步驟以繼續建置支援搜尋的網站:
- 建立新的索引
- 載入資料
程式使用適用於 .NET 的 Azure SDK 中的 Azure.Search.Documents:
開始之前,請確定您在搜尋服務上有新索引的空間。 免費層限制為三個索引。 基本層限制為 15。
準備用於搜尋的大量匯入腳本
在 Visual Studio Code 中,開啟子目錄 (
Program.cs) 中的azure-search-static-web-app/bulk-insert檔案,用您自己的值取代下列變數,以向 Azure 搜尋服務 SDK 進行驗證。- YOUR-SEARCH-SERVICE-NAME (不是完整 URL)
- YOUR-SEARCH-ADMIN-API-KEY (請參閱尋找 API 金鑰)
using Azure;
using Azure.Search.Documents;
using Azure.Search.Documents.Indexes;
using Azure.Search.Documents.Indexes.Models;
using AzureSearch.BulkInsert;
using ServiceStack;

const string BOOKS_URL = "https://raw.githubusercontent.com/Azure-Samples/azure-search-sample-data/main/good-books/books.csv";
const string SEARCH_ENDPOINT = "https://YOUR-SEARCH-RESOURCE-NAME.search.windows.net";
const string SEARCH_KEY = "YOUR-SEARCH-ADMIN-KEY";
const string SEARCH_INDEX_NAME = "good-books";

Uri searchEndpointUri = new(SEARCH_ENDPOINT);

SearchClient client = new(
    searchEndpointUri,
    SEARCH_INDEX_NAME,
    new AzureKeyCredential(SEARCH_KEY));

SearchIndexClient clientIndex = new(
    searchEndpointUri,
    new AzureKeyCredential(SEARCH_KEY));

await CreateIndexAsync(clientIndex);
await BulkInsertAsync(client);

static async Task CreateIndexAsync(SearchIndexClient clientIndex)
{
    Console.WriteLine("Creating (or updating) search index");
    SearchIndex index = new BookSearchIndex(SEARCH_INDEX_NAME);
    var result = await clientIndex.CreateOrUpdateIndexAsync(index);

    Console.WriteLine(result);
}

static async Task BulkInsertAsync(SearchClient client)
{
    Console.WriteLine("Download data file");
    using HttpClient httpClient = new();

    var csv = await httpClient.GetStringAsync(BOOKS_URL);

    Console.WriteLine("Reading and parsing raw CSV data");
    var books =
        csv.ReplaceFirst("book_id", "id").FromCsv<List<BookModel>>();

    Console.WriteLine("Uploading bulk book data");
    _ = await client.UploadDocumentsAsync(books);

    Console.WriteLine("Finished bulk inserting book data");
}
針對專案目錄的子目錄 (
azure-search-static-web-app/bulk-insert),開啟 Visual Studio 中的整合式終端。執行下列命令以安裝相依性。
dotnet restore
執行大量匯入指令碼以進行搜尋
在相同的子目錄中 (
azure-search-static-web-app/bulk-insert) 執行程序:dotnet run程式碼執行時,主控台會顯示進度。 您應該會看見下列輸出。
 Creating (or updating) search index
 Status: 201, Value: Azure.Search.Documents.Indexes.Models.SearchIndex
 Download data file
 Reading and parsing raw CSV data
 Uploading bulk book data
 Finished bulk inserting book data
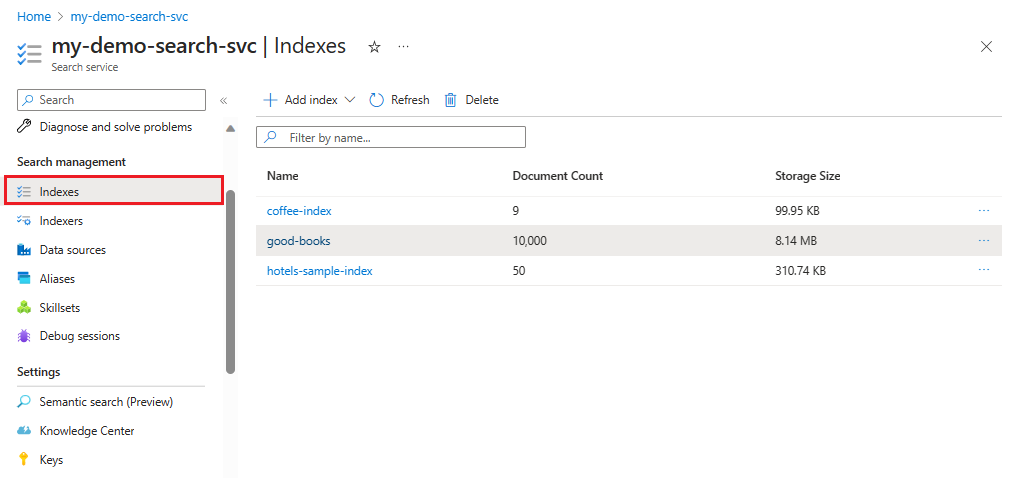
檢閱新的搜尋索引
上傳完成之後,即可使用搜尋索引。 在 Azure 入口網站中檢閱您的新索引。
在 Azure 入口網站上,尋找您的搜尋服務。
在左側選取 [搜尋管理 > 索引],然後選取 [好書索引]。
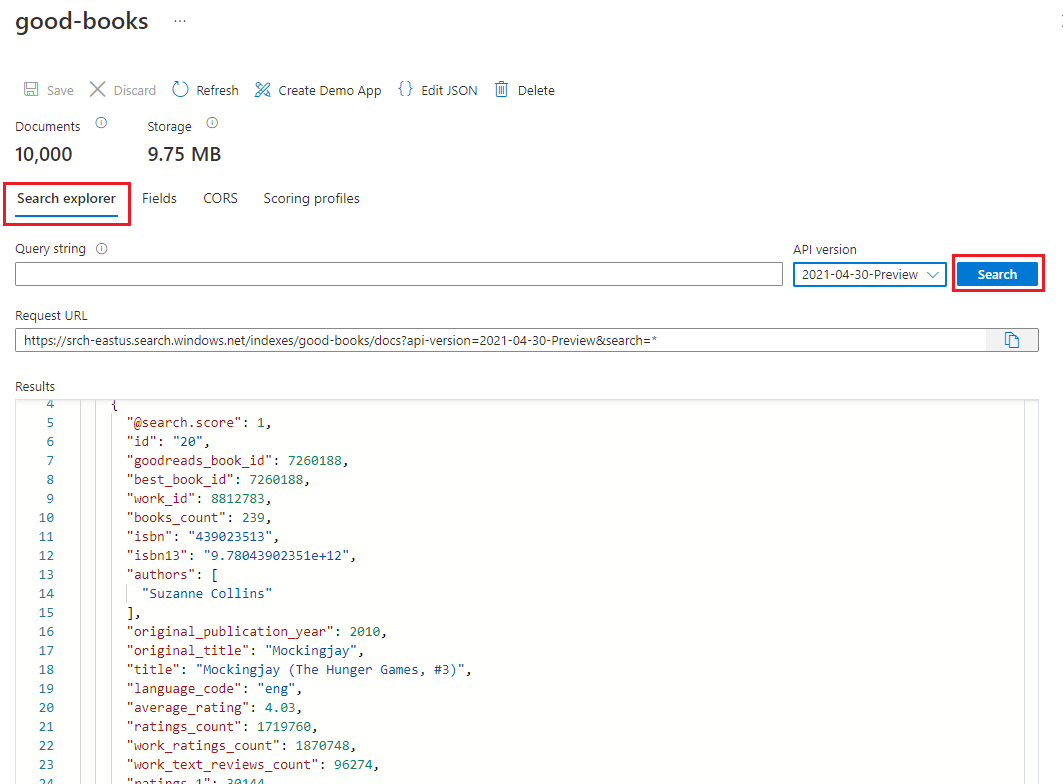
根據預設,索引會在 [搜尋總管] 索引標籤中開啟。選取 [搜尋] 以從索引傳回文件。


復原大量匯入檔案變更
在 bulk-insert 目錄的 Visual Studio Code 整合式終端機中,使用下列 git 命令可復原 Program.cs 檔案的變更。 本教學課程後續不會用到這些檔案,您不應將 API 金鑰或搜尋服務名稱儲存或推送至您的存放庫。
git checkout .