快速入門:在 Azure 入口網站中建立資料表
本快速入門說明如何在 Web 型 Azure 入口網站中建立資料表和實體。 本快速入門也說明如何建立 Azure 儲存體帳戶。
如果您沒有 Azure 訂閱,請在開始之前,先建立 Azure 免費帳戶。
必要條件
若要完成本快速入門,首先在 Azure 入口網站中建立 Azure 儲存體帳戶。 如需建立帳戶的協助,請參閱建立儲存體帳戶。
新增資料表
若要在 Azure 入口網站中建立資料表:
瀏覽至您的儲存體帳戶。
在左側導覽面板中選取 [儲存體瀏覽器]。
在 [儲存體瀏覽器] 樹狀目錄中,選取 [資料表]。
選取 [新增資料表] 按鈕以新增資料表。
在 [新增資料表] 對話框中,提供新資料表的名稱。
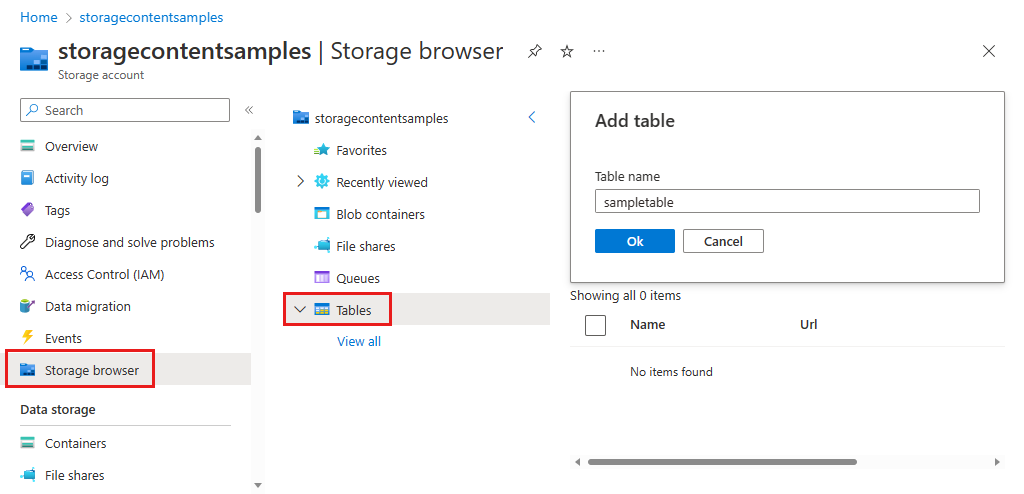
選取 [確定] 以建立新資料表。
將實體加入至資料表
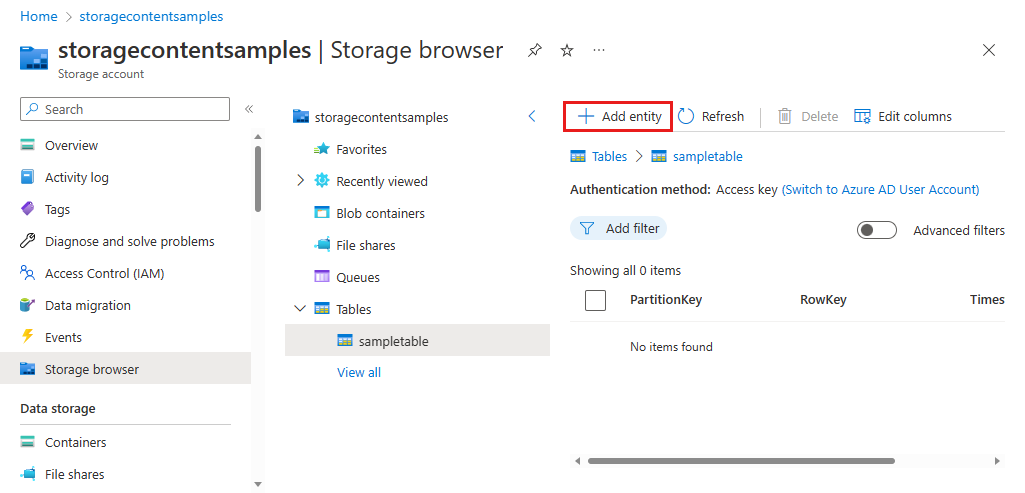
若要從 Azure 入口網站將實體新增至資料表:
在 Azure 入口網站的 [儲存體瀏覽器] 中,選取您先前建立的資料表。
選取 [新增實體] 按鈕以新增實體。
在 [新增實體] 對話框中,提供分割區索引鍵和資料列索引鍵,然後針對您想要寫入實體的資料新增任何其他屬性。
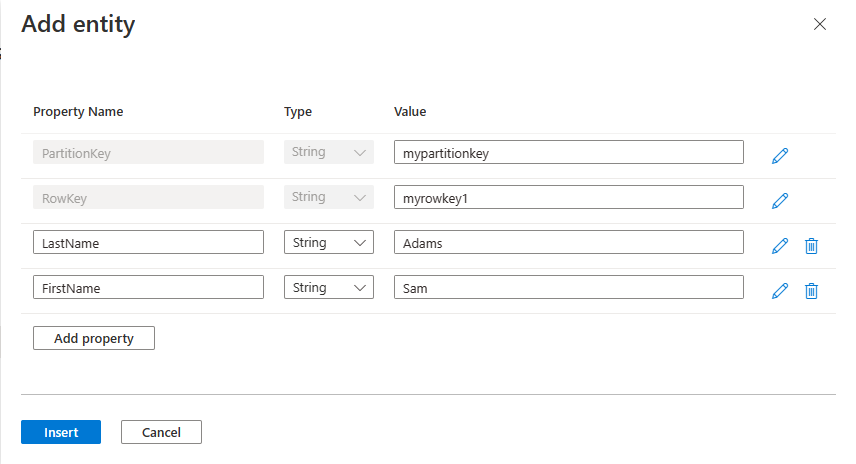
如需使用實體和屬性的詳細資訊,請參閱了解資料表服務資料模型。