設定 P2S OpenVPN 通訊協定連線的 VPN 用戶端:Microsoft Entra 驗證
本文可協助您設定 VPN 用戶端,以使用點對站 VPN 和 Microsoft Entra 驗證來連線。 您必須先設定 Microsoft Entra 租用戶,才能使用 Microsoft Entra ID 進行連線和驗證。 如需詳細資訊,請參閱設定 Microsoft Entra 租用戶。
注意
Microsoft Entra 驗證僅支援 OpenVPN® 通訊協定連線。
使用用戶端設定檔
對於想要透過 VPN 用戶端連線到 VNet 的每部電腦,您必須下載電腦的 Azure VPN Client,並同時設定 VPN 用戶端設定檔。 如果您想要設定多部電腦,您可以在一部電腦上建立用戶端設定檔、匯出該設定檔,然後將其匯入到其他電腦。
下載 Azure VPN Client
使用以下連結之一下載最新版本的 Azure VPN 用戶端安裝檔案:
- 使用 [用戶端安裝檔案] 進行安裝:https://aka.ms/azvpnclientdownload。
- 在用戶端電腦上登入時直接安裝:Microsoft Store。
將 Azure VPN Client 安裝到每部電腦。
確認 Azure VPN Client 具有在背景中執行的權限。 如需步驟,請參閱 Windows 背景應用程式。
若要驗證已安裝的用戶端版本,請開啟 Azure VPN Client。 移至用戶端底部,然後按一下 [... -> ?]說明 。 在右窗格中,您可以看到用戶端版本號碼。
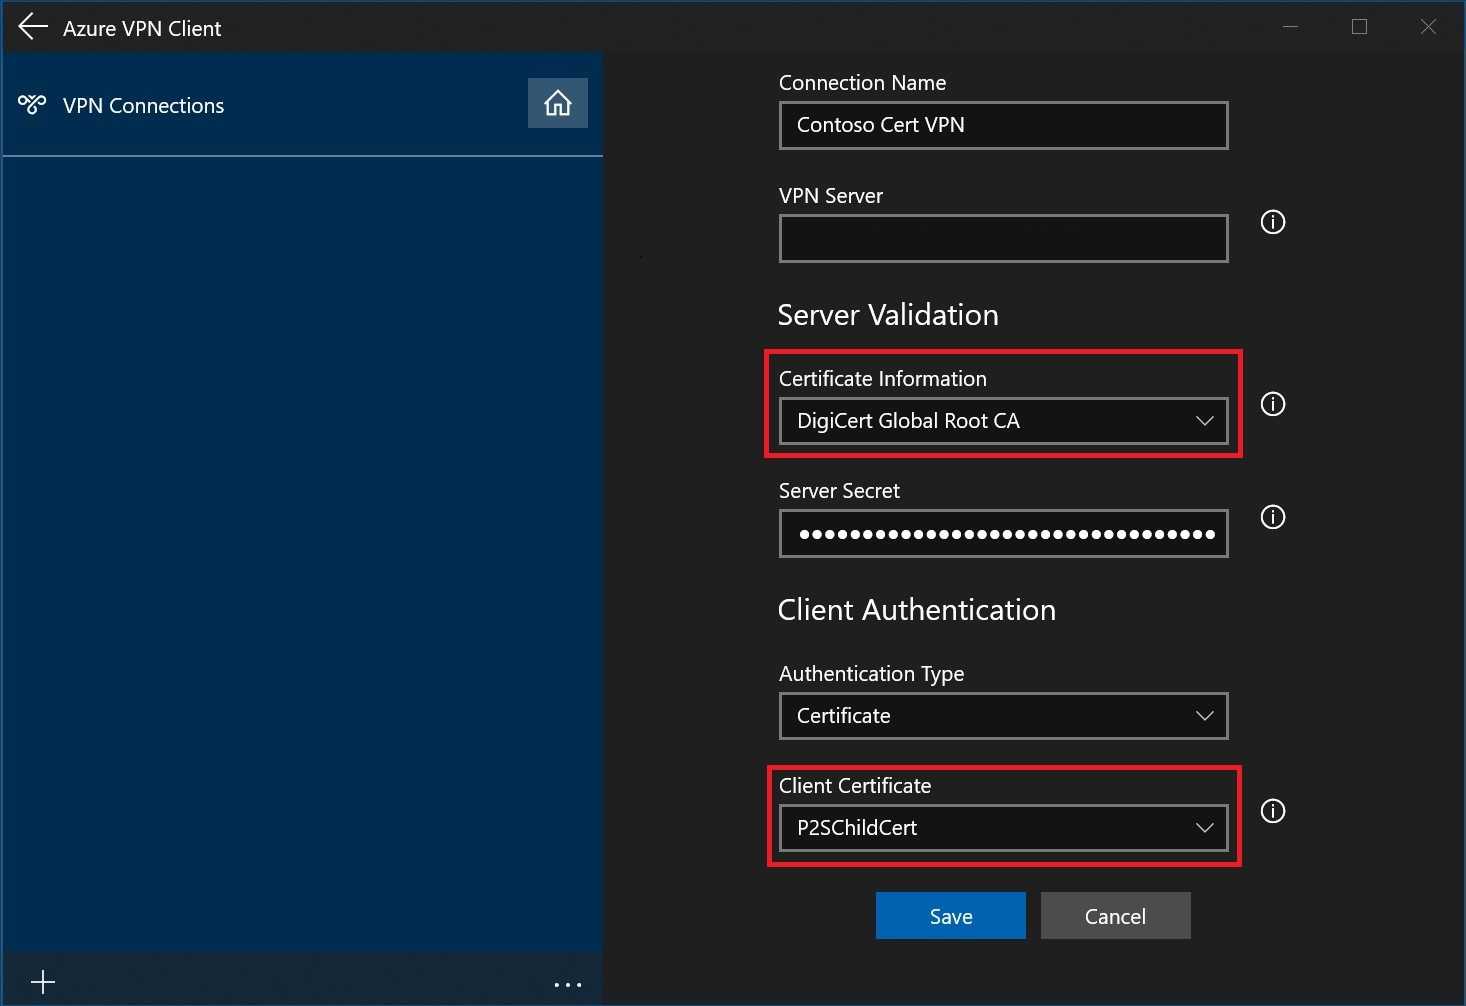
建立憑證型用戶端設定檔
使用憑證型設定檔時,請確定用戶端電腦上已安裝適當的憑證。 您可以使用 Azure VPN 用戶端 2.1963.44.0 版或更高版本以安裝和指定多個憑證。 如需憑證的詳細資訊,請參閱安裝用戶端憑證。
建立 RADIUS 用戶端設定檔
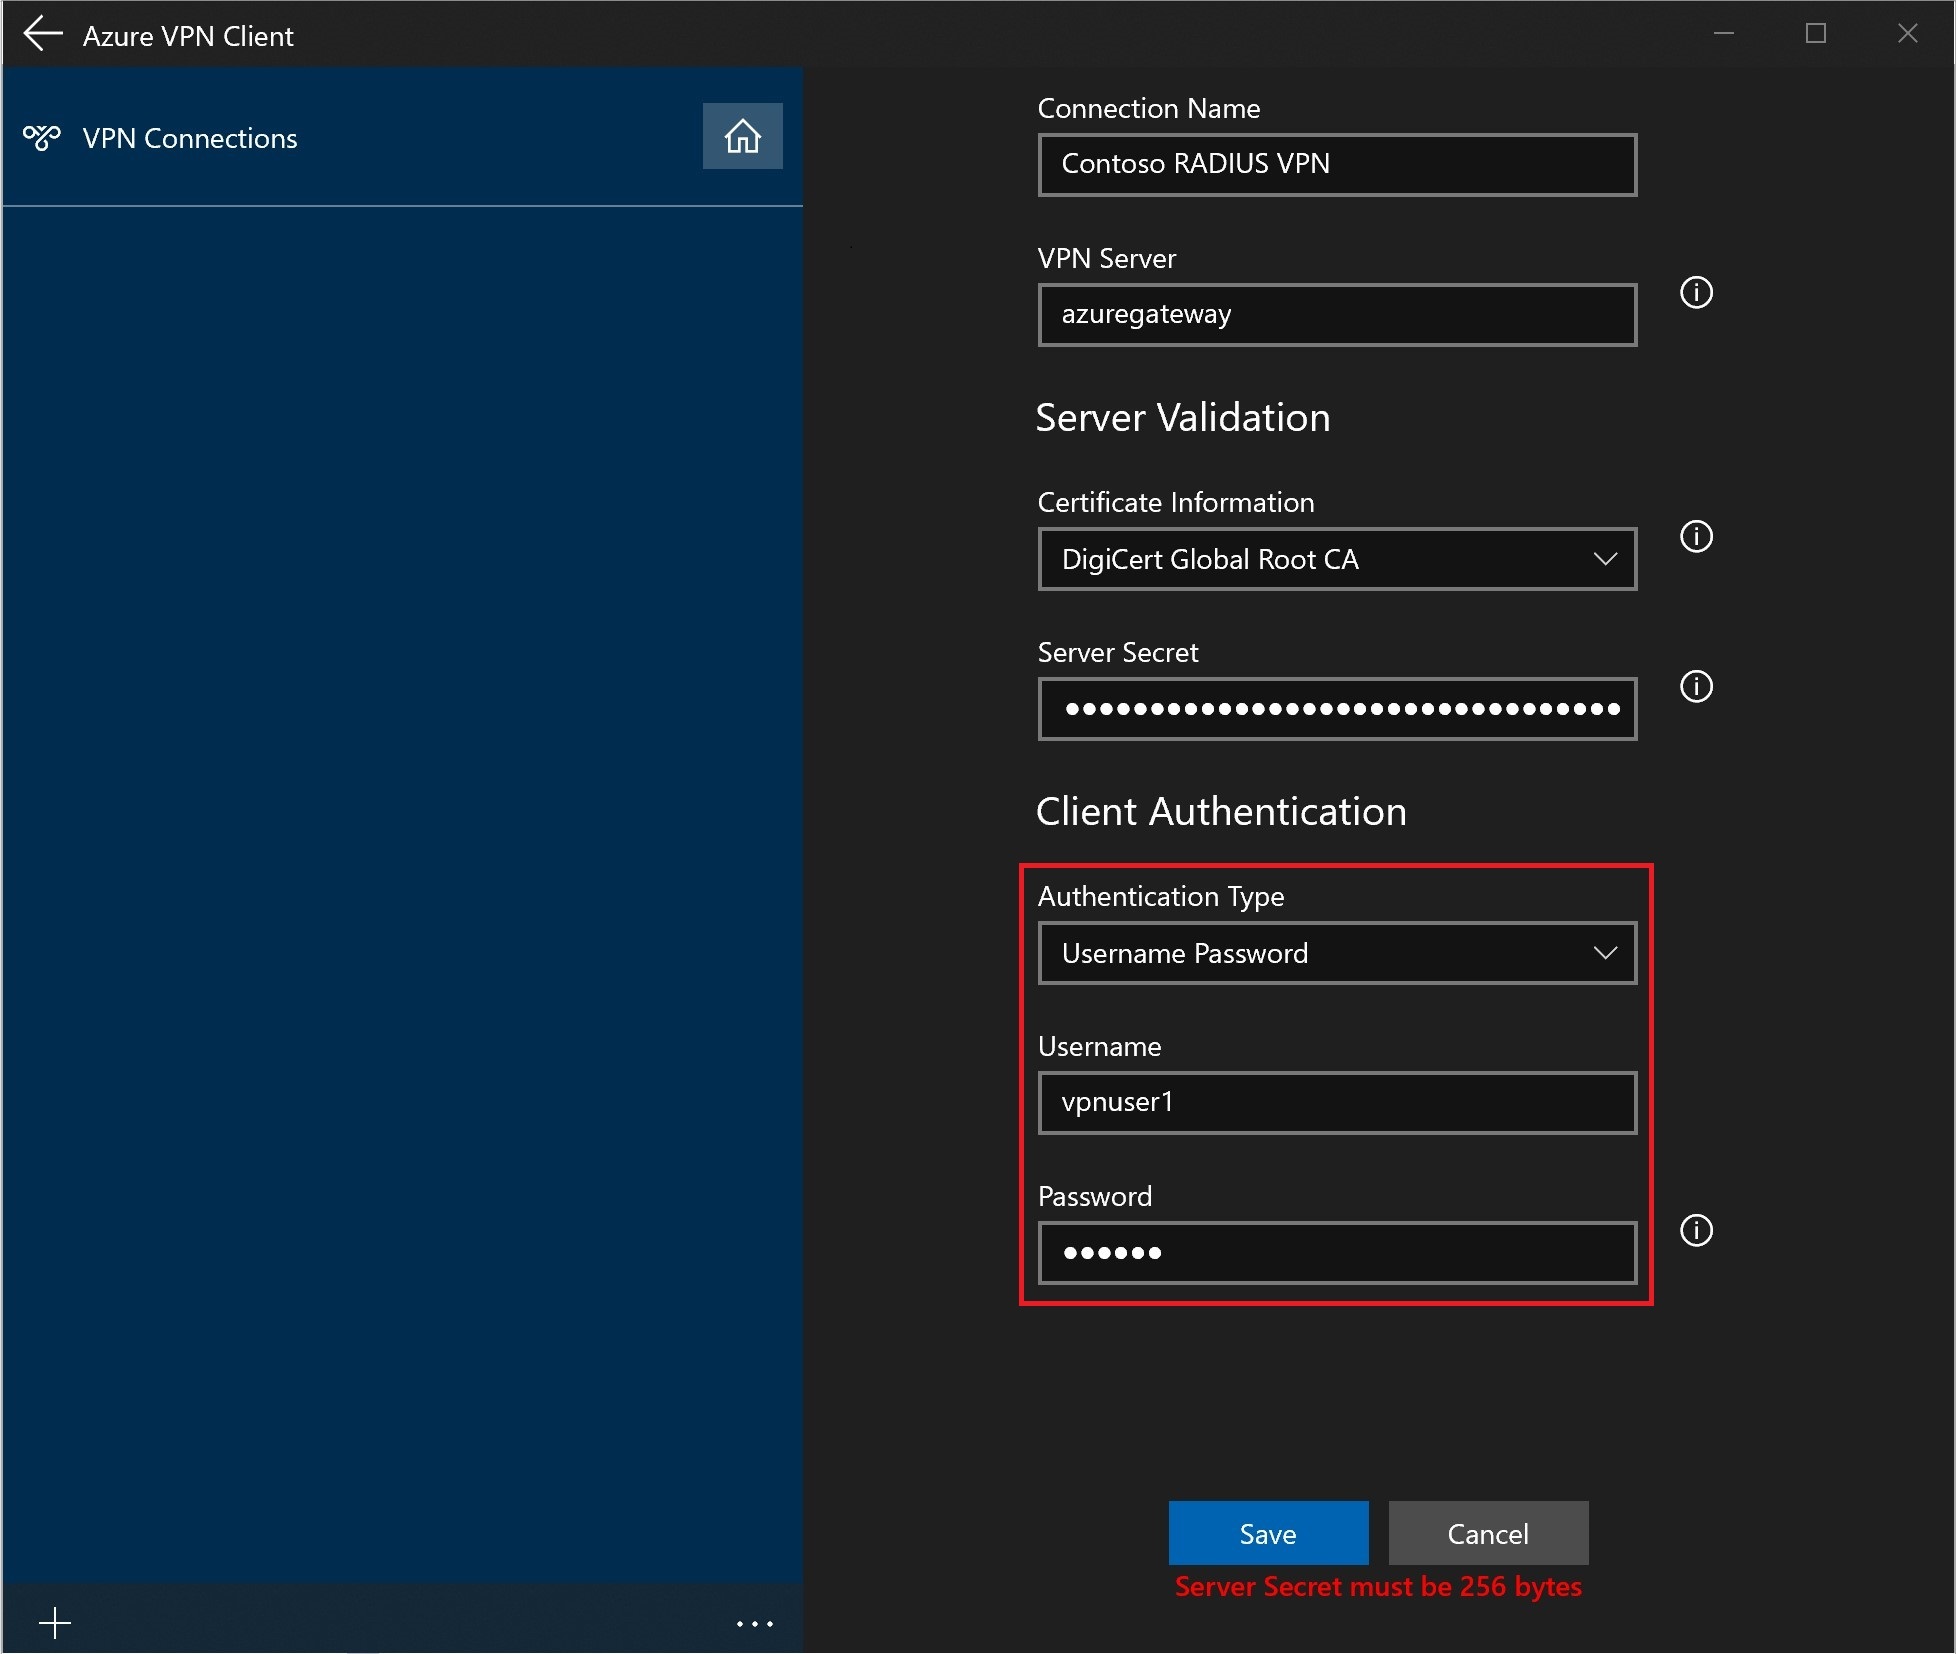
注意
伺服器密碼可以在 P2S VPN 用戶端設定檔中匯出。 若要匯出用戶端設定檔,請參閱使用者 VPN 用戶端設定檔。
匯出和散發用戶端設定檔
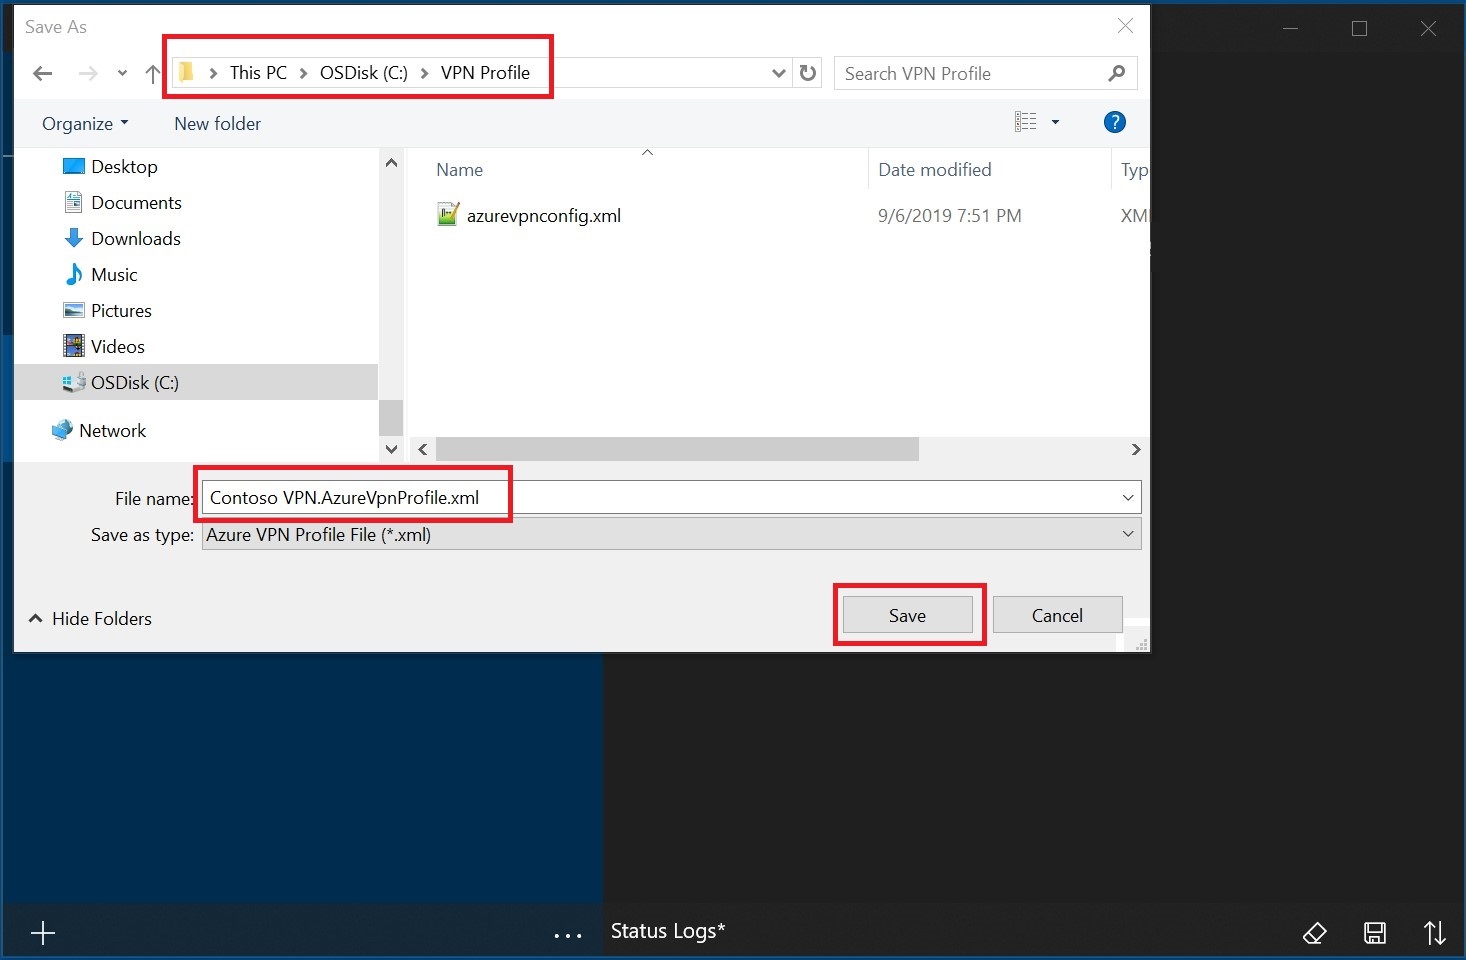
一旦您擁有工作設定檔,且需要將其散發給其他使用者,便可以使用下列步驟來匯出設定檔:
反白顯示您要匯出的 VPN 用戶端設定檔,選取 [...],然後選取 [匯出]。

選取您要儲存此設定檔的位置,讓檔案名保持原狀,然後選取 [儲存] 以儲存 xml 檔案。
匯入用戶端設定檔
在頁面上,選取 [匯入]。
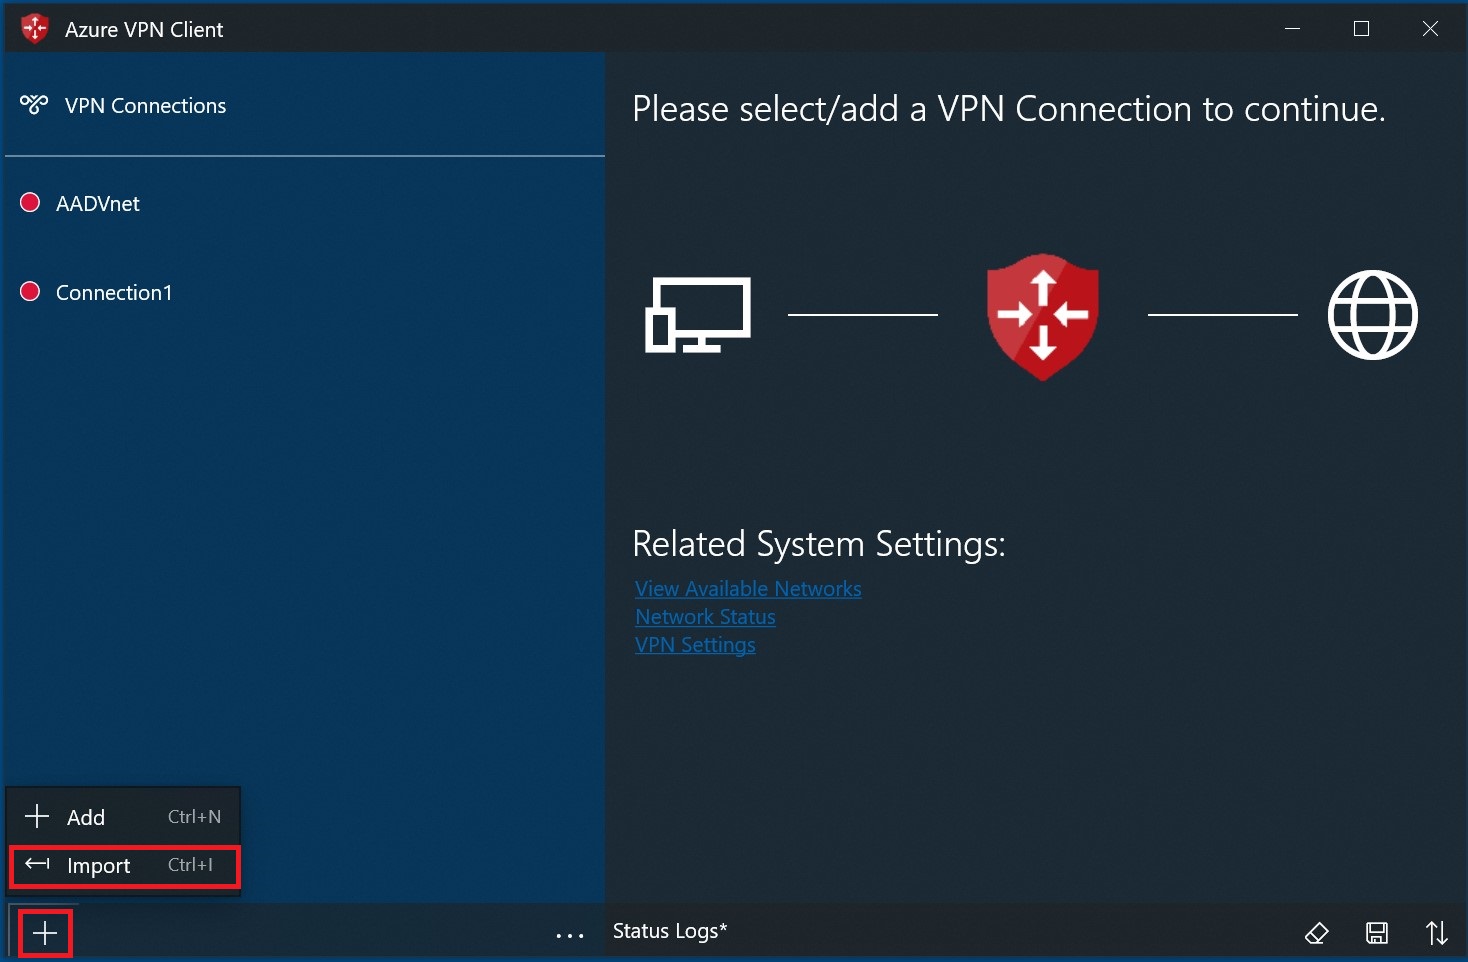
瀏覽至設定檔 xml 檔案,並加以選取。 選取檔案後,請選取 [開啟]。
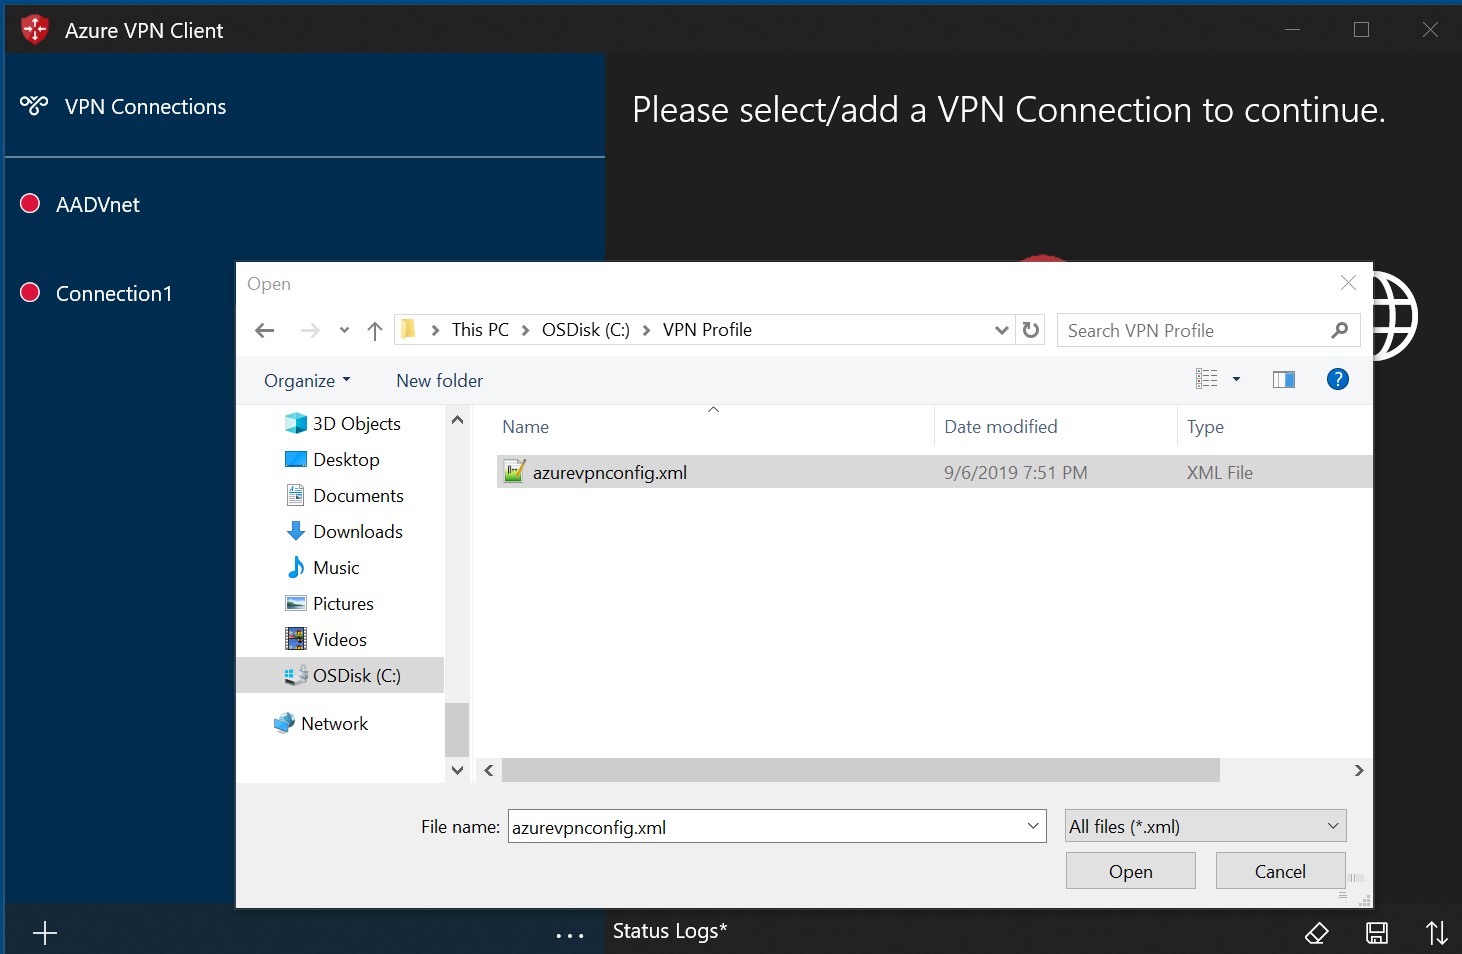
指定設定檔的名稱,然後選取 [儲存]。

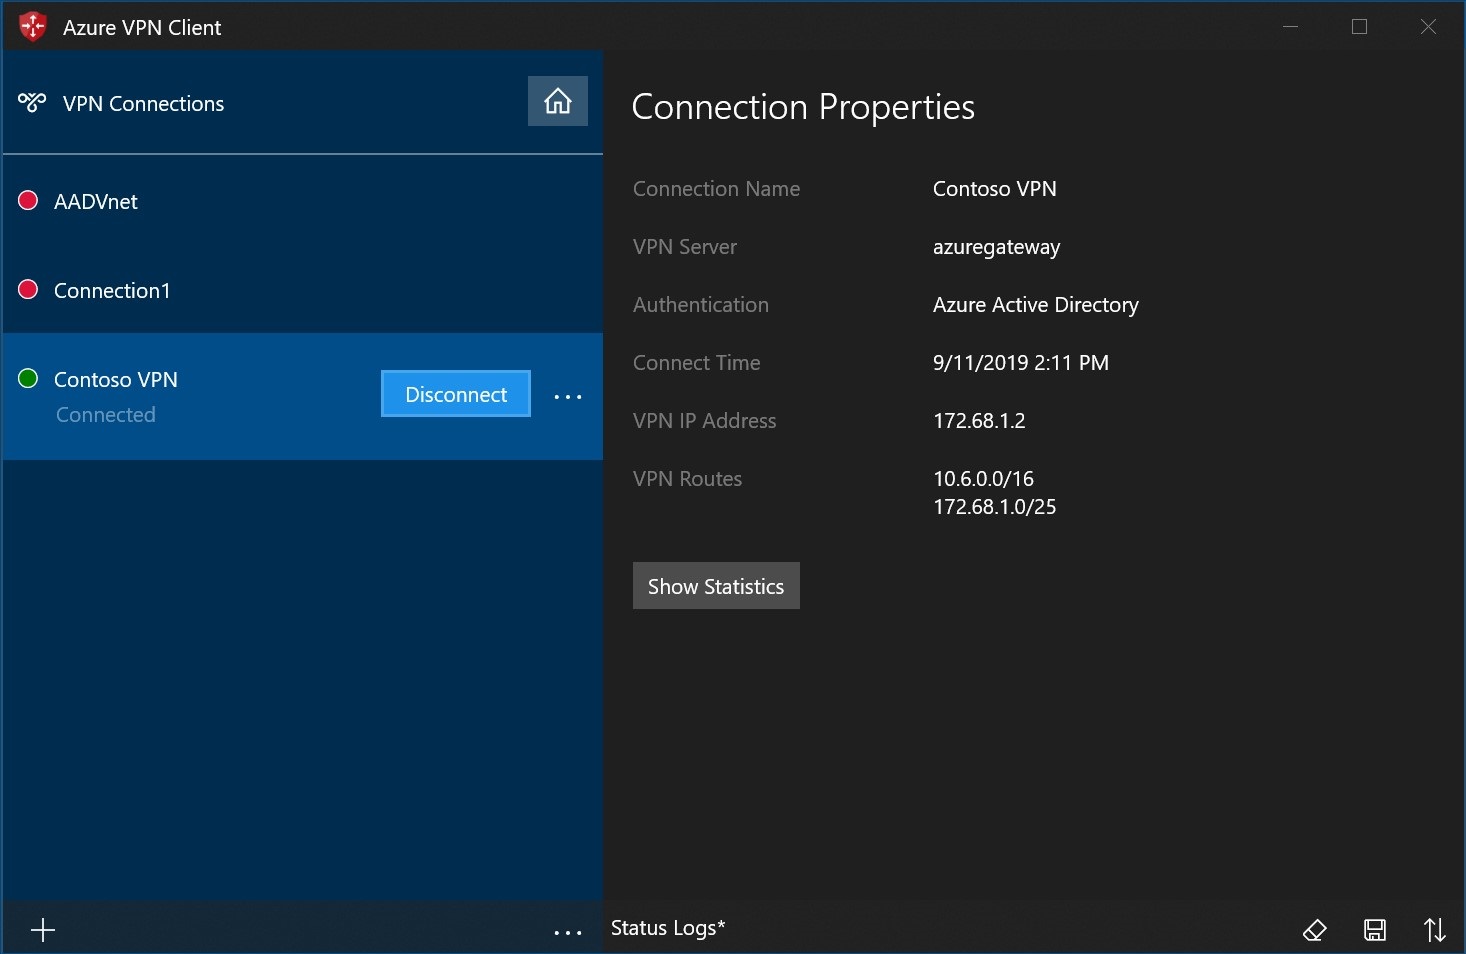
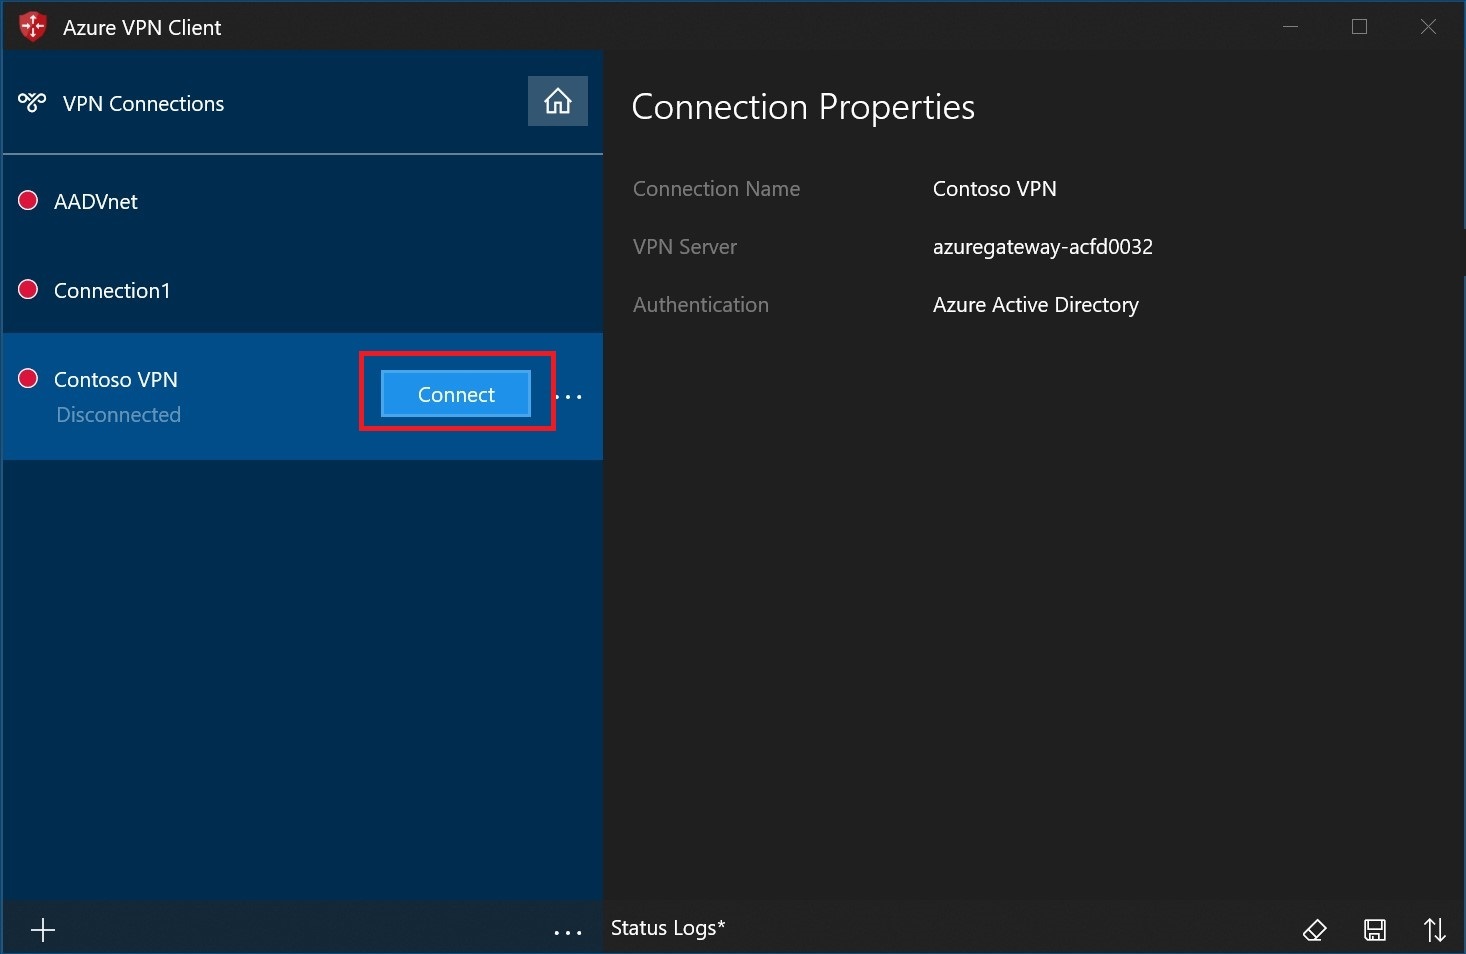
選取 [連線] 以連線至 VPN。
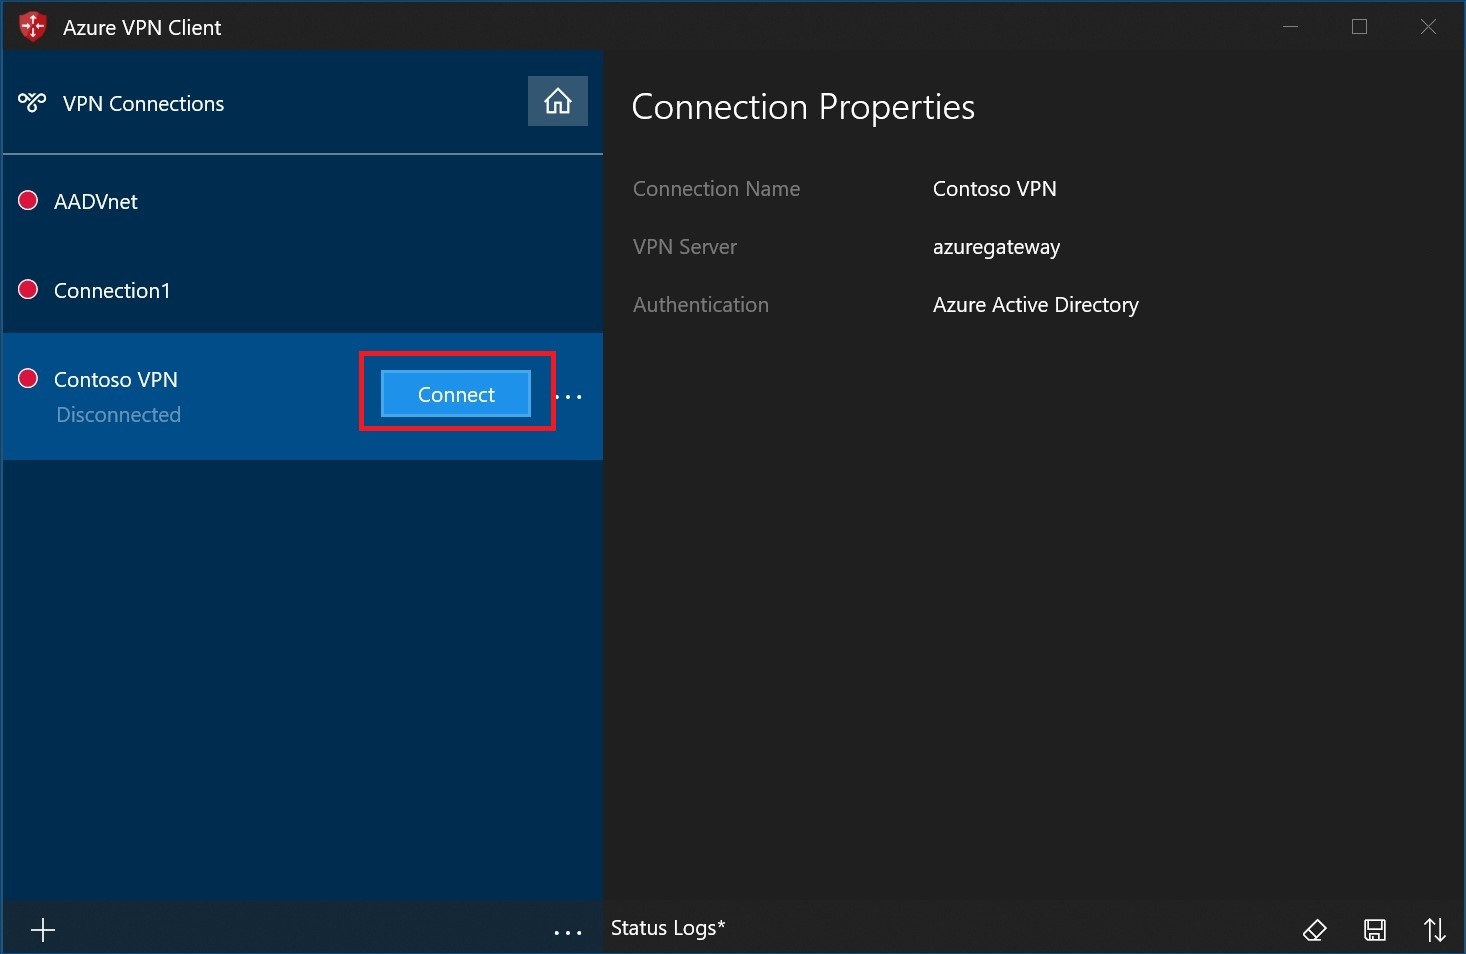
連線之後,圖示將會變成綠色,並顯示為 [已連線]。
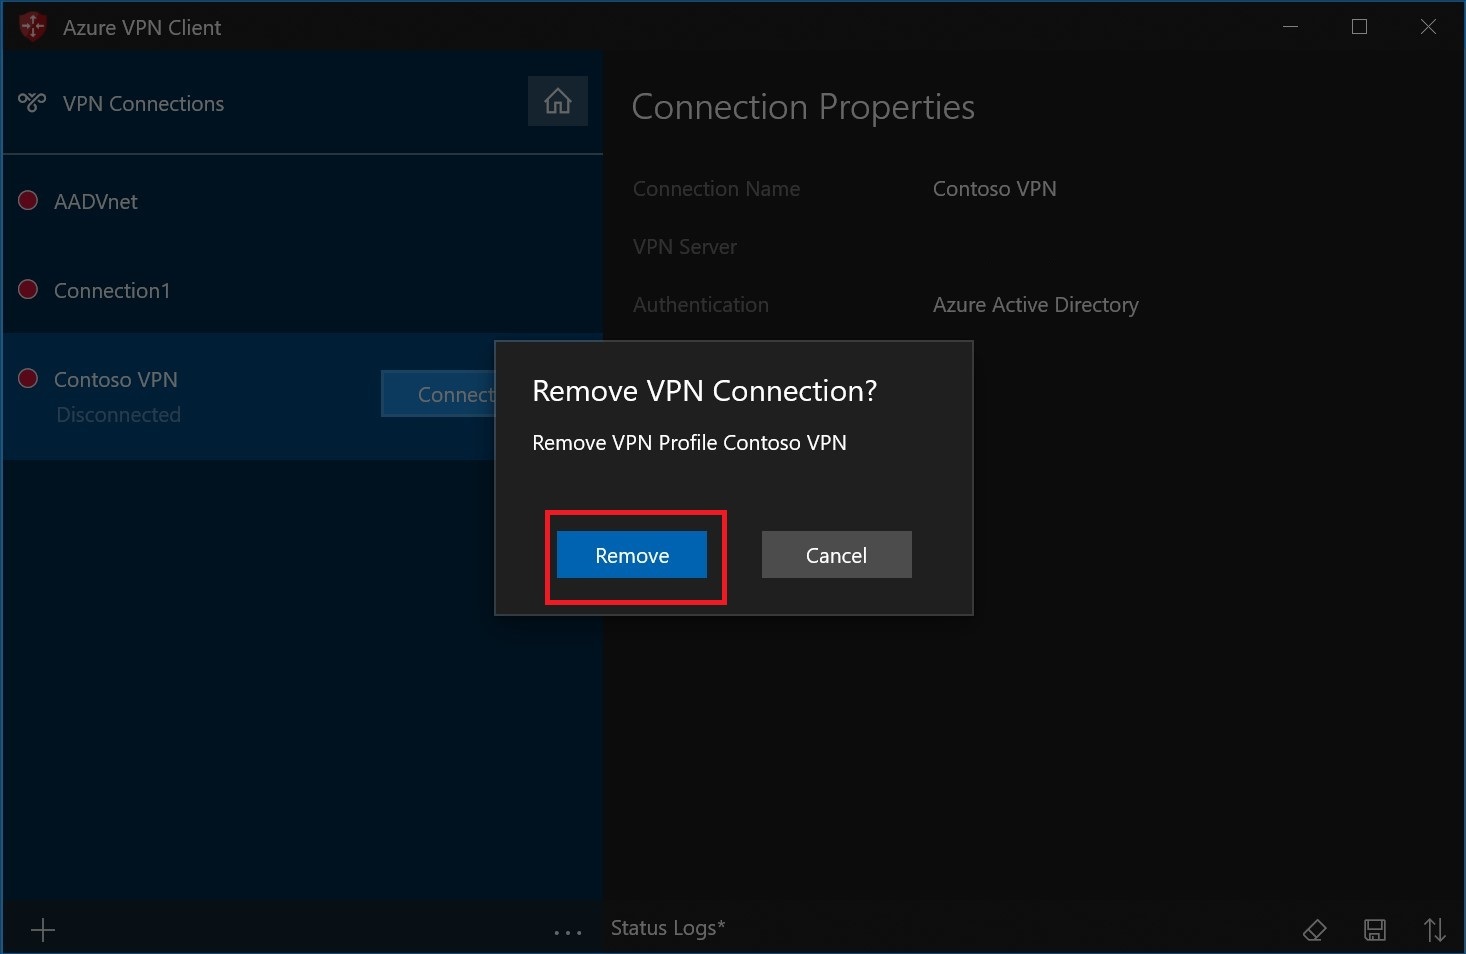
刪除用戶端設定檔
選取要刪除的用戶端設定檔旁的省略符號。 然後,選取 [移除]。
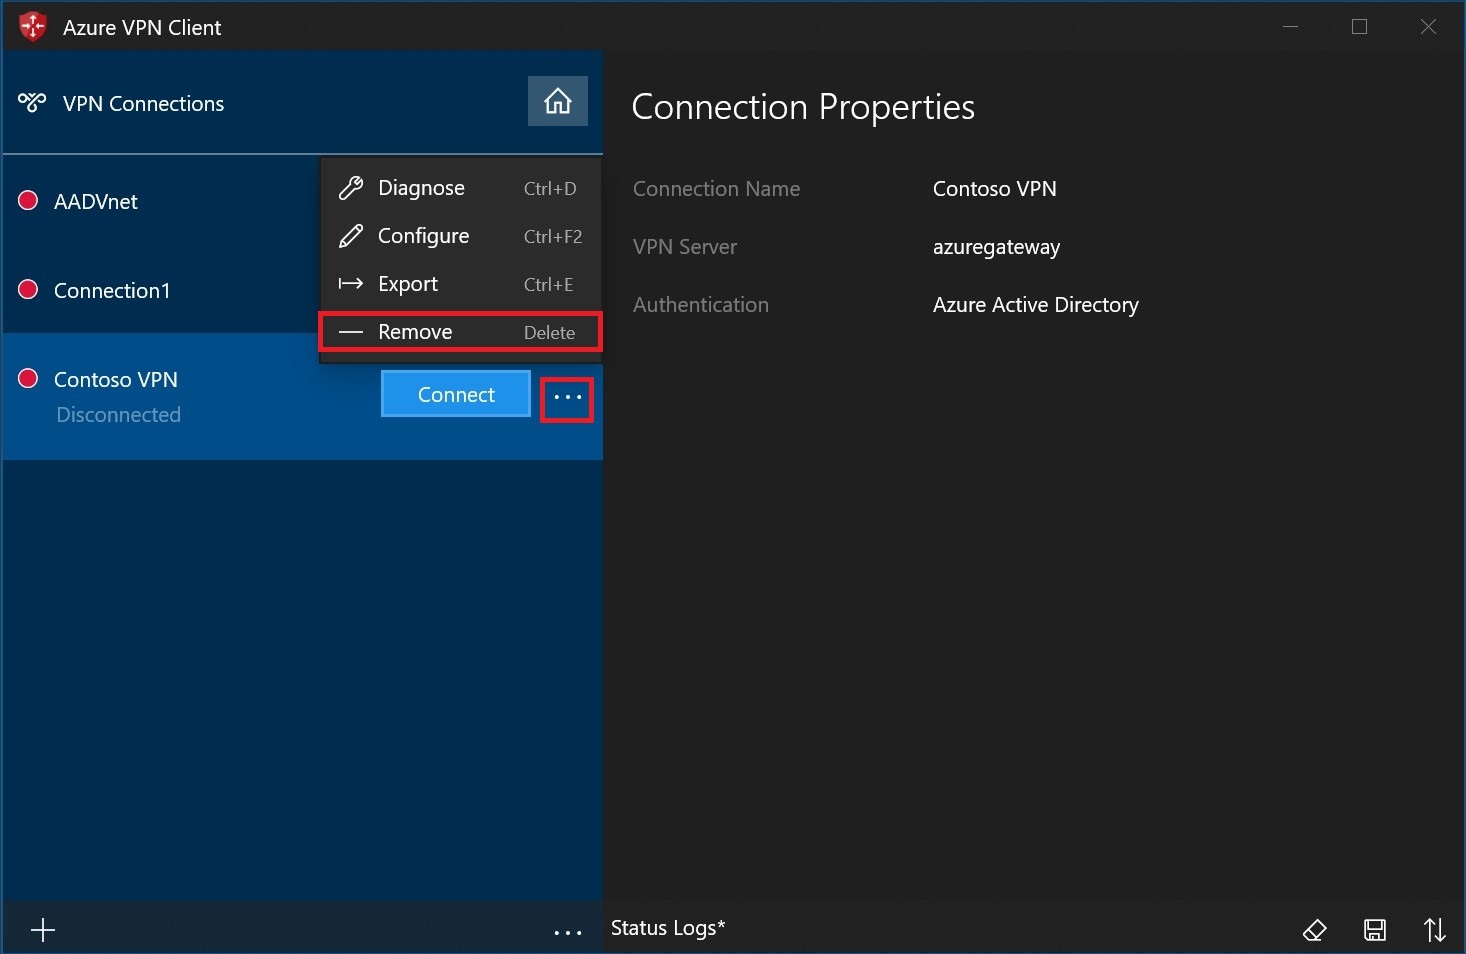
選取 [移除] 以刪除。
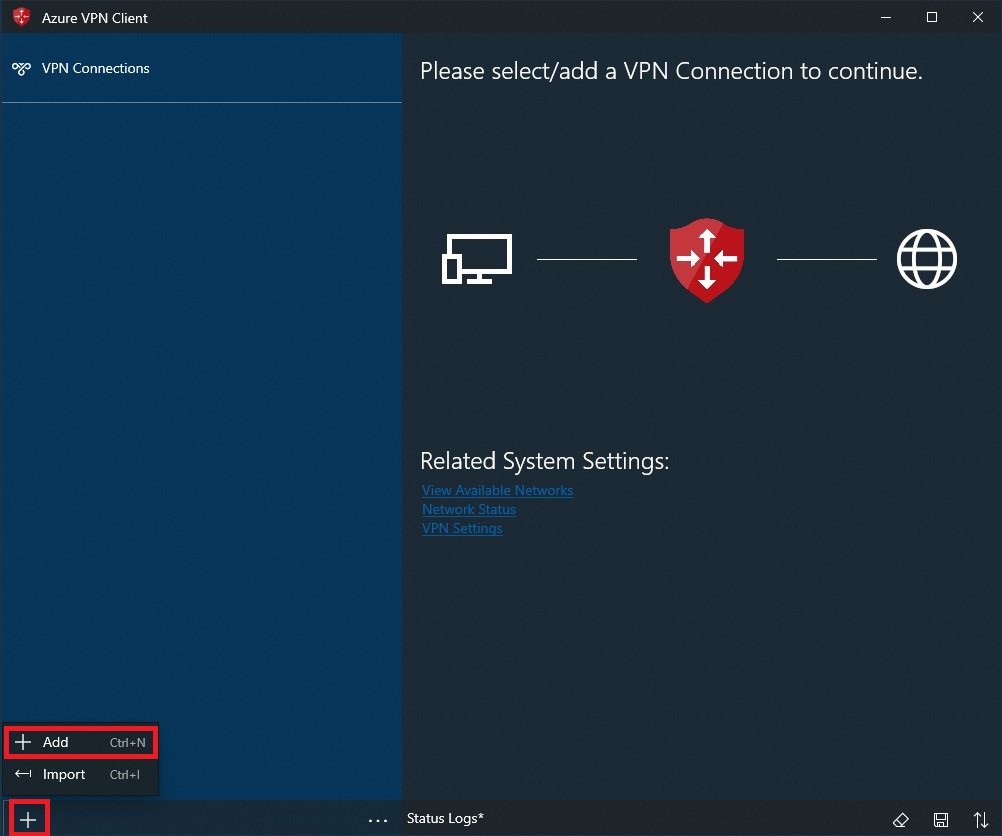
建立連接
在頁面上,選取 +,然後選取 [+ 新增]。
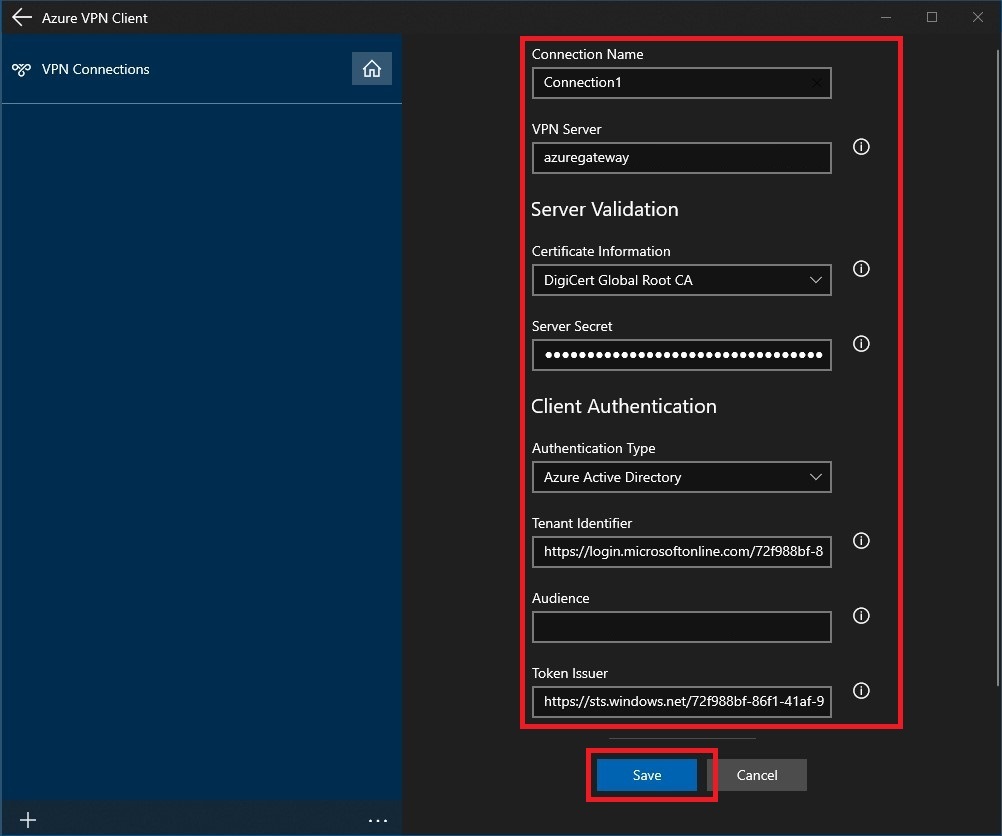
填寫連線資訊。 如果您不確定這些值,請連絡您的系統管理員。 填寫值之後,選取 [儲存]。
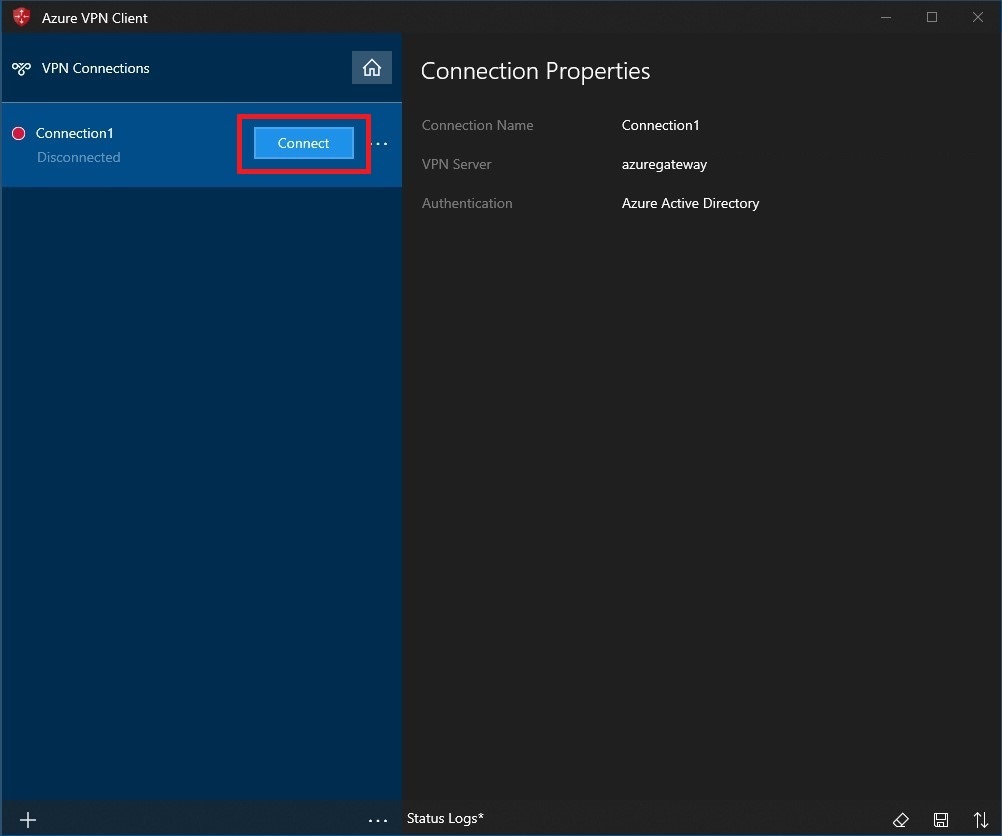
選取 [連線] 以連線至 VPN。
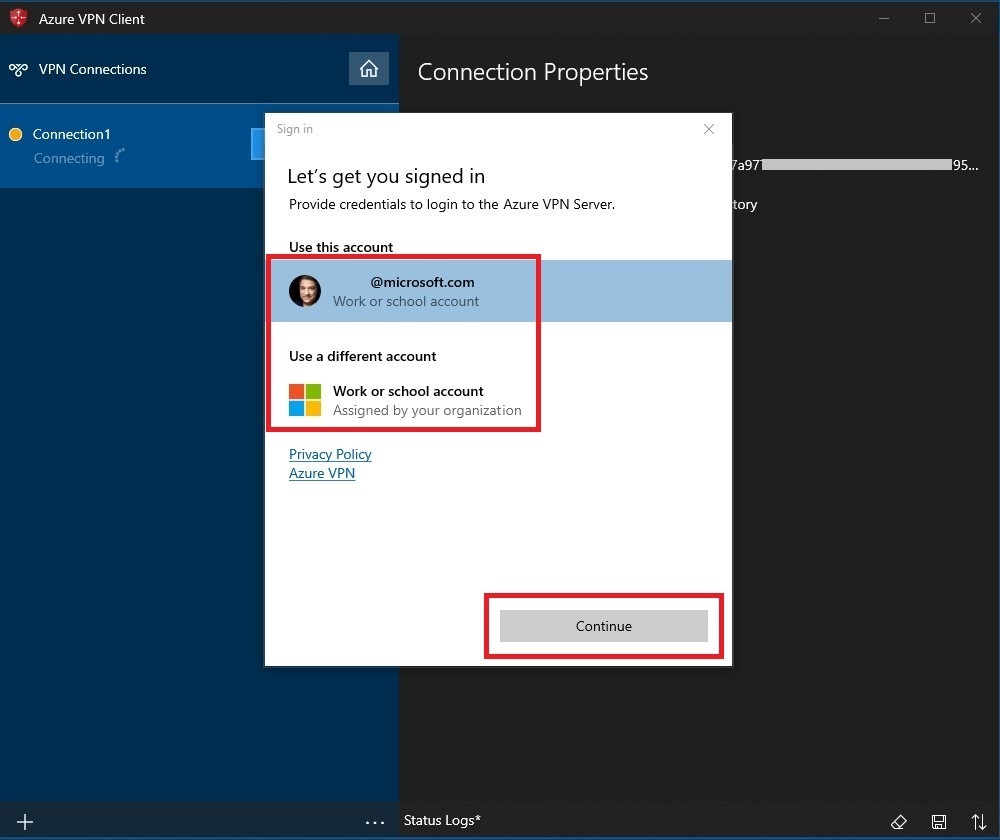
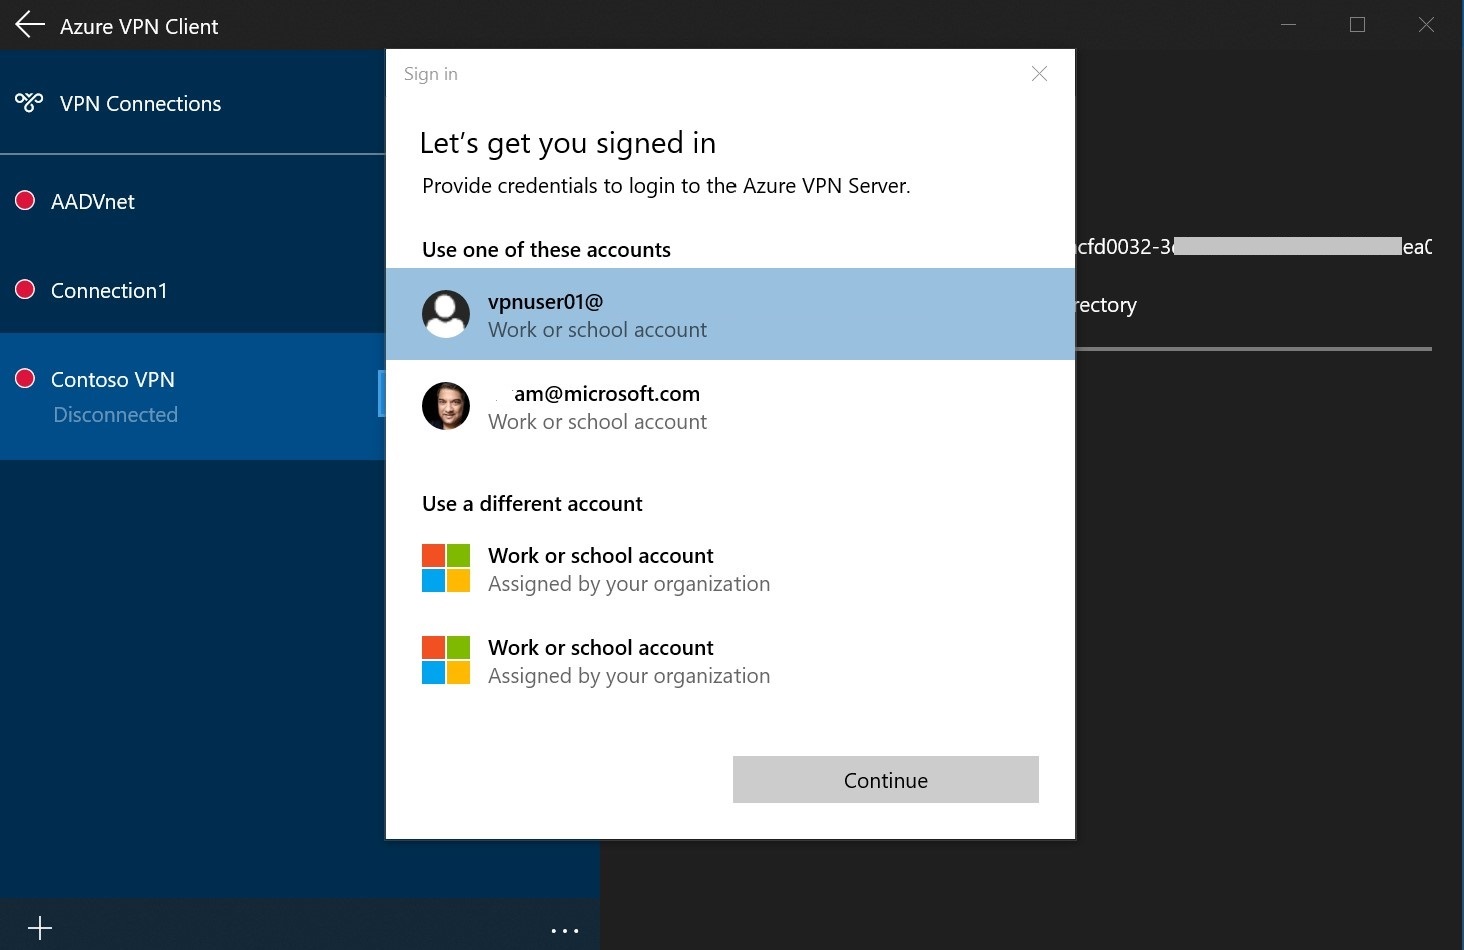
選取適當的認證,然後選取 [繼續]。
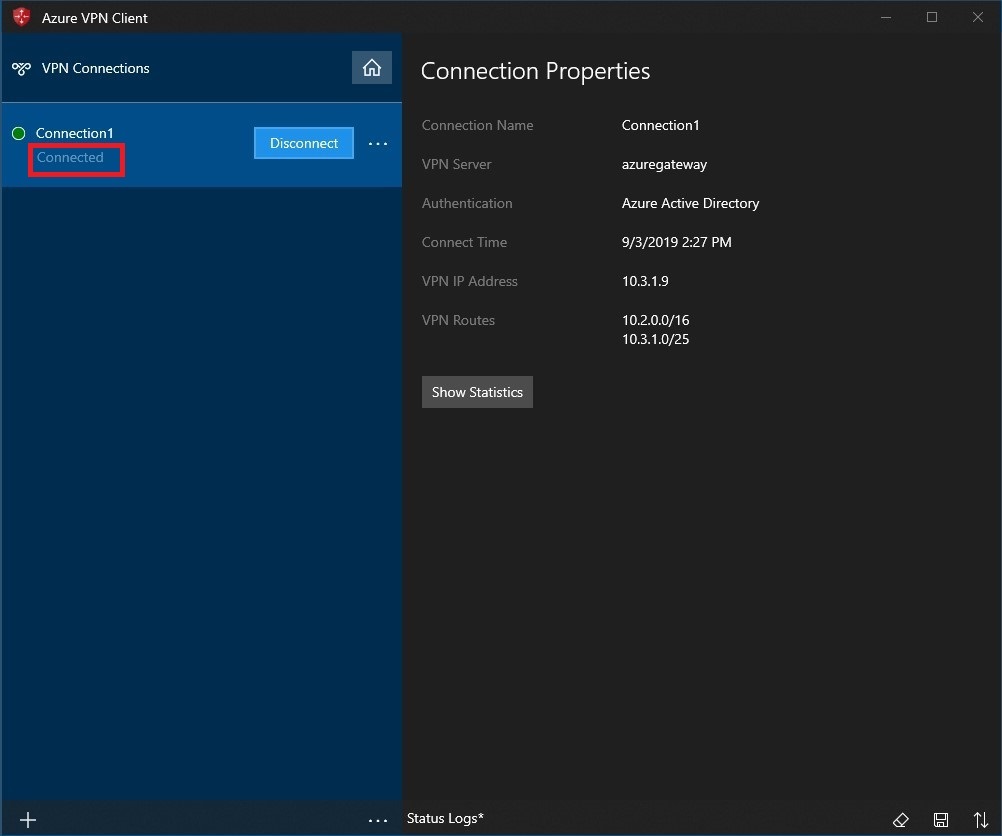
成功連線之後,圖示將會變成綠色,並顯示為 [已連線]。
自動連線
這些步驟可協助您設定連線以自動與 Always-on 連線。
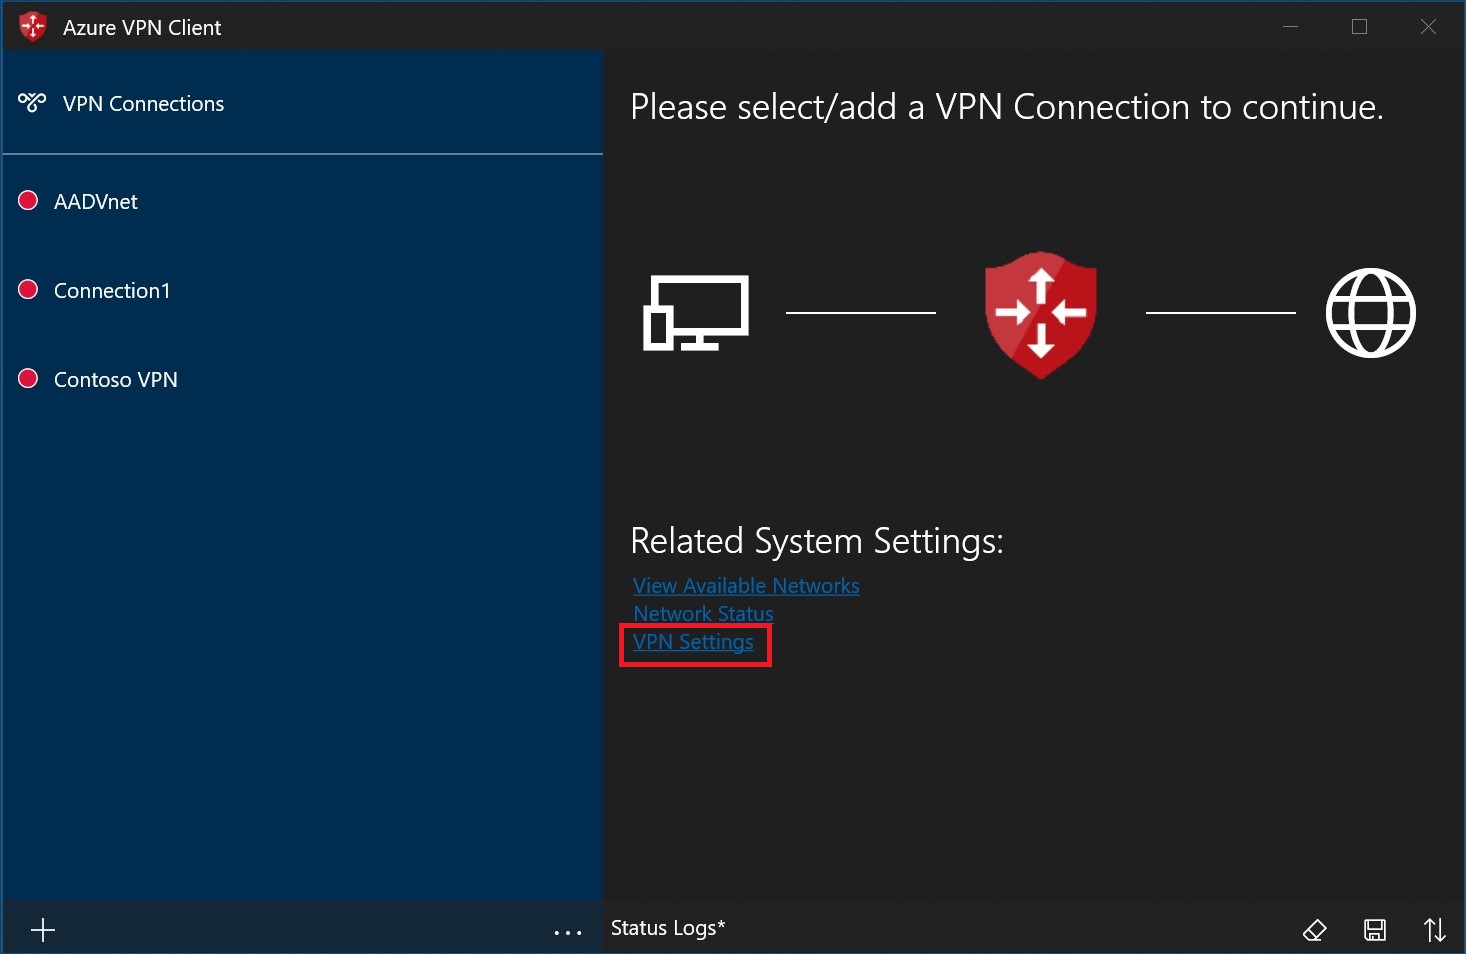
在 VPN 用戶端的首頁上,選取 [VPN 設定]。
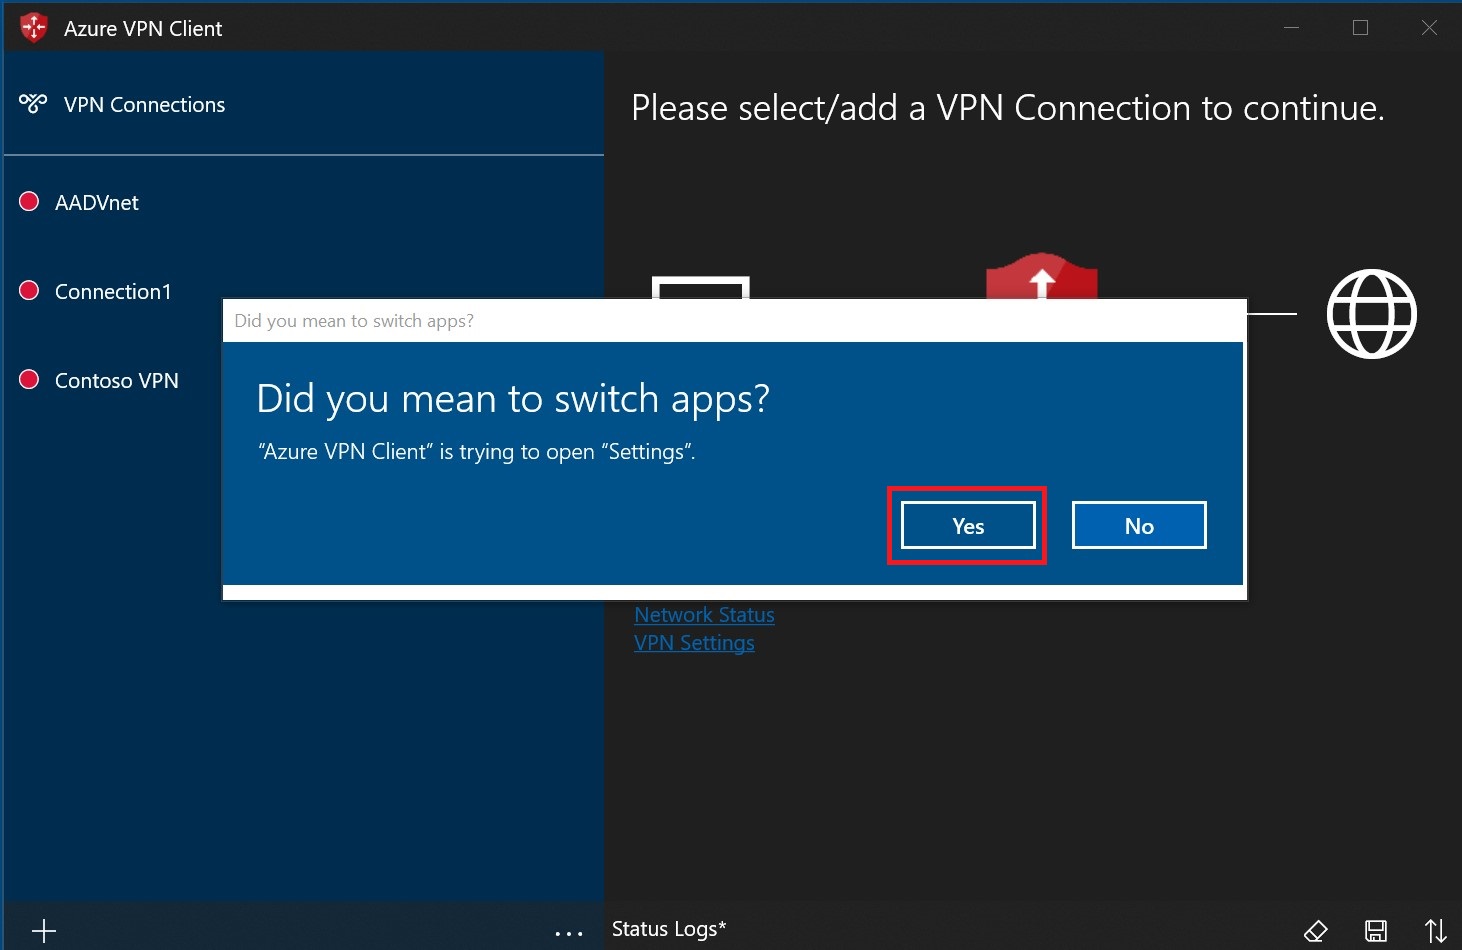
在切換應用程式對話方塊上選取 [是]。
請確定您想要設定的連線尚未連線,然後反白顯示設定檔,然後核取 [自動連線] 核取方塊。
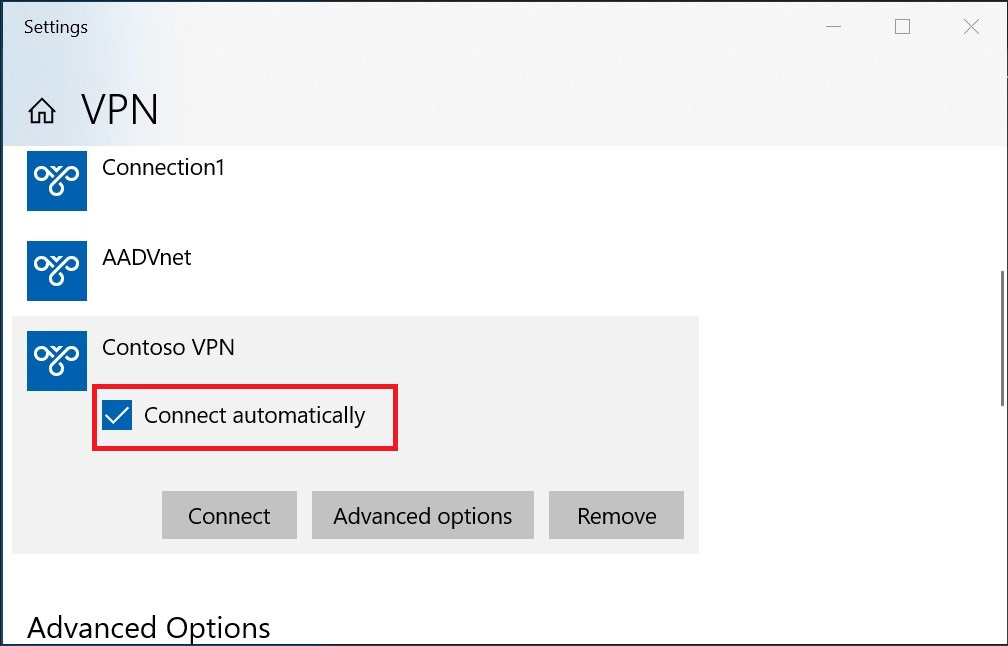
選取 [連線] 以起始 VPN 連線。
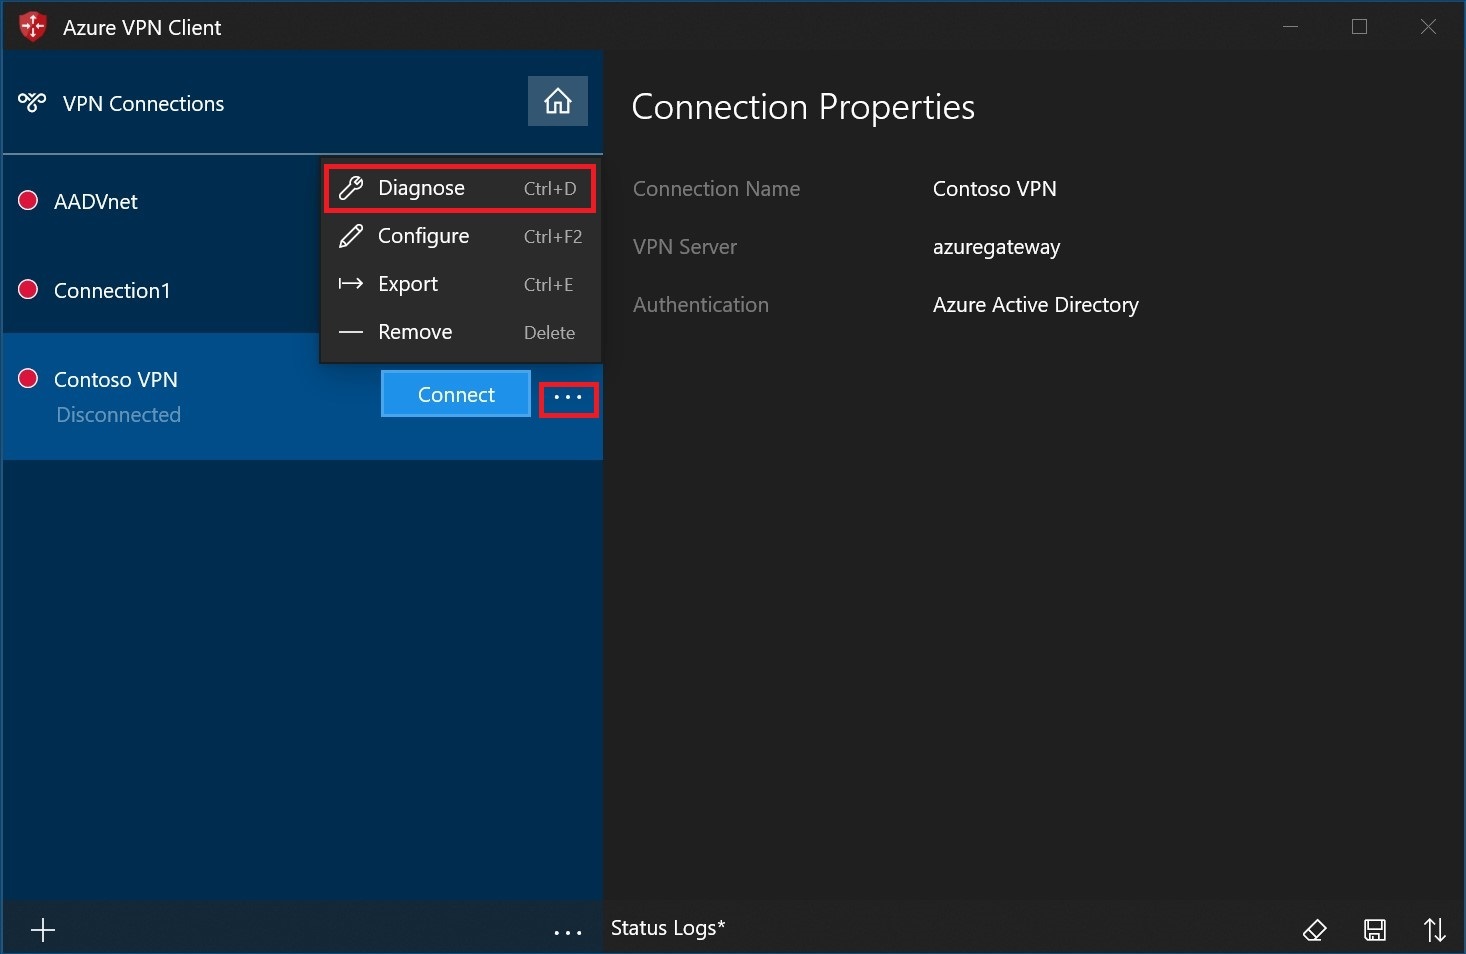
診斷連線問題
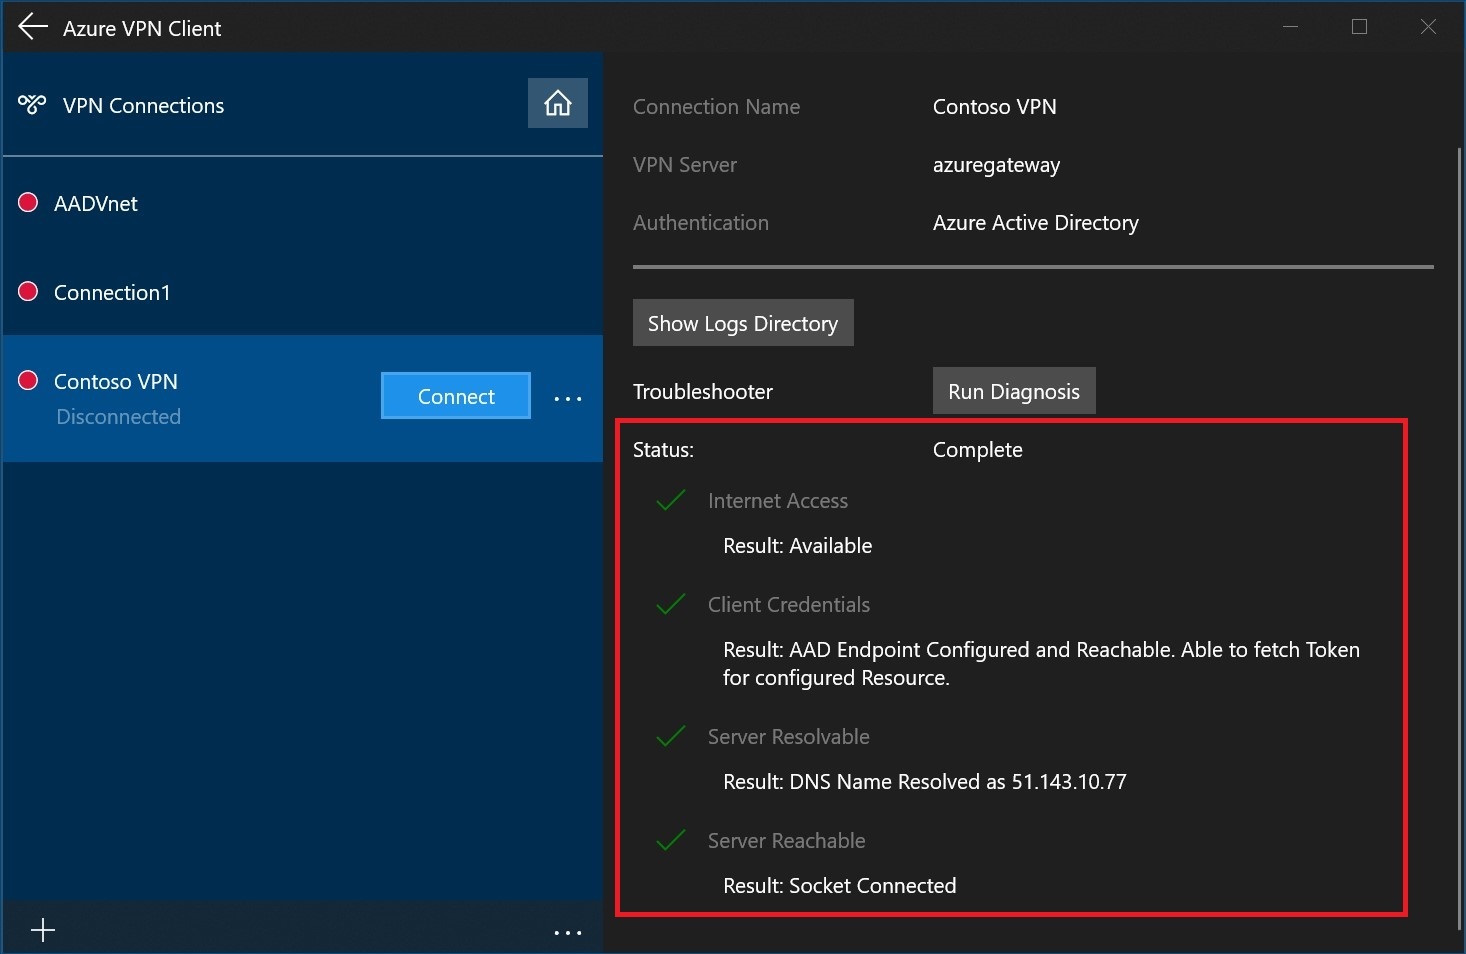
若要診斷連線問題,您可以使用診斷工具。 選取要診斷的 VPN 連線旁的 [...],以顯示功能表。 然後,選取 [診斷]。
在 [連線屬性] 頁面上,選取 [執行診斷]。
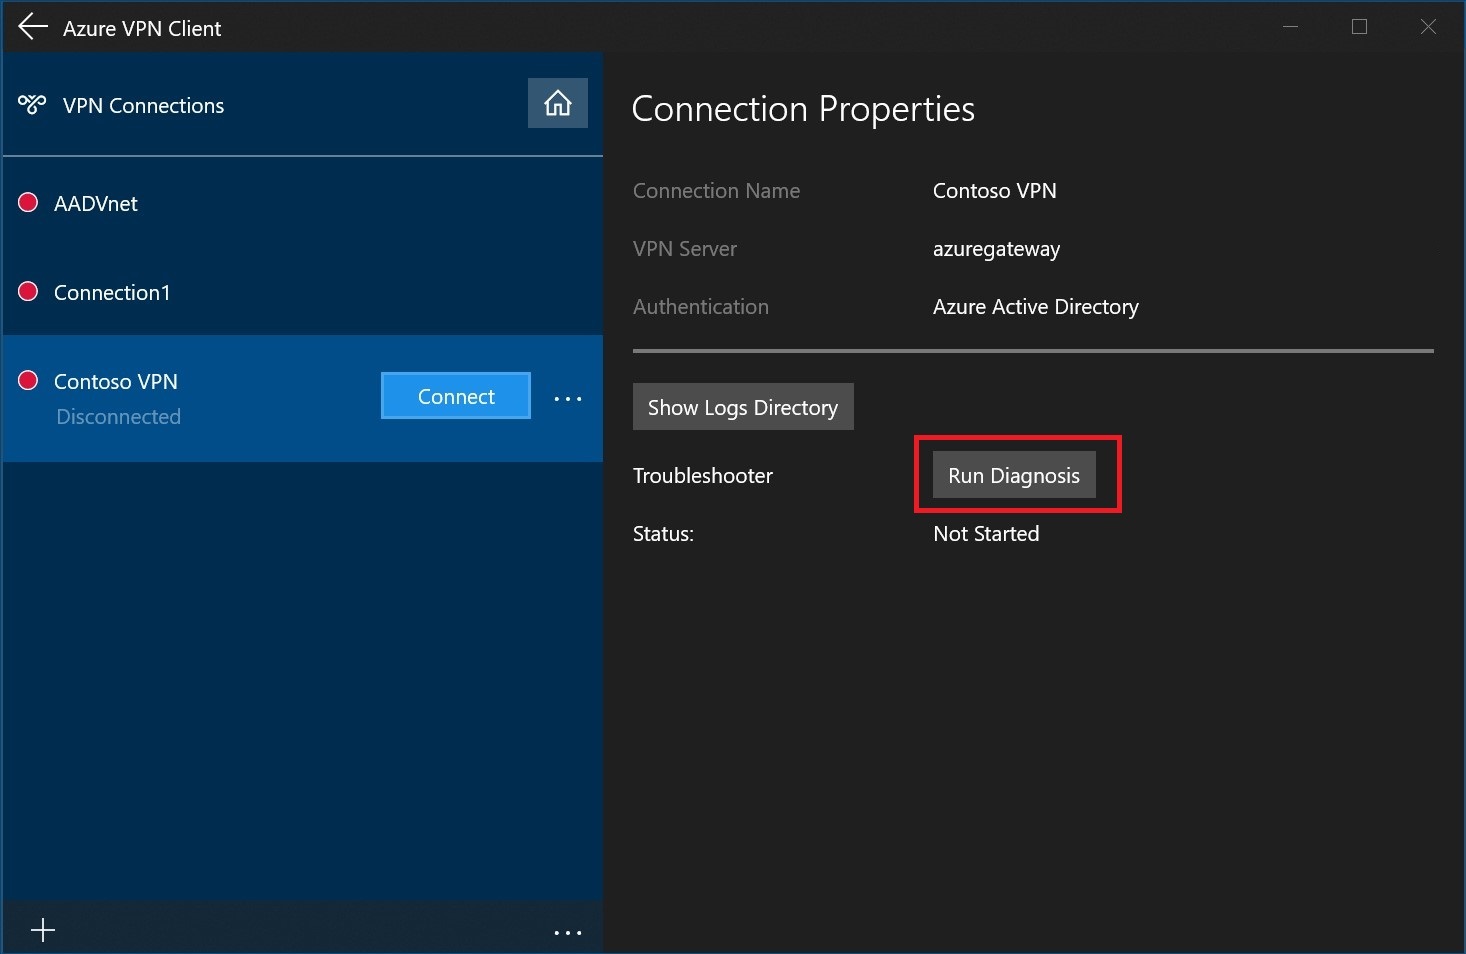
使用您的認證登入。
檢視診斷結果。
選擇性用戶端設定
您可以設定 Azure VPN Client 的選擇性設定,例如強制通道、排除路由、DNS 和憑證驗證設定。 如需步驟,請參閱設定 Azure VPN Client 選用設定。
下一步
如需詳細資訊,請參閱為使用 Microsoft Entra 驗證的 P2S OpenVPN 連線建立 Microsoft Entra 租用戶。