教學課程:從 React 單頁應用程式呼叫 Microsoft Graph API
在能夠與單頁應用程式 (SPA) 互動之前,我們需要起始對 Microsoft Graph 的 API 呼叫,並為應用程式建立使用者介面 (UI)。 新增之後,我們可以登入應用程式,並從 Microsoft Graph API 取得設定檔資料資訊。
在本教學課程中:
- 建立 Microsoft Graph 的 API 呼叫
- 建立應用程式的 UI
- 在應用程式中匯入和使用元件
- 建立可轉譯使用者設定檔資訊的元件
- 從應用程式呼叫 API
必要條件
- 完成教學課程:建立用於在 React 單頁應用程式中登入和登出的元件中的先決條件和步驟。
建立 Microsoft Graph 的 API 呼叫
若要允許 SPA 要求存取 Microsoft Graph,必須新增 graphConfig 物件的參考。 這包含 authConfig.js 檔案中定義的 Graph REST API 端點。
在 [src] 資料夾中,開啟 graph.js,並將檔案的內容取代為下列程式碼片段,以要求存取 Microsoft Graph。
import { graphConfig } from "./authConfig";

/**
 * Attaches a given access token to a MS Graph API call. Returns information about the user
 * @param accessToken
 */
export async function callMsGraph(accessToken) {
    const headers = new Headers();
    const bearer = `Bearer ${accessToken}`;

    headers.append("Authorization", bearer);

    const options = {
        method: "GET",
        headers: headers
    };

    return fetch(graphConfig.graphMeEndpoint, options)
        .then(response => response.json())
        .catch(error => console.log(error));
}
更新匯入以在應用程式中使用元件
下列程式碼片段會將先前建立的 UI 元件匯入應用程式。 它也會從 @azure/msal-react 套件匯入必要的元件。 這些元件將用來轉譯使用者介面並呼叫 API。
在 [src] 資料夾中,開啟 App.jsx,並以下列程式碼片段取代檔案的內容以要求存取權。
  import React, { useState } from 'react';

  import { PageLayout } from './components/PageLayout';
  import { loginRequest } from './authConfig';
  import { callMsGraph } from './graph';
  import { ProfileData } from './components/ProfileData';

  import { AuthenticatedTemplate, UnauthenticatedTemplate, useMsal } from '@azure/msal-react';

  import './App.css';

  import Button from 'react-bootstrap/Button';
新增 ProfileContent 函式
ProfileContent 函式是用來在使用者登入之後轉譯使用者的設定檔資訊。 當使用者選取 [要求設定檔資訊] 按鈕時,將會呼叫此函式。
在 App.jsx 檔案中,於匯入下方新增下列程式碼:
/**
* Renders information about the signed-in user or a button to retrieve data about the user
*/
const ProfileContent = () => {
    const { instance, accounts } = useMsal();
    const [graphData, setGraphData] = useState(null);

    function RequestProfileData() {
        // Silently acquires an access token which is then attached to a request for MS Graph data
        instance
            .acquireTokenSilent({
                ...loginRequest,
                account: accounts[0],
            })
            .then((response) => {
                callMsGraph(response.accessToken).then((response) => setGraphData(response));
            });
    }

    return (
        <>
            <h5 className="card-title">Welcome {accounts[0].name}</h5>
            <br/>
            {graphData ? (
                <ProfileData graphData={graphData} />
            ) : (
                <Button variant="secondary" onClick={RequestProfileData}>
                    Request Profile Information
                </Button>
            )}
        </>
    );
};
新增 MainContent 函式
MainContent 函式是用來在使用者登入之後轉譯使用者的設定檔資訊。 當使用者選取 [要求設定檔資訊] 按鈕時,將會呼叫此函式。
在 App.jsx 檔案中,以下列程式碼取代
App()函式:/** * If a user is authenticated the ProfileContent component above is rendered. Otherwise a message indicating a user is not authenticated is rendered. */ const MainContent = () => { return ( <div className="App"> <AuthenticatedTemplate> <ProfileContent /> </AuthenticatedTemplate> <UnauthenticatedTemplate> <h5> <center> Please sign-in to see your profile information. </center> </h5> </UnauthenticatedTemplate> </div> ); }; export default function App() { return ( <PageLayout> <center> <MainContent /> </center> </PageLayout> ); }
從應用程式呼叫 Microsoft Graph API
已新增所有必要的程式碼片段,因此現在可以在網頁瀏覽器中呼叫及測試應用程式。
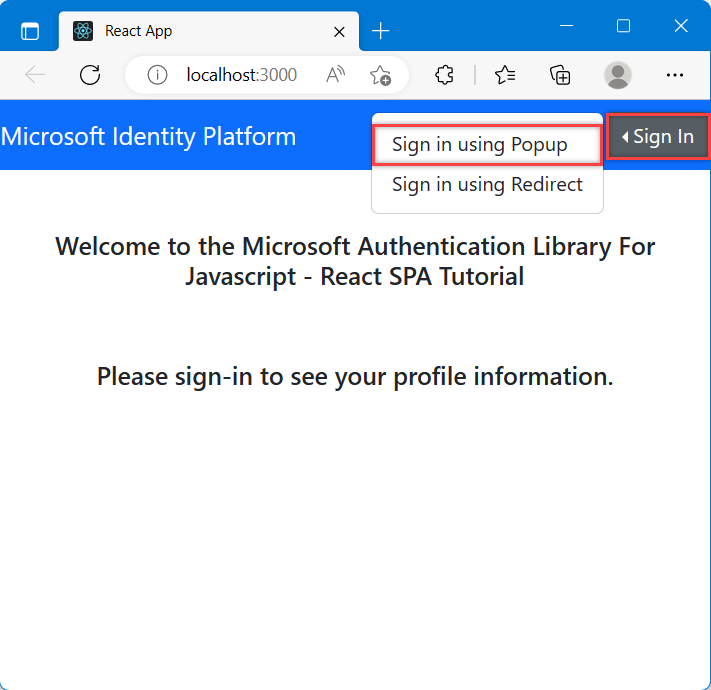
瀏覽至先前在教學課程開啟的瀏覽器:準備應用程式以進行驗證。 如果您的瀏覽器已關閉,請開啟具有位址的新視窗
http://localhost:3000/。選取 [登入] 按鈕。 針對本教學課程的目的,請選擇 [使用快顯登入] 選項。
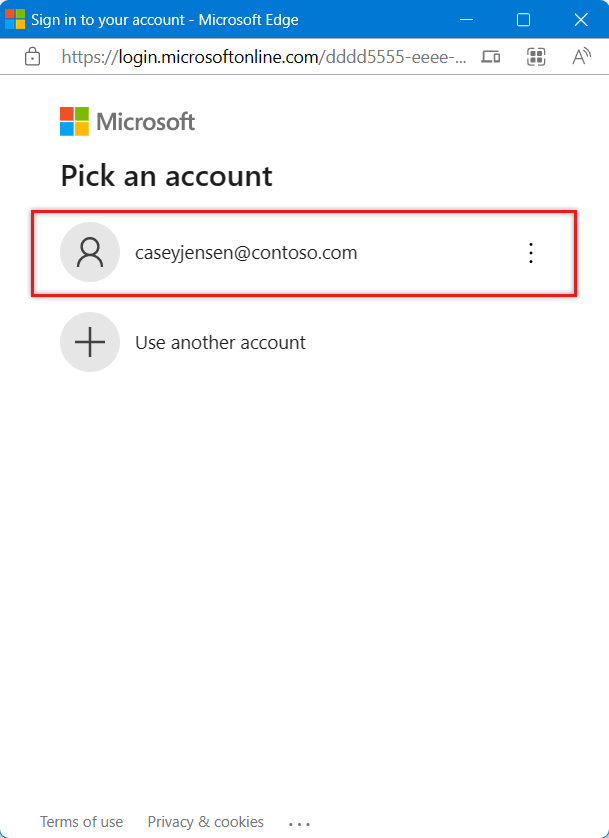
彈出視窗出現並顯示登入選項之後,請選取要登入的帳戶。
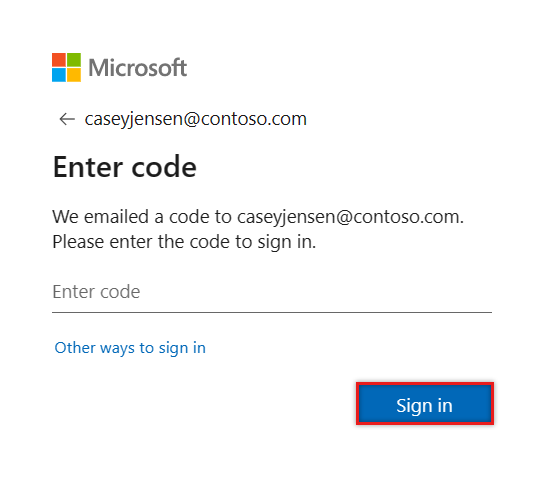
可能會顯示第二個視窗,指出程式碼將傳送至您的電子郵件地址。 如果發生這種情況,請選擇 [傳送程式碼]。 開啟來自寄件者 Microsoft 帳戶小組的電子郵件,然後輸入 7 位數的一次性代碼。 輸入之後,請選取 [登入]。
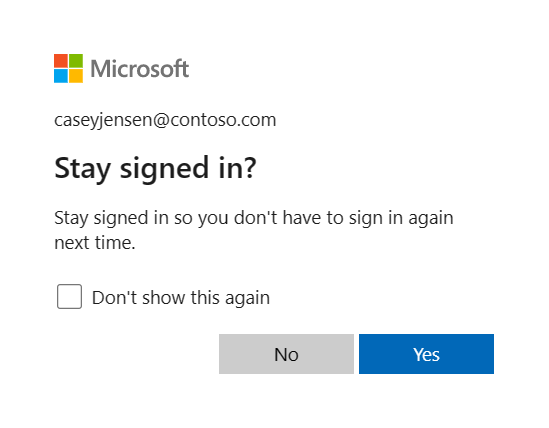
針對 保持登入,您可以選取 [否] 或 [是]。
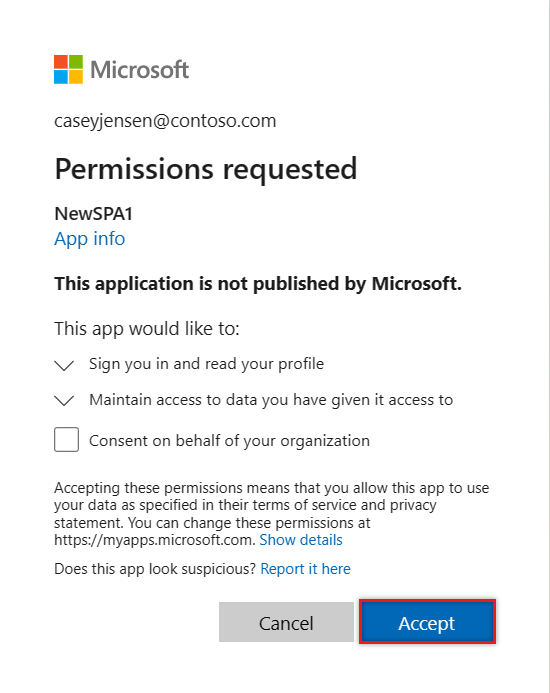
應用程式現在會要求登入和存取資料的權限。 選取 [接受] 以繼續操作。
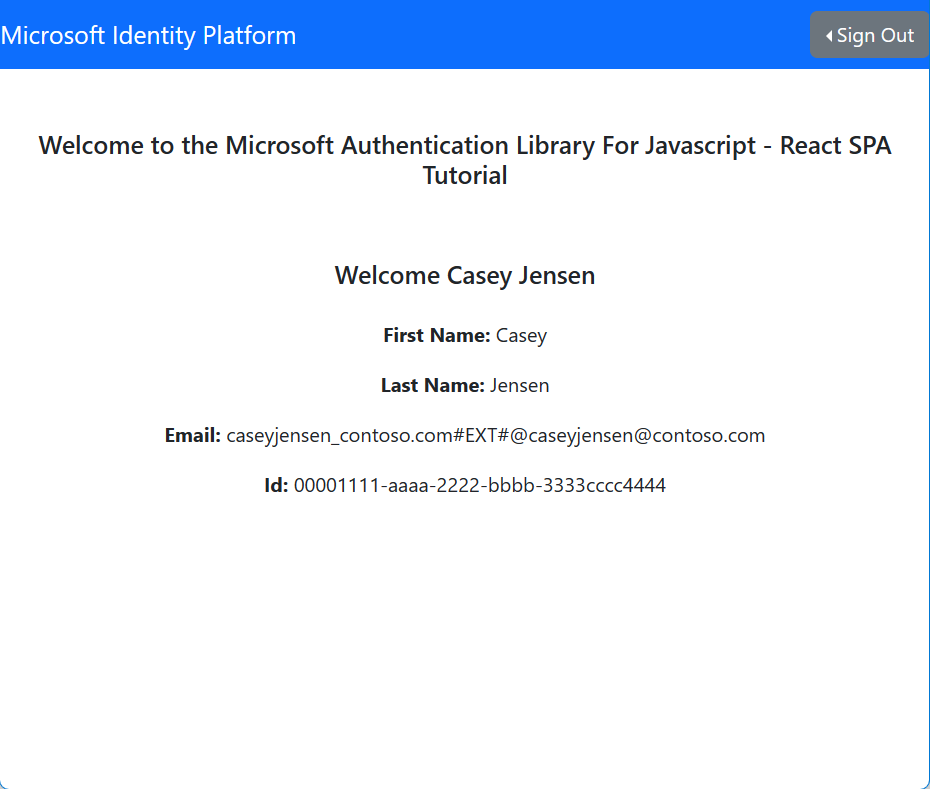
SPA 現在會顯示一個按鈕,指出 要求設定檔資訊。 選取它以顯示從 Microsoft Graph API 取得的 Microsoft Graph 設定檔資料。
下一步
瞭解如何透過嘗試下列教學課程系列,瞭解如何建置 Web API,以使用 Microsoft 身分識別平台。