適用於: Workforce 租戶 外部租戶(深入了解)
在本教學課程中,您會將登入和註銷邏輯新增至 Node/Express Web 應用程式。 此程式碼可讓您將外部租戶的使用者或工作區租戶的員工登入您的客戶端應用程式。
本教學課程是 3 部分教學課程系列的第 2 部分。
在本教學課程中,您會:
- 新增登入和註銷邏輯
- 檢視身份令牌宣告
- 執行應用程式和測試登入和註銷體驗。
先決條件
- 完成 教學課程:使用 Microsoft 身分識別平臺設定 Node.js Web 應用程式來登入使用者。
建立 MSAL 組態物件
在您的程式代碼編輯器中,開啟 authConfig.js 檔案,然後新增下列程式代碼:
require('dotenv').config();

const TENANT_SUBDOMAIN = process.env.TENANT_SUBDOMAIN || 'Enter_the_Tenant_Subdomain_Here';
const REDIRECT_URI = process.env.REDIRECT_URI || 'http://localhost:3000/auth/redirect';
const POST_LOGOUT_REDIRECT_URI = process.env.POST_LOGOUT_REDIRECT_URI || 'http://localhost:3000';
const GRAPH_ME_ENDPOINT = process.env.GRAPH_API_ENDPOINT + "v1.0/me" || 'Enter_the_Graph_Endpoint_Here';

/**
 * Configuration object to be passed to MSAL instance on creation.
 * For a full list of MSAL Node configuration parameters, visit:
 * https://github.com/AzureAD/microsoft-authentication-library-for-js/blob/dev/lib/msal-node/docs/configuration.md
 */
const msalConfig = {
    auth: {
        clientId: process.env.CLIENT_ID || 'Enter_the_Application_Id_Here', // 'Application (client) ID' of app registration in Azure portal - this value is a GUID
        //For external tenant
        authority: process.env.AUTHORITY || `https://${TENANT_SUBDOMAIN}.ciamlogin.com/`, // replace "Enter_the_Tenant_Subdomain_Here" with your tenant name
        //For workforce tenant
        //authority: process.env.CLOUD_INSTANCE + process.env.TENANT_ID
        clientSecret: process.env.CLIENT_SECRET || 'Enter_the_Client_Secret_Here', // Client secret generated from the app registration in Azure portal
    },
    system: {
        loggerOptions: {
            loggerCallback(loglevel, message, containsPii) {
                console.log(message);
            },
            piiLoggingEnabled: false,
            logLevel: 'Info',
        },
    },
};

module.exports = {
    msalConfig,
    REDIRECT_URI,
    POST_LOGOUT_REDIRECT_URI,
    TENANT_SUBDOMAIN,
    GRAPH_ME_ENDPOINT
};
msalConfig 物件包含一組設定選項,可用來自訂驗證流程的行為。
在您的 authConfig.js 檔案中,取代:
Enter_the_Application_Id_Here,其中包含您稍早註冊之應用程式的應用程式(用戶端)標識碼。Enter_the_Tenant_Subdomain_Here,並將其替換為外部 Directory(tenant)子域。 例如,如果您的租戶主要網域是contoso.onmicrosoft.com,請使用contoso。 如果您沒有租戶名稱,請瞭解如何 查看租戶詳細資料。 只有外部租使用者才需要此值。將您稍早複製的應用程式密鑰替換為
Enter_the_Client_Secret_Here。Enter_the_Graph_Endpoint_Here您的應用程式將呼叫的 Microsoft Graph API 雲端實例。 使用值https://graph.microsoft.com/(包括結尾的正斜線)
如果您使用 .env 檔案來儲存組態資訊:
在您的程式代碼編輯器中,開啟 .env 檔案,然後新增下列程序代碼。
    CLIENT_ID=Enter_the_Application_Id_Here
    TENANT_SUBDOMAIN=Enter_the_Tenant_Subdomain_Here
    CLOUD_INSTANCE="Enter_the_Cloud_Instance_Id_Here" # cloud instance string should end with a trailing slash
    TENANT_ID=Enter_the_Tenant_ID_here
    CLIENT_SECRET=Enter_the_Client_Secret_Here
    REDIRECT_URI=http://localhost:3000/auth/redirect
    POST_LOGOUT_REDIRECT_URI=http://localhost:3000
    GRAPH_API_ENDPOINT=Enter_the_Graph_Endpoint_Here # graph api endpoint string should end with a trailing slash
    EXPRESS_SESSION_SECRET=Enter_the_Express_Session_Secret_Here # express session secret, just any random text
取代佔位符:
- 如先前所述,
Enter_the_Application_Id_Here、Enter_the_Tenant_Subdomain_Here和Enter_the_Client_Secret_Here。 -
Enter_the_Cloud_Instance_Id_Here與應用程式註冊的 Azure 雲端實例一起使用。 使用https://login.microsoftonline.com/作為其值(包括尾端正斜線)。 此值僅適用於員工租戶。 -
Enter_the_Tenant_ID_here員工租使用者標識碼或主要網域,例如 或 aaaabbbb-0000-cccc-1111-dddd222eeee 或 contoso.microsoft.com。 此值僅適用於員工租戶。
- 如先前所述,
您可以匯出 msalConfig 檔案中的 REDIRECT_URI、TENANT_SUBDOMAIN、GRAPH_ME_ENDPOINT、POST_LOGOUT_REDIRECT_URI 和 變數,使其可在其他檔案中存取。
應用程式的授權URL
外部和員工租用戶的應用程式權限設置有所不同。 請按照下方所示建造它們:
//Authority for workforce tenant
authority: process.env.CLOUD_INSTANCE + process.env.TENANT_ID
使用自訂網址 (選擇性)
新增快速路由
Express 路由提供端點,讓我們可以執行登入、登出和檢視 ID Token 宣告的聲明等作業。
應用程式進入點
在您的程式代碼編輯器中,開啟 routes/index.js 檔案,然後新增下列程式代碼:
const express = require('express');
const router = express.Router();

router.get('/', function (req, res, next) {
    res.render('index', {
        title: 'MSAL Node & Express Web App',
        isAuthenticated: req.session.isAuthenticated,
        username: req.session.account?.username !== '' ? req.session.account?.username : req.session.account?.name,
    });
});
module.exports = router;
/ 路由是應用程式的進入點。 它會呈現您稍早在 構建應用程式 UI 元件時建立的 views/index.hbs 檢視。
isAuthenticated 是一個布爾變數,可決定您在檢視中看到的內容。
登入和登出
在您的程式代碼編輯器中,開啟 routes/auth.js 檔案,然後新增下列程式代碼:
const express = require('express');
const authController = require('../controller/authController');
const router = express.Router();

router.get('/signin', authController.signIn);
router.get('/signout', authController.signOut);
router.post('/redirect', authController.handleRedirect);

module.exports = router;
在您的程式代碼編輯器中,開啟 controller/authController.js 檔案,然後新增下列程式代碼:
const authProvider = require('../auth/AuthProvider');

exports.signIn = async (req, res, next) => {
    return authProvider.login(req, res, next);
};

exports.handleRedirect = async (req, res, next) => {
    return authProvider.handleRedirect(req, res, next);
}

exports.signOut = async (req, res, next) => {
    return authProvider.logout(req, res, next);
};
在您的程式代碼編輯器中,開啟 驗證/AuthProvider.js 檔案,然後新增下列程序代碼:
const msal = require('@azure/msal-node'); const axios = require('axios'); const { msalConfig, TENANT_SUBDOMAIN, REDIRECT_URI, POST_LOGOUT_REDIRECT_URI, GRAPH_ME_ENDPOINT} = require('../authConfig'); class AuthProvider { config; cryptoProvider; constructor(config) { this.config = config; this.cryptoProvider = new msal.CryptoProvider(); } getMsalInstance(msalConfig) { return new msal.ConfidentialClientApplication(msalConfig); } async login(req, res, next, options = {}) { // create a GUID for crsf req.session.csrfToken = this.cryptoProvider.createNewGuid(); /** * The MSAL Node library allows you to pass your custom state as state parameter in the Request object. * The state parameter can also be used to encode information of the app's state before redirect. * You can pass the user's state in the app, such as the page or view they were on, as input to this parameter. */ const state = this.cryptoProvider.base64Encode( JSON.stringify({ csrfToken: req.session.csrfToken, redirectTo: '/', }) ); const authCodeUrlRequestParams = { state: state, /** * By default, MSAL Node will add OIDC scopes to the auth code url request. For more information, visit: * https://docs.microsoft.com/azure/active-directory/develop/v2-permissions-and-consent#openid-connect-scopes */ scopes: [], }; const authCodeRequestParams = { state: state, /** * By default, MSAL Node will add OIDC scopes to the auth code request. For more information, visit: * https://docs.microsoft.com/azure/active-directory/develop/v2-permissions-and-consent#openid-connect-scopes */ scopes: [], }; /** * If the current msal configuration does not have cloudDiscoveryMetadata or authorityMetadata, we will * make a request to the relevant endpoints to retrieve the metadata. This allows MSAL to avoid making * metadata discovery calls, thereby improving performance of token acquisition process. */ if (!this.config.msalConfig.auth.authorityMetadata) { const authorityMetadata = await this.getAuthorityMetadata(); this.config.msalConfig.auth.authorityMetadata = JSON.stringify(authorityMetadata); } const msalInstance = this.getMsalInstance(this.config.msalConfig); // trigger the first leg of auth code flow return this.redirectToAuthCodeUrl( req, res, next, authCodeUrlRequestParams, authCodeRequestParams, msalInstance ); } async handleRedirect(req, res, next) { const authCodeRequest = { ...req.session.authCodeRequest, code: req.body.code, // authZ code codeVerifier: req.session.pkceCodes.verifier, // PKCE Code Verifier }; try { const msalInstance = this.getMsalInstance(this.config.msalConfig); msalInstance.getTokenCache().deserialize(req.session.tokenCache); const tokenResponse = await msalInstance.acquireTokenByCode(authCodeRequest, req.body); req.session.tokenCache = msalInstance.getTokenCache().serialize(); req.session.idToken = tokenResponse.idToken; req.session.account = tokenResponse.account; req.session.isAuthenticated = true; const state = JSON.parse(this.cryptoProvider.base64Decode(req.body.state)); res.redirect(state.redirectTo); } catch (error) { next(error); } } async logout(req, res, next) { /** * Construct a logout URI and redirect the user to end the * session with Microsoft Entra ID. For more information, visit: * https://docs.microsoft.com/azure/active-directory/develop/v2-protocols-oidc#send-a-sign-out-request */ //For external tenant //const logoutUri = `${this.config.msalConfig.auth.authority}${TENANT_SUBDOMAIN}.onmicrosoft.com/oauth2/v2.0/logout?post_logout_redirect_uri=${this.config.postLogoutRedirectUri}`; //For workforce tenant let logoutUri = `${this.config.msalConfig.auth.authority}/oauth2/v2.0/logout?post_logout_redirect_uri=${this.config.postLogoutRedirectUri}`; req.session.destroy(() => { res.redirect(logoutUri); }); } /** * Prepares the auth code request parameters and initiates the first leg of auth code flow * @param req: Express request object * @param res: Express response object * @param next: Express next function * @param authCodeUrlRequestParams: parameters for requesting an auth code url * @param authCodeRequestParams: parameters for requesting tokens using auth code */ async redirectToAuthCodeUrl(req, res, next, authCodeUrlRequestParams, authCodeRequestParams, msalInstance) { // Generate PKCE Codes before starting the authorization flow const { verifier, challenge } = await this.cryptoProvider.generatePkceCodes(); // Set generated PKCE codes and method as session vars req.session.pkceCodes = { challengeMethod: 'S256', verifier: verifier, challenge: challenge, }; /** * By manipulating the request objects below before each request, we can obtain * auth artifacts with desired claims. For more information, visit: * https://azuread.github.io/microsoft-authentication-library-for-js/ref/modules/_azure_msal_node.html#authorizationurlrequest * https://azuread.github.io/microsoft-authentication-library-for-js/ref/modules/_azure_msal_node.html#authorizationcoderequest **/ req.session.authCodeUrlRequest = { ...authCodeUrlRequestParams, redirectUri: this.config.redirectUri, responseMode: 'form_post', // recommended for confidential clients codeChallenge: req.session.pkceCodes.challenge, codeChallengeMethod: req.session.pkceCodes.challengeMethod, }; req.session.authCodeRequest = { ...authCodeRequestParams, redirectUri: this.config.redirectUri, code: '', }; try { const authCodeUrlResponse = await msalInstance.getAuthCodeUrl(req.session.authCodeUrlRequest); res.redirect(authCodeUrlResponse); } catch (error) { next(error); } } /** * Retrieves oidc metadata from the openid endpoint * @returns */ async getAuthorityMetadata() { // For external tenant //const endpoint = `${this.config.msalConfig.auth.authority}${TENANT_SUBDOMAIN}.onmicrosoft.com/v2.0/.well-known/openid-configuration`; // For workforce tenant const endpoint = `${this.config.msalConfig.auth.authority}/v2.0/.well-known/openid-configuration`; try { const response = await axios.get(endpoint); return await response.data; } catch (error) { console.log(error); } } } const authProvider = new AuthProvider({ msalConfig: msalConfig, redirectUri: REDIRECT_URI, postLogoutRedirectUri: POST_LOGOUT_REDIRECT_URI, }); module.exports = authProvider;/signin、/signout和/redirect路由定義於 routes/auth.js 檔案中,但您會在 驗證/AuthProvider.js 類別中實作其邏輯。
login方法會處理/signin路由:它會觸發驗證碼流程的第一階段來啟動登入流程。
它會使用您稍早建立的 MSAL 組態物件,,初始化
msalConfig實例。const msalInstance = this.getMsalInstance(this.config.msalConfig);getMsalInstance方法定義為:getMsalInstance(msalConfig) { return new msal.ConfidentialClientApplication(msalConfig); }驗證碼流程的第一回合會產生授權碼要求 URL,然後重新導向至該 URL 以取得授權碼。 第一個回合是在
redirectToAuthCodeUrl方法中實作。 請注意,我們如何使用 MSALs getAuthCodeUrl 方法來產生授權碼 URL://... const authCodeUrlResponse = await msalInstance.getAuthCodeUrl(req.session.authCodeUrlRequest); //...然後,我們會重新導向至授權碼 URL 本身。
//...
res.redirect(authCodeUrlResponse);
//...
handleRedirect方法會處理/redirect路由:您稍早在 Microsoft Entra 系統管理中心中的 快速入門:在範例 Web 應用程式中登入使用者 中,將此 URL 設定為 Web 應用程式的重新導向 URI。
此端點會實作授權碼流程的第二階段。 它會使用授權碼透過 MSAL 的 acquireTokenByCode 方法來請求 ID 令牌。
//...
const tokenResponse = await msalInstance.acquireTokenByCode(authCodeRequest, req.body);
//...
收到響應之後,您可以建立 Express 會話,並將您想要的任何資訊儲存在其中。 您需要包含
isAuthenticated,並將其設定為true。//... req.session.idToken = tokenResponse.idToken; req.session.account = tokenResponse.account; req.session.isAuthenticated = true; //...
logout方法會處理/signout路由:async logout(req, res, next) { /** * Construct a logout URI and redirect the user to end the * session with Azure AD. For more information, visit: * https://docs.microsoft.com/azure/active-directory/develop/v2-protocols-oidc#send-a-sign-out-request */ const logoutUri = `${this.config.msalConfig.auth.authority}${TENANT_SUBDOMAIN}.onmicrosoft.com/oauth2/v2.0/logout?post_logout_redirect_uri=${this.config.postLogoutRedirectUri}`; req.session.destroy(() => { res.redirect(logoutUri); }); }它會起始註銷要求。
當您想要將使用者從應用程式登出時,僅僅結束使用者的會話是不足夠的。 您必須將使用者重新導向至 logoutUri。 否則,使用者可能可以重新驗證您的應用程式,而不需要重新輸入其認證。 如果您的租戶名稱是 contoso,則 logoutUri 看起來類似
https://contoso.ciamlogin.com/contoso.onmicrosoft.com/oauth2/v2.0/logout?post_logout_redirect_uri=http://localhost:3000。
應用程式的註銷 URI 和授權單位元數據端點
應用程式的註銷 URI logoutUri 和授權單位元數據端點 endpoint,針對外部和員工租用戶來說,看起來不同。 請按照下方所示建造它們:
//Logout URI for workforce tenant
const logoutUri = `${this.config.msalConfig.auth.authority}/oauth2/v2.0/logout?post_logout_redirect_uri=${this.config.postLogoutRedirectUri}`;

//authority metadata endpoint for workforce tenant
const endpoint = `${this.config.msalConfig.auth.authority}/v2.0/.well-known/openid-configuration`;
檢視身份令牌宣告
在您的程式代碼編輯器中,開啟 routes/users.js 檔案,然後新增下列程式代碼:
const express = require('express');
const router = express.Router();

// custom middleware to check auth state
function isAuthenticated(req, res, next) {
    if (!req.session.isAuthenticated) {
        return res.redirect('/auth/signin'); // redirect to sign-in route
    }

    next();
};

router.get('/id',
    isAuthenticated, // check if user is authenticated
    async function (req, res, next) {
        res.render('id', { idTokenClaims: req.session.account.idTokenClaims });
    }
);
module.exports = router;
如果使用者通過驗證,/id 路由會使用 views/id.hbs 檢視來顯示標識元令牌宣告。 您稍早在 建置應用程式 UI 元件中新增此檢視。
若要擷取特定標識元令牌宣告,例如 指定的名稱:
const givenName = req.session.account.idTokenClaims.given_name
完成網頁應用程式
在您的程式代碼編輯器中,開啟 app.js 檔案,然後將程式代碼從 app.js 新增至其中。
在您的程式代碼編輯器中,開啟 server.js 檔案,然後將程式代碼從 server.js 新增至其中。
在您的程式代碼編輯器中,開啟 package.json 檔案,然後將
scripts屬性更新為:"scripts": { "start": "node server.js" }
執行及測試 Node/Express.js Web 應用程式
此時,您可以測試節點 Web 應用程式。
使用在 建立新使用者 中的步驟,在員工租戶中建立測試使用者。 如果您無法存取租戶,請要求租戶系統管理員為您建立使用者。
若要啟動伺服器,請從專案目錄內執行下列命令:
npm start開啟瀏覽器,然後移至
http://localhost:3000。 您應該會看到類似下列螢幕快照的頁面: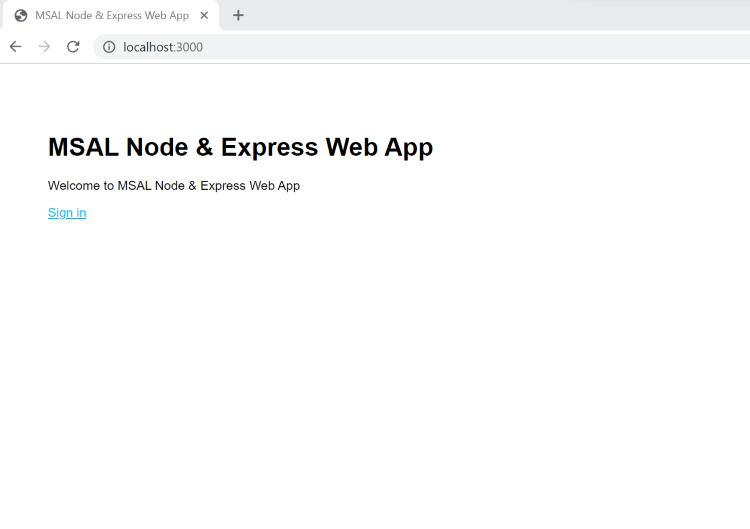
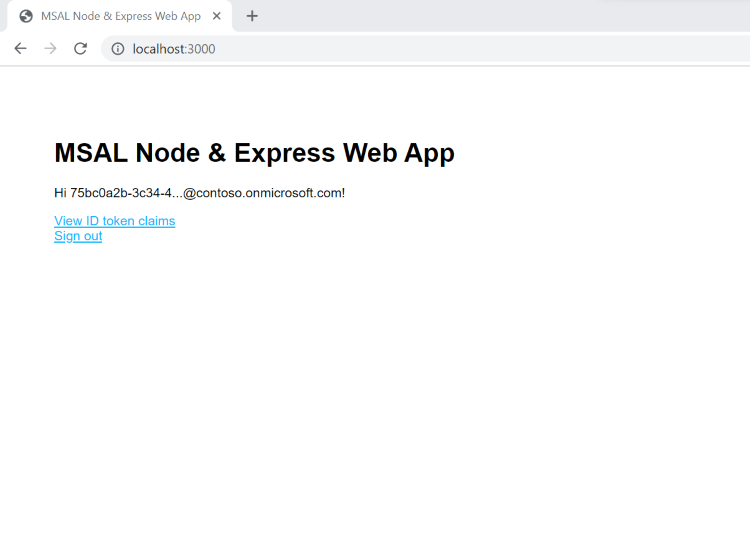
選取 [登入] 以開始登入流程。 第一次登入時,系統會提示您提供同意,以允許應用程式登入並存取配置檔,如下列螢幕快照所示:

成功登入之後,系統會將您重新導向回應用程式首頁。