Filtering Data Sources
This section describes how to filter a collection of messages based on the associated data sources from which the messages derive. This feature is particularly useful if you are loading saved data from multiple sources into Message Analyzer through a Data Retrieval Session. For example, you might have a collection of messages from related sources such as logs and traces that you are correlating and it may be advantageous to isolate the messages that are associated with each source of data. There are two ways you can achieve this, as follows:
Filtering — filter on the data sources that contain the messages you want to view.
To do this, select one or more data sources in the Data Source Filter dialog that is accessible from the global Message Analyzer Session menu after you load a collection of messages into Message Analyzer. By selecting one or more data sources in the dialog and clicking the Apply button, all messages are filtered from the current data viewer except those that are associated with the selected data source/s.
Note
The Data Source Filter feature does not support filtering in Layouts for the Chart viewer that you can access from the New Viewer drop-down list.
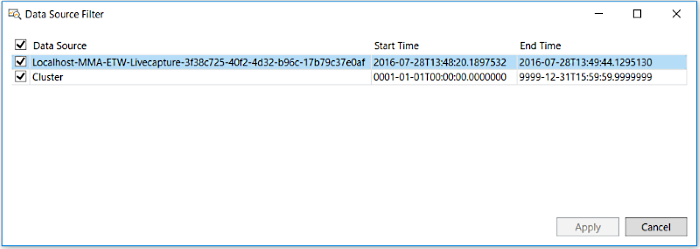
The Data Source Filter dialog is shown in the figure that follows, where a trace file and a cluster log are the selected data sources.

Figure 60: Data Source Filter dialog
Grouping — create an associated message Group for each data source in a message collection under separate expandable Data Source nodes in the Analysis Grid viewer.
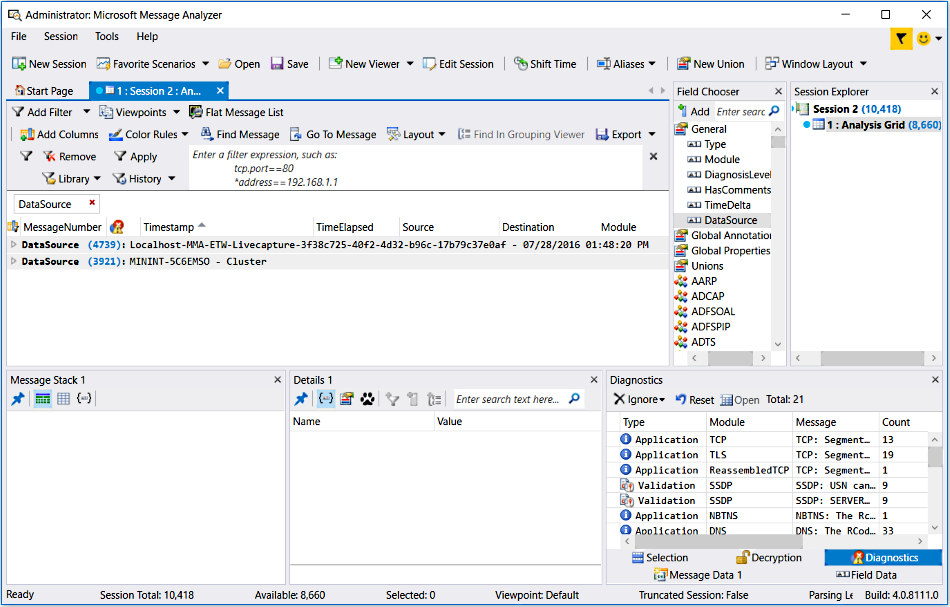
To do this, add a DataSource column to the Analysis Grid viewer by right-clicking DataSource under the General node of the Field Chooser Tool Window, and then select the Add as Column command in the context menu that appears. Next, right-click the newly added DataSource column in the Analysis Grid viewer and select the Group command in the context menu that appears. The messages from each data source are then organized and encapsulated under a separate node that you can expand for analysis, as shown in the figure that follows.

Figure 61: Data Source Groups in the Analysis Grid
Tip
The Grouping viewer does not currently have any Layouts that make use of the DataSource field by default. However, you can manually add this field to any Grouping viewer Layout as needed, as long as the Grouping viewer has focus when you are doing so. To add the DataSource field to a Grouping viewer Layout, use the Field Chooser as described immediately above.
Using the Data Source Filter Dialog
As previously described, you can access the Data Source Filter dialog by clicking the global Session menu, highlighting the Data Source Filter item, and then selecting the Edit command that appears in the drop-down list. When the Data Source Filter dialog displays, you will see a tabular listing of data source information in the following column headers:
Data Source — the listings in this column are specified in a format similar to the following examples, for the indicated file types:
Message Analyzer Trace Parsed (.matp) files — uses the format: HostName-MMA-ETW-LiveCapture-GUID.
Capture (.cap) files — uses the format: FileName
Event Trace Log (.etl) files — uses the format: FileName
Log (.log) files — uses the format: FileName
Note
The DataSource column in the Analysis Grid viewer can also include additional information when messages from cap, .etl, and other files are displayed. For example the host name can be included in the listing.
Start Time — specifies the Timestamp of the first message in the trace file or log.
End Time — specifies the Timestamp of the last message in the trace file or log.
Applying and Removing Data Source Filtering
After you use the Data Source Filter dialog to select the data source/s containing the messages that you want to view, click the Apply button in the dialog to initiate the filtering process. After you apply the filtering, the Apply command is disabled and the Remove command is enabled in the Data Source Filter drop-down list so you can remove the applied filter as necessary. After you click the Remove command, the Apply command then re-enables in the Data Source Filter drop-down list so that you can re-apply the current data source filtering configuration. You can toggle back and forth between applying and removing the Data Source Filter as many times as you want without changing the current data source filter configuration. To change the configuration, simply select the Edit command in the drop-down and reconfigure your Data Source Filter as required before you re-apply it.
More Information
To learn more about how to use the Group context menu command in the Analysis Grid viewer, see Using the Analysis Grid Group Feature.
To learn more about the Grouping viewer, see the Grouping Viewer topic.