本文涵蓋開發人員可用來在 Xamarin.Mac 中建置新式 macOS 應用程式的數個秘訣、功能和技術。
使用新式檢視建置新式外觀
新式外觀將包含新式視窗和工具列外觀,例如如下所示的範例應用程式:

啟用完整大小的內容檢視
為了在 Xamarin.Mac 應用程式中達成此外觀,開發人員會想要使用 完整大小的內容檢視,這表示內容會在 [工具] 和 [標題欄] 區域下延伸,而且 macOS 會自動模糊。
若要在程式代碼中啟用這項功能,請建立的 NSWindowController 自定義類別,使其看起來如下:
using System;
using Foundation;
using AppKit;

namespace MacModern
{
    public partial class MainWindowController : NSWindowController
    {
        #region Constructor
        public MainWindowController (IntPtr handle) : base (handle)
        {
        }
        #endregion

        #region Override Methods
        public override void WindowDidLoad ()
        {
            base.WindowDidLoad ();

            // Set window to use Full Size Content View
            Window.StyleMask = NSWindowStyle.FullSizeContentView;
        }
        #endregion
    }
}
您也可以在 Xcode 的介面產生器中啟用此功能,方法是選取 [視窗] 並檢查 [完整大小的內容檢視]:

使用完整大小內容檢視時,開發人員可能需要將內容位移在標題和工具列區域下方,讓特定內容(例如標籤)不會滑入其中。
若要使此問題複雜化,標題和工具列區域可以根據使用者目前正在執行的動作、用戶已安裝的macOS版本,以及/或應用程式執行所在的Mac硬體,擁有動態高度。
因此,在配置使用者介面時,只要硬式編碼位移將無法運作。 開發人員必須採用動態方法。
Apple 已包含 類別的 NSWindow Key-Value Observable ContentLayoutRect 屬性,以取得程式代碼中的目前內容區域。 開發人員可以使用此值,在內容區域變更時手動放置必要的元素。
更好的解決方案是使用自動配置和大小類別,在程式碼或介面產生器中放置UI元素。
如下列範例的程式代碼可用來在應用程式的檢視控制器中使用 AutoLayout 和 Size 類別來放置 UI 元素:
using System;
using AppKit;
using Foundation;

namespace MacModern
{
    public partial class ViewController : NSViewController
    {
        #region Computed Properties
        public NSLayoutConstraint topConstraint { get; set; }
        #endregion

        ...

        #region Override Methods
        public override void UpdateViewConstraints ()
        {
            // Has the constraint already been set?
            if (topConstraint == null) {
                // Get the top anchor point
                var contentLayoutGuide = ItemTitle.Window?.ContentLayoutGuide as NSLayoutGuide;
                var topAnchor = contentLayoutGuide.TopAnchor;

                // Found?
                if (topAnchor != null) {
                    // Assemble constraint and activate it
                    topConstraint = topAnchor.ConstraintEqualToAnchor (topAnchor, 20);
                    topConstraint.Active = true;
                }
            }

            base.UpdateViewConstraints ();
        }
        #endregion
    }
}
此程式代碼會建立要套用至標籤 (ItemTitle) 之最上層條件約束的記憶體,以確保它不會滑落在 [標題] 和 [工具欄] 區域下方:
public NSLayoutConstraint topConstraint { get; set; }
藉由覆寫檢視控制器的 UpdateViewConstraints 方法,開發人員可以測試是否已建置所需的條件約束,並視需要建立它。
如果需要建置新的條件約束, ContentLayoutGuide 則會存取需要限制之控件的 Window 屬性,並轉換成 NSLayoutGuide:
var contentLayoutGuide = ItemTitle.Window?.ContentLayoutGuide as NSLayoutGuide;
的 NSLayoutGuide TopAnchor 屬性會存取,如果可用,則會使用它來建置具有所需位移數量的新條件約束,並將新的條件約束設為作用中以套用它:
// Assemble constraint and activate it
topConstraint = topAnchor.ConstraintEqualToAnchor (topAnchor, 20);
topConstraint.Active = true;
啟用簡化的工具列
標準 macOS 視窗包含標準標題列,沿著視窗的上邊緣執行。 如果視窗也包含工具列,則會顯示在此標題列區域底下:

使用簡化工具列時,[標題區域] 會消失,而工具列會向上移至標題欄的位置,與 [視窗關閉]、[最小化] 和 [最大化] 按鈕對齊:

[簡化工具列] 是透過覆寫 ViewWillAppear 的 NSViewController 方法來啟用,並使其看起來如下:
public override void ViewWillAppear ()
{
    base.ViewWillAppear ();

    // Enable streamlined Toolbars
    View.Window.TitleVisibility = NSWindowTitleVisibility.Hidden;
}
這個效果通常用於 Shoebox 應用程式(一個視窗應用程式 ),例如地圖、行事曆、筆記和系統喜好設定。
使用配件檢視控制器
根據應用程式的設計,開發人員可能也想要使用位於標題/工具列區域正下方的輔助元件檢視控制器來補充標題欄區域,以根據使用者目前參與的活動,提供內容敏感性控件:

存取裝置檢視控制器會自動模糊並重設大小,而不需要開發人員介入。
若要新增配件檢視控制器,請執行下列動作:
在方案總管中按兩下
Main.storyboard檔案將其開啟以進行編輯。將 自訂檢視控制器 拖曳至視窗的階層:

設定配件檢視的 UI:

將配件檢視公開為 輸出 ,以及其 UI 的任何其他 動作 或 輸出 :
儲存變更。
返回 Visual Studio for Mac 以同步處理變更。


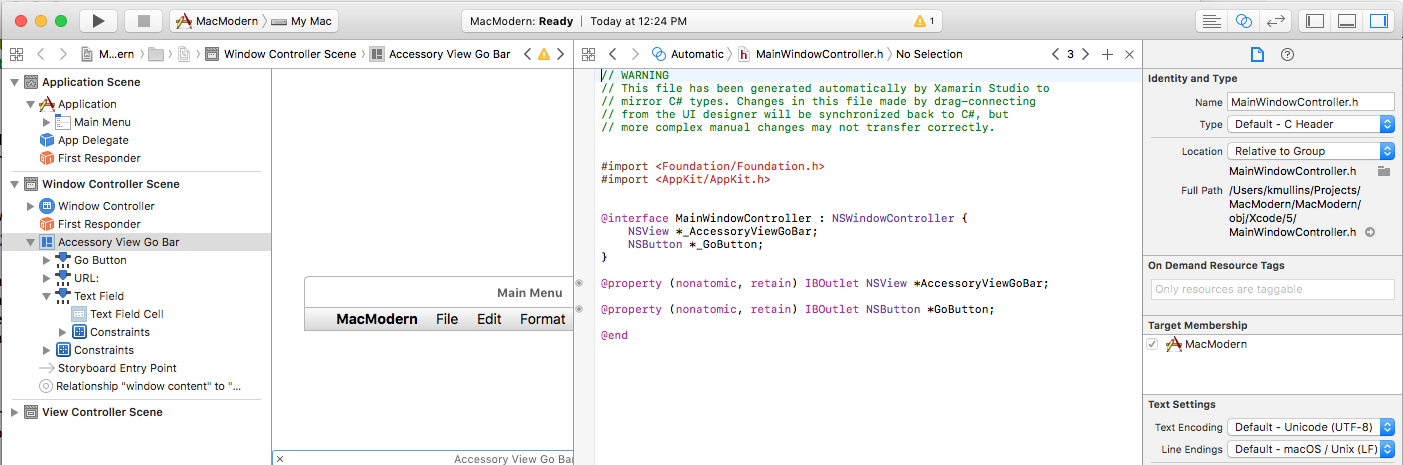
NSWindowController編輯 ,使其看起來如下:
using System;
using Foundation;
using AppKit;

namespace MacModern
{
    public partial class MainWindowController : NSWindowController
    {
        #region Constructor
        public MainWindowController (IntPtr handle) : base (handle)
        {
        }
        #endregion

        #region Override Methods
        public override void WindowDidLoad ()
        {
            base.WindowDidLoad ();

            // Create a title bar accessory view controller and attach
            // the view created in Interface Builder
            var accessoryView = new NSTitlebarAccessoryViewController ();
            accessoryView.View = AccessoryViewGoBar;

            // Set the location and attach the accessory view to the
            // titlebar to be displayed
            accessoryView.LayoutAttribute = NSLayoutAttribute.Bottom;
            Window.AddTitlebarAccessoryViewController (accessoryView);

        }
        #endregion
    }
}
此程式代碼的重點在於 View 設定為介面產生器中定義的自定義檢視,並公開為 輸出:
accessoryView.View = AccessoryViewGoBar;
LayoutAttribute,定義要顯示配件的位置:
accessoryView.LayoutAttribute = NSLayoutAttribute.Bottom;
因為 macOS 現在已完全當地語系化,Left因此與RightNSLayoutAttribute屬性已被取代,且應該取代為 Leading 和 Trailing。
使用索引標籤式 Windows
此外,macOS 系統可能會將配件檢視控制器新增至應用程式的視窗。 例如,若要建立Tabbed Windows,其中數個應用程式的 Windows 會合併成一個虛擬視窗:
一般而言,開發人員必須在其 Xamarin.Mac 應用程式中使用 Tabbed Windows,系統會自動處理它們,如下所示:
- 叫用 方法時
OrderFront,Windows 會自動被Tabbed。 - 叫用 方法時
OrderOut,Windows 會自動取消選取。 - 在程式代碼中,所有 Tabbed 視窗仍視為「可見」,不過任何非前端索引卷標都會由系統使用 CoreGraphics 隱藏。
TabbingIdentifier使用 的NSWindow屬性,將 Windows 群組在 Tabs 中。- 如果是以應用程式為基礎的應用程式,將會自動啟用其中數項
NSDocument功能(例如新增至 Tab Bar 的加號按鈕),而不需要任何開發人員動作。 NSDocument非型應用程式可以藉由覆GetNewWindowForTab寫 的NSWindowsController方法,在索引標籤群組中啟用 [加號] 按鈕,以新增檔。
將所有部分整合在一起, AppDelegate 想要使用系統型 Tabbed Windows 的應用程式可能如下所示:
using AppKit;
using Foundation;

namespace MacModern
{
    [Register ("AppDelegate")]
    public class AppDelegate : NSApplicationDelegate
    {
        #region Computed Properties
        public int NewDocumentNumber { get; set; } = 0;
        #endregion

        #region Constructors
        public AppDelegate ()
        {
        }
        #endregion

        #region Override Methods
        public override void DidFinishLaunching (NSNotification notification)
        {
            // Insert code here to initialize your application
        }

        public override void WillTerminate (NSNotification notification)
        {
            // Insert code here to tear down your application
        }
        #endregion

        #region Custom Actions
        [Export ("newDocument:")]
        public void NewDocument (NSObject sender)
        {
            // Get new window
            var storyboard = NSStoryboard.FromName ("Main", null);
            var controller = storyboard.InstantiateControllerWithIdentifier ("MainWindow") as NSWindowController;

            // Display
            controller.ShowWindow (this);
        }
        #endregion
    }
}
屬性會 NewDocumentNumber 追蹤所建立的新文件數目,而 NewDocument 方法會建立新的檔並加以顯示。
NSWindowController然後看起來會像這樣:
using System;
using Foundation;
using AppKit;

namespace MacModern
{
    public partial class MainWindowController : NSWindowController
    {
        #region Application Access
        /// <summary>
        /// A helper shortcut to the app delegate.
        /// </summary>
        /// <value>The app.</value>
        public static AppDelegate App {
            get { return (AppDelegate)NSApplication.SharedApplication.Delegate; }
        }
        #endregion

        #region Constructor
        public MainWindowController (IntPtr handle) : base (handle)
        {
        }
        #endregion

        #region Public Methods
        public void SetDefaultDocumentTitle ()
        {
            // Is this the first document?
            if (App.NewDocumentNumber == 0) {
                // Yes, set title and increment
                Window.Title = "Untitled";
                ++App.NewDocumentNumber;
            } else {
                // No, show title and count
                Window.Title = $"Untitled {App.NewDocumentNumber++}";
            }
        }
        #endregion

        #region Override Methods
        public override void WindowDidLoad ()
        {
            base.WindowDidLoad ();

            // Prefer Tabbed Windows
            Window.TabbingMode = NSWindowTabbingMode.Preferred;
            Window.TabbingIdentifier = "Main";

            // Set default window title
            SetDefaultDocumentTitle ();

            // Set window to use Full Size Content View
            // Window.StyleMask = NSWindowStyle.FullSizeContentView;

            // Create a title bar accessory view controller and attach
            // the view created in Interface Builder
            var accessoryView = new NSTitlebarAccessoryViewController ();
            accessoryView.View = AccessoryViewGoBar;

            // Set the location and attach the accessory view to the
            // titlebar to be displayed
            accessoryView.LayoutAttribute = NSLayoutAttribute.Bottom;
            Window.AddTitlebarAccessoryViewController (accessoryView);

        }

        public override void GetNewWindowForTab (NSObject sender)
        {
            // Ask app to open a new document window
            App.NewDocument (this);
        }
        #endregion
    }
}
其中靜態 App 屬性提供取得的 AppDelegate快捷方式。 方法 SetDefaultDocumentTitle 會根據建立的新文件數目來設定新的文件標題。
下列程式代碼會告訴 macOS 應用程式偏好使用索引標籤,並提供字串,讓應用程式的 Windows 群組成索引標籤:
// Prefer Tabbed Windows
Window.TabbingMode = NSWindowTabbingMode.Preferred;
Window.TabbingIdentifier = "Main";
而下列 override 方法會將加號按鈕新增至索引卷標列,以在使用者按兩下時建立新檔:
public override void GetNewWindowForTab (NSObject sender)
{
    // Ask app to open a new document window
    App.NewDocument (this);
}
使用核心動畫
核心動畫是內建於macOS的高電源圖形轉譯引擎。 核心動畫已優化,以利用新式 macOS 硬體中可用的 GPU(圖形處理單元),而不是在 CPU 上執行圖形作業,而這可能會使機器變慢。
CALayerCore Animation 提供的 ,可用於快速且流暢的捲動和動畫等工作。 應用程式的使用者介面應該由多個子檢視和圖層組成,以充分利用 Core 動畫。
物件提供數個 CALayer 屬性,可讓開發人員控制螢幕上向使用者呈現的內容,例如:
Content- 可以是NSImage或CGImage,可提供圖層的內容。BackgroundColor- 將層次的背景色彩設定為CGColorBorderWidth- 設定框線寬度。BorderColor- 設定框線色彩。
若要在應用程式的 UI 中使用核心圖形,它必須使用 圖層支援的 檢視,Apple 建議開發人員一律在視窗的內容檢視中啟用。 如此一來,所有子檢視也會自動繼承圖層備份。
此外,Apple 建議使用圖層支援的檢視,而不是新增 CALayer 為子圖層,因為系統會自動處理數個必要的設定(例如 Retina Display 所需的設定)。
若要啟用圖層支援,可藉由檢查核心動畫層,在 Xcode 介面產生器底下,將 的 設定WantsLayerNSView為 true 或 內部的 Xcode 介面產生器:

使用圖層重新繪製檢視
在 Xamarin.Mac 應用程式中使用圖層支援的檢視時,另一個重要步驟是在 中將 的 設定LayerContentsRedrawPolicyNSView為 OnSetNeedsDisplay 。NSViewController 例如:
public override void ViewWillAppear ()
{
    base.ViewWillAppear ();

    // Set the content redraw policy
    View.LayerContentsRedrawPolicy = NSViewLayerContentsRedrawPolicy.OnSetNeedsDisplay;
}
如果開發人員未設定這個屬性,每當畫面原點變更時,檢視就會重新繪製,因為效能原因並不需要。 不過,將此屬性設定為 OnSetNeedsDisplay 開發人員時,必須手動設定 NeedsDisplay 為 true ,以強制重繪內容。
當檢視標示為已變更時,系統會檢查 WantsUpdateLayer View 的 屬性。 如果傳回 true UpdateLayer ,則會呼叫 方法,否則 DrawRect 會呼叫 View 的 方法來更新 View 的內容。
Apple 有下列建議,可在需要時更新 Views 內容:
- Apple 偏好盡可能
UpdateLater使用 ,DrawRect因為它可提供顯著的效能提升。 - 針對
layer.Contents看起來類似的 UI 元素使用相同的 。 - Apple 也希望開發人員盡可能使用標準檢視來撰寫其 UI,例如
NSTextField。
若要使用 UpdateLayer,請建立的 NSView 自訂類別,並讓程式代碼看起來如下:
using System;
using Foundation;
using AppKit;

namespace MacModern
{
    public partial class MainView : NSView
    {
        #region Computed Properties
        public override bool WantsLayer {
            get { return true; }
        }

        public override bool WantsUpdateLayer {
            get { return true; }
        }
        #endregion

        #region Constructor
        public MainView (IntPtr handle) : base (handle)
        {
        }
        #endregion

        #region Override Methods
        public override void DrawRect (CoreGraphics.CGRect dirtyRect)
        {
            base.DrawRect (dirtyRect);

        }

        public override void UpdateLayer ()
        {
            base.UpdateLayer ();

            // Draw view
            Layer.BackgroundColor = NSColor.Red.CGColor;
        }
        #endregion
    }
}
使用新式拖放
若要呈現使用者的新式拖放體驗,開發人員應該在其應用程式的拖放作業中採用 拖放 功能。 拖曳 Flocking 是拖曳的每個個別檔案或專案一開始會顯示為個別專案,而使用者繼續拖曳作業時,會依序分組在游標下方,以及項目數。
如果使用者終止拖曳作業,個別元素將會取消鎖定並返回其原始位置。
下列範例程式代碼會在自定義檢視上啟用拖曳 Flocking:
using System;
using System.Collections.Generic;
using Foundation;
using AppKit;

namespace MacModern
{
    public partial class MainView : NSView, INSDraggingSource, INSDraggingDestination
    {
        #region Constructor
        public MainView (IntPtr handle) : base (handle)
        {
        }
        #endregion

        #region Override Methods
        public override void MouseDragged (NSEvent theEvent)
        {
            // Create group of string to be dragged
            var string1 = new NSDraggingItem ((NSString)"Item 1");
            var string2 = new NSDraggingItem ((NSString)"Item 2");
            var string3 = new NSDraggingItem ((NSString)"Item 3");

            // Drag a cluster of items
            BeginDraggingSession (new [] { string1, string2, string3 }, theEvent, this);
        }
        #endregion
    }
}
藉由將拖曳的每個項目傳送至 BeginDraggingSession 的方法 NSView ,做為陣列中的個別專案,來達成蜂擁效果。
使用 NSTableView 或 NSOutlineView時,請使用 PastboardWriterForRow 類別的 NSTableViewDataSource 方法來啟動拖曳作業:
using System;
using System.Collections.Generic;
using Foundation;
using AppKit;

namespace MacModern
{
    public class ContentsTableDataSource: NSTableViewDataSource
    {
        #region Constructors
        public ContentsTableDataSource ()
        {
        }
        #endregion

        #region Override Methods
        public override INSPasteboardWriting GetPasteboardWriterForRow (NSTableView tableView, nint row)
        {
            // Return required pasteboard writer
            ...

            // Pasteboard writer failed
            return null;
        }
        #endregion
    }
}
這可讓開發人員針對要拖曳之數據表中的每個專案提供個別 NSDraggingItem 專案,而不是將所有數據列寫入貼上板的較舊方法 WriteRowsWith 。
使用 NSCollectionViews時,在開始拖曳時,再次使用 PasteboardWriterForItemAt 方法,而不是 WriteItemsAt 方法。
開發人員應該一律避免將大型檔案放在貼上板上。 macOS Sierra 的新功能檔案 Promises 可讓開發人員在貼上板上放置指定檔案的參考,當使用者使用新的 NSFilePromiseProvider 和 NSFilePromiseReceiver 類別完成 Drop 作業時,這些檔案稍後將會完成。
使用新式事件追蹤
針對已新增至 [標題] 或 [工具列] 區域的 [使用者介面] 元素 NSButton,使用者應該能夠按兩下元素,並讓它以一般方式引發事件(例如顯示彈出視窗)。 不過,由於專案也位於 [標題] 或 [工具欄] 區域中,因此使用者應該能夠按下並拖曳元素來移動視窗。
若要在程式代碼中完成這項作業,請為 專案建立自定義類別(例如 NSButton),並覆寫 MouseDown 事件,如下所示:
public override void MouseDown (NSEvent theEvent)
{
    var shouldCallSuper = false;

    Window.TrackEventsMatching (NSEventMask.LeftMouseUp, 2000, NSRunLoop.NSRunLoopEventTracking, (NSEvent evt, ref bool stop) => {
        // Handle event as normal
        stop = true;
        shouldCallSuper = true;
    });

    Window.TrackEventsMatching(NSEventMask.LeftMouseDragged, 2000, NSRunLoop.NSRunLoopEventTracking, (NSEvent evt, ref bool stop) => {
        // Pass drag event to window
        stop = true;
        Window.PerformWindowDrag (evt);
    });

    // Call super to handle mousedown
    if (shouldCallSuper) {
        base.MouseDown (theEvent);
    }
}
此程式代碼會使用TrackEventsMatching附加UI元素來攔截 LeftMouseUp 和 LeftMouseDragged 事件的方法NSWindow。 LeftMouseUp如果是事件,UI 元素會如常回應。 LeftMouseDragged針對事件,事件會傳遞至NSWindow的 PerformWindowDrag 方法,以移動畫面上的視窗。
PerformWindowDrag呼叫 類別的 NSWindow 方法提供下列優點:
- 它允許窗口移動,即使應用程式已停止回應(例如處理深層循環時)。
- 空間切換會如預期般運作。
- 空格列會顯示為一般。
- 視窗貼齊和對齊正常運作。
使用新式容器檢視控件
macOS Sierra 為舊版OS中可用的現有容器檢視控件提供許多新式改善。
數據表檢視增強功能
開發人員應該一律使用新 NSView 版的容器檢視控制項,例如 NSTableView。 例如:
using System;
using System.Collections.Generic;
using Foundation;
using AppKit;

namespace MacModern
{
    public class ContentsTableDelegate : NSTableViewDelegate
    {
        #region Constructors
        public ContentsTableDelegate ()
        {
        }
        #endregion

        #region Override Methods
        public override NSView GetViewForItem (NSTableView tableView, NSTableColumn tableColumn, nint row)
        {
            // Build new view
            var view = new NSView ();
            ...

            // Return the view representing the item to display
            return view;
        }
        #endregion
    }
}
這可讓自定義的數據表數據列動作附加至數據表中的指定數據列(例如,在刪除數據列時向右撥動)。 若要啟用此行為,請覆寫 RowActions 的 NSTableViewDelegate方法:
using System;
using System.Collections.Generic;
using Foundation;
using AppKit;

namespace MacModern
{
    public class ContentsTableDelegate : NSTableViewDelegate
    {
        #region Constructors
        public ContentsTableDelegate ()
        {
        }
        #endregion

        #region Override Methods
        public override NSView GetViewForItem (NSTableView tableView, NSTableColumn tableColumn, nint row)
        {
            // Build new view
            var view = new NSView ();
            ...

            // Return the view representing the item to display
            return view;
        }

        public override NSTableViewRowAction [] RowActions (NSTableView tableView, nint row, NSTableRowActionEdge edge)
        {
            // Take action based on the edge
            if (edge == NSTableRowActionEdge.Trailing) {
                // Create row actions
                var editAction = NSTableViewRowAction.FromStyle (NSTableViewRowActionStyle.Regular, "Edit", (action, rowNum) => {
                    // Handle row being edited
                    ...
                });

                var deleteAction = NSTableViewRowAction.FromStyle (NSTableViewRowActionStyle.Destructive, "Delete", (action, rowNum) => {
                    // Handle row being deleted
                    ...
                });

                // Return actions
                return new [] { editAction, deleteAction };
            } else {
                // No matching actions
                return null;
            }
        }
        #endregion
    }
}
靜態 NSTableViewRowAction.FromStyle 用來建立下列樣式的新數據表數據列動作:
Regular- 執行標準非破壞性動作,例如編輯數據列的內容。Destructive- 執行破壞性動作,例如從數據表中刪除數據列。 這些動作將會以紅色背景呈現。
卷動檢視增強功能
直接使用卷動檢視 (NSScrollView) 或作為另一個控件的一部分時, NSTableView卷動檢視的內容可以使用新式外觀和檢視,在 Xamarin.Mac 應用程式中的 [標題] 和 [工具欄] 區域下滑動。
因此,卷動檢視內容區域中的第一個專案可以部分遮蔽 [標題] 和 [工具欄] 區域。
若要更正此問題,Apple 已將兩個新屬性新增至 NSScrollView 類別:
ContentInsets- 可讓開發人員提供NSEdgeInsets物件,定義將套用至卷動檢視頂端的位移。AutomaticallyAdjustsContentInsets- 如果true捲動檢視會自動處理ContentInsets開發人員的 。
藉由使用 ContentInsets 開發人員可以調整卷動檢視的開始,以允許包含配件,例如:
- 排序指標,如郵件應用程式中所示的排序指標。
- 搜尋欄位。
- [重新整理] 或 [更新] 按鈕。
新式應用程式中的自動版面配置和當地語系化
Apple 在 Xcode 中包含數種技術,可讓開發人員輕鬆地建立國際化的 macOS 應用程式。 Xcode 現在可讓開發人員在分鏡腳本檔案中將使用者對向文字與應用程式的使用者介面設計區隔開,並在 UI 變更時提供工具來維護此分隔。
如需詳細資訊,請參閱Apple的 國際化和當地語系化指南。
實作基底國際化
藉由實作基底國際化,開發人員可以提供單一分鏡腳本檔案來代表應用程式的 UI,並將所有使用者面向的字串分開。
當開發人員建立定義應用程式使用者介面的初始分鏡腳本檔案(或檔案)時,它們會建置在基底國際化中(開發人員所使用的語言)。
接下來,開發人員可以匯出當地語系化和基底國際化字串(在分鏡腳本 UI 設計中),這些字串可以翻譯成多種語言。
稍後可以匯入這些當地語系化,而 Xcode 將產生分鏡腳本的語言特定字串檔案。
實作自動版面配置以支援當地語系化
因為本地化的字串值版本可以有截然不同的大小和/或閱讀方向,開發人員應該使用自動版面配置來定位和調整應用程式的使用者介面在分鏡腳本檔案中的大小。
Apple 建議執行下列動作:
- 拿掉固定寬度條件約束 - 應該允許所有以文字為基礎的檢視根據其內容重設大小。 固定寬度檢視可能會以特定語言裁剪其內容。
- 使用內建內容大小 - 根據預設,文字型檢視會自動重設大小以符合其內容。 針對未正確重設大小的文字型檢視,請在 Xcode 的介面產生器中選取它們,然後選擇 [編輯>大小以符合內容]。
- 套用前置和尾端屬性 - 因為文字的方向可以根據使用者的語言變更,因此請使用新的
Leading和條件約束屬性,而不是現有的Right和TrailingLeft屬性。Leading和Trailing會根據語言方向自動調整。 - 將檢視釘選到相鄰檢視 - 這可讓檢視重新定位及重設大小,因為檢視周圍的檢視會隨著選取的語言而變更。
- 不要設定 Windows 最小值和/或大小上限 - 允許 Windows 變更大小,因為選取的語言會調整其內容區域的大小。
- 測試版面配置會持續 變更 - 在應用程式開發期間,應該以不同的語言持續測試。 如需詳細資訊, 請參閱Apple的測試國際化應用程式 檔。
- 使用 NSStackViews 將檢視釘選在一起 -
NSStackViews,可讓其內容以可預測的方式轉移和成長,並根據選取的語言變更大小。
在 Xcode 的介面產生器中當地語系化
Apple 在 Xcode 的 Interface Builder 中提供了數個功能,開發人員可在設計或編輯應用程式的 UI 以支援當地語系化時使用。 屬性偵測器的 [文字方向] 區段可讓開發人員在選取的 [文字型檢視] 上提供應如何使用及更新方向的提示(例如 NSTextField):

文字方向有三個可能的值:
- 自然 - 配置是以指派給控件的字串為基礎。
- 從左至右 - 配置一律會強制由左至右。
- 從右至左 - 配置一律會強制由右至左。
版面配置有兩個可能的值:
- 由左至右 - 版面配置一律由左至右。
- 由右至左 - 版面配置一律由右至左。
除非需要特定的對齊方式,否則通常不應該變更這些。
Mirror 屬性會告知系統翻轉特定控件屬性(例如儲存格影像位置)。 屬性可能的值包含以下三種:
- 自動 - 位置會根據選取的語言方向自動變更。
- 在從右至左介面 - 位置只會以從右至左的語言變更。
- 永不 - 位置永遠不會改變。
如果開發人員已在文字型檢視的內容上指定 Center、 Justify 或 Full 對齊方式,則永遠不會根據選取的語言來翻轉這些設定。
在macOS Sierra之前,在程式碼中建立的控件不會自動鏡像。 開發人員必須使用類似下列的程式代碼來處理鏡像:
public override void ViewDidLoad ()
{
    base.ViewDidLoad ();

    // Setting a button's mirroring based on the layout direction
    var button = new NSButton ();
    if (button.UserInterfaceLayoutDirection == NSUserInterfaceLayoutDirection.LeftToRight) {
        button.Alignment = NSTextAlignment.Right;
        button.ImagePosition = NSCellImagePosition.ImageLeft;
    } else {
        button.Alignment = NSTextAlignment.Left;
        button.ImagePosition = NSCellImagePosition.ImageRight;
    }
}
和 Alignment ImagePosition 會根據 UserInterfaceLayoutDirection 控件的 設定位置。
macOS Sierra 新增數個新的便利建構函式(透過靜態 CreateButton 方法),採用數個參數(例如 Title、Image 和 Action),並會自動正確鏡像。 例如:
var button2 = NSButton.CreateButton (myTitle, myImage, () => {
    // Take action when the button is pressed
    ...
});
使用系統外觀
新式 macOS 應用程式可以採用適用於影像建立、編輯或簡報應用程式的新深色介面外觀:

這可以藉由在顯示 Window 之前新增一行程式代碼來完成。 例如:
using System;
using AppKit;
using Foundation;

namespace MacModern
{
    public partial class ViewController : NSViewController
    {
        ...

        #region Override Methods
        public override void ViewWillAppear ()
        {
            base.ViewWillAppear ();

            // Apply the Dark Interface Appearance
            View.Window.Appearance = NSAppearance.GetAppearance (NSAppearance.NameVibrantDark);

            ...
        }
        #endregion
    }
}
類別的NSAppearance靜態GetAppearance方法可用來從系統取得具名外觀(在此案例中為 NSAppearance.NameVibrantDark)。
Apple 有下列使用系統外觀的建議:
- 偏好使用具名色彩而不是硬式編碼值(例如
LabelColor和SelectedControlColor)。 - 盡可能使用系統標準控件樣式。
使用系統外觀的 macOS 應用程式會自動針對已從系統喜好設定應用程式啟用輔助功能功能的使用者正確運作。 因此,Apple 建議開發人員一律在其 macOS 應用程式中使用系統外觀。
使用分鏡腳本設計UI
分鏡腳本可讓開發人員不僅設計組成應用程式使用者介面的個別元素,還可以可視化及設計指定元素的UI流程和階層。
控制器可讓開發人員將元素收集到組合單位和 Segues 抽象,並移除在整個檢視階層中移動所需的一般「黏附程式碼」:

如需詳細資訊,請參閱我們的 分鏡腳本 簡介檔。
在分鏡腳本中定義的指定場景需要檢視階層中上一個場景的數據時,有許多實例。 Apple 有下列在場景之間傳遞信息的建議:
- 數據相依性應該一律會透過階層向下串聯。
- 避免硬式編碼 UI 結構相依性,因為這樣會限制 UI 彈性。
- 使用 C# 介面提供一般數據相依性。
做為 Segue 來源的檢視控制器可以覆寫 PrepareForSegue 方法,並在執行 Segue 以顯示目標檢視控制器之前執行任何必要的初始化(例如傳遞數據)。 例如:
public override void PrepareForSegue (NSStoryboardSegue segue, NSObject sender)
{
    base.PrepareForSegue (segue, sender);

    // Take action based on Segue ID
    switch (segue.Identifier) {
    case "MyNamedSegue":
        // Prepare for the segue to happen
        ...
        break;
    }
}
如需詳細資訊,請參閱我們的 Segues 檔。
傳播動作
根據 macOS 應用程式的設計,有時 UI 控制件上動作的最佳處理程式可能位於 UI 階層中的其他地方。 這通常是位於自己場景中的功能表和功能表項,與應用程式 UI 的其餘部分分開。
若要處理這種情況,開發人員可以建立自定義動作,並將動作傳遞至回應程序鏈結。 如需詳細資訊,請參閱使用 自定義視窗動作 檔。
新式Mac功能
Apple 在 macOS Sierra 中包含數個使用者面向功能,可讓開發人員充分利用 Mac 平臺,例如:
- NSUserActivity - 這可讓應用程式描述使用者目前參與的活動。
NSUserActivity最初是為了支援 HandOff 而建立,其中一個使用者裝置上啟動的活動可以在另一個裝置上挑選並繼續。NSUserActivity在macOS中運作的方式與iOS相同,因此如需詳細資訊,請參閱 我們的遞交 iOS 簡介檔。 - Mac 上的 Siri - Siri 會使用目前活動 (
NSUserActivity) 提供內容給使用者可以發出的命令。 - 狀態還原 - 當使用者在 macOS 上結束應用程式,然後稍後重新啟動它時,應用程式會自動回到其先前的狀態。 開發人員可以使用狀態還原 API,在向使用者顯示使用者介面之前,先對暫時性 UI 狀態進行編碼和還原。 如果應用程式是以
NSDocument為基礎,則會自動處理狀態還原。 若要開啟非NSDocument型應用程式的狀態還原,請將 類別的NSWindow設定Restorable為true。 - 雲端 中的檔 - 在 macOS Sierra 之前,應用程式必須明確選擇使用使用者 iCloud Drive 中的檔。 在macOS Sierra中,使用者的 桌面 和 文件 資料夾可能會由系統自動與其iCloud Drive 同步處理。 因此,可能會刪除檔的本機複本,以釋出用戶電腦上的空間。
NSDocument型應用程式會自動處理這項變更。 所有其他應用程式類型都必須使用NSFileCoordinator來同步讀取和寫入檔案。
摘要
本文涵蓋開發人員可用來在 Xamarin.Mac 中建置新式 macOS 應用程式的數個秘訣、功能和技術。