數據系結允許連結兩個物件的屬性,讓其中一個對象的變更造成另一個對象的變更。 這是一個非常有價值的工具,雖然數據系結可以完全在程式碼中定義,但 XAML 提供快捷方式和便利性。 因此,中 Xamarin.Forms 最重要的標記延伸之一是 Binding。
數據系結
數據系結會連接兩個物件的屬性,稱為 來源 和 目標。 在程序代碼中,需要兩個步驟:目標 BindingContext 對象的 屬性必須設定為來源物件,而且 SetBinding 方法(通常與 Binding 類別一起使用)必須在目標物件上呼叫,才能將該對象的屬性系結至來源物件的屬性。
目標屬性必須是可繫結的屬性,這表示目標對象必須衍生自 BindableObject。 在線 Xamarin.Forms 檔會指出哪些屬性是可繫結的屬性。 之類的 Text 屬性Label與可系結屬性TextProperty相關聯。
在標記中,您也必須執行程式碼中所需的相同兩個步驟,但 Binding 標記延伸會取代 SetBinding 呼叫和 Binding 類別。
不過,當您在 XAML 中定義資料系結時,有多種方式可以設定 BindingContext 目標物件的 。 有時候會從程式代碼後置檔案進行設定,有時使用 StaticResource 或 x:Static 標記延伸,有時則是屬性元素標記的內容 BindingContext 。
系結最常用來將程序視覺效果與基礎數據模型連接,通常是在實現MVVM (Model-View-View-ViewModel) 應用程式架構時 ,如第5部分所述。從數據系結到MVVM,但可能會有其他案例。
檢視對檢視系結
您可以定義數據系結,以連結相同頁面上兩個檢視的屬性。 在這裡情況下,您會使用x:Reference標記延伸來設定BindingContext目標物件的 。
以下是包含 Slider 和 兩 Label 個檢視的 XAML 檔案,其中一個是由 Slider 值旋轉,另一個則顯示 Slider 值:
<ContentPage xmlns="http://xamarin.com/schemas/2014/forms"
             xmlns:x="http://schemas.microsoft.com/winfx/2009/xaml"
             x:Class="XamlSamples.SliderBindingsPage"
             Title="Slider Bindings Page">

    <StackLayout>
        <Label Text="ROTATION"
               BindingContext="{x:Reference Name=slider}"
               Rotation="{Binding Path=Value}"
               FontAttributes="Bold"
               FontSize="Large"
               HorizontalOptions="Center"
               VerticalOptions="CenterAndExpand" />

        <Slider x:Name="slider"
                Maximum="360"
                VerticalOptions="CenterAndExpand" />

        <Label BindingContext="{x:Reference slider}"
               Text="{Binding Value, StringFormat='The angle is {0:F0} degrees'}"
               FontAttributes="Bold"
               FontSize="Large"
               HorizontalOptions="Center"
               VerticalOptions="CenterAndExpand" />
    </StackLayout>
</ContentPage>
Slider包含使用標記延伸之兩Label個x:Name檢視x:Reference所參考的屬性。
系 x:Reference 結延伸會定義名為 Name 的屬性,以設定為參考項目的名稱,在此案例 slider中為 。 不過, ReferenceExtension 定義標記延伸的 x:Reference 類別也會定義 ContentProperty 的屬性 Name,這表示它並非明確必要。 就各種而言,第一個 x:Reference 包含 「Name=」,但第二個則不包含:
BindingContext="{x:Reference Name=slider}"
…
BindingContext="{x:Reference slider}"
Binding標記延伸本身可以有數個屬性,就像和 Binding 類別一樣BindingBase。 ContentProperty Binding的 是 Path,但如果路徑是標記延伸中的第一個專案,則可以省略標記延伸的 Binding “Path=” 部分。 第一個範例有 「Path=」,但第二個範例省略它:
Rotation="{Binding Path=Value}"
…
Text="{Binding Value, StringFormat='The angle is {0:F0} degrees'}"
這些屬性全都可以在一行上,或分隔成多行:
Text="{Binding Value,
               StringFormat='The angle is {0:F0} degrees'}"
做任何方便的事情。
StringFormat請注意第二個Binding標記延伸中的 屬性。 在 中 Xamarin.Forms,系結不會執行任何隱含類型轉換,而且如果您需要將非字串對象顯示為字串,則必須提供類型轉換器或使用 StringFormat。 在幕後,靜態 String.Format 方法可用來實 StringFormat作 。 這可能是個問題,因為 .NET 格式規格牽涉到大括弧,這也會用來分隔標記延伸。 這會造成造成 XAML 剖析器混淆的風險。 若要避免這種情況,請將整個格式字串放在單引號中:
Text="{Binding Value, StringFormat='The angle is {0:F0} degrees'}"
以下是執行中的程式:
系結模式
單一檢視可以在其數個屬性上具有數據系結。 不過,每個檢視只能有一個 BindingContext,因此該檢視上的多個數據系結必須擁有相同物件的所有參考屬性。
這個和其他問題的解決方案牽 Mode 涉到 屬性,該屬性會設定為 列舉的成員 BindingMode :
DefaultOneWay- 值會從來源傳送至目標OneWayToSource- 值會從目標傳送到來源TwoWay— 值會在來源和目標之間雙向傳輸OneTime— 資料會從來源移至目標,但只有在變更時BindingContext
下列程式示範和 TwoWay 系結模式的OneWayToSource一個常見用法。 四Slider個檢視是用來控制Scale的、 RotateXRotate、 和 RotateY 屬性Label。 起初,這似乎這四個 Label 屬性應該是數據系結目標,因為每個屬性都是由 所 Slider設定。 不過, BindingContext 的 Label 只能是一個 物件,而且有四個不同的滑桿。
因此,所有系結都會以看似向後的方式設定: BindingContext 四個滑桿中的每一個都設定為 Label,而且系結是在滑桿的屬性上 Value 設定。 藉由使用 OneWayToSource 和 TwoWay 模式,這些 Value 屬性可以設定來源屬性,這些屬性是 Scale的、 Rotate、 RotateX和 RotateY 屬性 Label:
<ContentPage xmlns="http://xamarin.com/schemas/2014/forms"
             xmlns:x="http://schemas.microsoft.com/winfx/2009/xaml"
             x:Class="XamlSamples.SliderTransformsPage"
             Padding="5"
             Title="Slider Transforms Page">
    <Grid>
        <Grid.RowDefinitions>
            <RowDefinition Height="*" />
            <RowDefinition Height="Auto" />
            <RowDefinition Height="Auto" />
            <RowDefinition Height="Auto" />
            <RowDefinition Height="Auto" />
        </Grid.RowDefinitions>

        <Grid.ColumnDefinitions>
            <ColumnDefinition Width="*" />
            <ColumnDefinition Width="Auto" />
        </Grid.ColumnDefinitions>

        <!-- Scaled and rotated Label -->
        <Label x:Name="label"
               Text="TEXT"
               HorizontalOptions="Center"
               VerticalOptions="CenterAndExpand" />

        <!-- Slider and identifying Label for Scale -->
        <Slider x:Name="scaleSlider"
                BindingContext="{x:Reference label}"
                Grid.Row="1" Grid.Column="0"
                Maximum="10"
                Value="{Binding Scale, Mode=TwoWay}" />

        <Label BindingContext="{x:Reference scaleSlider}"
               Text="{Binding Value, StringFormat='Scale = {0:F1}'}"
               Grid.Row="1" Grid.Column="1"
               VerticalTextAlignment="Center" />

        <!-- Slider and identifying Label for Rotation -->
        <Slider x:Name="rotationSlider"
                BindingContext="{x:Reference label}"
                Grid.Row="2" Grid.Column="0"
                Maximum="360"
                Value="{Binding Rotation, Mode=OneWayToSource}" />

        <Label BindingContext="{x:Reference rotationSlider}"
               Text="{Binding Value, StringFormat='Rotation = {0:F0}'}"
               Grid.Row="2" Grid.Column="1"
               VerticalTextAlignment="Center" />

        <!-- Slider and identifying Label for RotationX -->
        <Slider x:Name="rotationXSlider"
                BindingContext="{x:Reference label}"
                Grid.Row="3" Grid.Column="0"
                Maximum="360"
                Value="{Binding RotationX, Mode=OneWayToSource}" />

        <Label BindingContext="{x:Reference rotationXSlider}"
               Text="{Binding Value, StringFormat='RotationX = {0:F0}'}"
               Grid.Row="3" Grid.Column="1"
               VerticalTextAlignment="Center" />

        <!-- Slider and identifying Label for RotationY -->
        <Slider x:Name="rotationYSlider"
                BindingContext="{x:Reference label}"
                Grid.Row="4" Grid.Column="0"
                Maximum="360"
                Value="{Binding RotationY, Mode=OneWayToSource}" />

        <Label BindingContext="{x:Reference rotationYSlider}"
               Text="{Binding Value, StringFormat='RotationY = {0:F0}'}"
               Grid.Row="4" Grid.Column="1"
               VerticalTextAlignment="Center" />
    </Grid>
</ContentPage>
三個 Slider 檢視上的系結是 OneWayToSource,這表示 Slider 值會導致其 BindingContext的屬性變更,也就是 Label 具名 label的 。 這三Slider個檢視會導致的、 RotateX和 RotateY 屬性Label變更Rotate。
不過,屬性的 Scale 系結是 TwoWay。 這是因為 Scale 屬性的預設值為1,而使用 TwoWay 系結會導致 Slider 初始值設定為1而不是0。 如果該系結為 OneWayToSource,則 Scale 屬性一開始會從 Slider 預設值設定為0。 Label不會顯示 ,這可能會對使用者造成一些混淆。
注意
類別 VisualElement 也有 ScaleX 和 ScaleY 屬性,分別在 x 軸和 Y 軸上縮放 VisualElement 。
系結和集合
沒有任何說明 XAML 與資料系結的威力優於樣板化 ListView。
ListView 會 ItemsSource 定義 類型的 IEnumerable屬性,並顯示該集合中的專案。 這些專案可以是任何類型的物件。 根據預設, ListView 會使用 ToString 每個專案的 方法來顯示該專案。 有時候這隻是您想要的,但在許多情況下, ToString 只會傳回物件的完整類別名稱。
不過,您可以透過使用範本,以任何方式顯示集合中的ListView專案,其中包含衍生自 Cell的類別。 範本會針對 中 ListView設定的每個專案複製範本,而且範本上設定的數據系結會傳送至個別複製品。
您通常會想要使用 ViewCell 類別建立這些專案的自定義儲存格。 此程式在程序代碼中有些混亂,但在 XAML 中,它變得非常直接。
包含在 XamlSamples 專案中的類別稱為 NamedColor。 每個NamedColor物件都有 Name 類型的 string和 FriendlyName 屬性,以及 Color 類型的Color屬性。 此外, NamedColor 還有141個靜態唯讀欄位,其類型 Color 對應至 類別中 Xamarin.FormsColor 定義的色彩。 靜態建構函式會 IEnumerable<NamedColor> 建立集合,其中包含 NamedColor 對應至這些靜態字段的物件,並將它指派給其公用靜態 All 屬性。
將靜態 NamedColor.All 屬性設定為 ItemsSource 的 ListView 很容易使用 x:Static 標記延伸:
<ContentPage xmlns="http://xamarin.com/schemas/2014/forms"
             xmlns:x="http://schemas.microsoft.com/winfx/2009/xaml"
             xmlns:local="clr-namespace:XamlSamples;assembly=XamlSamples"
             x:Class="XamlSamples.ListViewDemoPage"
             Title="ListView Demo Page">

    <ListView ItemsSource="{x:Static local:NamedColor.All}" />

</ContentPage>
結果顯示會建立項目確實屬於 類型 XamlSamples.NamedColor:
這不是太多資訊,但是 ListView 是可捲動且可選取的。
若要定義項目的樣本,您要將 屬性分割 ItemTemplate 為屬性專案,並將它 DataTemplate設定為 ,然後參考 ViewCell。 若要 的 View 屬性, ViewCell 您可以定義一或多個檢視的配置,以顯示每個專案。 以下是簡單的範例:
<ListView ItemsSource="{x:Static local:NamedColor.All}">
    <ListView.ItemTemplate>
        <DataTemplate>
            <ViewCell>
                <ViewCell.View>
                    <Label Text="{Binding FriendlyName}" />
                </ViewCell.View>
            </ViewCell>
        </DataTemplate>
    </ListView.ItemTemplate>
</ListView>
注意
單元格和儲存格子系的系結來源是 ListView.ItemsSource 集合。
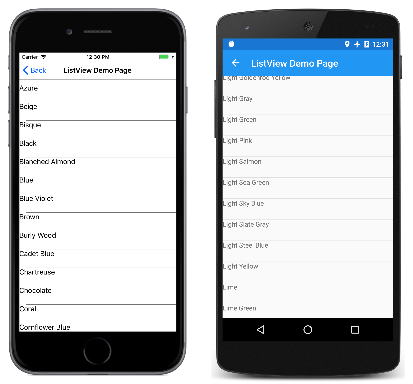
項目 Label 會設定為 View 的 ViewCell屬性。 (不需要標記 ViewCell.View , View 因為 屬性是 的內容 ViewCell屬性。)此標籤會顯示 FriendlyName 每個 NamedColor 物件的屬性:
好多了。 現在,只需要以詳細資訊和實際色彩將專案範本展開。 為了支援此範本,已在頁面的資源字典中定義一些值和物件:
<ContentPage xmlns="http://xamarin.com/schemas/2014/forms"
             xmlns:x="http://schemas.microsoft.com/winfx/2009/xaml"
             xmlns:local="clr-namespace:XamlSamples"
             x:Class="XamlSamples.ListViewDemoPage"
             Title="ListView Demo Page">

    <ContentPage.Resources>
        <ResourceDictionary>
            <OnPlatform x:Key="boxSize"
                        x:TypeArguments="x:Double">
                <On Platform="iOS, Android, UWP" Value="50" />
            </OnPlatform>

            <OnPlatform x:Key="rowHeight"
                        x:TypeArguments="x:Int32">
                <On Platform="iOS, Android, UWP" Value="60" />
            </OnPlatform>

            <local:DoubleToIntConverter x:Key="intConverter" />

        </ResourceDictionary>
    </ContentPage.Resources>

    <ListView ItemsSource="{x:Static local:NamedColor.All}"
              RowHeight="{StaticResource rowHeight}">
        <ListView.ItemTemplate>
            <DataTemplate>
                <ViewCell>
                    <StackLayout Padding="5, 5, 0, 5"
                                 Orientation="Horizontal"
                                 Spacing="15">

                        <BoxView WidthRequest="{StaticResource boxSize}"
                                 HeightRequest="{StaticResource boxSize}"
                                 Color="{Binding Color}" />

                        <StackLayout Padding="5, 0, 0, 0"
                                     VerticalOptions="Center">

                            <Label Text="{Binding FriendlyName}"
                                   FontAttributes="Bold"
                                   FontSize="Medium" />

                            <StackLayout Orientation="Horizontal"
                                         Spacing="0">
                                <Label Text="{Binding Color.R,
                                       Converter={StaticResource intConverter},
                                       ConverterParameter=255,
                                       StringFormat='R={0:X2}'}" />

                                <Label Text="{Binding Color.G,
                                       Converter={StaticResource intConverter},
                                       ConverterParameter=255,
                                       StringFormat=', G={0:X2}'}" />

                                <Label Text="{Binding Color.B,
                                       Converter={StaticResource intConverter},
                                       ConverterParameter=255,
                                       StringFormat=', B={0:X2}'}" />
                            </StackLayout>
                        </StackLayout>
                    </StackLayout>
                </ViewCell>
            </DataTemplate>
        </ListView.ItemTemplate>
    </ListView>
</ContentPage>
請注意,使用 OnPlatform 來定義 數據列的大小 BoxView 和高度 ListView 。 雖然所有平臺的值都相同,但標記可以輕鬆地調整為其他值來微調顯示。
繫結值轉換器
先前 的 ListView 示範 XAML 檔案會顯示 結構的個別 R、 G和 B 屬性 Xamarin.FormsColor 。 這些屬性的類型 double 和範圍從 0 到 1。 如果您想要顯示十六進位值,則不能只搭配 「X2」 格式規格使用 StringFormat 。 這隻適用於整數和此外,值 double 必須乘以 255。
這個小問題已解決 於值轉換器,也稱為 系結轉換器。 這是實作 介面的 IValueConverter 類別,這表示它有兩個名為 Convert 和 ConvertBack的方法。 當Convert值從來源傳輸至目標時,會呼叫 方法;ConvertBack方法會呼叫 ,以便從目標傳輸至或系結中的OneWayToSourceTwoWay來源:
using System;
using System.Globalization;
using Xamarin.Forms;

namespace XamlSamples
{
    class DoubleToIntConverter : IValueConverter
    {
        public object Convert(object value, Type targetType,
                              object parameter, CultureInfo culture)
        {
            double multiplier;

            if (!Double.TryParse(parameter as string, out multiplier))
                multiplier = 1;

            return (int)Math.Round(multiplier * (double)value);
        }

        public object ConvertBack(object value, Type targetType,
                                  object parameter, CultureInfo culture)
        {
            double divider;

            if (!Double.TryParse(parameter as string, out divider))
                divider = 1;

            return ((double)(int)value) / divider;
        }
    }
}
方法 ConvertBack 不會在此程式中扮演角色,因為系結只是從來源到目標的一種方式。
系結會參考具有 屬性的 Converter 系結轉換子。 係結轉換器也可以接受以 ConverterParameter 屬性指定的參數。 對於某些多功能性,這就是指定乘數的方式。 系結轉換器會檢查轉換器參數是否有有效的 double 值。
轉換器會在資源字典中具現化,以便在多個系結之間共用:
<local:DoubleToIntConverter x:Key="intConverter" />
三個數據系結會參考這個單一實例。 請注意, Binding 標記延伸包含內嵌 StaticResource 標記延伸:
<Label Text="{Binding Color.R,
                      Converter={StaticResource intConverter},
                      ConverterParameter=255,
                      StringFormat='R={0:X2}'}" />
以下是結果:
ListView處理可能會在基礎數據中動態發生的變更相當複雜,但前提是您採取某些步驟。 如果在運行時間期間指派給 ItemsSource 屬性 ListView 的專案集合,也就是可以加入或移除集合中的專案,請使用 ObservableCollection 這些項目的類別。 ObservableCollection 會實作 INotifyCollectionChanged 介面,並 ListView 會安裝 事件的處理程式 CollectionChanged 。
如果專案的屬性在運行時間本身變更,則集合中的專案應該實 INotifyPropertyChanged 作 介面,並使用 PropertyChanged 事件向屬性值發出變更訊號。 本系列 第 5 部分會示範這一點。從數據系結到MVVM。
摘要
數據系結提供強大的機制,可在頁面內的兩個對象之間,或可視化對象與基礎數據之間連結屬性。 但是當應用程式開始使用數據源時,熱門的應用程式架構模式會開始以有用的範例形式出現。 這涵蓋於 第 5 部分。從數據系結到MVVM。


