本教學課程將介紹如何使用 Microsoft Purview Python SDK。 您可以使用 SDK 以程式設計方式執行所有最常見的 Microsoft Purview 作業,而不是透過 Microsoft Purview 治理入口網站。
在本教學課程中,您將瞭解我們如何使用 SDK 來:
- 授與以程式設計方式使用 Microsoft Purview 的必要許可權
- 將 Blob 儲存體容器註冊為 Microsoft Purview 中的資料來源
- 定義並執行掃描
- 搜尋目錄
- 刪除資料來源
必要條件
在本教學課程中,您需要:
- Python 3.6 或更高版本
- 作用中的 Azure 訂用帳戶。 如果您沒有,可以 免費創建一個。
- 與您的訂用帳戶相關聯的 Microsoft Entra 租用戶。
- Azure 儲存體帳戶。 如果您還沒有,可以 按照我們的快速入門指南建立一個。
- Microsoft Purview 帳戶。 如果您還沒有,可以 按照我們的快速入門指南建立一個。
- 具有用戶端密碼的服務主體。
重要事項
針對這些腳本,您的端點值會根據您使用的 Microsoft Purview 入口網站而有所不同。 傳統 Microsoft Purview 治理入口網站的端點:purview.azure.com/ 新 Microsoft Purview 入口網站的端點:purview.microsoft.com/
因此,如果您使用新的入口網站,您的端點值會類似:「;https://consotopurview.scan.purview.microsoft.com"
授與儲存體帳戶的 Microsoft Purview 存取權
在能夠掃描儲存體帳戶的內容之前,您必須先為 Microsoft Purview 提供正確的角色。
透過 Azure 入口網站移至您的儲存體帳戶。
選取存取控制 (IAM) 。
選取 [新增] 按鈕,然後選取 [新增角色指派]。
![儲存體帳戶中 [存取控制] 功能表的螢幕擷取畫面,已選取 [新增] 按鈕,然後選取 [新增角色指派]。](media/tutorial-using-python-sdk/add-role-assignment-storage.png)
在下一個視窗中,搜尋 Storage Blob 讀取者 角色並選取它:
![新增角色指派功能表的螢幕擷取畫面,其中已從可用角色清單中選取 [儲存體 Blob 資料讀取者]。](media/tutorial-using-python-sdk/storage-blob-reader-role.png)
然後前往 成員 標籤並選擇 選擇成員:
![已選取 [+ 選取成員] 按鈕的新增角色指派功能表的螢幕擷取畫面。](media/tutorial-using-python-sdk/select-members-blob-reader-role.png)
右側會出現一個新窗格。 搜尋並選取現有 Microsoft Purview 實例的名稱。
然後,您可以選取 [檢閱 + 指派]。
Microsoft Purview 現在具有掃描 Blob 儲存體所需的讀取權限。
授與應用程式 Microsoft Purview 帳戶的存取權
首先,您需要服務主體的用戶端識別碼、租用戶識別碼和用戶端密碼。 若要尋找這項資訊,請選取您的 Microsoft Entra ID。
然後,選取 [應用程式註冊]。
選取您的應用程式並找出所需的資訊:
名稱
用戶端 ID (或應用程式 ID)
租用戶 ID (或目錄 ID)
![Azure 入口網站中服務主體頁面的螢幕擷取畫面,其中醒目提示 [用戶端識別碼] 和 [租用戶識別碼]。](media/tutorial-using-python-sdk/app-registration-info.png)
-
![Azure 入口網站中服務主體頁面的螢幕擷取畫面,已選取 [憑證 & 秘密] 索引標籤,顯示可用的用戶端憑證和秘密。](media/tutorial-using-python-sdk/get-service-principal-secret.png)
您現在必須將相關的 Microsoft Purview 角色授與服務主體。 若要這樣做,請存取您的 Microsoft Purview 實例。 選取 [ 開啟 Microsoft Purview 治理入口網站 ],或直接開啟 Microsoft Purview 的治理入口網站 ,然後選擇您部署的實例。
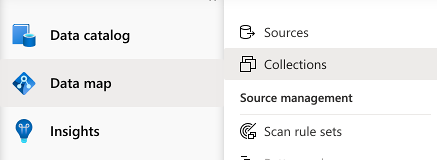
在 Microsoft Purview 治理入口網站內,選取 [ 資料對應],然後選取 [集合]:
選取您要使用的集合,然後前往 [角色指派] 索引標籤。在下列角色中新增服務主體:
- 集合管理員
- 資料來源管理員
- 資料策展人
- 資料讀取器
針對每個角色,選取 [編輯角色指派] 按鈕,然後選取您要新增服務主體的角色。 或者選取每個角色旁的 [ 新增 ] 按鈕,然後搜尋服務主體的名稱或用戶端識別碼來新增服務主體,如下所示:
![Microsoft Purview 治理入口網站中集合下 [角色指派] 功能表的螢幕擷取畫面。新增使用者按鈕位於 [集合管理員] 索引標籤旁邊。新增或移除集合管理員窗格隨即顯示,並在文字方塊中搜尋服務主體。](media/tutorial-using-python-sdk/add-role-purview.png)
安裝 Python 套件
- 開啟新的命令提示字元或終端機
- 安裝 Azure 身分識別套件以進行驗證:
pip install azure-identity - 安裝 Microsoft Purview 掃描用戶端套件:
pip install azure-purview-scanning - 安裝 Microsoft Purview 系統管理用戶端套件:
pip install azure-purview-administration - 安裝 Microsoft Purview 用戶端套件:
pip install azure-purview-catalog - 安裝 Microsoft Purview 帳戶套件:
pip install azure-purview-account - 安裝 Azure Core 套件:
pip install azure-core
建立 Python 指令碼檔
建立純文字檔,並將其儲存為後綴為.py的 Python 指令碼。 例如:tutorial.py。
實例化「掃描」、「型錄」及「管理」用戶端
在本節中,您將瞭解如何具現化:
- 掃描用戶端,可用於註冊資料來源、建立和管理掃描規則、觸發掃描等。
- 目錄用戶端,有助於透過搜尋、瀏覽探索到的資產、識別資料的敏感度等與目錄互動。
- 系統管理用戶端對於與 Microsoft Purview 資料對應本身互動、清單集合等作業很有用。
首先,您必須向 Microsoft Entra ID 進行驗證。 為此,您將使用 您建立的用戶端密碼。
從必要的匯入陳述式開始:我們的三個用戶端、認證陳述式和 Azure 例外狀況陳述式。
from azure.purview.scanning import PurviewScanningClient
from azure.purview.catalog import PurviewCatalogClient
from azure.purview.administration.account import PurviewAccountClient
from azure.identity import ClientSecretCredential
from azure.core.exceptions import HttpResponseError
在程式碼中指定下列資訊:
- 用戶端 ID (或應用程式 ID)
- 租用戶 ID (或目錄 ID)
- 用戶端密碼
client_id = "<your client id>"
client_secret = "<your client secret>"
tenant_id = "<your tenant id>"
指定您的端點:
重要事項
您的端點值會根據您使用的 Microsoft Purview 入口網站而有所不同。 傳統 Microsoft Purview 治理入口網站的端點:
https://{your_purview_account_name}.purview.azure.com/新 Microsoft Purview 入口網站的端點:https://api.purview-service.microsoft.com掃描 傳統 Microsoft Purview 治理入口網站的端點:
https://{your_purview_account_name}.scan.purview.azure.com/新 Microsoft Purview 入口網站的端點:https://api.scan.purview-service.microsoft.compurview_endpoint = "<endpoint>" purview_scan_endpoint = "<scan endpoint>"您現在可以實例化三個用戶端:
def get_credentials(): credentials = ClientSecretCredential(client_id=client_id, client_secret=client_secret, tenant_id=tenant_id) return credentials def get_purview_client(): credentials = get_credentials() client = PurviewScanningClient(endpoint=purview_scan_endpoint, credential=credentials, logging_enable=True) return client def get_catalog_client(): credentials = get_credentials() client = PurviewCatalogClient(endpoint=purview_endpoint, credential=credentials, logging_enable=True) return client def get_admin_client(): credentials = get_credentials() client = PurviewAccountClient(endpoint=purview_endpoint, credential=credentials, logging_enable=True) return client
我們的許多腳本都會從這些相同的步驟開始,因為我們需要這些客戶端與帳戶互動。
註冊資料來源
在本節中,您將註冊 Blob 儲存體。
如同我們在上一節中討論,首先,您將匯入存取 Microsoft Purview 帳戶所需的用戶端。 此外,請匯入 Azure 錯誤回應套件,以便進行疑難排解,並匯入 ClientSecretCredential 來建構 Azure 認證。
from azure.purview.administration.account import PurviewAccountClient from azure.purview.scanning import PurviewScanningClient from azure.core.exceptions import HttpResponseError from azure.identity import ClientSecretCredential請遵循本指南收集儲存體帳戶的資源識別碼 :取得儲存體帳戶的資源識別碼。
然後,在您的 Python 檔案中,定義下列資訊,以便能夠以程式設計方式註冊 Blob 儲存體:
storage_name = "<name of your Storage Account>" storage_id = "<id of your Storage Account>" rg_name = "<name of your resource group>" rg_location = "<location of your resource group>" reference_name_purview = "<name of your Microsoft Purview account>"提供您要註冊 Blob 儲存體的集合名稱。 (它應該是您稍早套用權限的相同集合。如果不是,請先將許可權套用至此集合。) 如果是根集合,請使用與 Microsoft Purview 實例相同的名稱。
collection_name = "<name of your collection>"建立函式來建構認證以存取您的 Microsoft Purview 帳戶:
client_id = "<your client id>" client_secret = "<your client secret>" tenant_id = "<your tenant id>" def get_credentials(): credentials = ClientSecretCredential(client_id=client_id, client_secret=client_secret, tenant_id=tenant_id) return credentialsMicrosoft Purview 資料對應中的所有集合都有易記名稱和名稱。
- 易記名稱是您在集合上看到的名稱。 例如:銷售。
- 除了根集合) 之外,所有集合 (的 名稱 是資料對映所指派的六個字元名稱。
Python 需要這個六個字元的名稱來引用任何子集合。 若要自動將 易記名稱 轉換為腳本中所需的六個字元集合名稱,請新增下列程式碼區塊:
重要事項
您的端點值會根據您使用的 Microsoft Purview 入口網站而有所不同。 傳統 Microsoft Purview 治理入口網站的端點:purview.azure.com/ 新 Microsoft Purview 入口網站的端點:purview.microsoft.com/
因此,如果您使用新的入口網站,您的端點值會類似:「;https://consotopurview.scan.purview.microsoft.com"
def get_admin_client(): credentials = get_credentials() client = PurviewAccountClient(endpoint=purview_endpoint, credential=credentials, logging_enable=True) return client try: admin_client = get_admin_client() except ValueError as e: print(e) collection_list = client.collections.list_collections() for collection in collection_list: if collection["friendlyName"].lower() == collection_name.lower(): collection_name = collection["name"]對於這兩個用戶端,視作業而定,您也需要提供輸入主體。 若要註冊來源,您必須提供資料來源註冊的輸入本文:
ds_name = "<friendly name for your data source>" body_input = { "kind": "AzureStorage", "properties": { "endpoint": f"https://{storage_name}.blob.core.windows.net/", "resourceGroup": rg_name, "location": rg_location, "resourceName": storage_name, "resourceId": storage_id, "collection": { "type": "CollectionReference", "referenceName": collection_name }, "dataUseGovernance": "Disabled" } }現在您可以呼叫 Microsoft Purview 用戶端並註冊資料來源。
重要事項
您的端點值會根據您使用的 Microsoft Purview 入口網站而有所不同。 傳統 Microsoft Purview 治理入口網站的端點:
https://{your_purview_account_name}.purview.azure.com/新 Microsoft Purview 入口網站的端點:https://api.purview-service.microsoft.com如果您使用傳統入口網站,您的端點值會是:
https://{your_purview_account_name}.scan.purview.azure.com如果您使用新的入口網站,您的端點值會是:https://scan.api.purview-service.microsoft.comdef get_purview_client(): credentials = get_credentials() client = PurviewScanningClient(endpoint={{ENDPOINT}}, credential=credentials, logging_enable=True) return client try: client = get_purview_client() except ValueError as e: print(e) try: response = client.data_sources.create_or_update(ds_name, body=body_input) print(response) print(f"Data source {ds_name} successfully created or updated") except HttpResponseError as e: print(e)
當註冊程序成功時,您可以看到來自用戶端的擴充內文回應。
在下列各節中,您將掃描您註冊的資料來源並搜尋目錄。 每個指令碼的結構都與此註冊指令碼類似。
完整程式碼
from azure.purview.scanning import PurviewScanningClient
from azure.identity import ClientSecretCredential
from azure.core.exceptions import HttpResponseError
from azure.purview.administration.account import PurviewAccountClient
client_id = "<your client id>"
client_secret = "<your client secret>"
tenant_id = "<your tenant id>"
purview_endpoint = "<endpoint>"

purview_scan_endpoint = "<scan endpoint>"
storage_name = "<name of your Storage Account>"
storage_id = "<id of your Storage Account>"
rg_name = "<name of your resource group>"
rg_location = "<location of your resource group>"
collection_name = "<name of your collection>"
ds_name = "<friendly data source name>"
def get_credentials():
credentials = ClientSecretCredential(client_id=client_id, client_secret=client_secret, tenant_id=tenant_id)
return credentials
def get_purview_client():
credentials = get_credentials()
client = PurviewScanningClient(endpoint=purview_scan_endpoint, credential=credentials, logging_enable=True)
return client
def get_admin_client():
credentials = get_credentials()
client = PurviewAccountClient(endpoint=purview_endpoint, credential=credentials, logging_enable=True)
return client
try:
admin_client = get_admin_client()
except ValueError as e:
print(e)
collection_list = admin_client.collections.list_collections()
for collection in collection_list:
if collection["friendlyName"].lower() == collection_name.lower():
collection_name = collection["name"]
body_input = {
"kind": "AzureStorage",
"properties": {
"endpoint": f"https://{storage_name}.blob.core.windows.net/",
"resourceGroup": rg_name,
"location": rg_location,
"resourceName": storage_name,
"resourceId": storage_id,
"collection": {
"type": "CollectionReference",
"referenceName": collection_name
},
"dataUseGovernance": "Disabled"
}
}
try:
client = get_purview_client()
except ValueError as e:
print(e)
try:
response = client.data_sources.create_or_update(ds_name, body=body_input)
print(response)
print(f"Data source {ds_name} successfully created or updated")
except HttpResponseError as e:
print(e)
掃描資料來源
掃描資料來源可以透過兩個步驟完成:
- 建立掃描定義
- 觸發掃描執行
在本教學課程中,您將使用 Blob 儲存體容器的預設掃描規則。 不過,您也可以 使用 Microsoft Purview 掃描用戶端以程式設計方式建立自定義掃描規則。
現在讓我們掃描您在上面註冊的資料來源。
新增匯入陳述式以產生 唯一識別碼、呼叫 Microsoft Purview 掃描用戶端、Microsoft Purview 系統管理用戶端、Azure 錯誤回應套件以進行疑難排解,以及用戶端密碼認證來收集 Azure 認證。
import uuid from azure.purview.scanning import PurviewScanningClient from azure.purview.administration.account import PurviewAccountClient from azure.core.exceptions import HttpResponseError from azure.identity import ClientSecretCredential使用您的認證建立掃描用戶端:
client_id = "<your client id>" client_secret = "<your client secret>" tenant_id = "<your tenant id>" def get_credentials(): credentials = ClientSecretCredential(client_id=client_id, client_secret=client_secret, tenant_id=tenant_id) return credentials def get_purview_client(): credentials = get_credentials() client = PurviewScanningClient(endpoint=f"https://{reference_name_purview}.scan.purview.azure.com", credential=credentials, logging_enable=True) return client try: client = get_purview_client() except ValueError as e: print(e)新增程式碼以收集集合的內部名稱。 (如需詳細資訊,請參閱上一節) :
collection_name = "<name of the collection where you will be creating the scan>"

def get_admin_client():
     credentials = get_credentials()
     client = PurviewAccountClient(endpoint=purview_endpoint, credential=credentials, logging_enable=True)
     return client

try:
    admin_client = get_admin_client()
except ValueError as e:
    print(e)

collection_list = client.collections.list_collections()
 for collection in collection_list:
  if collection["friendlyName"].lower() == collection_name.lower():
      collection_name = collection["name"]
然後,建立掃描定義:
ds_name = "<name of your registered data source>"
scan_name = "<name of the scan you want to define>"
reference_name_purview = "<name of your Microsoft Purview account>"

body_input = {
        "kind":"AzureStorageMsi",
        "properties": {
            "scanRulesetName": "AzureStorage",
            "scanRulesetType": "System", #We use the default scan rule set
            "collection":
                {
                    "referenceName": collection_name,
                    "type": "CollectionReference"
                }
        }
}

try:
    response = client.scans.create_or_update(data_source_name=ds_name, scan_name=scan_name, body=body_input)
    print(response)
    print(f"Scan {scan_name} successfully created or updated")
except HttpResponseError as e:
    print(e)
現在已定義掃描,您可以使用唯一 ID 觸發掃描執行:
run_id = uuid.uuid4() #unique id of the new scan

try:
    response = client.scan_result.run_scan(data_source_name=ds_name, scan_name=scan_name, run_id=run_id)
    print(response)
    print(f"Scan {scan_name} successfully started")
except HttpResponseError as e:
    print(e)
完整程式碼
import uuid
from azure.purview.scanning import PurviewScanningClient
from azure.purview.administration.account import PurviewAccountClient
from azure.identity import ClientSecretCredential

ds_name = "<name of your registered data source>"
scan_name = "<name of the scan you want to define>"
reference_name_purview = "<name of your Microsoft Purview account>"
client_id = "<your client id>"
client_secret = "<your client secret>"
tenant_id = "<your tenant id>"
collection_name = "<name of the collection where you will be creating the scan>"

def get_credentials():
	credentials = ClientSecretCredential(client_id=client_id, client_secret=client_secret, tenant_id=tenant_id)
	return credentials

def get_purview_client():
	credentials = get_credentials()
	client = PurviewScanningClient(endpoint=purview_scan_endpoint, credential=credentials, logging_enable=True)
	return client

def get_admin_client():
	credentials = get_credentials()
	client = PurviewAccountClient(endpoint=purview_endpoint, credential=credentials, logging_enable=True)
	return client

try:
	admin_client = get_admin_client()
except ValueError as e:
        print(e)

collection_list = admin_client.collections.list_collections()
for collection in collection_list:
	if collection["friendlyName"].lower() == collection_name.lower():
		collection_name = collection["name"]


try:
	client = get_purview_client()
except AzureError as e:
	print(e)

body_input = {
	"kind":"AzureStorageMsi",
	"properties": {
		"scanRulesetName": "AzureStorage",
		"scanRulesetType": "System",
		"collection": {
			"type": "CollectionReference",
			"referenceName": collection_name
		}
	}
}

try:
	response = client.scans.create_or_update(data_source_name=ds_name, scan_name=scan_name, body=body_input)
	print(response)
	print(f"Scan {scan_name} successfully created or updated")
except HttpResponseError as e:
	print(e)

run_id = uuid.uuid4() #unique id of the new scan

try:
	response = client.scan_result.run_scan(data_source_name=ds_name, scan_name=scan_name, run_id=run_id)
	print(response)
	print(f"Scan {scan_name} successfully started")
except HttpResponseError as e:
	print(e)
搜尋目錄
掃描完成後,資產很可能已被發現甚至分類。 掃描後,此過程可能需要一些時間才能完成,因此您可能需要等待才能運行下一部分程式碼。 等候您的掃描顯示已完成,且資產會出現在 Microsoft Purview 整合式目錄中。
資產準備就緒之後,您可以使用 Microsoft Purview 目錄用戶端來搜尋整個目錄。
這次您需要匯入 目錄 用戶端,而不是掃描用戶端。 也包括 HTTPResponse 錯誤和 ClientSecretCredential。
from azure.purview.catalog import PurviewCatalogClient
from azure.identity import ClientSecretCredential
from azure.core.exceptions import HttpResponseError
建立函式來取得認證以存取您的 Microsoft Purview 帳戶,並具現化目錄用戶端。
client_id = "<your client id>"
client_secret = "<your client secret>"
tenant_id = "<your tenant id>"
reference_name_purview = "<name of your Microsoft Purview account>"

def get_credentials():
     credentials = ClientSecretCredential(client_id=client_id, client_secret=client_secret, tenant_id=tenant_id)
     return credentials

def get_catalog_client():
    credentials = get_credentials()
    client = PurviewCatalogClient(endpoint=f"https://{reference_name_purview}.scan.purview.azure.com", credential=credentials, logging_enable=True)
    return client

try:
    client_catalog = get_catalog_client()
except ValueError as e:
    print(e)
在輸入內文中設定您的搜尋條件和關鍵字:
keywords = "keywords you want to search"

body_input={
    "keywords": keywords
}
在這裡,您只指定關鍵字,但請記住, 您可以新增許多其他欄位來進一步指定您的查詢。
搜尋目錄:
try:
    response = client_catalog.discovery.query(search_request=body_input)
    print(response)
except HttpResponseError as e:
    print(e)
完整程式碼
from azure.purview.catalog import PurviewCatalogClient
from azure.identity import ClientSecretCredential
from azure.core.exceptions import HttpResponseError

client_id = "<your client id>"
client_secret = "<your client secret>"
tenant_id = "<your tenant id>"
reference_name_purview = "<name of your Microsoft Purview account>"
keywords = "<keywords you want to search for>"

def get_credentials():
	credentials = ClientSecretCredential(client_id=client_id, client_secret=client_secret, tenant_id=tenant_id)
	return credentials

def get_catalog_client():
	credentials = get_credentials()
	client = PurviewCatalogClient(endpoint=purview_endpoint, credential=credentials, logging_enable=True)
	return client

body_input={
	"keywords": keywords
}

try:
	catalog_client = get_catalog_client()
except ValueError as e:
	print(e)

try:
	response = catalog_client.discovery.query(search_request=body_input)
	print(response)
except HttpResponseError as e:
	print(e)
刪除資料來源
在本節中,您將瞭解如何刪除您先前註冊的資料來源。 此操作相當簡單,並且是通過掃描客戶端完成的。
匯入 掃描 用戶端。 也包括 HTTPResponse 錯誤和 ClientSecretCredential。
from azure.purview.scanning import PurviewScanningClient
from azure.identity import ClientSecretCredential
from azure.core.exceptions import HttpResponseError
建立函式來取得認證以存取您的 Microsoft Purview 帳戶,並具現化掃描用戶端。
client_id = "<your client id>"
client_secret = "<your client secret>"
tenant_id = "<your tenant id>"
reference_name_purview = "<name of your Microsoft Purview account>"

def get_credentials():
     credentials = ClientSecretCredential(client_id=client_id, client_secret=client_secret, tenant_id=tenant_id)
     return credentials

def get_scanning_client():
    credentials = get_credentials()
    PurviewScanningClient(endpoint=f"https://{reference_name_purview}.scan.purview.azure.com", credential=credentials, logging_enable=True)
    return client

try:
    client_scanning = get_scanning_client()
except ValueError as e:
    print(e)
刪除資料來源:
    ds_name = "<name of the registered data source you want to delete>"
    try:
        response = client_scanning.data_sources.delete(ds_name)
        print(response)
        print(f"Data source {ds_name} successfully deleted")
    except HttpResponseError as e:
        print(e)
完整程式碼
from azure.purview.scanning import PurviewScanningClient
from azure.identity import ClientSecretCredential
from azure.core.exceptions import HttpResponseError


client_id = "<your client id>"
client_secret = "<your client secret>"
tenant_id = "<your tenant id>"
reference_name_purview = "<name of your Microsoft Purview account>"
ds_name = "<name of the registered data source you want to delete>"

def get_credentials():
	credentials = ClientSecretCredential(client_id=client_id, client_secret=client_secret, tenant_id=tenant_id)
	return credentials

def get_scanning_client():
	credentials = get_credentials()
	client = PurviewScanningClient(endpoint=f"https://{reference_name_purview}.scan.purview.azure.com", credential=credentials, logging_enable=True)
	return client

try:
	client_scanning = get_scanning_client()
except ValueError as e:
	print(e)

try:
	response = client_scanning.data_sources.delete(ds_name)
	print(response)
	print(f"Data source {ds_name} successfully deleted")
except HttpResponseError as e:
	print(e)