SharePoint App-Only is the older, but still very relevant, model of setting up app-principals. This model works for both SharePoint Online and SharePoint on-premises (2013/2016/2019/subscription edition) and is ideal to prepare your applications for migration from SharePoint on-premises to SharePoint Online. Below steps show how to setup an app principal with tenant full control permissions, but you could also grant just read permissions using this approach.
Important
Using Azure ACS (Access Control Services) for SharePoint Online has been retired as of November 27th 2023 and will stop working from April 2nd 2026, checkout the full retirement announcement to learn more. Using Azure ACS outside of the context of SharePoint was already retired on November 7th, 2018 and is end-of-life now.
Retirement means that the feature will not get any new investments, but it's still supported. End-of-life means that the feature will be discontinued and is no longer available for use.
For new tenants, apps using an ACS app-only access token is disabled by default. We recommend using the Entra ID application permissions model which is modern and more secure. But you can change the behavior by running 'set-spotenant -DisableCustomAppAuthentication $false' (needs the latest SharePoint admin PowerShell).
Setting up an app-only principal with tenant permissions
Note
Site collection admin is not able to register add-in with Azure ACS in AppRegNew.aspx by default unless explicitly allowed by the SharePoint tenant admin. For more information, see Set-SPOTenant.
Navigate to a site in your tenant (e.g. https://contoso.sharepoint.com) and then call the appregnew.aspx page (e.g. https://contoso.sharepoint.com/_layouts/15/appregnew.aspx). In this page fill the remaining information like shown in the screen-shot below.
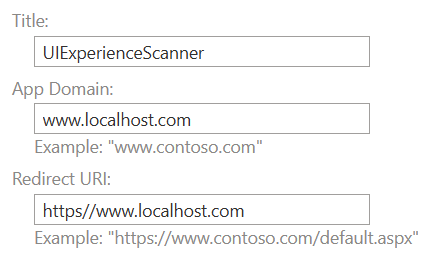
Important
After pressing Create you'll be presented with a client id and client secret, store the retrieved information (client id and client secret) since you'll need this in the next step!
Next step is granting permissions to the newly created principal. Since we're granting tenant scoped permissions this granting can only be done via the appinv.aspx page on the tenant administration site. You can reach this site via https://contoso-admin.sharepoint.com/_layouts/15/appinv.aspx. Once the page is loaded add your client id and look up the created principal:
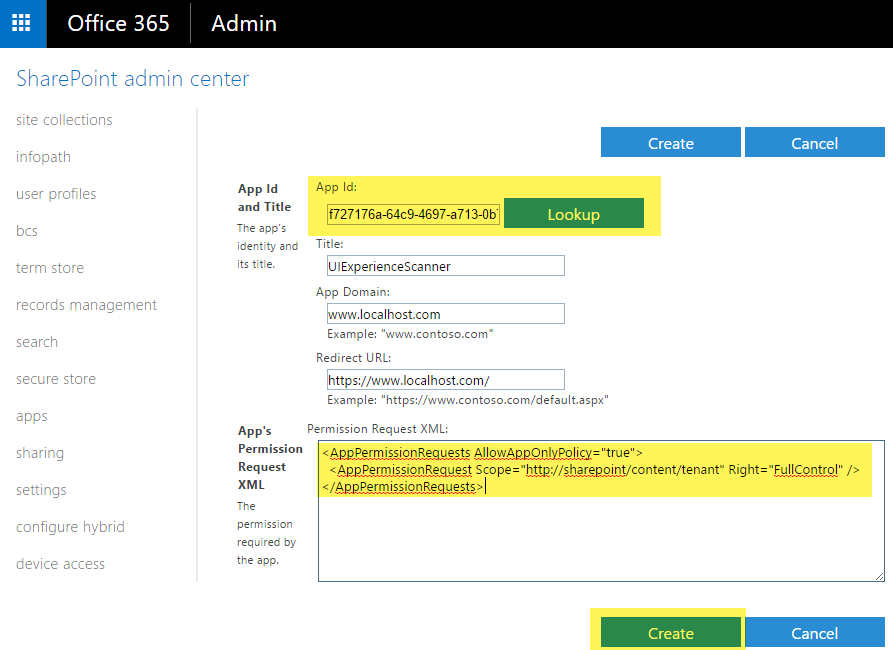
To grant permissions, you'll need to provide the permission XML that describes the needed permissions. Since this application needs to be able to access all sites + also uses search with app-only it needs below permissions:
<AppPermissionRequests AllowAppOnlyPolicy="true">
  <AppPermissionRequest Scope="http://sharepoint/content/tenant" Right="FullControl" />
</AppPermissionRequests>
When you click on Create you'll be presented with a permission consent dialog. Press Trust It to grant the permissions:
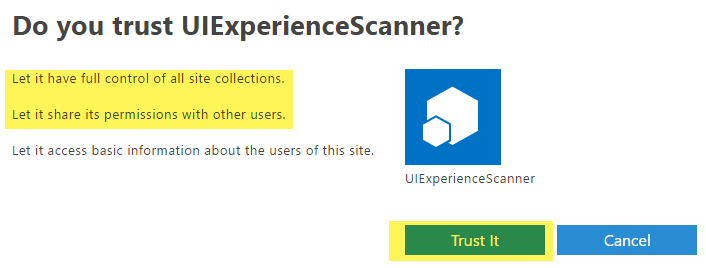
Important
Please safeguard the created client id/secret combination as would it be your administrator account. Using this client id/secret one can read/update all data in your SharePoint Online environment!
With the preparation work done let's continue to the next chapter showing how you can use the created app principal via its client id and secret combination.
Using this principal with PnP PowerShell
If you want to utilize the generated app-only registration with PnP PowerShell, you can do so by connecting to your SharePoint On-Premises or Online environment using:
Connect-PnPOnline -Url https://contoso.sharepoint.com/sites/demo -ClientId [Your Client ID] -ClientSecret "[Your Client Secret]"
Note
PnP PowerShell is an open-source solution with active community providing support for it. There is no SLA for the open-source tool support from Microsoft.
Using this principal in your application using the PnP Framework library
In a first step, you add the PnP Framework library nuget package: https://www.nuget.org/packages/PnP.Framework. Once that's done you can use below code construct:
string siteUrl = "https://contoso.sharepoint.com/sites/demo";
using (var cc = new AuthenticationManager().GetACSAppOnlyContext(siteUrl, "[Your Client ID]", "[Your Client Secret]"))
{
    cc.Load(cc.Web, p => p.Title);
    cc.ExecuteQuery();
    Console.WriteLine(cc.Web.Title);
};
Using this principal in your application without using the PnP Framework library
Once the principal is created and consented you can use the principal's id and secret to request an access. The TokenHelper.cs class will use the id and secret from the application's configuration file.
using Microsoft.SharePoint.Client;
using System;

namespace AzureACSAuth
{
    class Program
    {
        static void Main(string[] args)
        {
            string siteUrl = "https://contoso.sharepoint.com/sites/demo";

            //Get the realm for the URL
            string realm = TokenHelper.GetRealmFromTargetUrl(new Uri(siteUrl));

            //Get the access token for the URL.
            string accessToken = TokenHelper.GetAppOnlyAccessToken(TokenHelper.SharePointPrincipal, new Uri(siteUrl).Authority, realm).AccessToken;

            //Create a client context object based on the retrieved access token
            using (ClientContext cc = TokenHelper.GetClientContextWithAccessToken(siteUrl, accessToken))
            {
                cc.Load(cc.Web, p => p.Title);
                cc.ExecuteQuery();
                Console.WriteLine(cc.Web.Title);
            }
        }
    }
}
A sample app.config looks like this:
<?xml version="1.0" encoding="utf-8" ?>
<configuration>
  <appSettings>
    <!-- Use AppRegNew.aspx and AppInv.aspx to register client id with secret -->
    <add key="ClientId" value="[Your Client ID]" />
    <add key="ClientSecret" value="[Your Client Secret]" />
  </appSettings>
</configuration>
Note
You can easily insert the TokenHelper.cs class in your project by adding the AppForSharePointOnlineWebToolkit nuget package to your solution.