練習 - 建立並執行基本管線
重要
您必須有自己的 Azure 訂用帳戶才能執行本練習,且可能會產生費用。 如果您還沒有 Azure 訂用帳戶,請在開始前建立免費帳戶。
您想要將更新自動部署到您的玩具公司網站。 第一個步驟是在 Azure DevOps 中建立基本管線。
在本練習中,您將會:
- 建立 Azure DevOps 組織與專案。
- 建立基本管線。
- 執行您的基本管線。
在 Azure DevOps 中建立專案
在瀏覽器中,移至 dev.azure.com。 登入或建立新的帳戶。
如已建立新的帳戶,請依提示建立 Azure DevOps 組織。 Azure DevOps 接著會提示您建立新專案。 繼續下一個步驟,以設定專案。
若已登入現有的 Azure DevOps 組織,請選取 [新增專案] 建立新的專案。

在 [建立專案以開始使用] 窗格中,輸入新專案的下列詳細資料:
- 專案名稱:使用有意義但簡短的名稱。 在此練習中,請輸入 toy-website。
- 描述:輸入專案用途的描述。 在此練習中,輸入 Toy 公司網站。
- 可見度:您可以使用 Azure DevOps 建立公用與私人存放庫。 在此情況中,存放庫應該是私人的,因為您的公司網站檔案應該只能由組織內的人員存取。 您稍後可以將存取權授與其他使用者。
您的專案設定看起來應該類似此範例:
![Azure DevOps [建立專案以開始使用] 窗格的螢幕擷取畫面,其中醒目提示專案名稱和可見性選項。](../includes/media/azure-devops-new-project-details.png)
選取建立專案。
複製存放庫
在歡迎窗格中,或在資源功能表上,選取 [Repos]。
![[歡迎使用] 窗格的螢幕擷取畫面,其中顯示 Repos 圖示,並將窗格和資源功能表強調顯示。](../includes/media/azure-devops-repos-menu.png)
如果您使用 macOS,則需要特殊的密碼才能複製 Git 存放庫。 選取 [產生 Git 認證],並將顯示的使用者名稱和密碼複製到安全的位置。
在 [複製到您的電腦] 區段中,選取 [在 VS Code 中複製]。 如果系統提示您允許開啟 Visual Studio Code,請選取 [開啟]。
![顯示存放庫設定的螢幕擷取畫面,其中醒目提示 [在 VS Code 中複製] 按鈕。](media/3-clone-visual-studio-code.png)
如果出現對話方塊,提示您允許延伸模組開啟存放庫 URI,請選取 [開啟]。
在本機裝置上建立要用於此存放庫的資料夾,然後選取 [選取存放庫位置]。
因為您是第一次使用此存放庫,系統會提示您登入。
若為 Windows,請輸入您稍早在本練習中用來登入 Azure DevOps 的相同認證。
若為 macOS,請輸入您稍早所產生的 Git 使用者名稱和密碼。
Visual Studio Code 會提示您開啟存放庫。 選取開啟。
![Visual Studio Code 的螢幕擷取畫面,其中顯示開啟已複製存放庫對話方塊並醒目提示 [開啟] 按鈕。](../includes/media/open-cloned-repo.png)
安裝 Azure Pipelines 延伸模組
Microsoft 發行了適用於 Visual Studio Code 的 Azure Pipelines 延伸模組。 此延伸模組可協助您撰寫管線 YAML 檔案。 建議您安裝此延伸模組,以便在工作時驗證 YAML 檔案。
在 Visual Studio Code 中,選取 [檢視] > [延伸模組] (快速鍵為 Ctrl+Shift+x)。
在 [搜尋] 方塊中,輸入 Azure Pipelines,然後選取由 Microsoft 發行的 Azure Pipelines 延伸模組。 選取安裝。
![Visual Studio Code [延伸模組] 功能表的螢幕擷取畫面,其中醒目提示 Microsoft 的 'Azure Pipelines' 延伸模組和 [安裝] 按鈕。](media/3-visual-studio-code-extension.png)
建立 YAML 管線定義
建立組織、專案與存放庫後,您就可以開始建立基本的管線定義。
在 Visual Studio Code 中,開啟 [總管]。
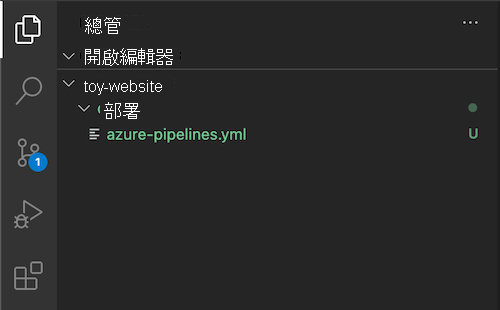
在 [總管] 中,將滑鼠停留在 TOY-WEBSITE 專案資料夾上,然後選取 [新增資料夾] 圖示。 將該資料夾命名為 deploy。
選取 [部署] 資料夾,然後在 TOY-WBSITE 專案中選取 [新增檔案] 圖示。 將檔案命名為 azure-pipelines.yml。

YML 檔案會在主面板中開啟。 將下列管線定義程式碼貼上到檔案中:
trigger: none

pool:
  vmImage: ubuntu-latest

jobs:
- job:
  steps:
  - script: echo Hello world!
    displayName: 'Placeholder step'
儲存對檔案所做的變更。
透過選取 [終端機]>[新增終端機],開啟一個 Visual Studio Code 終端機視窗。
終端機視窗隨即開啟,通常在畫面的下半部開啟。
若要認可並將 azure-pipelines.yml 檔案推送至 Git 存放庫,請將此程式碼貼上至終端機面板中,然後按 Enter。
git add deploy/azure-pipelines.yml
git commit -m "Add initial pipeline definition"
git push
在 Azure Pipelines 中設定管線
您已建立管線定義。 接下來,向 Azure Pipelines 註冊管線。
在 Azure DevOps 工作階段的資源功能表中,選取 [管線],然後在 [建立您的第一個管線] 窗格中,選取 [建立管線]。
![[建立您的第一個管線] 的螢幕擷取畫面,其中醒目提示資源功能表的 [管線],醒目提示 [建立管線] 按鈕。](media/3-create-pipeline.png)
在 [連線] 索引標籤上 ([您的程式碼在哪裡?] 窗格),選取 Azure Repos Git。
![[您的程式碼在何處?] 窗格的螢幕擷取畫面,其中選取 Azure Repos Git 選項。](media/3-create-pipeline-repo-type.png)
在 [選取] 索引標籤的 [選取存放庫] 窗格中,選取 toy-website。
![顯示 [設定您的管線] 索引標籤並選取 toy-website 存放庫的螢幕擷取畫面。](media/3-create-pipeline-repo.png)
在 [設定] 索引標籤上 ([設定您的管線] 窗格),選取 [現有 Azure Pipelines YAML 檔案]。
![顯示醒目提示 [現有 Azure Pipelines YAML 檔案] 選項的螢幕擷取畫面。](media/3-create-pipeline-configure.png)
在 [選取現有的 YAML 檔案] 窗格上的 [路徑] 下拉式清單中,選取 /deploy/azure-pipelines.yml,然後選取 [繼續]。
![Azure DevOps [選取現有 YAML 檔案] 窗格的螢幕擷取畫面,其中的 [路徑] 設為管線檔案,並醒目提示 [繼續] 按鈕。](media/3-create-pipeline-yaml-file.png)
[檢閱] 索引標籤 ([檢閱您的管線 YAML] 窗格) 會將您的 YAML 管線定義顯示為新的管線。
提示
您可使用 Azure Pipelines Web 介面提供的編輯器來管理管線定義。 在本課程模組中,您會使用 Visual Studio Code 中的定義檔案,但您也可以探索 Azure Pipelines 編輯器,查看其運作方式。
選取執行。
![螢幕擷取畫面顯示建立管線流程的「檢閱」步驟,並醒目提示 [執行] 按鈕。](media/3-create-pipeline-run.png)
Azure Pipelines 會建立管線,並啟動第一次執行。
驗證管線執行
重要
如果這是您第一次在此 Azure DevOps 組織中使用管線,您可能會看到錯誤指出:
未購買或授與託管平行處理原則。
為了防止誤用,Azure DevOps 要求新組織必須先核准,才能使用 Microsoft 裝載的管線代理程式,不需費用。
當管線執行啟動後,會有頁面顯示執行的相關資訊。

每個管線執行都包含一個識別碼。 您可以使用此識別碼協助尋找特定的管線執行。
作業狀態一開始會顯示為 [已排入佇列]。 您的管線可能無法立即啟動。 您的作業會新增至代理程式的佇列。 代理程式可供使用後,Azure Pipelines 就會指派代理程式並啟動該作業。 接著,作業狀態會變成 [正在執行]。
頁面中包含分支名稱,以及執行所使用之 Git 認可的識別碼。 此資訊會指出管線所用的存放庫內容版本。
重新整理頁面,直到作業狀態變更為 [成功] 為止。 然後,在 [作業] 下選取 [作業]。

作業資訊頁面會顯示管線所執行步驟的記錄。 您的預留位置步驟會列在左側功能表的步驟中。
![顯示管線作業記錄的螢幕擷取畫面,其中醒目提示 [預留位置步驟]。](media/3-pipeline-job-summary.png)
作業中的步驟清單包含您未建立的步驟。 這些步驟均由 Azure Pipelines 自動建立。 在某些組織中,您可能也會看到組織自動包含在所有管線中的步驟。 您可以選取任何步驟來檢視該步驟的記錄檔。
選取 [簽出 toy-website@main 至 s]。
![顯示管線作業記錄的螢幕擷取畫面,其中醒目提示 [預留位置步驟]。](media/3-pipeline-job-checkout-log.png)
每個步驟的記錄檔都會提供管線執行期間確實發生狀況的詳細資料。 如果您需要診斷管線的問題,則記錄資訊會很有幫助。 您無法直接存取執行步驟的代理程式。
在本案例中,存放庫內容是從 Azure Repos 下載至代理程式的檔案系統。
選取 [預留位置步驟]。

此步驟的記錄包含您在管線 YAML 檔案中建立的指令碼內容,以及執行此指令碼的
Hello world!文字輸出。
將管線執行連結至認可
建議先了解如何交互參考管線執行與其中所包含的認可。 將管線執行連結至認可,即可協助您追蹤部署和診斷問題的記錄。 Azure DevOps 提供數種將管線執行連結至認可的方式。 在此程序中,您會手動檢查認可歷程記錄。
若要回到存放庫概觀,請在 [DevOps 資源] 功能表中,選取 [Repos] > [認可]。

這個認可識別碼與您從管線執行中記下的認可識別碼相同。 而且,Azure Pipelines 會顯示與認可建立關聯的管線執行狀態。
選取該項認可。 已變更的檔案清單和透過認可的變更會以綠色醒目提示,表示所有文字都是新的。