練習 - 使用 API 外掛程式建立宣告式代理程式
使用動作擴充宣告式代理程式,可讓其實時擷取和更新儲存在外部系統中的數據。 使用 API 外掛程式,您可以透過其 API 連線到外部系統,以擷取和更新資訊。
下載入門專案
從下載範例項目開始。 在網頁瀏覽器中:
- 瀏覽至 https://github.com/microsoft/learn-declarative-agent-api-plugin-typescript。
- 如果您有 GitHub 帳戶:
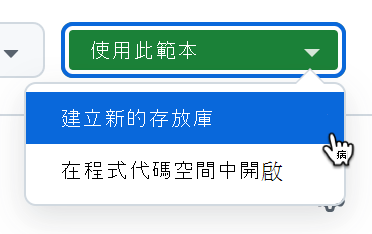
選 取 [使用此範本] 下拉式清單,然後從功能表中選擇 [ 建立新的存放庫]。
從可用的擁有者清單中,選擇您的帳戶。
將存放庫命名 為 da-ristorante-api。
使用 [建立存放庫] 按鈕確認建立 存放庫 。
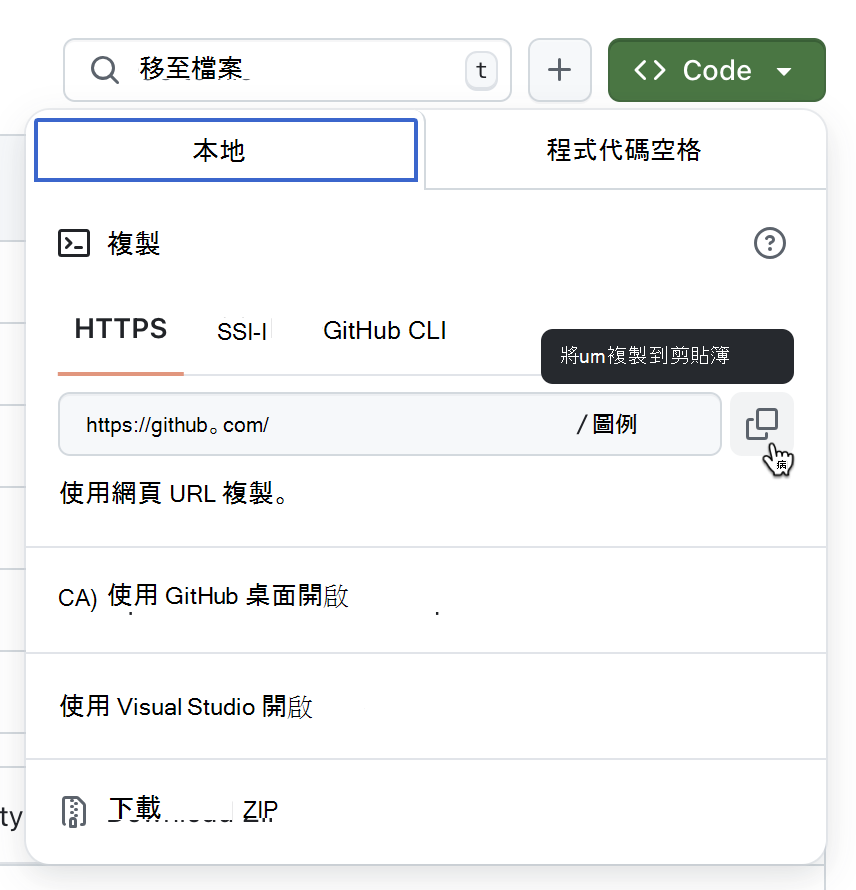
等候 GitHub 建立存放庫。 然後,複製存放庫 URL。
開啟命令行。
在命令列中,將工作目錄變更為您要將專案儲存在磁碟上的位置。
使用下列命令複製存放庫:
git clone https://github.com/your-user/your-repo。在 Visual Studio Code 中開啟複製的資料夾。
- 如果您沒有 GitHub 帳戶:
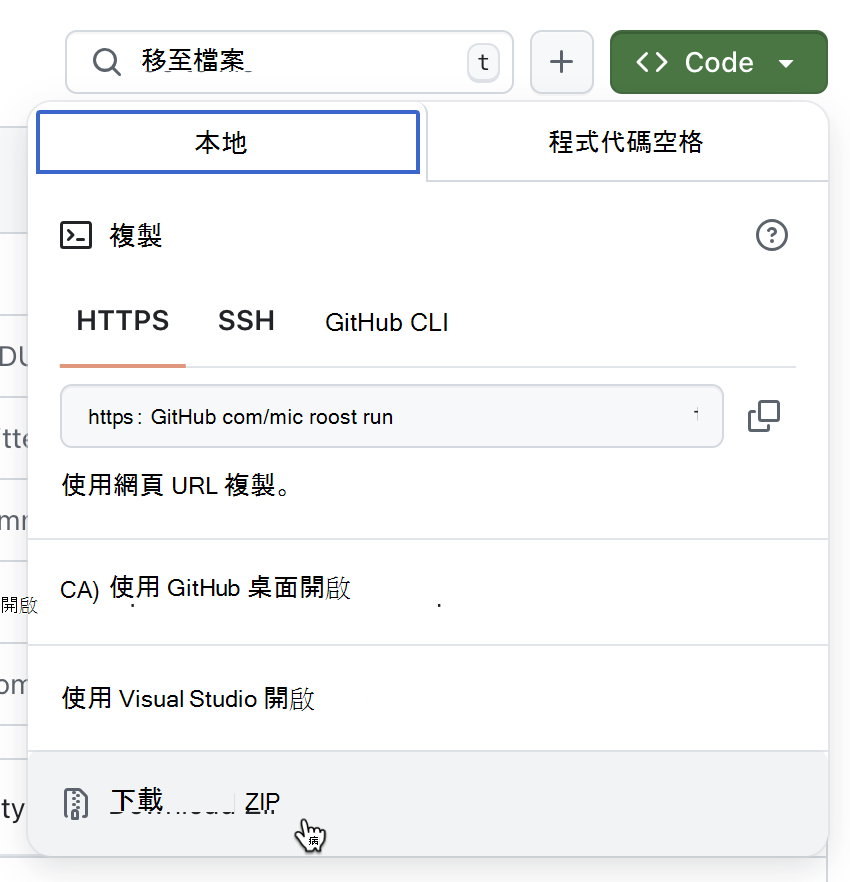
下載存放庫內容作為 ZIP。
擷取磁碟上 ZIP 的內容。
開啟 Visual Studio Code 中的資料夾。


範例專案是Microsoft 365 代理程式工具組專案,其中包含宣告式代理程式和在 Azure Functions 上執行的匿名 API。 宣告式代理程式與使用 Microsoft 365 代理程式工具組新建立的宣告式代理程式相同。 API 屬於虛構的義大利餐廳,可讓您流覽今天的功能表並下訂單。
檢查 API 定義
首先,查看義大利餐廳 API 的 API 定義。
在 Visual Studio Code:
在 [ 總管] 檢視 中,開啟 appPackage/apiSpecificationFile/ristorante.yml 檔案。 檔案是描述義大利餐廳 API 的 OpenAPI 規格。
找出 servers.url 屬性
servers:
  - url: http://localhost:7071/api
    description: Il Ristorante API server
請注意,它指向在本機執行時符合標準 URL 的本機 URL Azure Functions。
找出 paths 屬性,其中包含兩個作業: 用於 擷取今天功能表的 /搜尋,以及用於下訂單的 /orders 。
重要事項
請注意,每個作業都包含 operationId 屬性,可唯一識別 API 規格中的作業。 Copilot 要求每個作業都有唯一標識符,以便知道應該針對特定使用者提示呼叫哪個 API。
檢查 API 實作
接下來,查看您在此練習中使用的範例 API。
在 Visual Studio Code:
在 [ 總管] 檢視 中,開啟 src/data.json 檔案。 檔案包含義大利餐廳的虛構功能表項。 每道菜都包含:
- 名字
- 描述
- 影像的連結,
- 價格
- 在哪一個課程中提供
- 輸入 (餐或飲料) 、
- 選擇性地列出allergens
在此練習中,API 會使用此檔案作為其數據源。
接下來,展開 src/functions 資料夾。 請注意名為 dishes.ts和 placeOrder.ts 的兩 個檔案。 這些檔案包含 API 規格中定義之兩個作業的實作。
開啟 src/functions/dishes.ts 檔案。 請花點時間檢閱 API 的運作方式。 它會從從 src/functions/data.json 檔案載入範例數據開始。
import data from "../data.json";接下來,它會在不同的查詢字串參數中尋找呼叫 API 的用戶端可能通過的可能篩選條件。
const course = req.query.get('course');
const allergensString = req.query.get('allergens');
const allergens: string[] = allergensString ? allergensString.split(",") : [];
const type = req.query.get('type');
const name = req.query.get('name');
根據要求上指定的篩選條件,API 會篩選數據集並傳回回應。
接下來,檢查 API 以在 src/functions/placeOrder.ts 檔案中放置定義的訂單。 API 會從參考範例數據開始。 然後,它會定義用戶端在要求本文中傳送的順序圖形。
interface OrderedDish {
  name?: string;
  quantity?: number;
}

interface Order {
  dishes: OrderedDish[];
}
當 API 處理要求時,它會先檢查要求是否包含本文,以及其是否具有正確的圖形。 如果沒有,則會拒絕要求,並出現 400 不正確的要求錯誤。
let order: Order | undefined;
try {
  order = await req.json() as Order | undefined;
}
catch (error) {
  return {
    status: 400,
    jsonBody: { message: "Invalid JSON format" },
  } as HttpResponseInit;
}

if (!order.dishes || !Array.isArray(order.dishes)) {
  return {
    status: 400,
    jsonBody: { message: "Invalid order format" }
  } as HttpResponseInit;
}
接下來,API 會將要求解析成功能表上的值,並計算總價。
let totalPrice = 0;
const orderDetails = order.dishes.map(orderedDish => {
  const dish = data.find(d => d.name.toLowerCase().includes(orderedDish.name.toLowerCase()));
  if (dish) {
    totalPrice += dish.price * orderedDish.quantity;
    return {
      name: dish.name,
      quantity: orderedDish.quantity,
      price: dish.price,
    };
  }
  else {
    context.error(`Invalid dish: ${orderedDish.name}`);
    return null;
  }
});
重要事項
請注意,API 預期用戶端應如何依名稱的一部分來指定菜,而非其標識符。 這是基於目的,因為大型語言模型比數位更適合使用單字。 此外,在呼叫 API 來下訂單之前,Copilot 具有可在使用者提示中立即取得的菜名稱。 如果 Copilot 必須依其標識符參照菜,則必須先擷取需要其他 API 要求,而 Copilot 現在無法執行的作業。
當 API 準備就緒時,它會傳回總價格、訂單標識碼和狀態的回應。
const orderId = Math.floor(Math.random() * 10000);

return {
  status: 201,
  jsonBody: {
    order_id: orderId,
    status: "confirmed",
    total_price: totalPrice,
  }
} as HttpResponseInit;
建置外掛程式定義
下一個步驟是將外掛程式定義新增至專案。 外掛程式定義包含下列資訊:
- 外掛程式可以執行哪些動作。
- 其預期和傳回的數據形狀。
- 宣告式代理程序必須如何呼叫基礎 API。
新增基本外掛程式定義結構
在 Visual Studio Code:
在 appPackage 資料夾中,新增名為 ai-plugin.json 的新檔案。
貼上下列內容:
{
  "$schema": "https://developer.microsoft.com/json-schemas/copilot/plugin/v2.1/schema.json",
  "schema_version": "v2.1",
  "namespace": "ilristorante",
  "name_for_human": "Il Ristorante",
  "description_for_human": "See the today's menu and place orders",
  "description_for_model": "Plugin for getting the today's menu, optionally filtered by course and allergens, and placing orders",
  "functions": [
  ],
  "runtimes": [
  ],
  "capabilities": {
    "localization": {},
    "conversation_starters": []
  }
}
檔案包含 API 外掛程式的基本結構,其中包含人類和模型的描述。 此 description_for_model 包含外掛程式可執行哪些動作的詳細資訊,以協助代理程式瞭解何時應考慮叫用外掛程式。
儲存變更。
定義函式
API 外掛程式會定義一或多個函式,這些函式會對應至 API 規格中定義的 API 作業。 每個函式都包含名稱和描述,以及指示代理程式如何向使用者顯示數據的回應定義。
定義函式以擷取功能表
從定義函式開始,以擷取今天功能表的相關信息。
在 Visual Studio Code:
開啟 appPackage/ai-plugin.json 檔案。
在 functions 陣 列中,新增下列代碼段:
{
  "name": "getDishes",
  "description": "Returns information about the dishes on the menu. Can filter by course (breakfast, lunch or dinner), name, allergens, or type (dish, drink).",
  "capabilities": {
    "response_semantics": {
      "data_path": "$.dishes",
      "properties": {
        "title": "$.name",
        "subtitle": "$.description"
      }
    }
  }
}
首先,您可以定義從 API 規格叫用 getDishes 作業的函式。 接下來,您會提供函式描述。 此描述很重要,因為 Copilot 會使用它來決定要針對使用者提示叫用的函式。
在 response_semantics 屬性中,您可以指定 Copilot 應該如何顯示它從 API 接收的數據。 因為 API 會傳回 滑鼠 屬性中選單上之果子的相關信息,所以您會將 data_path 屬性設定為
$.dishesJSONPath 表達式。接下來,在 [ 屬性] 區段中,您會對應來自 API 回應的哪些屬性代表標題、描述和 URL。 因為在此情況下,這隻吃的沒有 URL,所以您只會對應 標題 和 描述。
完整的代碼段如下所示:
{
  "$schema": "https://developer.microsoft.com/json-schemas/copilot/plugin/v2.1/schema.json",
  "schema_version": "v2.1",
  "namespace": "ilristorante",
  "name_for_human": "Il Ristorante",
  "description_for_human": "See the today's menu and place orders",
  "description_for_model": "Plugin for getting the today's menu, optionally filtered by course and allergens, and placing orders",
  "functions": [
    {
      "name": "getDishes",
      "description": "Returns information about the dishes on the menu. Can filter by course (breakfast, lunch or dinner), name, allergens, or type (dish, drink).",
      "capabilities": {
        "response_semantics": {
          "data_path": "$.dishes",
          "properties": {
            "title": "$.name",
            "subtitle": "$.description"
          }
        }
      }
    }
  ],
  "runtimes": [
  ],
  "capabilities": {
    "localization": {},
    "conversation_starters": []
  }
}
儲存變更。
定義要排列順序的函式
接下來,定義要排列順序的函式。
在 Visual Studio Code:
開啟 appPackage/ai-plugin.json 檔案。
在函式 陣列的 結尾處,新增下列代碼段:
{
  "name": "placeOrder",
  "description": "Places an order and returns the order details",
  "capabilities": {
    "response_semantics": {
      "data_path": "$",
      "properties": {
        "title": "$.order_id",
        "subtitle": "$.total_price"
      }
    }
  }
}
首先,您會參考標識碼 為 placeOrder 的 API 作業。 然後,您會提供 Copilot 用來比對此函式與使用者提示的描述。 接下來,您會指示 Copilot 如何傳回數據。 以下是 API 在下訂單後所傳回的數據:
{
  "order_id": 6532,
  "status": "confirmed",
  "total_price": 21.97
}
因為您想要顯示的數據直接位於回應物件的根目錄中,所以您會將 data_path 設定為 $ ,以指出 JSON 物件的頂端節點。 您可以定義標題,以顯示訂單的號碼和其價格的副標題。
完整的檔案看起來像這樣:
{
  "$schema": "https://developer.microsoft.com/json-schemas/copilot/plugin/v2.1/schema.json",
  "schema_version": "v2.1",
  "namespace": "ilristorante",
  "name_for_human": "Il Ristorante",
  "description_for_human": "See the today's menu and place orders",
  "description_for_model": "Plugin for getting the today's menu, optionally filtered by course and allergens, and placing orders",
  "functions": [
    {
      "name": "getDishes",
      "description": "Returns information about the dishes on the menu. Can filter by course (breakfast, lunch or dinner), name, allergens, or type (dish, drink).",
      ...trimmed for brevity
    },
    {
      "name": "placeOrder",
      "description": "Places an order and returns the order details",
      "capabilities": {
        "response_semantics": {
          "data_path": "$",
          "properties": {
            "title": "$.order_id",
            "subtitle": "$.total_price"
          }
        }
      }
    }
  ],
  "runtimes": [
  ],
  "capabilities": {
    "localization": {},
    "conversation_starters": []
  }
}
儲存變更。
定義運行時間
定義要叫用的 Copilot 函式之後,下一個步驟是指示它應該如何呼叫它們。 您可以在外掛程式定義的 [執行時間 ] 區段中執行此動作。
在 Visual Studio Code:
開啟 appPackage/ai-plugin.json 檔案。
在運行時間陣列中,新增下列程式代碼:
{
  "type": "OpenApi",
  "auth": {
    "type": "None"
  },
  "spec": {
    "url": "apiSpecificationFile/ristorante.yml"
  },
  "run_for_functions": [
    "getDishes",
    "placeOrder"
  ]
}
首先,您會指示 Copilot 提供 API (類型的 OpenAPI 資訊 :要呼叫的 OpenApi) ,且其為匿名 (auth.type:無) 。 接下來,在 [規格 ] 區段中,指定專案中 API 規格的相對路徑。 最後,在 run_for_functions 屬性中,列出屬於此 API 的所有函式。
完整的檔案看起來像這樣:
{
  "$schema": "https://developer.microsoft.com/json-schemas/copilot/plugin/v2.1/schema.json",
  "schema_version": "v2.1",
  "namespace": "ilristorante",
  "name_for_human": "Il Ristorante",
  "description_for_human": "See the today's menu and place orders",
  "description_for_model": "Plugin for getting the today's menu, optionally filtered by course and allergens, and placing orders",
  "functions": [
    {
      "name": "getDishes",
      ...trimmed for brevity
    },
    {
      "name": "placeOrder",
      ...trimmed for brevity
    }
  ],
  "runtimes": [
    {
      "type": "OpenApi",
      "auth": {
        "type": "None"
      },
      "spec": {
        "url": "apiSpecificationFile/ristorante.yml"
      },
      "run_for_functions": [
        "getDishes",
        "placeOrder"
      ]
    }
  ],
  "capabilities": {
    "localization": {},
    "conversation_starters": []
  }
}
儲存變更。
將外掛程式定義連接到宣告式代理程式
完成建置 API 外掛程式定義之後,下一個步驟是向宣告式代理程式註冊它。 當使用者與宣告式代理程序互動時,它會比對使用者對已定義 API 外掛程式的提示,並叫用相關的函式。
在 Visual Studio Code:
開啟 appPackage/declarativeAgent.json 檔案。
在 instructions 屬性之後,新增下列代碼段:
"actions": [
  {
    "id": "menuPlugin",
    "file": "ai-plugin.json"
  }
]
使用此代碼段,您可以將宣告式代理程式連線到 API 外掛程式。 您可以指定外掛程式的唯一標識碼,並指示代理程式在何處找到外掛程式的定義。
完整的檔案看起來像這樣:
{
  "$schema": "https://developer.microsoft.com/json-schemas/copilot/declarative-agent/v1.0/schema.json",
  "version": "v1.0",
  "name": "Declarative agent",
  "description": "Declarative agent created with Microsoft 365 Agents Toolkit",
  "instructions": "$[file('instruction.txt')]",
  "actions": [
    {
      "id": "menuPlugin",
      "file": "ai-plugin.json"
    }
  ]
}
儲存變更。
更新宣告式代理程式資訊和指示
您在此練習中建置的宣告式代理程式可協助使用者瀏覽當地義大利餐廳的功能表並下訂單。 若要針對此案例優化代理程式,請更新其名稱、描述和指示。
在 Visual Studio Code:
- 更新宣告式代理程式資訊:
- 開啟 appPackage/declarativeAgent.json 檔案。
- 將 name 屬性的值更新為 Il Ristorante。
- 將 description 屬性的值更新為 從桌面舒適訂購最舒適的義大利文和飲料。
- 儲存變更。
- 更新宣告式代理程式的指示:
開啟 appPackage/instruction.txt 檔案。
將其內容取代為:
You are an assistant specialized in helping users explore the menu of an Italian restaurant and place orders. You interact with the restaurant's menu API and guide users through the ordering process, ensuring a smooth and delightful experience. Follow the steps below to assist users in selecting their desired dishes and completing their orders:

### General Behavior:
- Always greet the user warmly and offer assistance in exploring the menu or placing an order.
- Use clear, concise language with a friendly tone that aligns with the atmosphere of a high-quality local Italian restaurant.
- If the user is browsing the menu, offer suggestions based on the course they are interested in (breakfast, lunch, or dinner).
- Ensure the conversation remains focused on helping the user find the information they need and completing the order.
- Be proactive but never pushy. Offer suggestions and be informative, especially if the user seems uncertain.

### Menu Exploration:
- When a user requests to see the menu, use the `GET /dishes` API to retrieve the list of available dishes, optionally filtered by course (breakfast, lunch, or dinner).
  - Example: If a user asks for breakfast options, use the `GET /dishes?course=breakfast` to return only breakfast dishes.
- Present the dishes to the user with the following details:
  - Name of the dish
  - A tasty description of the dish
  - Price in € (Euro) formatted as a decimal number with two decimal places
  - Allergen information (if relevant)
  - Don't include the URL.

### Beverage Suggestion:
- If the order does not already include a beverage, suggest a suitable beverage option based on the course.
- Use the `GET /dishes?course={course}&type=drink` API to retrieve available drinks for that course.
- Politely offer the suggestion: *"Would you like to add a beverage to your order? I recommend [beverage] for [course]."*

### Placing the Order:
- Once the user has finalized their order, use the `POST /order` API to submit the order.
  - Ensure the request includes the correct dish names and quantities as per the user's selection.
  - Example API payload:

    ```json
    {
      "dishes": [
        {
          "name": "frittata",
          "quantity": 2
        },
        {
          "name": "cappuccino",
          "quantity": 1
        }
      ]
    }
    ```

### Error Handling:
- If the user selects a dish that is unavailable or provides an invalid dish name, respond gracefully and suggest alternative options.
  - Example: *"It seems that dish is currently unavailable. How about trying [alternative dish]?"*
- Ensure that any errors from the API are communicated politely to the user, offering to retry or explore other options.
請注意,在指示中,我們會定義代理程式的一般行為,並指示其功能。 我們也包含有關下訂單之特定行為的指示,包括 API 預期的數據形狀。 我們包含此資訊,以確保代理程式如預期般運作。
儲存變更。
- 若要協助使用者,了解他們可以使用代理程式的用途,請新增交談入門:
開啟 appPackage/declarativeAgent.json 檔案。
在 instructions 屬性之後,新增名為 conversation_starters 的新屬性:
"conversation_starters": [
  {
    "text": "What's for lunch today?"
  },
  {
    "text": "What can I order for dinner that is gluten-free?"
  }
]
完整的檔案看起來像這樣:
{
  "$schema": "https://developer.microsoft.com/json-schemas/copilot/declarative-agent/v1.0/schema.json",
  "version": "v1.0",
  "name": "Il Ristorante",
  "description": "Order the most delicious Italian dishes and drinks from the comfort of your desk.",
  "instructions": "$[file('instruction.txt')]",
  "conversation_starters": [
    {
      "text": "What's for lunch today?"
    },
    {
      "text": "What can I order for dinner that is gluten-free?"
    }
  ],
  "actions": [
    {
      "id": "menuPlugin",
      "file": "ai-plugin.json"
    }
  ]
}
儲存變更。
更新 API URL
您必須先更新 API 規格檔案中的 API URL,才能測試宣告式代理程式。 現在,URL 已設定為 http://localhost:7071/api ,這是 Azure Functions 在本機執行時所使用的URL。 不過,因為您希望 Copilot 從雲端呼叫您的 API,所以您需要將 API 公開至因特網。 Microsoft 365 代理程式工具組會藉由建立開發通道,自動透過因特網公開您的本機 API。 每次開始偵錯專案時,Microsoft 365 代理程式工具組都會啟動新的開發通道,並將其 URL 儲存在 OPENAPI_SERVER_URL 變數中。 您可以在 [啟動本機通道] 工作中,查看 Microsoft 365 Agents Toolkit 如何啟動通道,並將其 URL 儲存在 .vscode/tasks.json 檔案中:
{
  // Start the local tunnel service to forward public URL to local port and inspect traffic.
  // See https://aka.ms/teamsfx-tasks/local-tunnel for the detailed args definitions.
  "label": "Start local tunnel",
  "type": "teamsfx",
  "command": "debug-start-local-tunnel",
  "args": {
    "type": "dev-tunnel",
    "ports": [
      {
        "portNumber": 7071,
        "protocol": "http",
        "access": "public",
        "writeToEnvironmentFile": {
          "endpoint": "OPENAPI_SERVER_URL", // output tunnel endpoint as OPENAPI_SERVER_URL
        }
      }
    ],
    "env": "local"
  },
  "isBackground": true,
  "problemMatcher": "$teamsfx-local-tunnel-watch"
}
若要使用此通道,您必須更新 API 規格以使用 OPENAPI_SERVER_URL 變數。
在 Visual Studio Code:
開啟 appPackage/apiSpecificationFile/ristorante.yml 檔案。
將 servers.url 屬性的值變更為 ${{OPENAPI_SERVER_URL}/api。
變更的檔案看起來像這樣:
openapi: 3.0.0
info:
  title: Il Ristorante menu API
  version: 1.0.0
  description: API to retrieve dishes and place orders for Il Ristorante.
servers:
  - url: ${{OPENAPI_SERVER_URL}}/api
    description: Il Ristorante API server
paths:
  ...trimmed for brevity
儲存變更。
您的 API 外掛程式已完成,並與宣告式代理程式整合。 繼續在 Microsoft 365 Copilot 中測試代理程式。
在 Microsoft 365 Copilot 中使用 API 外掛程式測試宣告式代理程式
最後一個步驟是使用 Microsoft 365 Copilot 中的 API 外掛程式來測試宣告式代理程式。
在 Visual Studio Code:
從 [活動列] 中,選擇 [Microsoft 365 代理程式工具組]。
在 [帳戶] 區段中,確定您已使用 Microsoft 365 Copilot 登入Microsoft 365 租使用者。
![Visual Studio Code 中 [Microsoft 365 Agents Toolkit 帳戶] 區段的螢幕快照。](../../m365-developer/copilot-declarative-agent-action-api-plugin-vsc/media/3-m365-agents-toolkit-accounts.png)
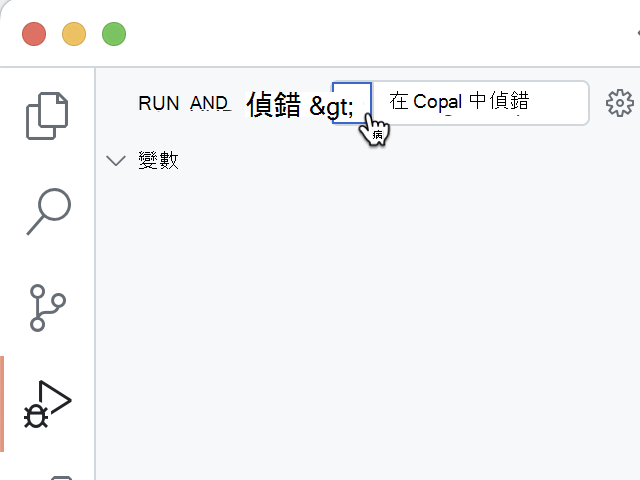
從 [活動列] 中,選擇 [ 執行和偵錯]。
選取 Copilot 設定中的 [偵錯],然後使用 [開始偵錯] 按鈕開始偵 錯 。
Visual Studio Code 建置專案並將其部署到您的 Microsoft 365 租使用者,並開啟新的網頁瀏覽器視窗。
![Visual Studio Code 中 [Microsoft 365 Agents Toolkit 帳戶] 區段的螢幕快照。](../../m365-developer/copilot-declarative-agent-action-api-plugin-vsc/media/3-m365-agents-toolkit-accounts.png#lightbox)

在網頁瀏覽器中:
出現提示時,請使用您Microsoft 365 租使用者所屬的帳戶登入,Microsoft 365 Copilot。
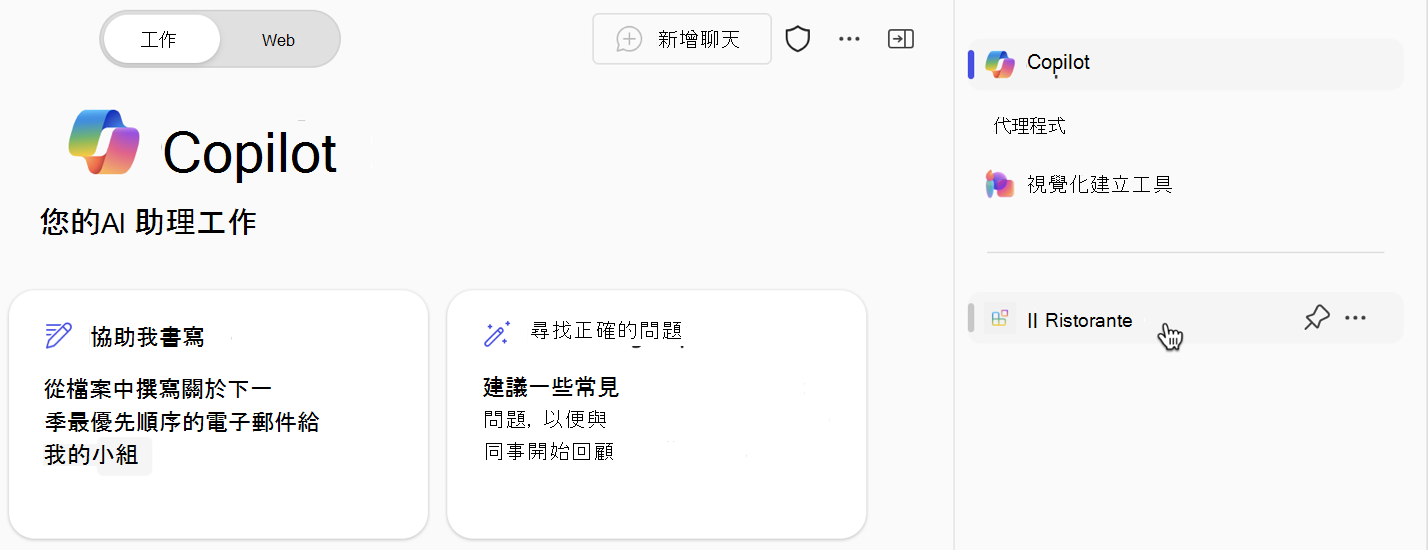
從側邊列中,選取 [Il Ristorante]。
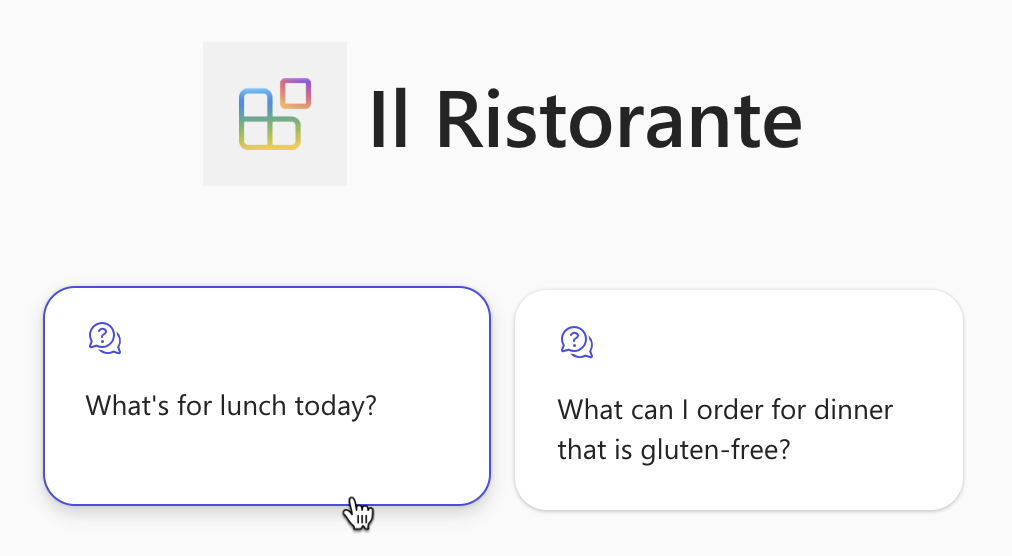
選擇 [今天午餐有什麼? 交談入門],然後提交提示。
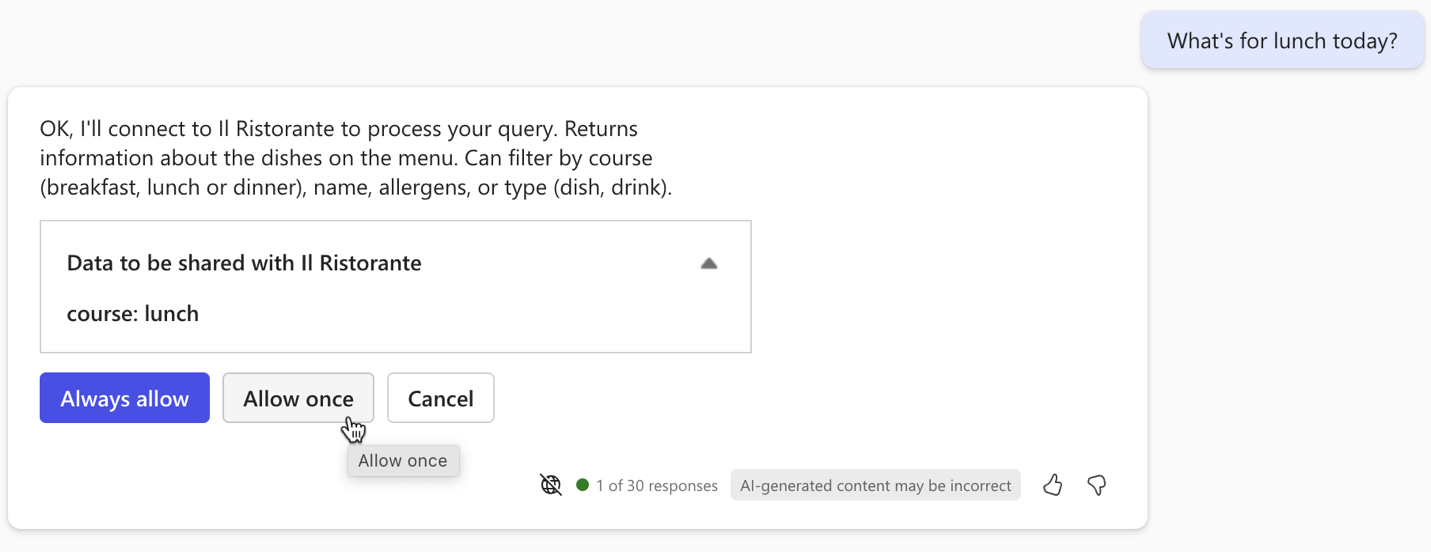
出現提示時,檢查代理程式傳送至 API 的數據,並使用 [ 允許一次] 按鈕進行確認。
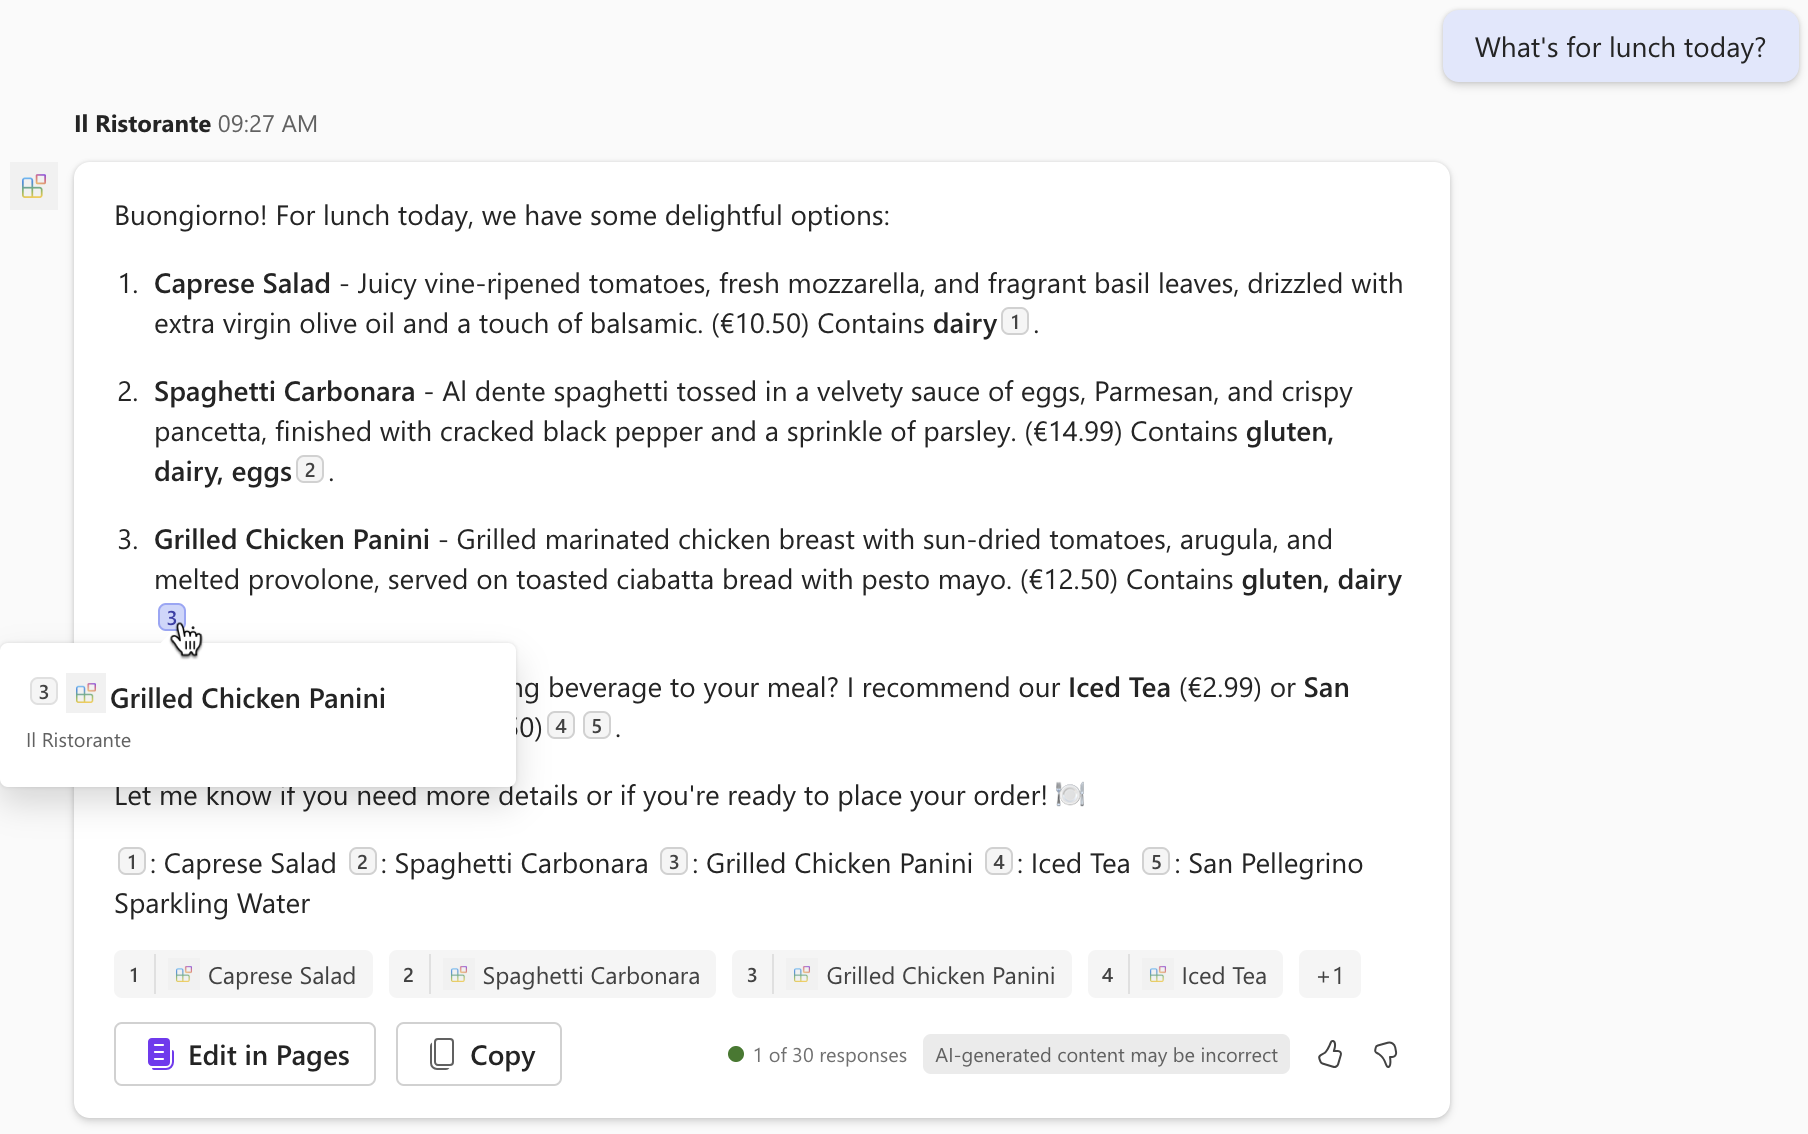
等候代理程序回應。 請注意,雖然它會顯示從 API 擷取之資訊的引文,但彈出視窗只會顯示菜的標題。 它不會顯示任何其他資訊,因為 API 外掛程式不會定義調適型卡片範本。
在提示文本框中輸入下訂單: 1x spaghetti、1x iced tea 並提交提示。
檢查代理程式傳送至 API 的數據,並繼續使用 [ 確認 ] 按鈕。
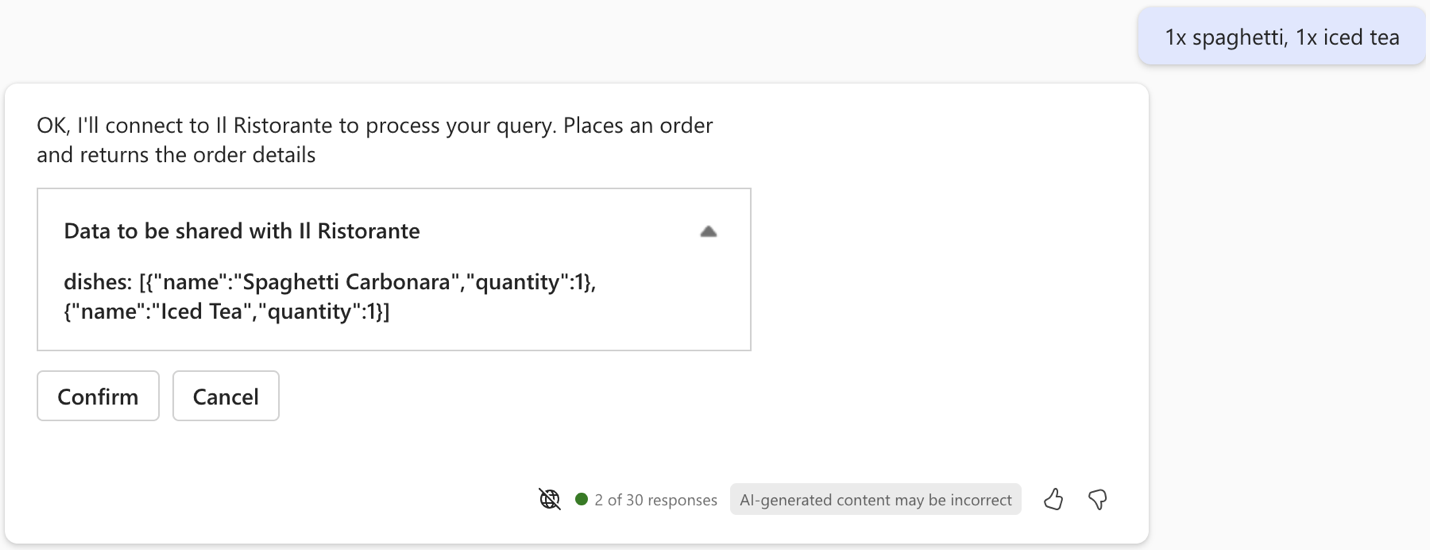
等候代理程式下訂單並傳回訂單摘要。 再次注意,代理程式會以純文本顯示訂單摘要,因為它沒有調適型卡片範本。

返回 Visual Studio Code 並停止偵錯。
切換至 [ 終端機] 索引 標籤,然後關閉所有作用中的終端機。
![[Visual Studio Code 終端機] 索引標籤的螢幕快照,其中包含關閉所有終端機的選項。](../../m365-developer/copilot-declarative-agent-action-api-plugin-vsc/media/3-visual-studio-code-close-terminal.png)


![[Visual Studio Code 終端機] 索引標籤的螢幕快照,其中包含關閉所有終端機的選項。](../../m365-developer/copilot-declarative-agent-action-api-plugin-vsc/media/3-visual-studio-code-close-terminal.png#lightbox)