實作 Azure DNS
了解公用和私人 Azure DNS 區域之後,Contoso 基礎結構小組必須知道如何建立及管理這些區域,以完成轉換至 Azure。 在本單元中,您將了解如何建立公用區域、填入記錄,然後測試名稱解析。 您也將了解如何建立私人 DNS 區域、將其連結至 VNet,以及檢查該區域自動產生的記錄。
設定公用 DNS 區域
您可以使用 Azure 入口網站、Azure PowerShell 或 Azure CLI,在 Azure 中建立及管理公用 DNS 區域。
建立公用區域
若要使用 Azure 入口網站在 Azure 中建立公用 DNS 區域,請使用下列程序:
從首頁選取 [建立資源]。
在 Marketplace 中搜尋 DNS 區域。
從傳回的結果中選取 [DNS 區域],然後選取 [建立]。
選取適當的資源群組,然後在 [名稱] 文字方塊中輸入您的 DNS 區域名稱。 如果區域是現有區域的子區域,請選取標示為 [此區域是已裝載在 Azure DNS 中的現有區域子系] 的核取方塊。
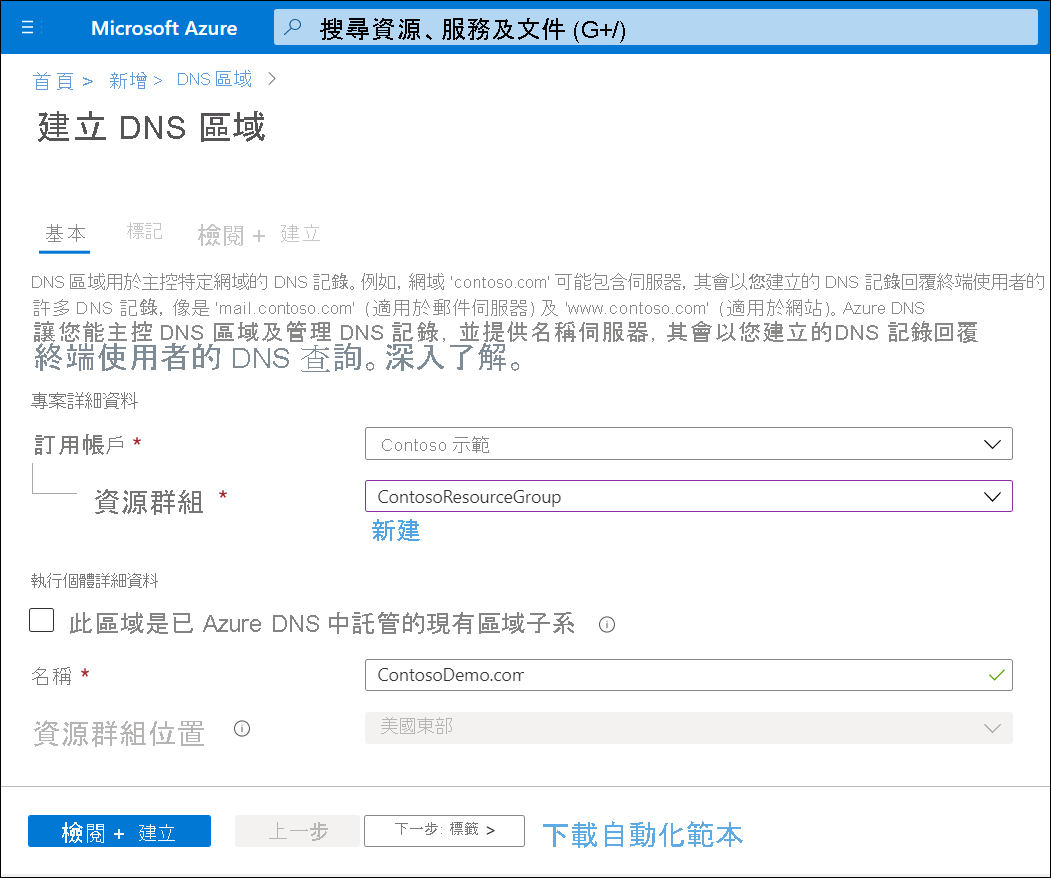
選取 [檢閱 + 建立],然後選取 [建立]。
將記錄新增至公用區域
若要將記錄新增至您的區域,請使用下列程序:
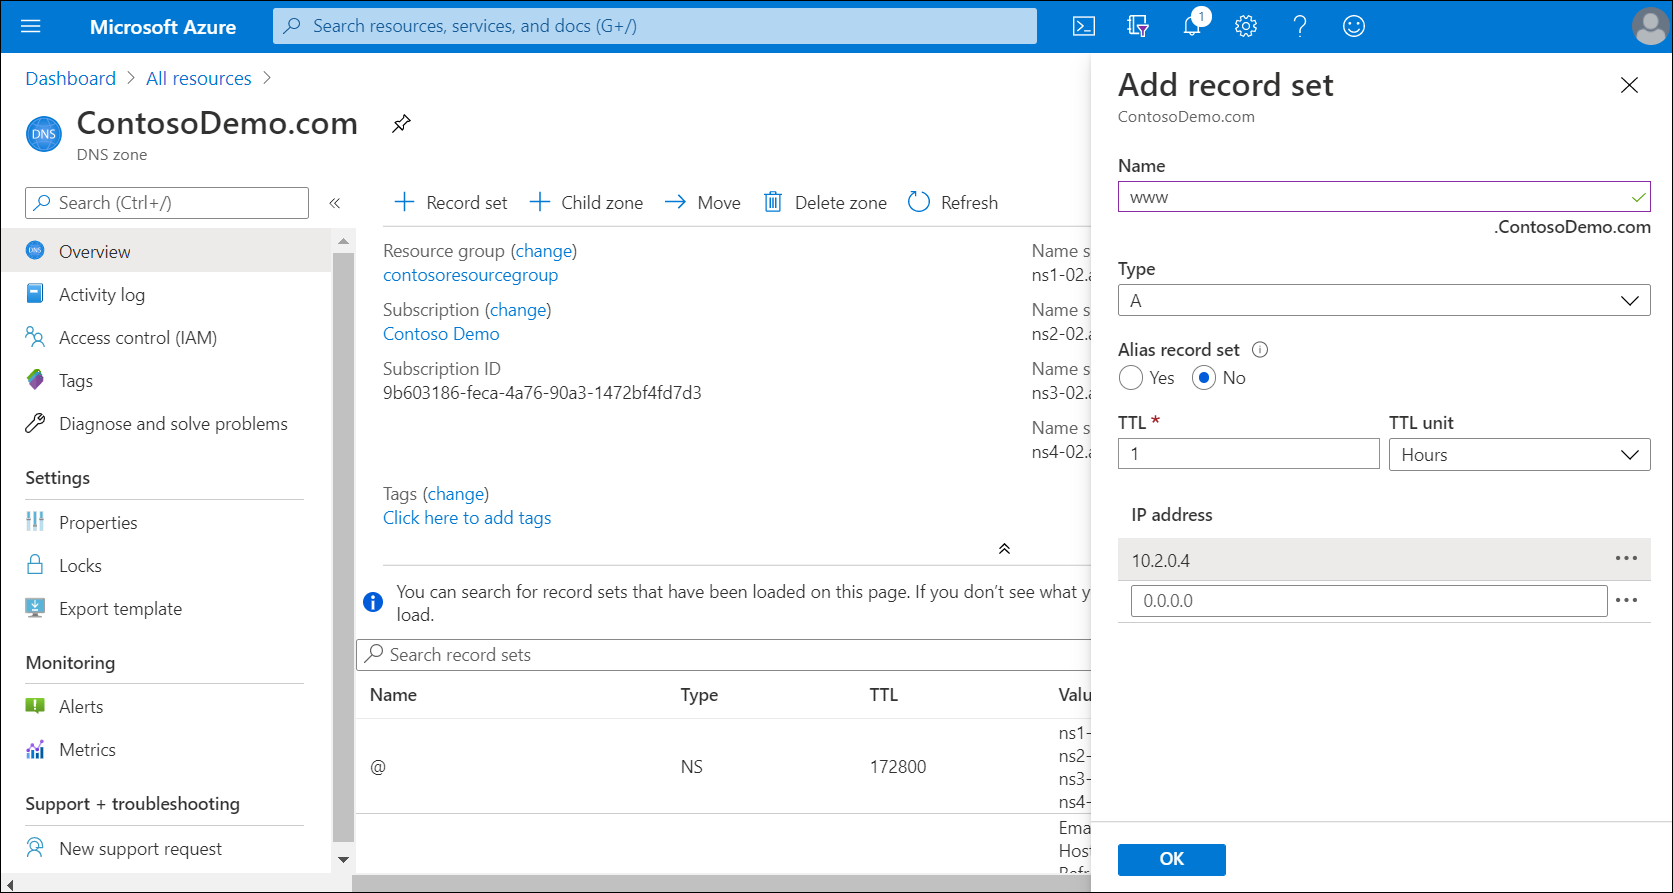
- 在 Azure 入口網站中,瀏覽至 [所有資源],然後找到並選取您剛才建立的區域。
- 在工具列上,選取 [+ 記錄集]。
- 輸入下表所述的必要資訊,然後選取 [確定]。
| 值 | 描述 |
|---|---|
| Name | 這是記錄的名稱。 如果這是部主機,請輸入主機名稱。 |
| 類型 | 選取適當的記錄類型。 可用的類型為:A、AAAA、CAA、CNAME、MX、NS、SRV、TXT 和 PTR。 |
| 別名記錄集 | 選取 [是] 或 [否] 。 只有 A、AAAA 和 CNAME 記錄類型支援這個值。 |
| TTL 和 TTL 單位 | 選取使用這兩個值的存留時間 (TTL) 值。 |
| IP 位址 | 輸入適當的記錄 IP 位址。 這個欄位只與主機記錄相關。 |
| Alias | 僅適用於 CNAME 記錄。 輸入這個別名 (CNAME) 記錄可識別的主機名稱。 |
| 喜好設定與郵件交換 | 僅適用於 MX 記錄。 輸入喜好設定值和郵件交換伺服器的 FQDN。 |
注意
其他記錄類型會有不同的值欄位。
在公用區域中測試名稱解析
例如,使用下列程序測試 www.contosodemo.com 伺服器的名稱解析:
在 Azure 入口網站中,複製您新區域 [概觀] 頁面所列之其中一部名稱伺服器的名稱。
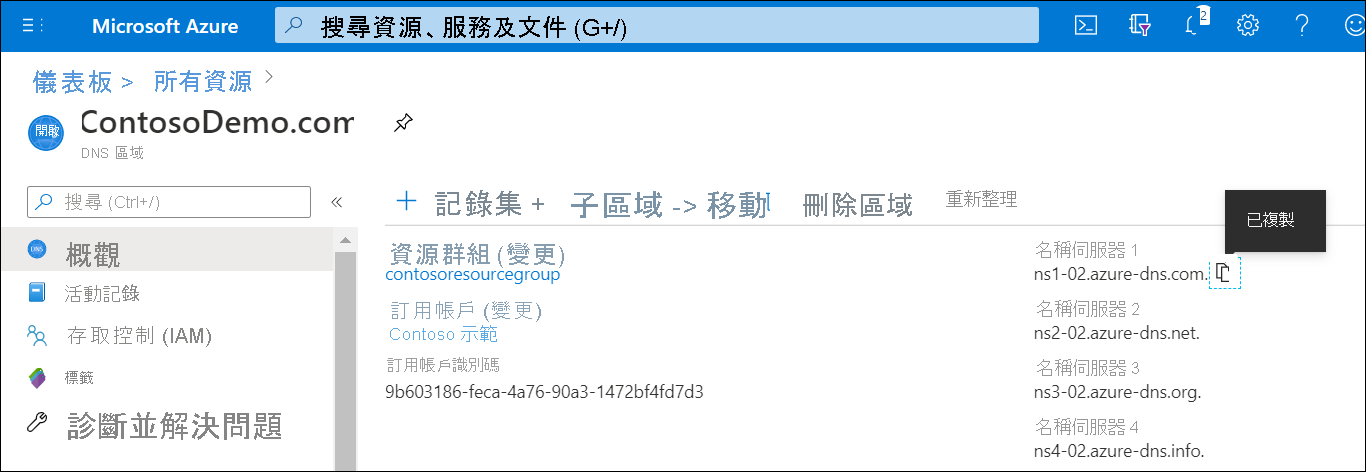
開啟命令提示字元執行下列命令:
nslookup www.contosodemo.com ns1-02.azure-dns.com,以您環境的相關資訊取代 FQDN 和名稱伺服器名稱。
設定 Azure 私人 DNS 區域
您可以使用私人 DNS 區域裝載特定網域的 DNS 記錄。 第一個步驟是為您的網域建立 DNS 區域。 若要將私人 DNS 區域提供給 Azure 資源,您必須將區域發佈到您的 VNet。 您連結區域的 VNet 稱為「連結 VNnet」。 如果您也啟用了自動登錄,每當您建立新的 VM、移除 VM 或 VM 的 IP 位址變更時,Azure DNS 就會更新區域記錄。 如同使用公用 DNS 區域一樣,您也可以使用 Azure 入口網站、Azure CLI 或 Azure PowerShell 建立及管理您的區域。
建立私人區域
使用下列程序建立您的私人 DNS 區域:
在搜尋方塊中搜尋私人 DNS 區域,然後從傳回的清單中選取 [私人 DNS 區域]。
選取 [建立私人 DNS 區域]。
選取適當的資源群組,然後輸入執行個體名稱。
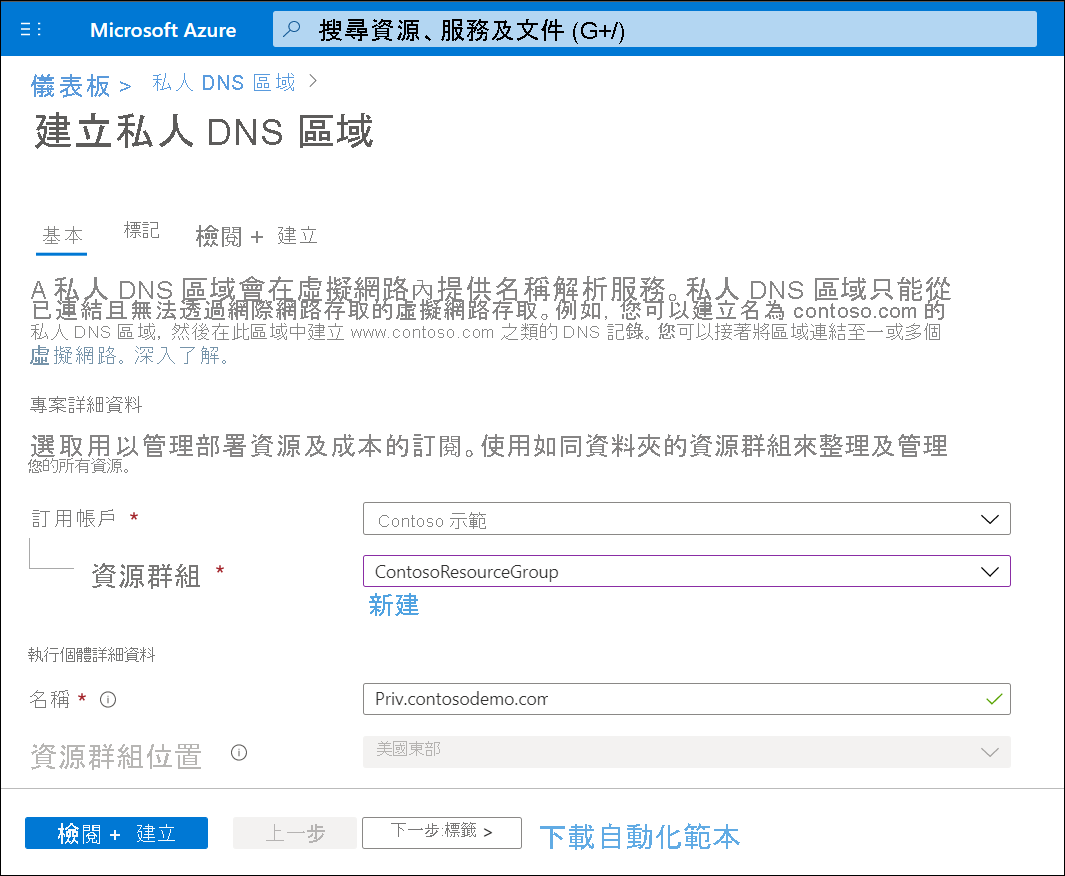
選取 [檢閱 + 建立],然後選取 [建立]。
連結 VNet
若要將 VNet 連結至您的新私人 DNS 區域,請使用下列程序:
- 在 [所有資源] 中搜尋您新建立的區域,然後開啟這個新的區域。
- 在 [設定] 底下,選取 [虛擬網路連結]。
- 在工具列上,選取 [+ 新增]。
- 輸入連結名稱,然後選取 (或建立) 適當的虛擬網路。
- 或者您可以選取 [啟用自動登錄] 核取方塊。
- 選取 [確定]。

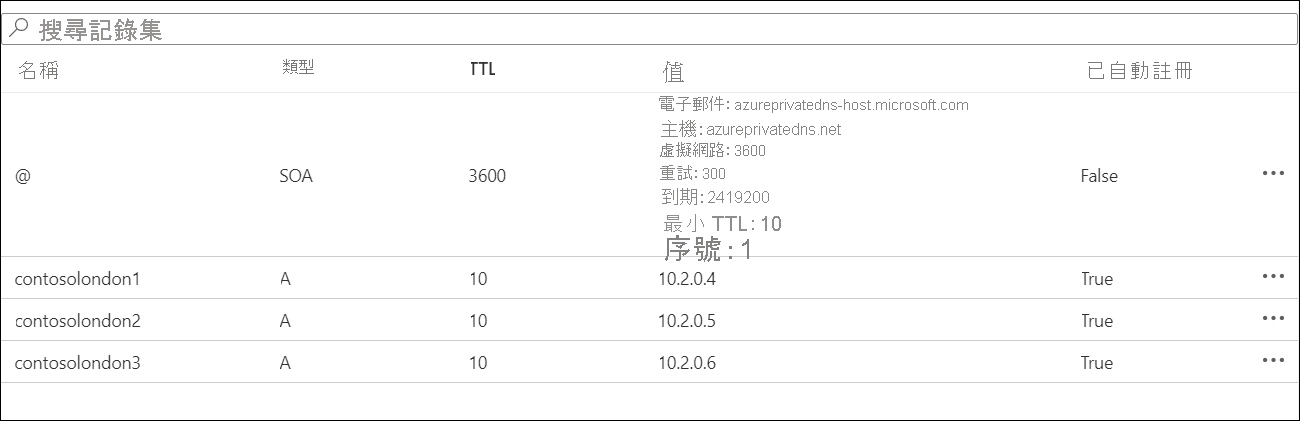
管理記錄
若要將記錄新增至區域,您可以使用與公用 DNS 區域相同的程序。 不過,如果已啟用自動註冊,則您的區域將會自動填入 Azure 資源 (例如 VM) 的 DNS 記錄,這些 Azure 資源會連線到已連結至私人 DNS 區域的 VNet。
私人區域中的測試名稱解析
私人區域的測試稍有不同。 您必須從連線至已連結 VNet 的其中一個 VM 來測試名稱解析,而非使用 nslookup 從連線到網際網路的電腦進行測試。 請參閱快速入門:使用 Azure 入口網站建立 Azure 私人 DNS 區域,測試私人區域 (機器翻譯) 中所提供的步驟。