練習 - 植入儲存體帳戶和資料庫
您已更新管線,以建置網站的應用程式並部署到 Bicep 檔案中定義的 Azure App Service 應用程式。 但是,由於資料庫尚未運作,因此煙霧測試階段會失敗。 在此單元中,您將部署新的 Azure SQL 邏輯伺服器和資料庫,並設定管線以建置和部署資料庫的結構描述。 您也會更新管線,以為測試環境新增一些範例產品資料,讓您的小組可以試用網站。
在此程序中,您將執行下列工作:
- 將 Blob 容器新增至 Azure 儲存體帳戶。
- 新增 Azure SQL 邏輯伺服器和資料庫。
- 更新建置階段,以將資料庫專案建置到 DACPAC 檔案中。
- 將新變數新增至 Azure SQL 邏輯伺服器和資料庫的變數群組。
- 更新部署階段,以使用新的變數作為參數值。
- 新增管線步驟以部署 DACPAC 檔案。
- 執行管線並檢視網站。
新增儲存體容器
您的 Bicep 檔案已定義儲存體帳戶,但未定義 Blob 容器。 在這裡,您會將 Blob 容器新增至 Bicep 檔案。 您也可以使用其組態設定,來將儲存體帳戶和 Blob 容器的名稱提供給應用程式。 如此一來,應用程式就知道要存取的儲存體帳戶。
在 Visual Studio Code 中,開啟 [deploy] 資料夾中的 main.bicep 檔案。
在定義資源名稱的變數下方 (第 27 行附近),為 Blob 儲存體容器的名稱新增一個新的變數定義:
var storageAccountImagesBlobContainerName = 'toyimages'更新
storageAccount資源以定義 Blob 容器:resource storageAccount 'Microsoft.Storage/storageAccounts@2022-09-01' = { name: storageAccountName location: location kind: 'StorageV2' sku: environmentConfigurationMap[environmentType].storageAccount.sku resource blobService 'blobServices' = { name: 'default' resource storageAccountImagesBlobContainer 'containers' = { name: storageAccountImagesBlobContainerName properties: { publicAccess: 'Blob' } } } }更新應用程式的
appSettings屬性以新增三個新的應用程式設定,用於儲存體帳戶名稱、Blob 端點和 Blob 容器名稱:resource appServiceApp 'Microsoft.Web/sites@2022-03-01' = { name: appServiceAppName location: location properties: { serverFarmId: appServicePlan.id httpsOnly: true siteConfig: { appSettings: [ { name: 'APPINSIGHTS_INSTRUMENTATIONKEY' value: applicationInsights.properties.InstrumentationKey } { name: 'APPLICATIONINSIGHTS_CONNECTION_STRING' value: applicationInsights.properties.ConnectionString } { name: 'ReviewApiUrl' value: reviewApiUrl } { name: 'ReviewApiKey' value: reviewApiKey } { name: 'StorageAccountName' value: storageAccount.name } { name: 'StorageAccountBlobEndpoint' value: storageAccount.properties.primaryEndpoints.blob } { name: 'StorageAccountImagesContainerName' value: storageAccount::blobService::storageAccountImagesBlobContainer.name } ] } } }在檔案的結尾,新增輸出,以公開儲存體帳戶和 Blob 容器的名稱:
output storageAccountName string = storageAccount.name
output storageAccountImagesBlobContainerName string = storageAccount::blobService::storageAccountImagesBlobContainer.name
儲存對檔案所做的變更。
將您的變更認可至 Git 存放庫,但還不要推送這些變更。 在 Visual Studio Code 終端中,執行下列命令:
git add .
git commit -m "Add storage container"
新增 Azure SQL 邏輯伺服器和資料庫
您的 Bicep 檔案目前不會部署 Azure SQL 邏輯伺服器或資料庫。 在本節中,您會將這些資源新增至 Bicep 檔案。
在 main.bicep 檔案中,在
reviewApiKey參數下方新增兩個新參數:@description('The administrator login username for the SQL server.') param sqlServerAdministratorLogin string @secure() @description('The administrator login password for the SQL server.') param sqlServerAdministratorLoginPassword string在定義資源名稱的變數下方,新增變數以定義 Azure SQL 邏輯伺服器和資料庫的名稱:
var sqlServerName = 'toy-website-${resourceNameSuffix}'
var sqlDatabaseName = 'Toys'
在您剛新增的變數下方,定義新變數,以建立可讓應用程式用來存取資料庫的連接字串:
// Define the connection string to access Azure SQL.
var sqlDatabaseConnectionString = 'Server=tcp:${sqlServer.properties.fullyQualifiedDomainName},1433;Initial Catalog=${sqlDatabase.name};Persist Security Info=False;User ID=${sqlServerAdministratorLogin};Password=${sqlServerAdministratorLoginPassword};MultipleActiveResultSets=False;Encrypt=True;TrustServerCertificate=False;Connection Timeout=30;'
注意
為了簡單起見,應用程式會使用管理員登入和密碼來存取資料庫。 不過,這不是用於實際執行解決方案的良好做法。 最好使用 App Service 受控識別來存取資料庫,並為受控識別授與應用程式所需的最低權限。 我們會在摘要頁面中連結更多資訊。
在接近檔案的結尾,於輸出上方,新增 Azure SQL 邏輯伺服器和資料庫資源:
resource sqlServer 'Microsoft.Sql/servers@2022-05-01-preview' = {
  name: sqlServerName
  location: location
  properties: {
    administratorLogin: sqlServerAdministratorLogin
    administratorLoginPassword: sqlServerAdministratorLoginPassword
  }
}

resource sqlServerFirewallRule 'Microsoft.Sql/servers/firewallRules@2022-05-01-preview' = {
  parent: sqlServer
  name: 'AllowAllWindowsAzureIps'
  properties: {
    endIpAddress: '0.0.0.0'
    startIpAddress: '0.0.0.0'
  }
}

resource sqlDatabase 'Microsoft.Sql/servers/databases@2022-05-01-preview' = {
  parent: sqlServer
  name: sqlDatabaseName
  location: location
  sku: environmentConfigurationMap[environmentType].sqlDatabase.sku
}
更新
environmentConfigurationMap變數,以定義要針對每個環境的資料庫使用的sku值:var environmentConfigurationMap = { Production: { appServicePlan: { sku: { name: 'S1' capacity: 1 } } storageAccount: { sku: { name: 'Standard_LRS' } } sqlDatabase: { sku: { name: 'Standard' tier: 'Standard' } } } Test: { appServicePlan: { sku: { name: 'F1' } } storageAccount: { sku: { name: 'Standard_GRS' } } sqlDatabase: { sku: { name: 'Standard' tier: 'Standard' } } } }針對資料庫連接字串,將其他應用程式設定新增至 App Service 應用程式:
resource appServiceApp 'Microsoft.Web/sites@2022-03-01' = {
  name: appServiceAppName
  location: location
  properties: {
    serverFarmId: appServicePlan.id
    httpsOnly: true
    siteConfig: {
      appSettings: [
        {
          name: 'APPINSIGHTS_INSTRUMENTATIONKEY'
          value: applicationInsights.properties.InstrumentationKey
        }
        {
          name: 'APPLICATIONINSIGHTS_CONNECTION_STRING'
          value: applicationInsights.properties.ConnectionString
        }
        {
          name: 'ReviewApiUrl'
          value: reviewApiUrl
        }
        {
          name: 'ReviewApiKey'
          value: reviewApiKey
        }
        {
          name: 'StorageAccountName'
          value: storageAccount.name
        }
        {
          name: 'StorageAccountBlobEndpoint'
          value: storageAccount.properties.primaryEndpoints.blob
        }
        {
          name: 'StorageAccountImagesContainerName'
          value: storageAccount::blobService::storageAccountImagesBlobContainer.name
        }
        {
          name: 'SqlDatabaseConnectionString'
          value: sqlDatabaseConnectionString
        }
      ]
    }
  }
}
在檔案底部,新增輸出以公開 Azure SQL 邏輯伺服器的主機名稱和資料庫的名稱:
output appServiceAppName string = appServiceApp.name
output appServiceAppHostName string = appServiceApp.properties.defaultHostName
output storageAccountName string = storageAccount.name
output storageAccountImagesBlobContainerName string = storageAccount::blobService::storageAccountImagesBlobContainer.name
output sqlServerFullyQualifiedDomainName string = sqlServer.properties.fullyQualifiedDomainName
output sqlDatabaseName string = sqlDatabase.name
儲存對檔案所做的變更。
為資料庫專案新增建置步驟
您的網站開發人員已備妥 Visual Studio 資料庫專案,以部署和設定您的網站資料庫資料表。 在這裡,您會更新管線「建置」階段,以將資料庫專案建置到 DACPAC 檔案,並將其發佈為管線成品。
開啟 deploy/pipeline-templates 資料夾中的 build.yml 檔案。
若要建置 Visual Studio 資料庫專案,請將產生的 DACPAC 檔案複製到暫存資料夾,並將其發佈為管線成品,新增下列步驟:
jobs:
- job: Build
  displayName: Build application and database
  pool:
    vmImage: windows-latest

  steps:

  # Build, copy, and publish the website.
  - task: DotNetCoreCLI@2
    displayName: Build publishable website
    inputs:
      command: 'publish'
      publishWebProjects: true

  - task: CopyFiles@2
    displayName: Copy publishable website
    inputs:
      sourceFolder: '$(Build.SourcesDirectory)/src/ToyCompany/ToyCompany.Website/bin'
      contents: '**/publish.zip'
      targetFolder: '$(Build.ArtifactStagingDirectory)/website'
      flattenFolders: true

  - task: PublishBuildArtifacts@1
    displayName: Publish website as pipeline artifact
    inputs:
      pathToPublish: '$(Build.ArtifactStagingDirectory)/website'
      artifactName: 'website'

  # Build, copy, and publish the DACPAC file.
  - task: VSBuild@1
    displayName: Build Visual Studio solution
    inputs:
      solution: '$(Build.SourcesDirectory)/src/ToyCompany/ToyCompany.Database/ToyCompany.Database.sqlproj'

  - task: CopyFiles@2
    displayName: Copy DACPAC
    inputs:
      sourceFolder: '$(Build.SourcesDirectory)/src/ToyCompany/ToyCompany.Database/bin'
      contents: '**/*.dacpac'
      targetFolder: '$(Build.ArtifactStagingDirectory)/database'
      flattenFolders: true

  - task: PublishBuildArtifacts@1
    displayName: Publish DACPAC as pipeline artifact
    inputs:
      pathToPublish: '$(Build.ArtifactStagingDirectory)/database'
      artifactName: 'database'
儲存對檔案所做的變更。
將值新增至變數群組
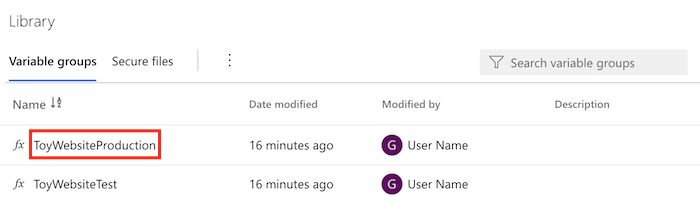
在您的瀏覽器中,移至 [管線]> [程式庫]。
選取 ToyWebsiteProduction 變數群組。
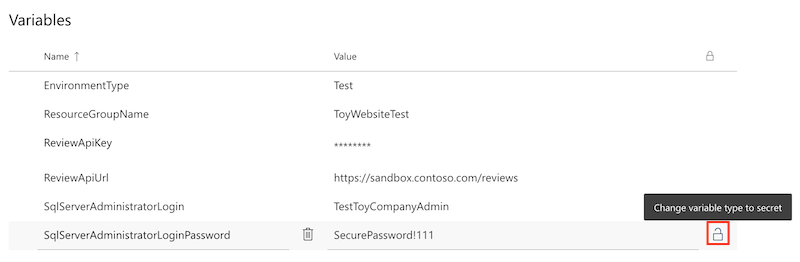
將下列變數新增至變數群組:
名稱 值 SqlServerAdministratorLogin ToyCompanyAdmin SqlServerAdministratorLoginPassword SecurePassword!111 選取 SqlServerAdministratorLoginPassword 變數旁的掛鎖圖示。 此功能會告訴 Azure Pipelines 安全地處理變數的值。
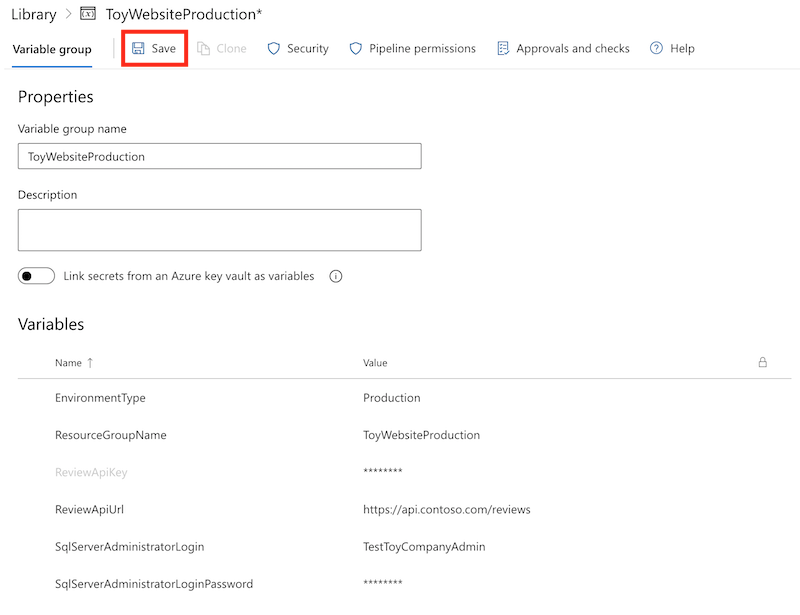
儲存變數群組。
重複此流程,以將下列變數新增至 ToyWebsiteTest 變數群組:
名稱 值 SqlServerAdministratorLogin TestToyCompanyAdmin SqlServerAdministratorLoginPassword SecurePassword!999 記得選取 SqlServerAdministratorLoginPassword 變數旁的掛鎖圖示,並儲存變數群組。
將參數值新增至驗證和預覽階段
Bicep 檔案現在有兩個新的強制參數:sqlServerAdministratorLogin 和 sqlServerAdministratorLoginPassword。 在這裡,您會針對「驗證」和「預覽」階段,從變數群組傳播那些參數值。
在 Visual Studio Code 中,開啟 deploy/pipeline-templates 資料夾中的 deploy.yml 檔案。
新增參數,以更新「驗證」階段的 RunPreflightValidation 步驟。
- task: AzureResourceManagerTemplateDeployment@3 name: RunPreflightValidation displayName: Run preflight validation inputs: connectedServiceName: ToyWebsite${{parameters.environmentType}} location: ${{parameters.deploymentDefaultLocation}} deploymentMode: Validation resourceGroupName: $(ResourceGroupName) csmFile: deploy/main.bicep overrideParameters: > -environmentType $(EnvironmentType) -reviewApiUrl $(ReviewApiUrl) -reviewApiKey $(ReviewApiKey) -sqlServerAdministratorLogin $(SqlServerAdministratorLogin) -sqlServerAdministratorLoginPassword $(SqlServerAdministratorLoginPassword)新增參數,以更新「預覽」階段的 RunWhatIf 步驟。
inlineScript: |
  az deployment group what-if \
    --resource-group $(ResourceGroupName) \
    --template-file deploy/main.bicep \
    --parameters environmentType=$(EnvironmentType) \
                 reviewApiUrl=$(ReviewApiUrl) \
                 reviewApiKey=$(ReviewApiKey) \
                 sqlServerAdministratorLogin=$(SqlServerAdministratorLogin) \
                 sqlServerAdministratorLoginPassword=$(SqlServerAdministratorLoginPassword)
重要
務必在設定
reviewApiKey參數值的行尾以及後續行上新增反斜線字元 (\)。\字元表示後續幾行是相同 Azure CLI 命令的一部分。
將參數值新增至部署階段
新增參數,以更新「部署」階段的 DeployBicepFile 步驟:
- task: AzureResourceManagerTemplateDeployment@3
  name: DeployBicepFile
  displayName: Deploy Bicep file
  inputs:
    connectedServiceName: ToyWebsite${{parameters.environmentType}}
    deploymentName: $(Build.BuildNumber)
    location: ${{parameters.deploymentDefaultLocation}}
    resourceGroupName: $(ResourceGroupName)
    csmFile: deploy/main.bicep
    overrideParameters: >
      -environmentType $(EnvironmentType)
      -reviewApiUrl $(ReviewApiUrl)
      -reviewApiKey $(ReviewApiKey)
      -sqlServerAdministratorLogin $(SqlServerAdministratorLogin)
      -sqlServerAdministratorLoginPassword $(SqlServerAdministratorLoginPassword)
    deploymentOutputs: deploymentOutputs
建立管線變數,以包含您最近為儲存體帳戶和 Azure SQL 資源新增的 Bicep 輸出值:
- bash: |
    echo "##vso[task.setvariable variable=appServiceAppName]$(echo $DEPLOYMENT_OUTPUTS | jq -r '.appServiceAppName.value')"
    echo "##vso[task.setvariable variable=appServiceAppHostName;isOutput=true]$(echo $DEPLOYMENT_OUTPUTS | jq -r '.appServiceAppHostName.value')"
    echo "##vso[task.setvariable variable=storageAccountName]$(echo $DEPLOYMENT_OUTPUTS | jq -r '.storageAccountName.value')"
    echo "##vso[task.setvariable variable=storageAccountImagesBlobContainerName]$(echo $DEPLOYMENT_OUTPUTS | jq -r '.storageAccountImagesBlobContainerName.value')"
    echo "##vso[task.setvariable variable=sqlServerFullyQualifiedDomainName]$(echo $DEPLOYMENT_OUTPUTS | jq -r '.sqlServerFullyQualifiedDomainName.value')"
    echo "##vso[task.setvariable variable=sqlDatabaseName]$(echo $DEPLOYMENT_OUTPUTS | jq -r '.sqlDatabaseName.value')"
  name: SaveDeploymentOutputs
  displayName: Save deployment outputs into variables
  env:
    DEPLOYMENT_OUTPUTS: $(deploymentOutputs)
新增資料庫部署步驟
在本節中,您會定義部署網站的資料庫元件所需的步驟。 首先,您會新增步驟來部署管線先前建置的 DACPAC 檔案。 然後,將範例資料新增至資料庫和儲存體帳戶,但僅適用非商業執行環境。
在「部署」階段的 DeployWebsiteApp 步驟下方,新增步驟以部署 DACPAC 檔案:
- task: SqlAzureDacpacDeployment@1
  name: DeploySqlDatabaseDacpac
  displayName: Deploy DACPAC to database
  inputs:
    ConnectedServiceNameARM: ToyWebsite${{parameters.environmentType}}
    authenticationType: 'server'
    serverName: $(sqlServerFullyQualifiedDomainName)
    databaseName: $(sqlDatabaseName)
    sqlUsername: $(SqlServerAdministratorLogin)
    sqlPassword: $(SqlServerAdministratorLoginPassword)
    deployType: 'DacpacTask'
    deploymentAction: 'Publish'
    dacpacFile: '$(Pipeline.Workspace)/database/ToyCompany.Database.dacpac'
在您剛新增的步驟下方,定義使用範例資料植入資料庫的步驟。
- ${{ if ne(parameters.environmentType, 'Production') }}:
  - task: SqlAzureDacpacDeployment@1
    name: AddTestDataToDatabase
    displayName: Add test data to database
    inputs:
      ConnectedServiceNameARM: ToyWebsite${{parameters.environmentType}}
      authenticationType: 'server'
      serverName: $(sqlServerFullyQualifiedDomainName)
      databaseName: $(sqlDatabaseName)
      sqlUsername: $(SqlServerAdministratorLogin)
      sqlPassword: $(SqlServerAdministratorLoginPassword)
      deployType: 'sqlTask'
      sqlFile: 'deploy/sample-data/Toys.sql'
請注意,此步驟套用了一個條件,以便其只會在非商業執行環境下執行。
在您剛新增的步驟下方,但仍在條件範圍內,新增一個步驟,以使用 Azure CLI 來將一些範例玩具影像上傳至 Blob 容器:
- task: AzureCLI@2
  name: UploadSampleImages
  displayName: Upload sample images
  inputs:
    azureSubscription: ToyWebsite${{parameters.environmentType}}
    scriptType: 'bash'
    scriptLocation: 'inlineScript'
    inlineScript: |
      az storage blob upload-batch \
        --account-name $(storageAccountName) \
        --destination $(storageAccountImagesBlobContainerName) \
        --source 'deploy/sample-data/toyimages'
驗證檔案並認可您的變更
驗證您的 main.bicep 檔案看起來像這樣:
@description('The location into which your Azure resources should be deployed.')
param location string = resourceGroup().location

@description('Select the type of environment you want to provision. Allowed values are Production and Test.')
@allowed([
  'Production'
  'Test'
])
param environmentType string

@description('A unique suffix to add to resource names that need to be globally unique.')
@maxLength(13)
param resourceNameSuffix string = uniqueString(resourceGroup().id)

@description('The URL to the product review API.')
param reviewApiUrl string

@secure()
@description('The API key to use when accessing the product review API.')
param reviewApiKey string

@description('The administrator login username for the SQL server.')
param sqlServerAdministratorLogin string

@secure()
@description('The administrator login password for the SQL server.')
param sqlServerAdministratorLoginPassword string

// Define the names for resources.
var appServiceAppName = 'toy-website-${resourceNameSuffix}'
var appServicePlanName = 'toy-website'
var logAnalyticsWorkspaceName = 'workspace-${resourceNameSuffix}'
var applicationInsightsName = 'toywebsite'
var storageAccountName = 'mystorage${resourceNameSuffix}'
var storageAccountImagesBlobContainerName = 'toyimages'
var sqlServerName = 'toy-website-${resourceNameSuffix}'
var sqlDatabaseName = 'Toys'

// Define the connection string to access Azure SQL.
var sqlDatabaseConnectionString = 'Server=tcp:${sqlServer.properties.fullyQualifiedDomainName},1433;Initial Catalog=${sqlDatabase.name};Persist Security Info=False;User ID=${sqlServerAdministratorLogin};Password=${sqlServerAdministratorLoginPassword};MultipleActiveResultSets=False;Encrypt=True;TrustServerCertificate=False;Connection Timeout=30;'

// Define the SKUs for each component based on the environment type.
var environmentConfigurationMap = {
  Production: {
    appServicePlan: {
      sku: {
        name: 'S1'
        capacity: 1
      }
    }
    storageAccount: {
      sku: {
        name: 'Standard_LRS'
      }
    }
    sqlDatabase: {
      sku: {
        name: 'Standard'
        tier: 'Standard'
      }
    }
  }
  Test: {
    appServicePlan: {
      sku: {
        name: 'F1'
      }
    }
    storageAccount: {
      sku: {
        name: 'Standard_GRS'
      }
    }
    sqlDatabase: {
      sku: {
        name: 'Standard'
        tier: 'Standard'
      }
    }
  }
}

resource appServicePlan 'Microsoft.Web/serverfarms@2022-03-01' = {
  name: appServicePlanName
  location: location
  sku: environmentConfigurationMap[environmentType].appServicePlan.sku
}

resource appServiceApp 'Microsoft.Web/sites@2022-03-01' = {
  name: appServiceAppName
  location: location
  properties: {
    serverFarmId: appServicePlan.id
    httpsOnly: true
    siteConfig: {
      appSettings: [
        {
          name: 'APPINSIGHTS_INSTRUMENTATIONKEY'
          value: applicationInsights.properties.InstrumentationKey
        }
        {
          name: 'APPLICATIONINSIGHTS_CONNECTION_STRING'
          value: applicationInsights.properties.ConnectionString
        }
        {
          name: 'ReviewApiUrl'
          value: reviewApiUrl
        }
        {
          name: 'ReviewApiKey'
          value: reviewApiKey
        }
        {
          name: 'StorageAccountName'
          value: storageAccount.name
        }
        {
          name: 'StorageAccountBlobEndpoint'
          value: storageAccount.properties.primaryEndpoints.blob
        }
        {
          name: 'StorageAccountImagesContainerName'
          value: storageAccount::blobService::storageAccountImagesBlobContainer.name
        }
        {
          name: 'SqlDatabaseConnectionString'
          value: sqlDatabaseConnectionString
        }
      ]
    }
  }
}

resource logAnalyticsWorkspace 'Microsoft.OperationalInsights/workspaces@2022-10-01' = {
  name: logAnalyticsWorkspaceName
  location: location
}

resource applicationInsights 'Microsoft.Insights/components@2020-02-02' = {
  name: applicationInsightsName
  location: location
  kind: 'web'
  properties: {
    Application_Type: 'web'
    Request_Source: 'rest'
    Flow_Type: 'Bluefield'
    WorkspaceResourceId: logAnalyticsWorkspace.id
  }
}

resource storageAccount 'Microsoft.Storage/storageAccounts@2022-09-01' = {
  name: storageAccountName
  location: location
  kind: 'StorageV2'
  sku: environmentConfigurationMap[environmentType].storageAccount.sku

  resource blobService 'blobServices' = {
    name: 'default'

    resource storageAccountImagesBlobContainer 'containers' = {
      name: storageAccountImagesBlobContainerName

      properties: {
        publicAccess: 'Blob'
      }
    }
  }
}

resource sqlServer 'Microsoft.Sql/servers@2022-05-01-preview' = {
  name: sqlServerName
  location: location
  properties: {
    administratorLogin: sqlServerAdministratorLogin
    administratorLoginPassword: sqlServerAdministratorLoginPassword
  }
}

resource sqlServerFirewallRule 'Microsoft.Sql/servers/firewallRules@2022-05-01-preview' = {
  parent: sqlServer
  name: 'AllowAllWindowsAzureIps'
  properties: {
    endIpAddress: '0.0.0.0'
    startIpAddress: '0.0.0.0'
  }
}

resource sqlDatabase 'Microsoft.Sql/servers/databases@2022-05-01-preview' = {
  parent: sqlServer
  name: sqlDatabaseName
  location: location
  sku: environmentConfigurationMap[environmentType].sqlDatabase.sku
}

output appServiceAppName string = appServiceApp.name
output appServiceAppHostName string = appServiceApp.properties.defaultHostName
output storageAccountName string = storageAccount.name
output storageAccountImagesBlobContainerName string = storageAccount::blobService::storageAccountImagesBlobContainer.name
output sqlServerFullyQualifiedDomainName string = sqlServer.properties.fullyQualifiedDomainName
output sqlDatabaseName string = sqlDatabase.name
如果沒有,請更新以符合檔案內容。
驗證 deploy.yml 檔案看起來像這樣:
parameters:
- name: environmentType
  type: string
- name: deploymentDefaultLocation
  type: string
  default: westus3

stages:

- ${{ if ne(parameters.environmentType, 'Production') }}:
  - stage: Validate_${{parameters.environmentType}}
    displayName: Validate (${{parameters.environmentType}} Environment)
    jobs:
    - job: ValidateBicepCode
      displayName: Validate Bicep code
      variables:
      - group: ToyWebsite${{parameters.environmentType}}
      steps:
        - task: AzureResourceManagerTemplateDeployment@3
          name: RunPreflightValidation
          displayName: Run preflight validation
          inputs:
            connectedServiceName: ToyWebsite${{parameters.environmentType}}
            location: ${{parameters.deploymentDefaultLocation}}
            deploymentMode: Validation
            resourceGroupName: $(ResourceGroupName)
            csmFile: deploy/main.bicep
            overrideParameters: >
              -environmentType $(EnvironmentType)
              -reviewApiUrl $(ReviewApiUrl)
              -reviewApiKey $(ReviewApiKey)
              -sqlServerAdministratorLogin $(SqlServerAdministratorLogin)
              -sqlServerAdministratorLoginPassword $(SqlServerAdministratorLoginPassword)

- ${{ if eq(parameters.environmentType, 'Production') }}:
  - stage: Preview_${{parameters.environmentType}}
    displayName: Preview (${{parameters.environmentType}} Environment)
    jobs:
    - job: PreviewAzureChanges
      displayName: Preview Azure changes
      variables:
      - group: ToyWebsite${{parameters.environmentType}}
      steps:
        - task: AzureCLI@2
          name: RunWhatIf
          displayName: Run what-if
          inputs:
            azureSubscription: ToyWebsite${{parameters.environmentType}}
            scriptType: 'bash'
            scriptLocation: 'inlineScript'
            inlineScript: |
              az deployment group what-if \
                --resource-group $(ResourceGroupName) \
                --template-file deploy/main.bicep \
                --parameters environmentType=$(EnvironmentType) \
                             reviewApiUrl=$(ReviewApiUrl) \
                             reviewApiKey=$(ReviewApiKey) \
                             sqlServerAdministratorLogin=$(SqlServerAdministratorLogin) \
                             sqlServerAdministratorLoginPassword=$(SqlServerAdministratorLoginPassword)

- stage: Deploy_${{parameters.environmentType}}
  displayName: Deploy (${{parameters.environmentType}} Environment)
  jobs:
  - deployment: DeployWebsite
    displayName: Deploy website
    pool:
      vmImage: windows-latest
    variables:
    - group: ToyWebsite${{parameters.environmentType}}
    environment: ${{parameters.environmentType}}
    strategy:
      runOnce:
        deploy:
          steps:
            - checkout: self

            - task: AzureResourceManagerTemplateDeployment@3
              name: DeployBicepFile
              displayName: Deploy Bicep file
              inputs:
                connectedServiceName: ToyWebsite${{parameters.environmentType}}
                deploymentName: $(Build.BuildNumber)
                location: ${{parameters.deploymentDefaultLocation}}
                resourceGroupName: $(ResourceGroupName)
                csmFile: deploy/main.bicep
                overrideParameters: >
                  -environmentType $(EnvironmentType)
                  -reviewApiUrl $(ReviewApiUrl)
                  -reviewApiKey $(ReviewApiKey)
                  -sqlServerAdministratorLogin $(SqlServerAdministratorLogin)
                  -sqlServerAdministratorLoginPassword $(SqlServerAdministratorLoginPassword)
                deploymentOutputs: deploymentOutputs

            - bash: |
                echo "##vso[task.setvariable variable=appServiceAppName]$(echo $DEPLOYMENT_OUTPUTS | jq -r '.appServiceAppName.value')"
                echo "##vso[task.setvariable variable=appServiceAppHostName;isOutput=true]$(echo $DEPLOYMENT_OUTPUTS | jq -r '.appServiceAppHostName.value')"
                echo "##vso[task.setvariable variable=storageAccountName]$(echo $DEPLOYMENT_OUTPUTS | jq -r '.storageAccountName.value')"
                echo "##vso[task.setvariable variable=storageAccountImagesBlobContainerName]$(echo $DEPLOYMENT_OUTPUTS | jq -r '.storageAccountImagesBlobContainerName.value')"
                echo "##vso[task.setvariable variable=sqlServerFullyQualifiedDomainName]$(echo $DEPLOYMENT_OUTPUTS | jq -r '.sqlServerFullyQualifiedDomainName.value')"
                echo "##vso[task.setvariable variable=sqlDatabaseName]$(echo $DEPLOYMENT_OUTPUTS | jq -r '.sqlDatabaseName.value')"
              name: SaveDeploymentOutputs
              displayName: Save deployment outputs into variables
              env:
                DEPLOYMENT_OUTPUTS: $(deploymentOutputs)

            - task: AzureRmWebAppDeployment@4
              name: DeployWebsiteApp
              displayName: Deploy website
              inputs:
                appType: webApp
                ConnectionType: AzureRM
                azureSubscription: ToyWebsite${{parameters.environmentType}}
                ResourceGroupName: $(ResourceGroupName)
                WebAppName: $(appServiceAppName)
                Package: '$(Pipeline.Workspace)/website/publish.zip'

            - task: SqlAzureDacpacDeployment@1
              name: DeploySqlDatabaseDacpac
              displayName: Deploy DACPAC to database
              inputs:
                ConnectedServiceNameARM: ToyWebsite${{parameters.environmentType}}
                authenticationType: 'server'
                serverName: $(sqlServerFullyQualifiedDomainName)
                databaseName: $(sqlDatabaseName)
                sqlUsername: $(SqlServerAdministratorLogin)
                sqlPassword: $(SqlServerAdministratorLoginPassword)
                deployType: 'DacpacTask'
                deploymentAction: 'Publish'
                dacpacFile: '$(Pipeline.Workspace)/database/ToyCompany.Database.dacpac'

            - ${{ if ne(parameters.environmentType, 'Production') }}:
              - task: SqlAzureDacpacDeployment@1
                name: AddTestDataToDatabase
                displayName: Add test data to database
                inputs:
                  ConnectedServiceNameARM: ToyWebsite${{parameters.environmentType}}
                  authenticationType: 'server'
                  serverName: $(sqlServerFullyQualifiedDomainName)
                  databaseName: $(sqlDatabaseName)
                  sqlUsername: $(SqlServerAdministratorLogin)
                  sqlPassword: $(SqlServerAdministratorLoginPassword)
                  deployType: 'sqlTask'
                  sqlFile: 'deploy/sample-data/Toys.sql'

              - task: AzureCLI@2
                name: UploadSampleImages
                displayName: Upload sample images
                inputs:
                  azureSubscription: ToyWebsite${{parameters.environmentType}}
                  scriptType: 'bash'
                  scriptLocation: 'inlineScript'
                  inlineScript: |
                    az storage blob upload-batch \
                      --account-name $(storageAccountName) \
                      --destination $(storageAccountImagesBlobContainerName) \
                      --source 'deploy/sample-data/toyimages'

- stage: SmokeTest_${{parameters.environmentType}}
  displayName: Smoke Test (${{parameters.environmentType}} Environment)
  jobs:
  - job: SmokeTest
    displayName: Smoke test
    variables:
      appServiceAppHostName: $[ stageDependencies.Deploy_${{parameters.environmentType}}.DeployWebsite.outputs['DeployWebsite.SaveDeploymentOutputs.appServiceAppHostName'] ]
    steps:
      - task: PowerShell@2
        name: RunSmokeTests
        displayName: Run smoke tests
        inputs:
          targetType: inline
          script: |
            $container = New-PesterContainer `
              -Path 'deploy/Website.Tests.ps1' `
              -Data @{ HostName = '$(appServiceAppHostName)' }
            Invoke-Pester `
              -Container $container `
              -CI

      - task: PublishTestResults@2
        name: PublishTestResults
        displayName: Publish test results
        condition: always()
        inputs:
          testResultsFormat: NUnit
          testResultsFiles: 'testResults.xml'
如果沒有,請更新以符合檔案內容。
儲存對檔案所做的變更。
認可並推送您的變更至 Git 存放庫。 在 Visual Studio Code 終端中,執行下列命令:
git add .
git commit -m "Add SQL database"
git push
執行管線
在您的瀏覽器中,移至 [管線]。
選取管線的最近一次執行。
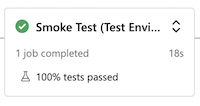
等候測試環境的所有階段都成功完成。 請注意,煙霧測試現在也會成功。
等候管線在「預覽 (實際執行環境)」階段之前再次暫停,因為它這次需要不同變數群組的權限。
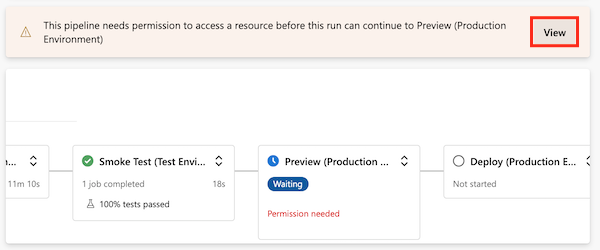
選取 [檢視],然後選取 [允許]> [允許]。
「預覽 (實際執行環境)」階段會成功完成。
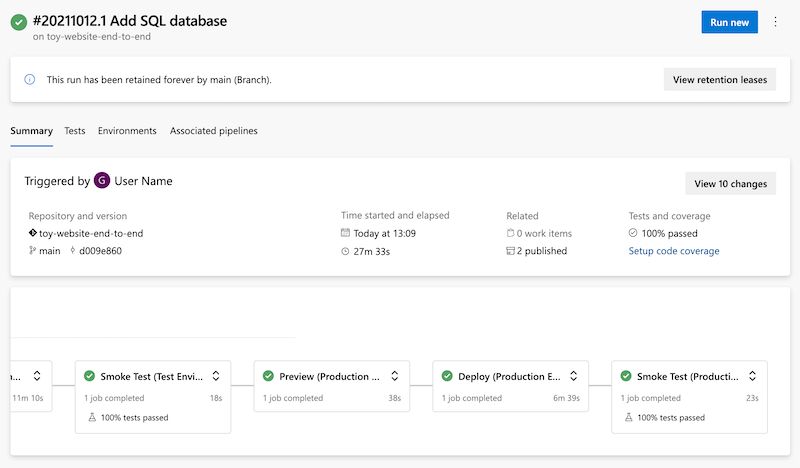
在管線完成最後階段時對其進行監視。
部署 (實際執行環境) 階段會成功完成,而煙霧測試 (實際執行環境) 階段也會成功完成。
檢視網站
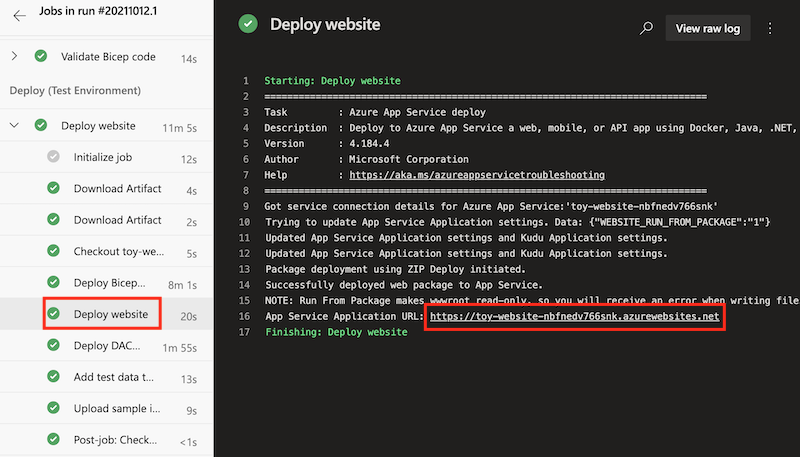
選取 [部署 (測試環境)] 階段來開啟管線記錄。
選取 [Deploy website] \(部署網站\) 步驟。
按住 Ctrl 鍵 (macOS 上為 ⌘),然後選取 App Service 應用程式的 URL,以在新瀏覽器索引標籤中將其開啟。
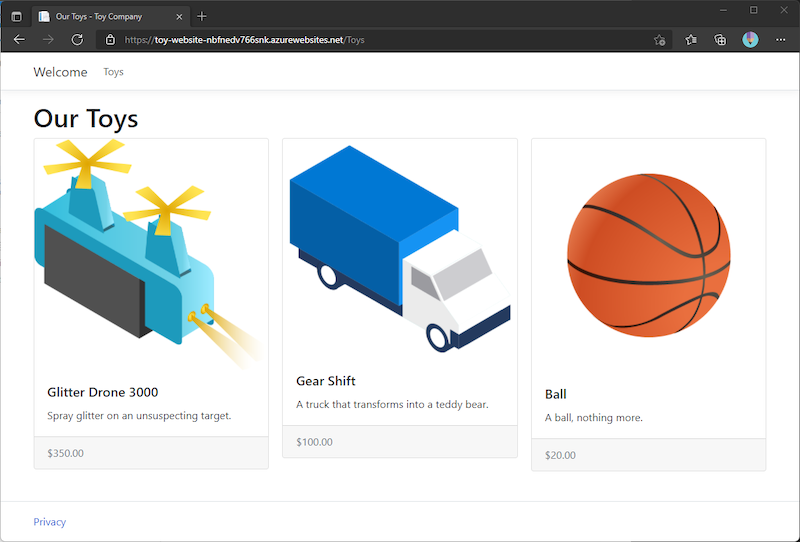
選取 [玩具]。

請注意,範例資料即會在測試環境中顯示。
針對 [部署 (實際執行環境)] 階段的應用程式重複前述程序。
請注意,實際執行環境中不會顯示任何範例資料。
清除資源
現在練習已完成,您應該移除資源,以避免因此產生費用。
在 Visual Studio Code 終端中,執行下列命令:
az group delete --resource-group ToyWebsiteTest --yes --no-wait
az group delete --resource-group ToyWebsiteProduction --yes --no-wait
資源群組會在背景中刪除。
Remove-AzResourceGroup -Name ToyWebsiteTest -Force
Remove-AzResourceGroup -Name ToyWebsiteProduction -Force