使用 Visual Studio 來定義和執行單元測試,藉以維護程式碼的健康狀態、確定程式碼涵蓋範圍,以及在客戶遭遇問題之前找出錯誤和失敗。 經常執行單元測試,以確定您的程式碼運作正常。
在本文中,程式碼使用 C# 和 C++,圖例位於 C# 中,但概念和功能適用於 .NET 語言、C++、Python、JavaScript 和 TypeScript。
建立單元測試
本節說明如何建立單元測試專案。
在 Visual Studio 中開啟您要測試的專案。
為了示範範例單元測試的目的,本文會測試名為 HelloWorld 的簡單「Hello World」C# 或 C++ 主控台專案。 此類專案的範例程式碼如下所示:
在 [方案總管] 中,選取解決方案節點。 然後,從頂端功能表列中,選取 [檔案]>[新增]>[新增專案]。
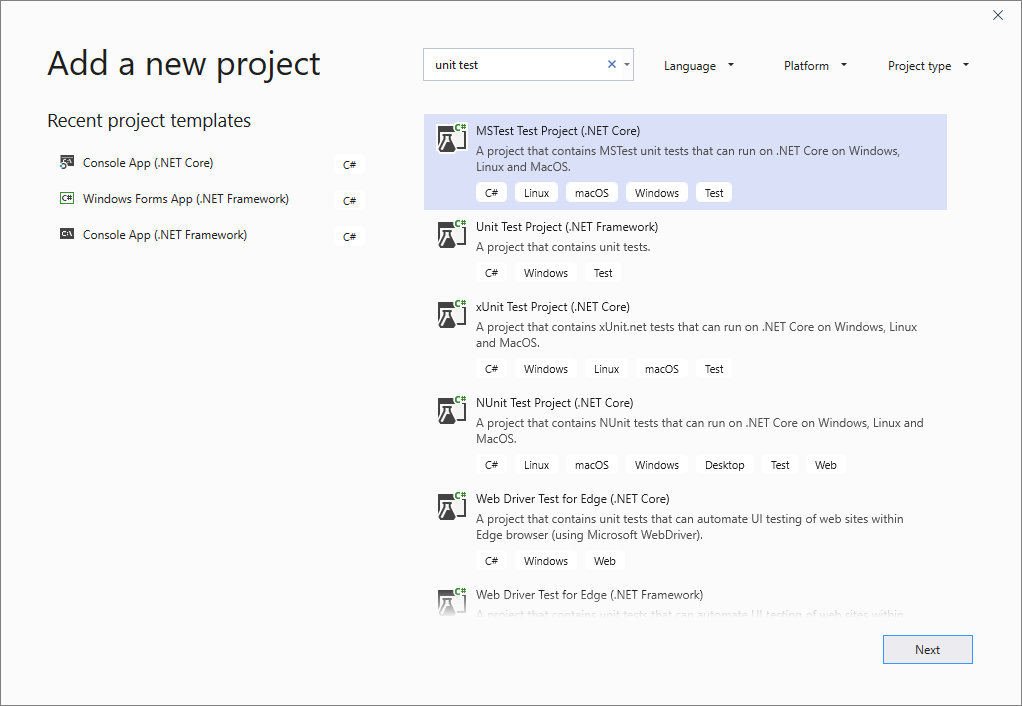
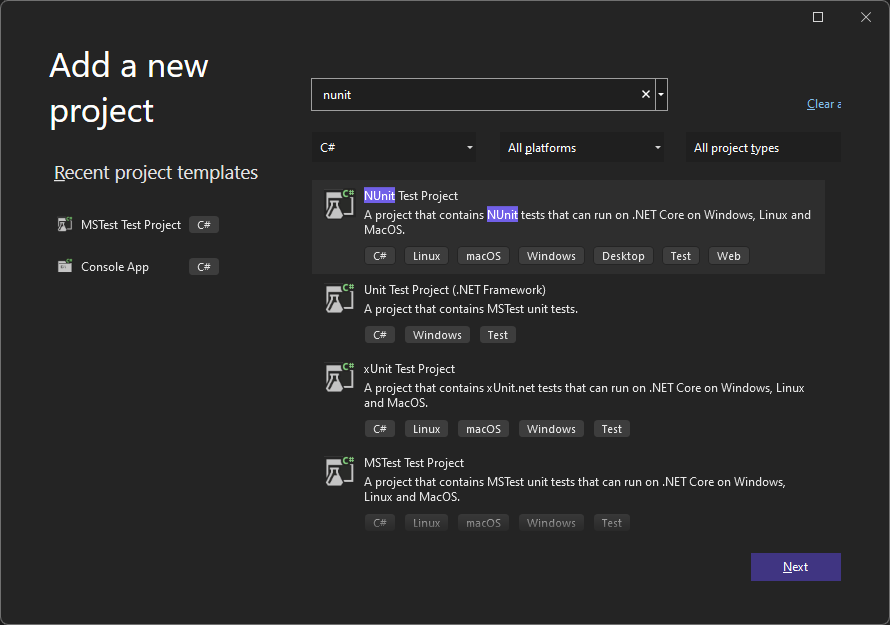
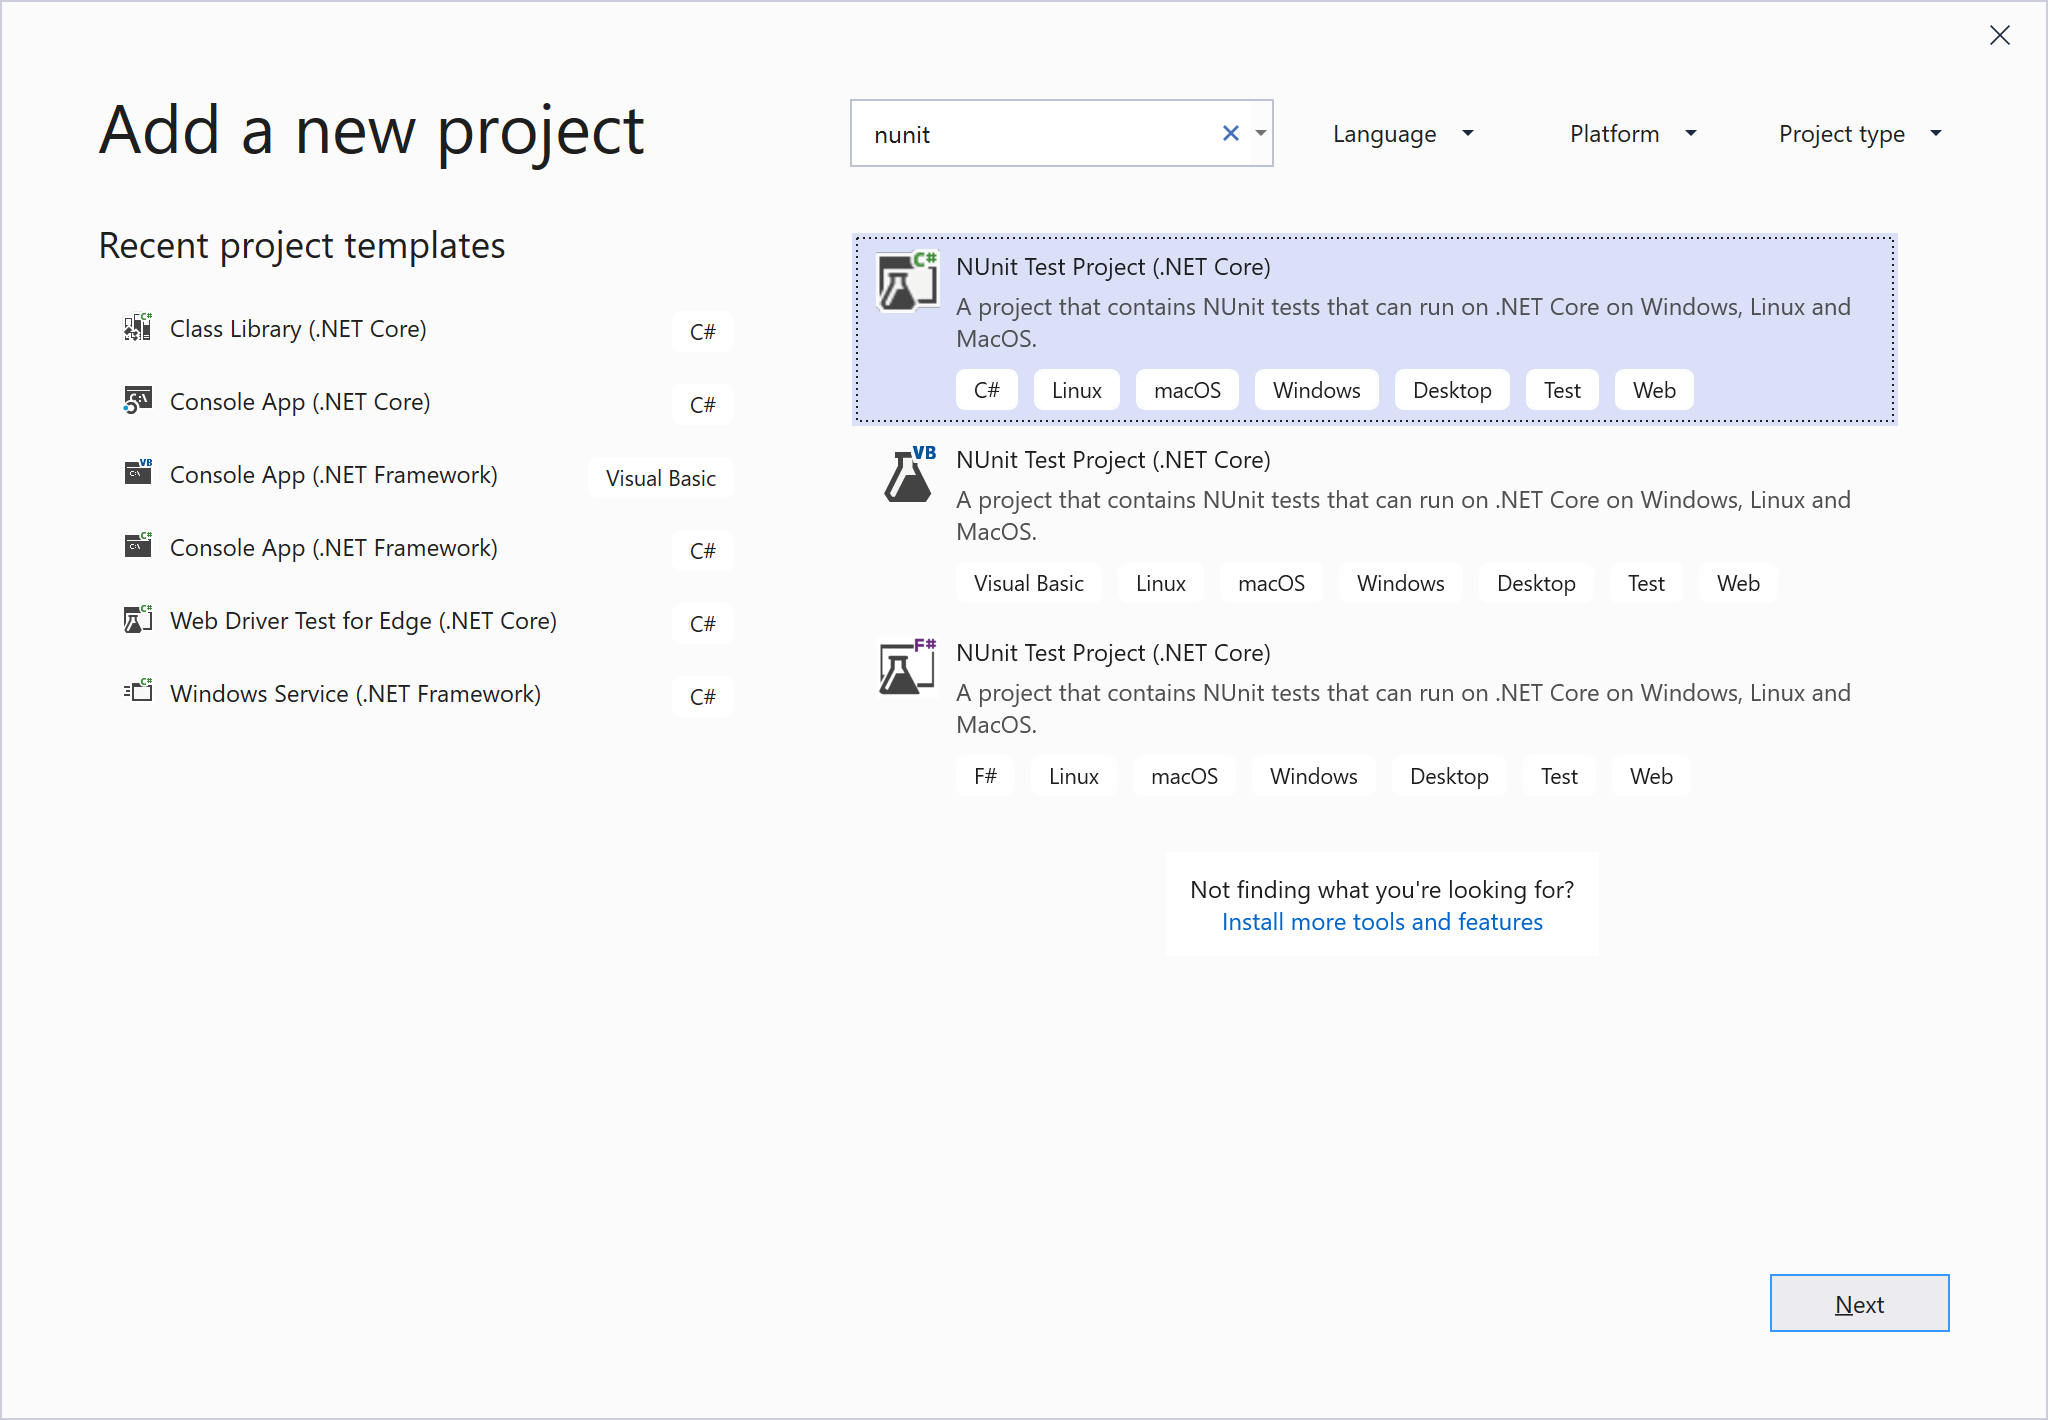
在 [新增專案] 對話方塊中,尋找要使用的單元測試專案。
在搜尋方塊中輸入測試,以尋找您想要使用之測試架構的單元測試專案範本,例如 MSTest (C#) 或原生單元測試專案 (C++),然後加以選取。
從 Visual Studio 2017 14.8 版開始,.NET 語言包含 NUnit 和 xUnit 的內建範本。 針對 C++,在此範例中,選取使用 Microsoft 原生單元測試架構的原生單元測試專案。 (若要使用不同的 C++ 測試架構,請參閱撰寫 C/C++ 的單元測試)。 針對 Python,請參閱在 Python 程式碼中設定單元測試,以設定您的測試專案。
提示
僅適用於 C#,您可以使用更快速的方法,從程式碼建立單元測試專案。 如需詳細資訊,請參閱建立單元測試專案和測試方法。 若要搭配 .NET Core 或 .NET Standard 使用此方法,則需要 Visual Studio 2019 或更新版本。
下圖顯示 .NET 中支援的 MSTest 單元測試。

按一下 [下一步],選擇測試專案的名稱,然後按一下 [建立]。
按一下 [下一步],選擇測試專案的名稱,然後按一下 [建立]。
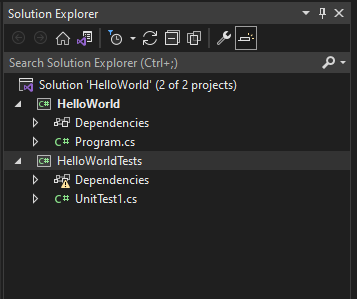
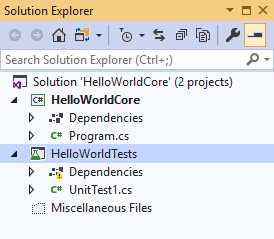
專案已加入您的方案中。
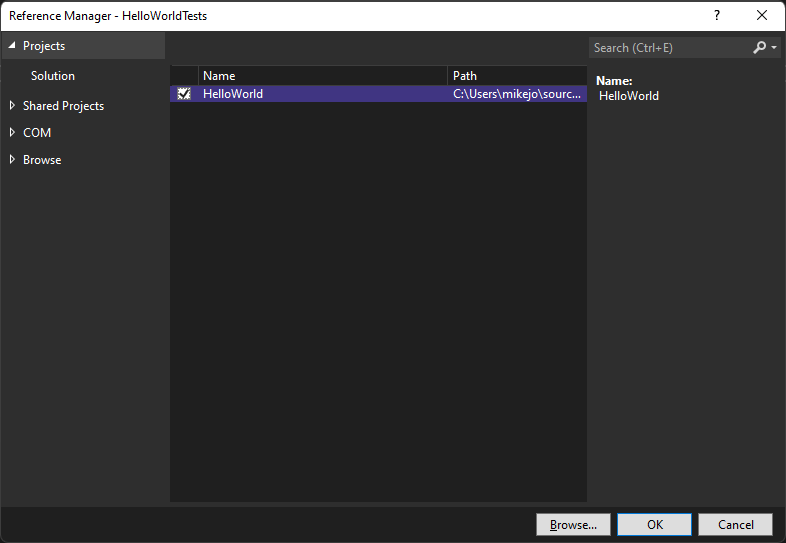
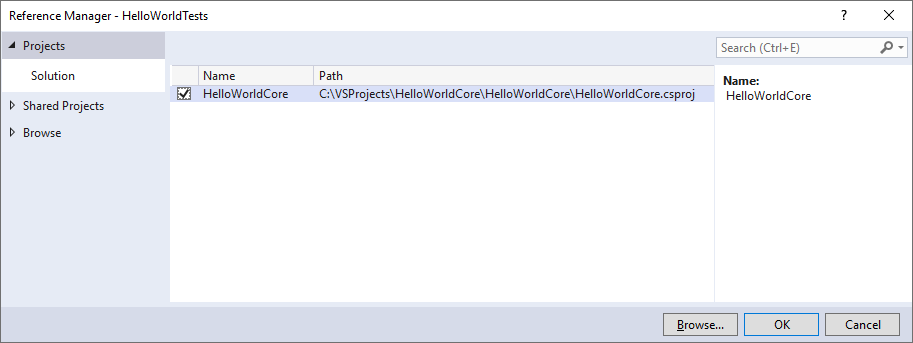
在單元測試專案中,以滑鼠右鍵按一下 [參考] 或 [相依性],然後選擇 [新增參考] 或 [新增專案參考],在您想要測試的專案中新增參考。
選取包含您要測試之程式碼的專案,然後按一下 [確定]OK。
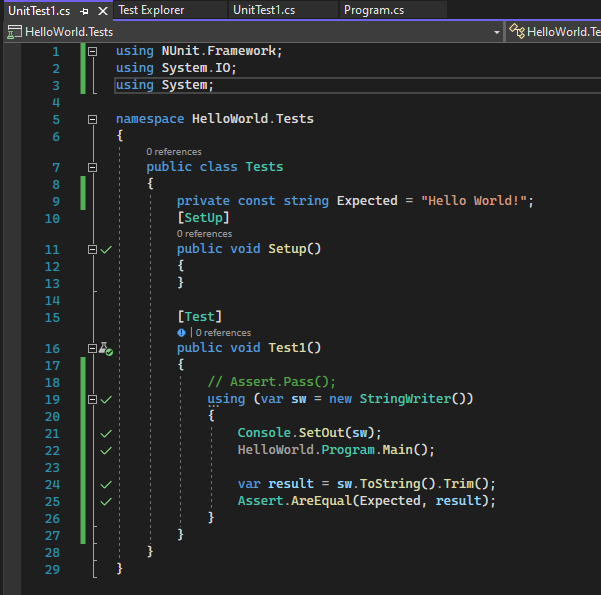
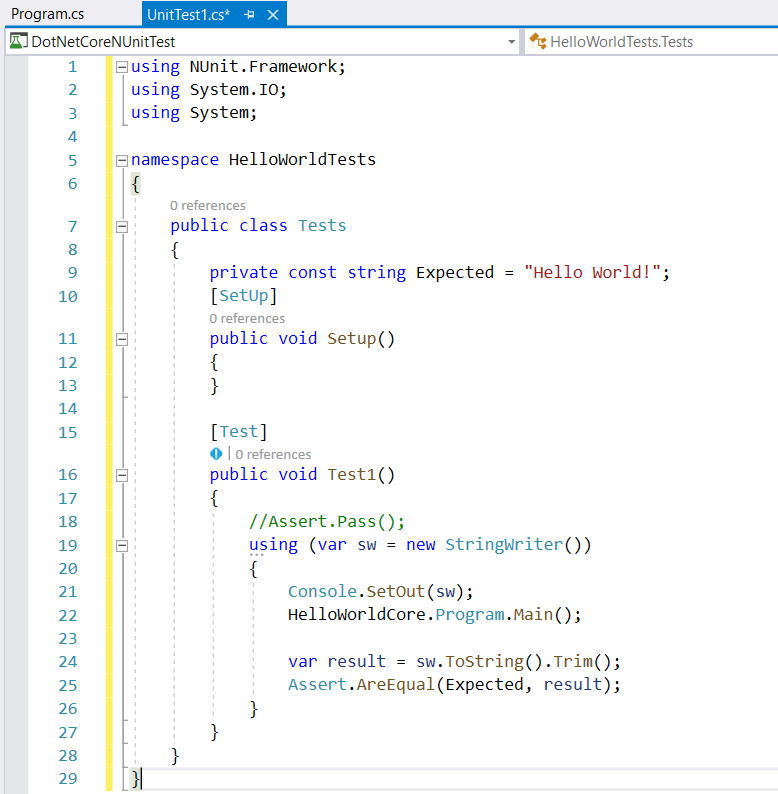
將程式碼新增至單元測試方法。
例如,您可以選取符合測試架構的正確文件索引標籤以使用下列程式碼:MSTest、NUnit 或 xUnit (僅 .NET 支援),或 C++ Microsoft 原生單元測試架構。
using Microsoft.VisualStudio.TestTools.UnitTesting;
using System.IO;
using System;

namespace HelloWorldTests
{
   [TestClass]
   public class UnitTest1
   {
      private const string Expected = "Hello World!";
      [TestMethod]
      public void TestMethod1()
      {
         using (var sw = new StringWriter())
         {
            Console.SetOut(sw);
            HelloWorld.Program.Main();

            var result = sw.ToString().Trim();
            Assert.AreEqual(Expected, result);
         }
      }
   }
}
執行單元測試
-
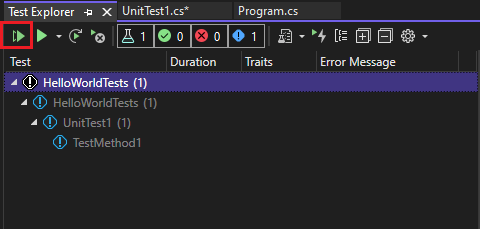
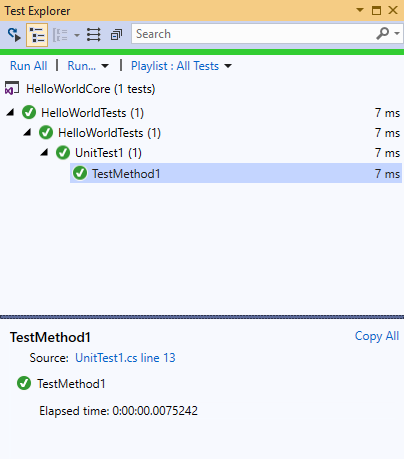
若要開啟測試總管,請從頂端功能表列選擇 [測試]>[測試總管] (或按 Ctrl + E、T)。
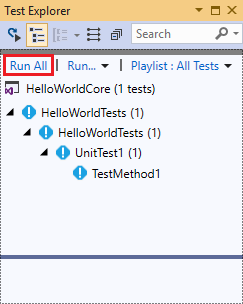
按一下 [全部執行] 執行您的單元測試 (或按 Ctrl + R、V)。
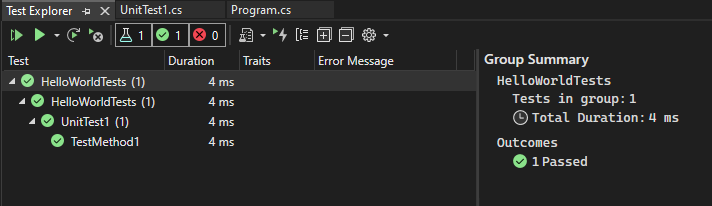
測試完成之後,綠色的核取記號表示測試通過。 紅色的 "x" 圖示表示測試失敗。
提示
您可以使用 [測試總管] 從內建的測試架構 (MSTest) 或從協力廠商測試架構執行單元測試。 您也可以將測試分組成分類、篩選測試清單,以及建立、儲存和執行測試播放清單。 您也可以偵錯測試和分析測試效能和程式碼涵蓋範圍。
檢視即時單元測試結果 (Visual Studio Enterprise)
如果您在 Visual Studio 2017 或更新版本中使用 MSTest、xUnit 或 NUnit 測試架構,則可以查看單元測試的即時結果。
注意
若要遵循這些步驟,需要 Visual Studio Enterprise 以及 .NET 程式碼和下列其中一個測試架構:MSTest、xUnit 或 NUnit。
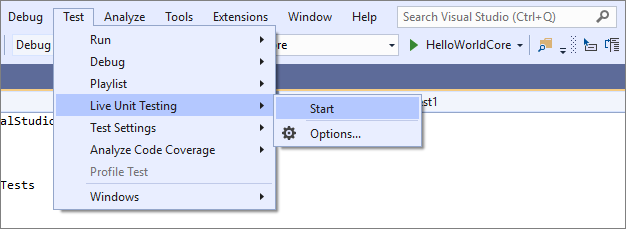
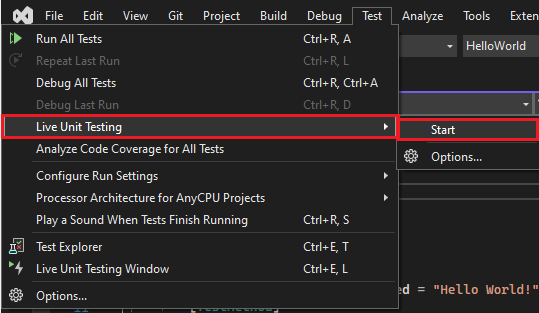
從 [測試] 功能表中選擇 [測試]>[Live Unit Testing]>[啟動] 來開啟 Live Unit Testing。
當您撰寫和編輯程式碼時,在程式碼編輯器視窗中檢視測試的結果。
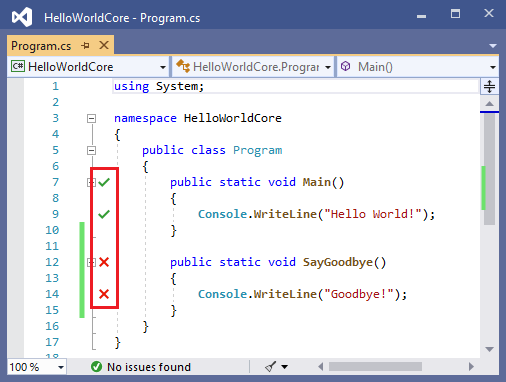
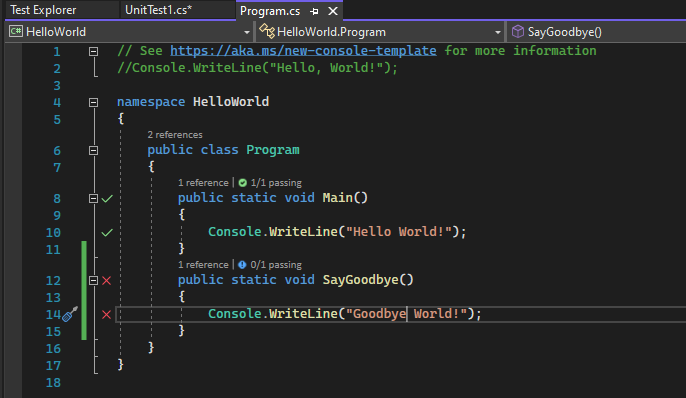
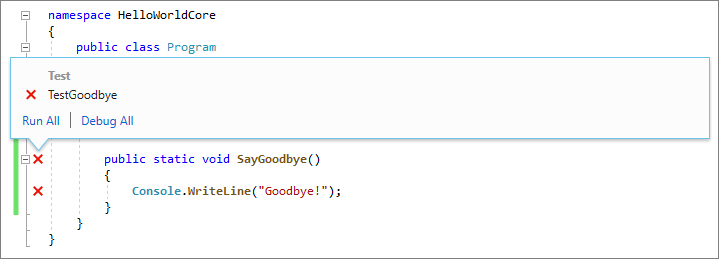
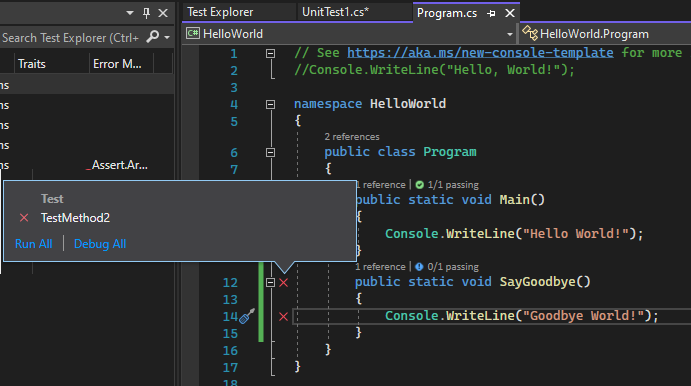
按一下測試結果指標查看詳細資訊,例如涵蓋該方法的測試名稱。
如需 Live Unit Testing 的詳細資訊,請參閱 Live Unit Testing。
使用協力廠商測試架構
您可以根據程式設計語言,使用 NUnit、Boost 或 Google C++ Testing Framework 等協力廠商測試架構,在 Visual Studio 中執行單元測試。 若要使用協力廠商架構:
使用 NuGet 套件管理員安裝您選擇的架構 NuGet 套件。
(.NET) 從 Visual Studio 2017 14.6 版開始,Visual Studio 包含 NUnit 和 xUnit 測試架構的預先設定測試專案範本。 範本也包含啟用支援所需的 NuGet 套件。
(C++) 在 Visual Studio 2017 和更新版本中,已包含一些像是 Google C++ Testing Framework 的架構。 如需詳細資訊,請參閱在 Visual Studio中撰寫 C/C++ 的單元測試。
若要新增單元測試專案:
開啟包含您要測試之程式碼的解決方案。
以滑鼠右鍵按一下 [方案總管] 中的解決方案,然後選擇 [新增]>[新增專案]。
選取單元測試專案範本。
按一下 [下一步]、命名專案,然後按一下 [建立]。
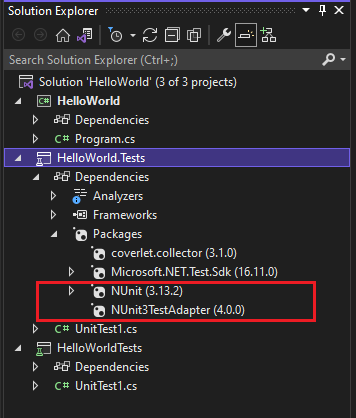
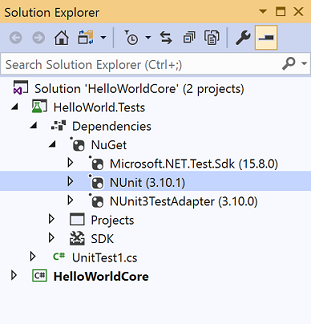
專案範本包括 NUnit 和 NUnit3TestAdapter 的 NuGet 參考。
從測試專案將參考新增至包含您想要測試之程式碼的專案。
以滑鼠右鍵按一下 [方案總管] 中的專案,然後選取 [新增]>[參考]。 (您也可以從 [參考] 或 [相依性] 節點的滑鼠右鍵功能表中加入參考。)
將程式碼新增至您的測試方法。
從 [測試總管] 執行測試,或在測試程式碼上按一下滑鼠右鍵,然後選擇 [執行測試] (或 Ctrl + R、T)。