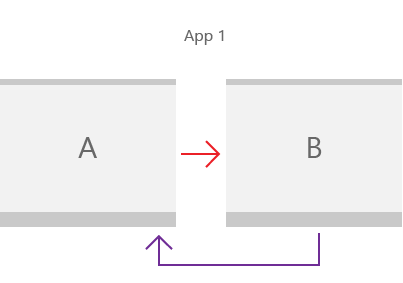
了解如何使用框架和頁面,以便在您的應用程式中能夠進行基本的對等瀏覽。
幾乎所有應用程式都需要在頁面之間進行瀏覽。 即使是只有單一內容頁面的簡單應用程式,通常也會有一個需要瀏覽功能的設定頁面。 本文說明在應用程式中新增 XAML Page,以及使用 Frame 進行頁面間瀏覽的基本概念。
- 適用於:Windows 應用程式 SDK/WinUI3
- 重要 API:Microsoft.UI.Xaml.Controls.Frame 類別、 Microsoft.UI.Xaml.Controls.Page 類別、Microsoft.UI.Xaml.Navigation 命名空間
注意
如需 UWP app 中的流覽,請參閱 應用程式流覽 (UWP)
1. 建立空白的應用程式
如何在 Visual Studio 中建立空白應用程式:
- 若要設定您的開發計算機,請參閱 開始開發 Windows 應用程式。
- 在 Microsoft Visual Studio 的 [開始] 視窗中,選擇 [建立新專案],或在 Visual Studio 功能表中選擇 [檔案]>[新增]>[專案]。
- 在 [建立新專案] 對話方塊的下拉式篩選器中,分別選取 [C#] 或 [C++]、[Windows] 和 [WinUI]。
- 選取 [已封裝的空白應用程式 (WinUI 3 in Desktop)] 專案範本,然後點擊 [下一步], 範本會使用以 WinUI 3 為基礎的使用者介面建立傳統型應用程式。
- 在 [專案名稱] 方塊中輸入
BasicNavigation,然後按一下 [建立]。 - 若要執行程式,請從功能表中選取 [偵錯]>[開始偵錯],或按 F5。 在您的開發電腦上建立並執行解決方案,確認應用程式執行時不會出現錯誤。 隨即顯示空白頁面。
- 若要停止偵錯並回到 Visual Studio,請結束 app,或從功能表按一下 [停止偵錯]。
- 將範本包含的所有範例程式碼從
MainWindow.xaml和MainWindow程式碼後置檔案中移除。
2. 使用框架進行頁面間瀏覽
當應用程式包含多個頁面時,您可以使用框架在不同頁面之間瀏覽。
Frame 類別支援各種不同的瀏覽方法,例如 Navigate、GoBack 和 GoForward,也支援不同的各種屬性,例如 BackStack、ForwardStack 和 BackStackDepth。
在 Visual Studio 中建立新的 Windows 應用程式 SDK 專案時,專案範本會建立一個 MainWindow 類別 (類型為 Microsoft.UI.Xaml.Window)。 但是,專案範本不會建立 Frame 或 Page,也不會提供任何瀏覽程式碼。
如果要啟用頁面間瀏覽,請新增 Frame 作為 MainWindow 的根元素。 您可以在 程式碼後置檔案中的 App.xaml 方法覆寫中執行此操作。 開啟 App 程式碼後置檔案,更新 OnLaunched 覆寫,並處理 NavigationFailed 事件 (如這裡所示)。
// App.xaml.cs

protected override void OnLaunched(Microsoft.UI.Xaml.LaunchActivatedEventArgs args)
{
    m_window = new MainWindow();

    // Create a Frame to act as the navigation context and navigate to the first page
    Frame rootFrame = new Frame();
    rootFrame.NavigationFailed += OnNavigationFailed;
    // Navigate to the first page, configuring the new page
    // by passing required information as a navigation parameter
    rootFrame.Navigate(typeof(MainPage), args.Arguments);

    // Place the frame in the current Window
    m_window.Content = rootFrame;
    // Ensure the MainWindow is active
    m_window.Activate();
}

void OnNavigationFailed(object sender, NavigationFailedEventArgs e)
{
    throw new Exception("Failed to load Page " + e.SourcePageType.FullName);
}
// App.xaml.h

// Add after OnLaunched declaration.
void OnNavigationFailed(IInspectable const&, Microsoft::UI::Xaml::Navigation::NavigationFailedEventArgs const&);

///////////////
// App.xaml.cpp

void App::OnLaunched(LaunchActivatedEventArgs const& e)
{
    window = make<MainWindow>();
    Frame rootFrame = Frame();
    rootFrame.NavigationFailed({ this, &App::OnNavigationFailed });
    rootFrame.Navigate(xaml_typename<BasicNavigation::MainPage>(), box_value(e.Arguments()));
    window.Content(rootFrame);
    window.Activate();
}

void App::OnNavigationFailed(IInspectable const&, NavigationFailedEventArgs const& e)
{
    throw hresult_error(E_FAIL, hstring(L"Failed to load Page ") + e.SourcePageType().Name);
}
注意
瀏覽功能較為複雜的應用程式,通常會使用 NavigationView 作為 MainWindow 的根,並放置 Frame 作為瀏覽檢視的內容。 如需詳細資訊,請參閱瀏覽檢視。
Navigate 方法可用來顯示這個 Frame 中的內容。 這裡會將 MainPage.xaml 傳遞至 Navigate 方法,因此該方法會在 MainPage 中載入 Frame。
如果瀏覽到應用程式的初始視窗失敗,則會發生 NavigationFailed 事件,且此程式碼會在事件處理常式中擲回例外狀況。
3. 新增基本頁面
空白應用程式範本不會為您建立多個應用程式頁面。 進行頁面間瀏覽之前,您需要先為應用程式新增一些頁面。
如何為應用程式新增項目:
- 在方案總管中,以滑鼠右鍵按一下
BasicNavigation專案節點以開啟操作功能表。 - 在操作功能表中選擇 [新增]>[新增項目]。
- 在 [新增項目] 對話方塊中,選擇左窗格中的 WinUI 節點,然後選擇中間窗格中的 [空白頁面 (WinUI 3)]。
- 在 [名稱] 方塊中,輸入
MainPage,然後按 [新增] 按鈕。 - 重複步驟 1-4 以新增第二頁,但在 [名稱] 方塊中輸入
Page2。
現在,這些檔案應該會列在您的 BasicNavigation 專案中。
| C# | C++ |
|---|---|
|
|
重要
針對 C++ 專案,您必須在引用另一個頁面的每個頁面的標頭檔中加入 #include 指示詞。 針對這裡呈現的頁面間瀏覽範例, MainPage.xaml.h 檔案 #include "Page2.xaml.h"會包含 ,接著 Page2.xaml.h 包含 #include "MainPage.xaml.h"。
C++ 頁面範本也包含範例 Button 和 Click 處理常式程式碼,您需要將其從頁面的 XAML 和程式碼後置檔案中移除。
將內容新增至頁面
在 MainPage.xaml 中,將現有頁面內容取代成以下內容:
<Grid>
    <TextBlock x:Name="pageTitle" Text="Main Page"
               Margin="16" Style="{StaticResource TitleTextBlockStyle}"/>
    <HyperlinkButton Content="Click to go to page 2"
                     Click="HyperlinkButton_Click"
                     HorizontalAlignment="Center"/>
</Grid>
此 XAML 會新增:
- 名為 的
pageTitle元素,其 Text 屬性設定為Main Page,做為根 Grid 的子元素。 - 一個 HyperlinkButton 元素,用於瀏覽到下一頁,做為根 Grid 的子元素。
在 MainPage 程式碼後置檔案中,新增下列程式碼以處理您先前新增之 Click 的 事件,以瀏覽至 Page2.xaml。
// MainPage.xaml.cs

private void HyperlinkButton_Click(object sender, RoutedEventArgs e)
{
    Frame.Navigate(typeof(Page2));
}
// pch.h
// Add this include in pch.h to support winrt::xaml_typename

#include <winrt/Windows.UI.Xaml.Interop.h>

////////////////////
// MainPage.xaml.h

void HyperlinkButton_Click(winrt::Windows::Foundation::IInspectable const& sender, winrt::Microsoft::UI::Xaml::RoutedEventArgs const& e);

////////////////////
// MainPage.xaml.cpp

void winrt::BasicNavigation::implementation::MainPage::HyperlinkButton_Click(winrt::Windows::Foundation::IInspectable const& sender, winrt::Microsoft::UI::Xaml::RoutedEventArgs const& e)
{
    Frame().Navigate(winrt::xaml_typename<BasicNavigation::Page2>());
}
MainPage 是 Page 類別的子類別。
Page 類別具有唯讀的 Frame 屬性,這個屬性會取得包含 Frame 的 Page。 當 Click 中的 HyperlinkButton 的 MainPage 事件處理常式呼叫 Frame.Navigate(typeof(Page2)) 時,Frame 會顯示 Page2.xaml 的內容。
每當頁面載入框架時,該頁面就會做為 PageStackEntry 新增到 Frame 的 BackStack 或 ForwardStack,以便進行歷程記錄和向後瀏覽。
現在,請在 Page2.xaml 中執行相同的操作。 將現有頁面內容取代成以下內容:
<Grid>
    <TextBlock x:Name="pageTitle" Text="Page 2"
               Margin="16" Style="{StaticResource TitleTextBlockStyle}"/>
    <HyperlinkButton Content="Click to go to main page"
                     Click="HyperlinkButton_Click"
                     HorizontalAlignment="Center"/>
</Grid>
在 Page2 Page2.xaml 程式碼後置檔案中,新增下列程式碼來處理您先前新增之 Click 的 事件,以瀏覽至 MainPage.xaml。
// Page2.xaml.cs

private void HyperlinkButton_Click(object sender, RoutedEventArgs e)
{
    Frame.Navigate(typeof(MainPage));
}
// Page2.xaml.h

void HyperlinkButton_Click(winrt::Windows::Foundation::IInspectable const& sender, winrt::Microsoft::UI::Xaml::RoutedEventArgs const& e);

/////////////////
// Page2.xaml.cpp

void winrt::BasicNavigation::implementation::Page2::HyperlinkButton_Click(winrt::Windows::Foundation::IInspectable const& sender, winrt::Microsoft::UI::Xaml::RoutedEventArgs const& e)
{
    Frame().Navigate(winrt::xaml_typename<BasicNavigation::MainPage>());
}
建置並執行應用程式。 按一下顯示「按一下以前往第 2 頁」的連結。 頂端顯示「第 2 頁」的第二頁,應該會載入並顯示在框架中。 現在,請按一下第二頁的連結,返回主頁面。
4. 在頁面之間傳遞資訊
您的應用程式現在可以在兩個頁面之間瀏覽,但實際上還沒有做任何有趣的事情。 通常,當應用程式有多個頁面時,頁面之間需要共用資訊。 現在,您想要將一些資訊從第一頁傳遞到第二頁。
在 MainPage.xaml 中,將您先前新增的 HyperlinkButton 取代成下列 StackPanel。 這會新增 TextBlock 標籤和 TextBoxname 來輸入文字字串。
<StackPanel VerticalAlignment="Center">
    <TextBlock HorizontalAlignment="Center" Text="Enter your name"/>
    <TextBox HorizontalAlignment="Center" Width="200" x:Name="name"/>
    <HyperlinkButton Content="Click to go to page 2"
                              Click="HyperlinkButton_Click"
                              HorizontalAlignment="Center"/>
</StackPanel>
現在,您將使用 Navigate 方法的第二個多載,並將文字方塊中的文字做為第二個參數傳遞。 這是此 Navigate 多載的簽章:
public bool Navigate(System.Type sourcePageType, object parameter);
bool Navigate(TypeName const& sourcePageType, IInspectable const& parameter);
在 HyperlinkButton_Click 程式碼後置檔案的 MainPage 事件處理常式中,將第二個參數新增至引用 Navigate 文字方塊之 Text 屬性的 name 方法。
// MainPage.xaml.cs

private void HyperlinkButton_Click(object sender, RoutedEventArgs e)
{
    Frame.Navigate(typeof(Page2), name.Text);
}
// MainPage.xaml.cpp

void winrt::BasicNavigation::implementation::MainPage::HyperlinkButton_Click(winrt::Windows::Foundation::IInspectable const& sender, winrt::Microsoft::UI::Xaml::RoutedEventArgs const& e)
{
    Frame().Navigate(xaml_typename<BasicNavigation::Page2>(), winrt::box_value(name().Text()));
}
在 Page2.xaml 中,將您先前新增的 HyperlinkButton 取代成下列 StackPanel。 這會新增一個 TextBlock,用於顯示從 MainPage 傳來的文字字串。
<StackPanel VerticalAlignment="Center">
    <TextBlock HorizontalAlignment="Center" x:Name="greeting"/>
    <HyperlinkButton Content="Click to go to page 1"
                     Click="HyperlinkButton_Click"
                     HorizontalAlignment="Center"/>
</StackPanel>
在 Page2 程式碼後置檔案中,加入以下程式碼以覆寫 OnNavigatedTo 方法:
// Page2.xaml.cs

protected override void OnNavigatedTo(NavigationEventArgs e)
{
    if (e.Parameter is string && !string.IsNullOrWhiteSpace((string)e.Parameter))
    {
        greeting.Text = $"Hello, {e.Parameter.ToString()}";
    }
    else
    {
        greeting.Text = "Hello!";
    }
    base.OnNavigatedTo(e);
}
// Page2.xaml.h

void Page2::OnNavigatedTo(Microsoft::UI::Xaml::Navigation::NavigationEventArgs const& e)
{
	auto propertyValue{ e.Parameter().as<Windows::Foundation::IPropertyValue>() };
	if (propertyValue.Type() == Windows::Foundation::PropertyType::String)
	{
		auto name{ winrt::unbox_value<winrt::hstring>(e.Parameter()) };
		if (!name.empty())
		{
			greeting().Text(L"Hello, " + name);
			__super::OnNavigatedTo(e);
			return;
		}
	}
	greeting().Text(L"Hello!");
	__super::OnNavigatedTo(e);
}
執行應用程式,在文字方塊中輸入您的姓名,然後按下顯示 Click to go to page 2的連結。
當 Click 中的 HyperlinkButton 的 MainPage 事件呼叫 Frame.Navigate(typeof(Page2), name.Text) 時,name.Text 屬性會傳送到 Page2,而事件資料的值會用於頁面上所顯示的訊息。
5. 快取頁面
預設不會快取頁面內容和狀態,因此,若您想要快取資訊,就必須在 App 的每個頁面中啟用。
在我們的基本對等範例中,當您按一下 Click to go to page 1 上的 Page2 連結時,TextBox 上的 MainPage (以及任何其他欄位) 將設定為其預設狀態。 解決此問題的其中一種方法,是使用 NavigationCacheMode 屬性來指定將頁面新增至框架的頁面快取中。
預設情況下,每當瀏覽發生時,都會使用其預設值建立新的頁面執行個體。 在 MainPage.xaml 中,將 NavigationCacheMode 設為 Enabled (在開頭的 Page 標記中) 以快取頁面,並保留頁面的所有內容和狀態值,直到超出框架的頁面快取為止。 如果您想要略過 CacheSize 限制,可將 NavigationCacheMode 設為必要,這樣就會指定瀏覽歷史記錄中可針對框架快取的頁數。 不過,務必記住,根據裝置的記憶體限制,快取大小限制可能會非常重要。
<Page
    x:Class="BasicNavigation.MainPage"
    ...
    mc:Ignorable="d"
    NavigationCacheMode="Enabled">
現在,當您按一下返回主頁面時,您在文字方塊中輸入的名稱仍然存在。
6. 自訂頁面轉換動畫
預設情況下,每當瀏覽發生時,每個頁面都會以動畫形式進入框架中。 預設動畫是「進場」動畫 (讓頁面從視窗底部向上滑動)。 不過,您可以選擇更適合應用程式瀏覽方式的其他動畫選項。 例如,您可以使用「鑽入」動畫,讓使用者感到正在逐步進入您的應用程式,或是使用水平滑動動畫,讓使用者感到兩個頁面是對等的。 如需詳細資訊,請參閱頁面轉換。
這些動畫是由 NavigationTransitionInfo 的子類別表示。 若要指定要用於頁面轉換的動畫,您將使用 Navigate 方法的第三個多載,並傳遞 NavigationTransitionInfo 子類別做為第三個參數 (infoOverride)。 這是此 Navigate 多載的簽章:
public bool Navigate(System.Type sourcePageType,
                     object parameter,
                     NavigationTransitionInfo infoOverride);
bool Navigate(TypeName const& sourcePageType,
              IInspectable const& parameter,
              NavigationTransitionInfo const& infoOverride);
在 HyperlinkButton_Click 程式碼後置檔案的 MainPage 事件處理常式中,將第三個參數新增至 Navigate 方法,將 infoOverride 參數設為 SlideNavigationTransitionInfo,並將其 Effect 屬性設定為 FromRight。
// MainPage.xaml.cs

private void HyperlinkButton_Click(object sender, RoutedEventArgs e)
{
    Frame.Navigate(typeof(Page2),
                   name.Text,
                   new SlideNavigationTransitionInfo()
                       { Effect = SlideNavigationTransitionEffect.FromRight});
}
// pch.h

#include <winrt/Microsoft.UI.Xaml.Media.Animation.h>

////////////////////
// MainPage.xaml.cpp

using namespace winrt::Microsoft::UI::Xaml::Media::Animation;

// ...

void winrt::BasicNavigation::implementation::MainPage::HyperlinkButton_Click(winrt::Windows::Foundation::IInspectable const& sender, winrt::Microsoft::UI::Xaml::RoutedEventArgs const& e)
{
    // Create the slide transition and set the transition effect to FromRight.
    SlideNavigationTransitionInfo slideEffect = SlideNavigationTransitionInfo();
    slideEffect.Effect(SlideNavigationTransitionEffect(SlideNavigationTransitionEffect::FromRight));
    Frame().Navigate(winrt::xaml_typename<BasicNavigation::Page2>(),
        		     winrt::box_value(name().Text()),
                     slideEffect);
}
在 HyperlinkButton_Click 程式碼後置檔案的 Page2 事件處理常式中,將 infoOverride 參數設為 SlideNavigationTransitionInfo,並將其 Effect 屬性設為 FromLeft。
// Page2.xaml.cs

private void HyperlinkButton_Click(object sender, RoutedEventArgs e)
{
    Frame.Navigate(typeof(MainPage),
                   null,
                   new SlideNavigationTransitionInfo()
                       { Effect = SlideNavigationTransitionEffect.FromLeft});
}
// Page2.xaml.cpp

using namespace winrt::Microsoft::UI::Xaml::Media::Animation;

// ...

void winrt::BasicNavigation::implementation::MainPage::HyperlinkButton_Click(winrt::Windows::Foundation::IInspectable const& sender, winrt::Microsoft::UI::Xaml::RoutedEventArgs const& e)
{
    // Create the slide transition and set the transition effect to FromLeft.
    SlideNavigationTransitionInfo slideEffect = SlideNavigationTransitionInfo();
    slideEffect.Effect(SlideNavigationTransitionEffect(SlideNavigationTransitionEffect::FromLeft));
    Frame().Navigate(winrt::xaml_typename<BasicNavigation::MainPage>(),
        		     nullptr,
                     slideEffect);
}
現在,當您進行頁面間瀏覽時,頁面會左右滑動,讓轉換效果感覺更加自然,並加強了頁面之間的聯繫。
