單元測試 Xamarin.iOS 應用程式
本文件說明如何為 Xamarin.iOS 專案建立單元測試。 為 Xamarin.iOS 進行單元測試時,是透過使用 Touch.Unit 架構來完成。該架構包含 iOS 測試執行器,以及修改過的 NUnit 版本 (稱為 Touch.Unit);此版本會提供一組熟悉的 API,以供編寫單元測試之用。
在 Visual Studio for Mac 中設定測試專案
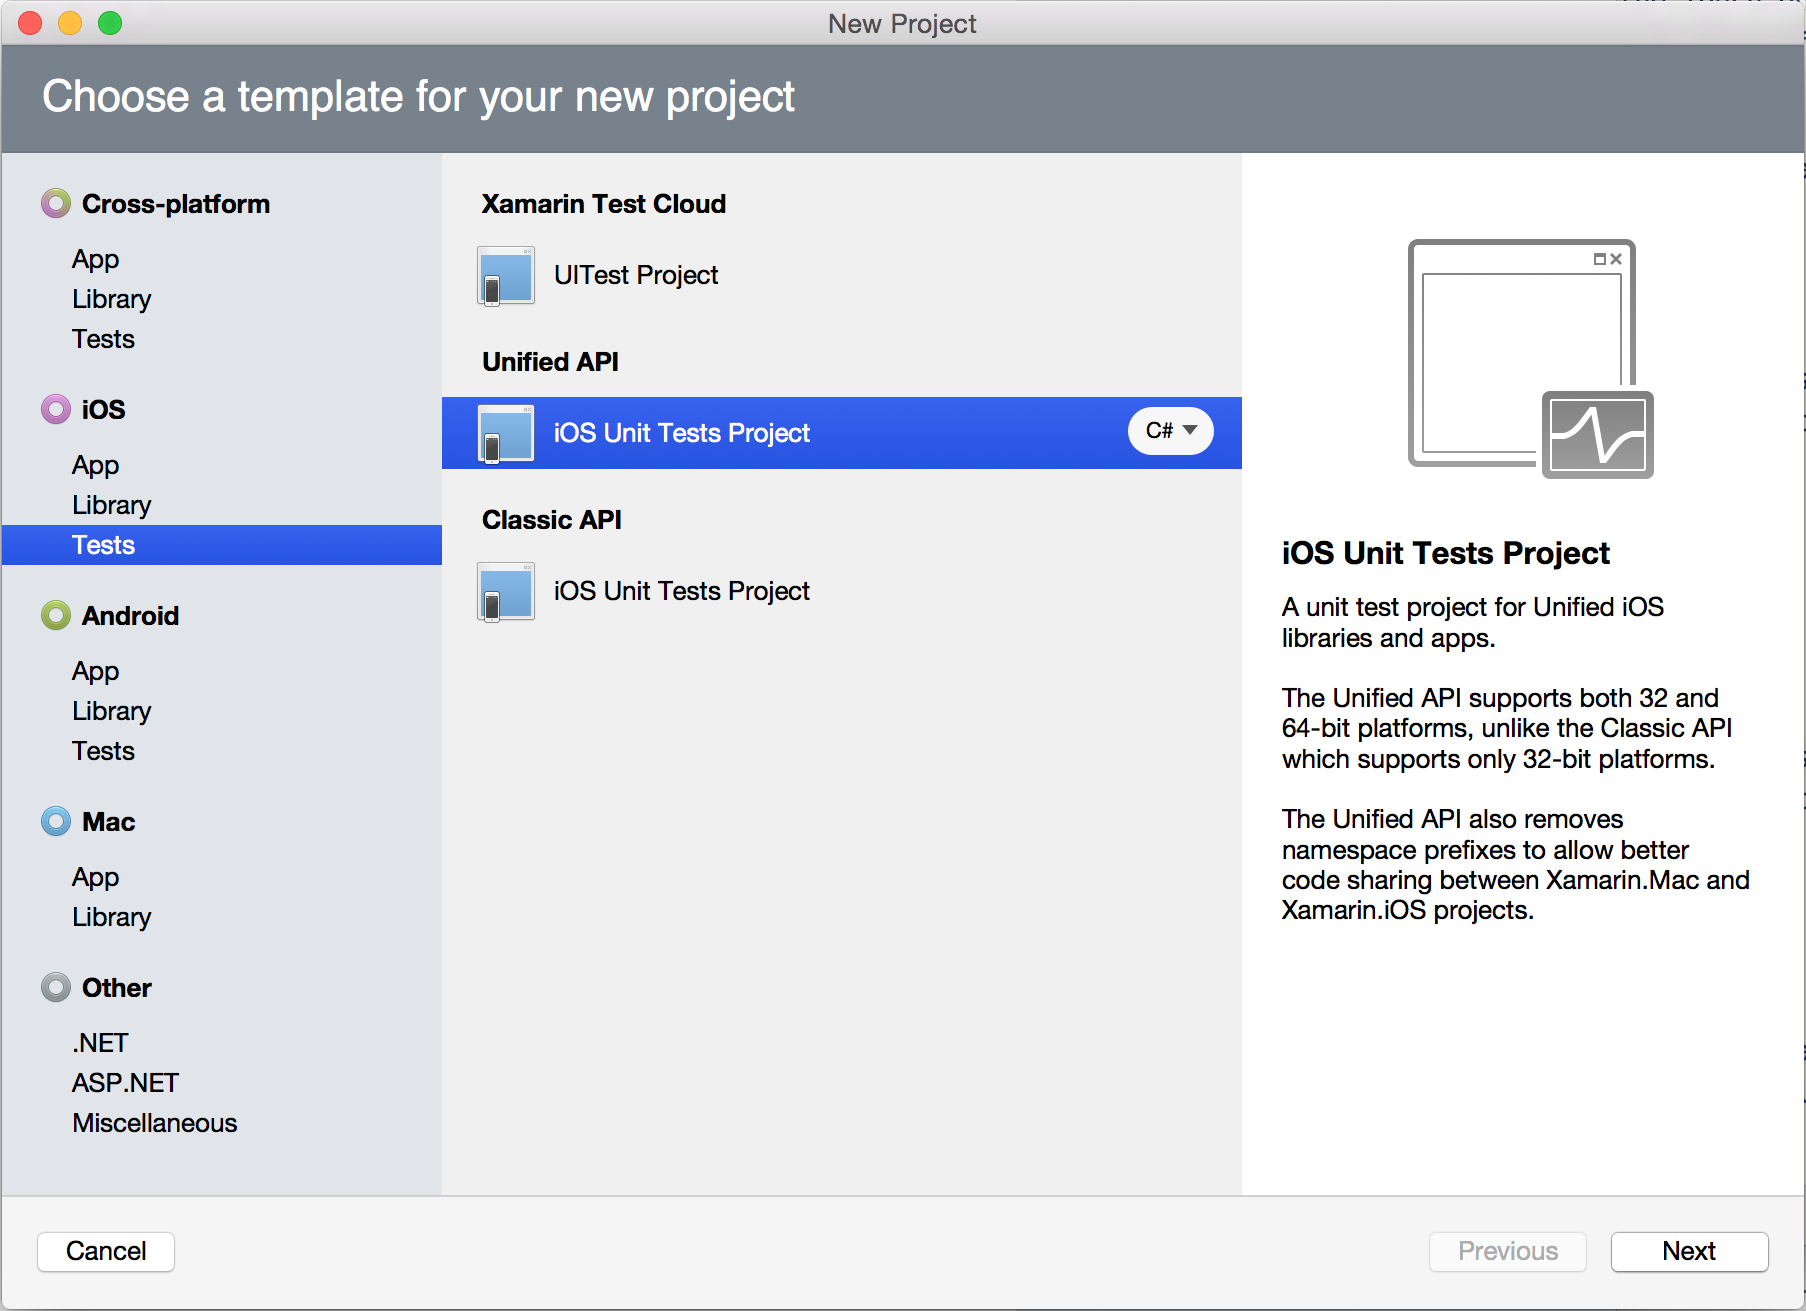
若要為您的專案設定單元測試架構,只需要將 [iOS 單元測試專案] 類型的專案新增至您的方案即可。 以滑鼠右鍵按下您的方案,然後選取 [ 新增 > 新增專案] 來執行此動作。 從清單中選取 [iOS > 測試 > 整合 API > iOS 單元測試專案 ] (您可以選擇 C# 或 F#)。
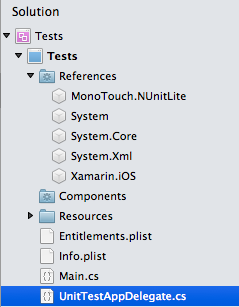
上面的動作將會建立其中包含基本執行器程式,並會參考新 MonoTouch.NUnitLite 組件的基本專案,您的專案看起來像這樣:
AppDelegate.cs 類別包含測試執行器,而且它看起來像這樣:
[Register ("AppDelegate")]
public partial class AppDelegate : UIApplicationDelegate
{
    UIWindow window;
    TouchRunner runner;

    public override bool FinishedLaunching (UIApplication app, NSDictionary options)
    {
        // create a new window instance based on the screen size
        window = new UIWindow (UIScreen.MainScreen.Bounds);
        runner = new TouchRunner (window);

        // register every tests included in the main application/assembly
        runner.Add (System.Reflection.Assembly.GetExecutingAssembly ());

        window.RootViewController = new UINavigationController (runner.GetViewController ());

        // make the window visible
        window.MakeKeyAndVisible ();

        return true;
    }
}
注意
Windows 上的 Visual Studio 2019 或 Visual Studio 2017 中不提供 iOS 單元測試專案類型。
編寫一些測試
既然您已經備妥基本的殼層,您應該編寫您的第一組測試。
若要編寫測試,請建立已套用 [TestFixture] 屬性的類別。 您應該在每個 TestFixture 類別內,將 [Test] 屬性套用至您希望測試執行器叫用的每個方法。 實際的測試固件可以存在於測試專案中的任何檔案。
若要快速開始,請選取 [加入]/[加入新檔案],然後在 Xamarin.iOS 群組中選取 [UnitTests]。 這將會新增包含一個通過測試、一個失敗測試,以及一個忽略測試的基本架構檔案,它看起來像這樣:
using System;
using NUnit.Framework;

namespace Fixtures {

    [TestFixture]
    public class Tests {

        [Test]
        public void Pass ()
        {
                Assert.True (true);
        }

        [Test]
        public void Fail ()
        {
                Assert.False (true);
        }

        [Test]
        [Ignore ("another time")]
        public void Ignore ()
        {
                Assert.True (false);
        }
    }
}
執行您的測試
若要執行此專案,請在方案內以滑鼠右鍵按一下該專案,然後選取 [Debug Item] \(針對項目進行偵錯\)或 [Run Item] \(執行項目\)。
測試執行器可讓您查看已登錄的測試,並個別選取可以執行的測試。


您可以透過從巢狀檢視中選取測試固件來執行個別的測試固件,或者您可以使用 [Run Everything] \(全部執行\) 來執行所有測試。 如果您執行預設測試,應該包括一個通過測試、一個失敗測試以及一個忽略測試。 這是報表的外觀,而且您可以直接向下切入失敗測試,並找出有關失敗的詳細資訊:


您也可以查看 IDE 中的 [應用程式輸出] 視窗,以了解正在執行哪些測試及其目前狀態。
編寫新的測試
NUnitLite 是修改後的 NUnit 版本,稱為 Touch.Unit 專案。 它是適用於 .NET 的輕量型測試架構,以 NUnit 的構想為基礎,並提供其功能的子集。 它使用最少的資源,並將在資源有限的平台上執行 (例如,用於內嵌和行動裝置開發的平台)。 您可在 Xamarin.iOS 中使用 NUnitLite API。 如果有單元測試範本所提供的基本架構,您的主要進入點就是判斷提示類別方法。
除了「判斷提示類別」方法之外,單元測試功能會在 NUnitLite 所屬的下列命名空間上分割: