Manage and organize queries in Azure Boards and Azure DevOps
Azure DevOps Services | Azure DevOps Server 2022 - Azure DevOps Server 2019
Visual Studio 2019 | Visual Studio 2022
Organize your personal or shared queries by adding a query folder. You can then add queries to or move existing queries into those folders. You can create queries and query folders from the web portal or from a supported client, such as Visual Studio Team Explorer.
Note
To create and manage queries in Visual Studio 2019, you need to Set the Work Items experience to the legacy option. Also, you can perform bulk drag-and-drop of queries into query folders from Visual Studio but not from the web portal.
Note
The browser images used in this article are from the new boards hubs feature, which is enabled by default. If this feature is not enabled, you might be using the previous boards experience. To display the images for the previous experience, select the Azure DevOps Server 2022 version of this article.
Prerequisites
- Access levels:
- Have Stakeholder access to view and run shared queries. All project members have Stakeholder access by default. For more information, see Change the permissions for a shared query or folder.
- Have Basic access or higher to add and save a shared query.
- Permissions: Have your Contribute permission set to Allow for the folder that you want to add a query to. By default, the Contributors group doesn't have this permission.
Note
Users with Stakeholder access for a public project have full access to query features just like users with Basic access. For more information, see Stakeholder access quick reference.
- Access levels: By default, all project members and users with Stakeholder access can view and run all shared queries. You can change the permissions set for a shared query folder or shared query. For more information, see Set query permissions.
- Permissions: To add and save a query under Shared queries, you must be granted Basic access or higher. Also, you must have your Contribute permission set to Allow for the folder you want to add the query to. By default, the Contributors group doesn't have this permission.
Open a query
From your web browser, (1) check that you selected the right project, (2) choose Boards > Queries, and then (3) choose All.
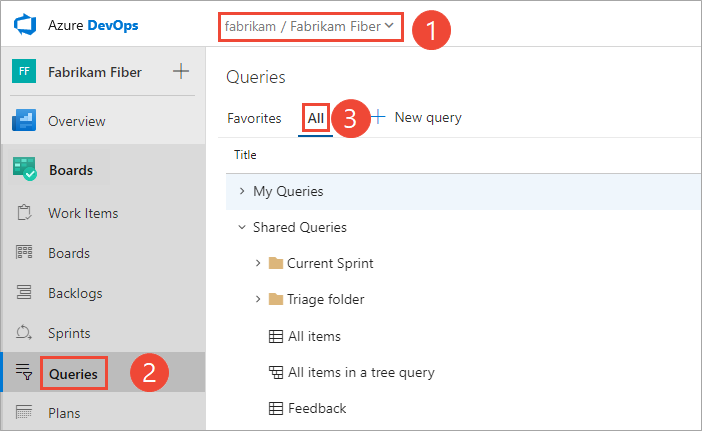
The Queries page opens to the Favorites tab that lists the queries you set as favorites. You can choose the All tab to view all queries you defined and shared queries for the project.
Tip
Queries you or your team have chosen as favorites show up on the Favorites page. Favorite queries along with other objects also appear on your Project page. For more information, see Set personal or team favorites.
From your project, choose Boards > Queries, and then choose All.
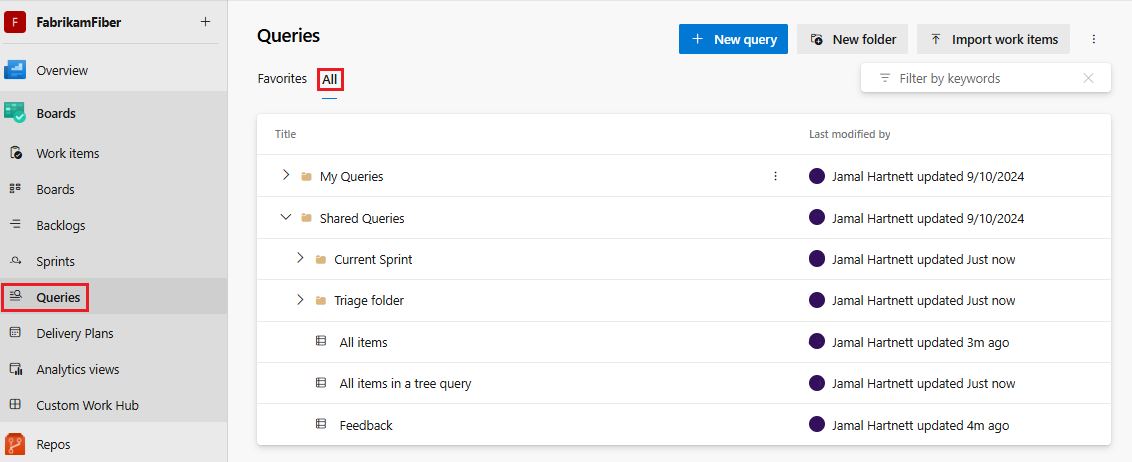
The Queries page opens to the Favorites tab that lists the queries you set as favorites. You can choose the All tab to view all queries you defined and shared queries for the project.
Tip
Queries you or your team have chosen as favorites show up on the Favorites page. Favorite queries along with other objects also appear on your Project page. For more information, see Set personal or team favorites.

Run, edit, and save a query
The easiest way to define a query is to start with an existing shared query. The following example shows how to find all closed bugs by modifying the Active Bugs shared query provided with the Agile process template. Examples are based on the user interface provided through the web portal.
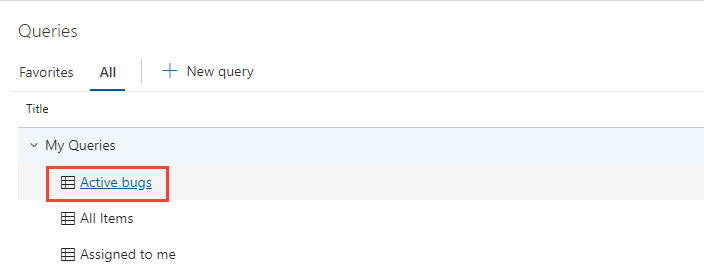
Open a shared query. For example, from the web portal, open the Active Bugs or similar flat list query.
Tip
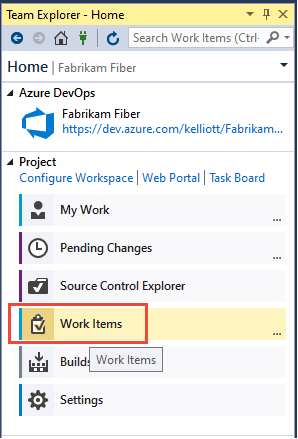
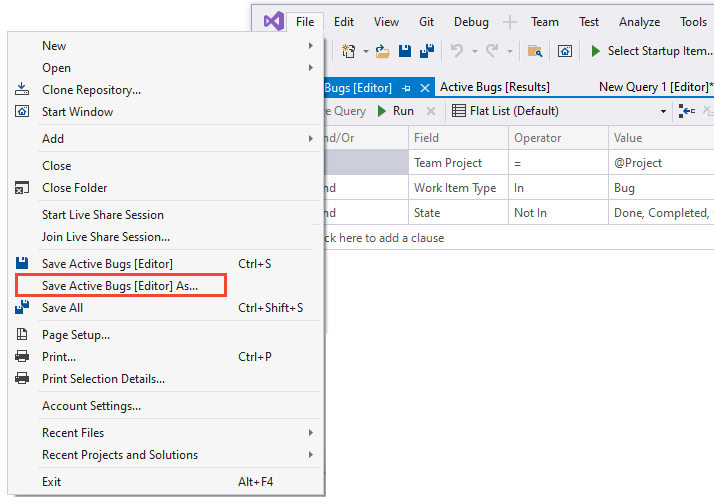
If you're working in Visual Studio Team Explorer, open the Work page to access your queries and shared queries. If Team Explorer isn't visible, choose View>Team Explorer from the top level menu.
Edit the query to find closed bugs and then run the query. Use
 to insert a clause above the current clause. Use
  to delete a clause. Queries are automatically scoped to the current project. To find work items defined in several projects, see Query across projects.
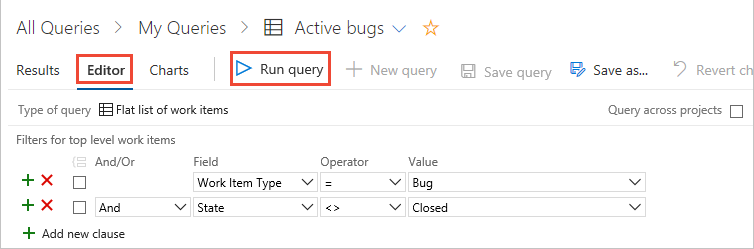
Save the query to your My Queries folder.
To save a query to the Shared Queries folder, you need to be a member of the Project Administrators group, or have your Contribute permissions on the folder set to Allow. For more information, see Set query permissions.
Open a shared query. For example, from the web portal, open the Active Bugs or similar flat list query.
Tip
If you're working in Visual Studio Team Explorer, open the Work page to access your queries and shared queries. If Team Explorer isn't visible, choose View > Team Explorer from the top level menu.
Edit the query to find closed bugs and then run the query. Use
to insert a clause above the current clause. Use to delete a clause. Queries are automatically scoped to the current project. To find work items defined in several projects, see Query across projects.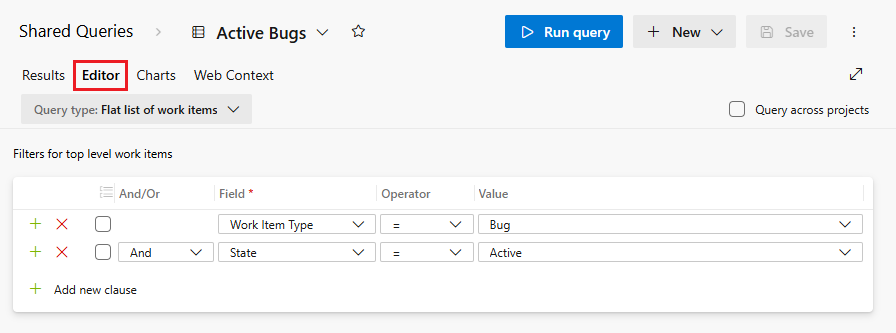
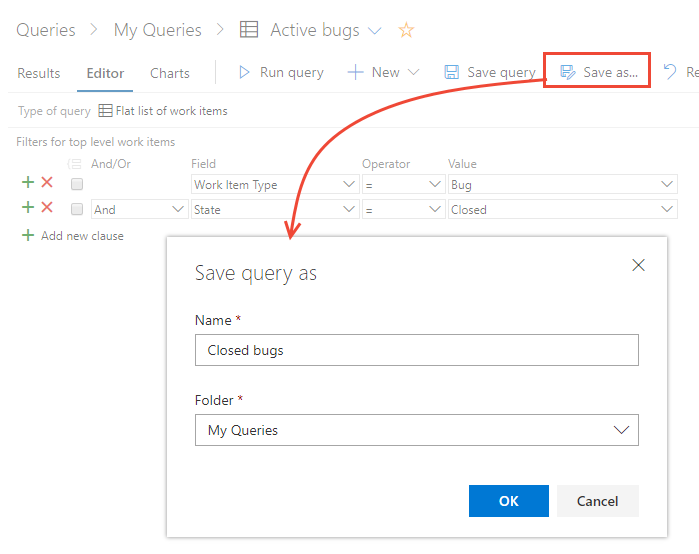
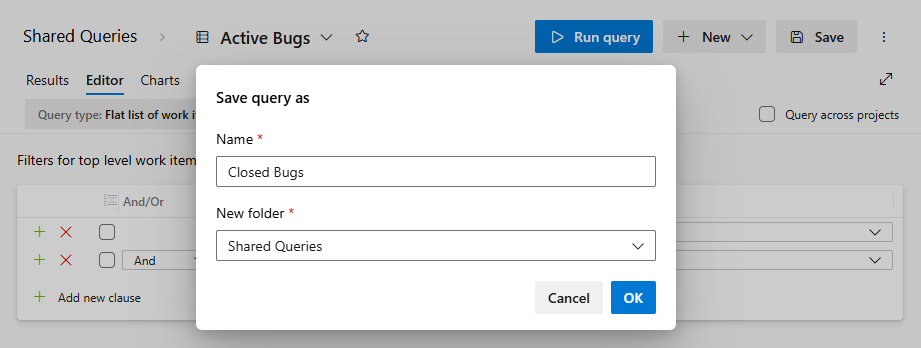
Select Save as in the more actions
 menu.
menu.Note
When the New Boards Hubs feature is not enabled, the Save As selection is at the top of the page.
Save the query to your My Queries folder.
To save a query to the Shared Queries folder, you need to be a member of the Project Administrators group, or have your Contribute permissions on the folder set to Allow. For more information, see Set query permissions.
Rename or delete a query
From either the Favorites or All page, choose the ![]() actions icon of a query to run, edit, rename, or delete the query.
actions icon of a query to run, edit, rename, or delete the query.
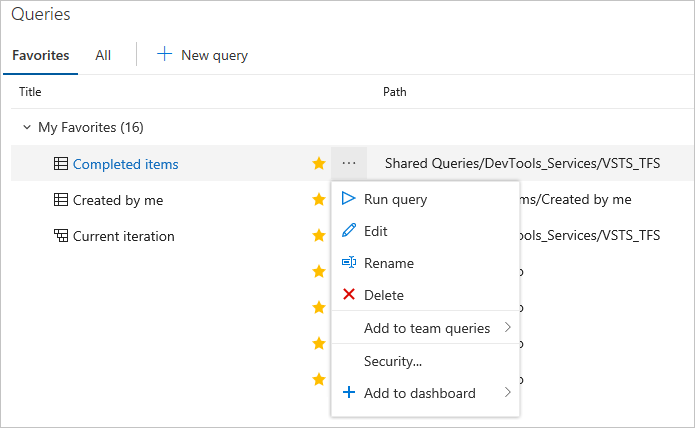
For shared queries, you can also choose to do one of these tasks:
- Add to team queries: Select the team to add the query as a team favorite
- Security...: to set permissions for the query. For more information, see Set query permissions.
- Add to dashboard: Adds a Query tile widget to the team dashboard you select. For more information, see Add widgets to a dashboard.
Add a query folder and move items into a folder
Tip
You need Delete permissions to rename or move a shared query or folder, and Contribute permissions for the folder where you move the query to. To view or set permissions, see Set permissions on queries and query folders.
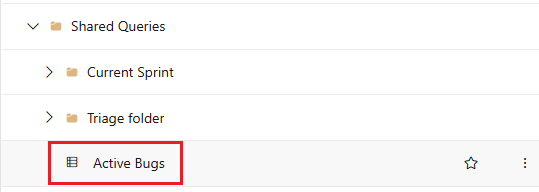
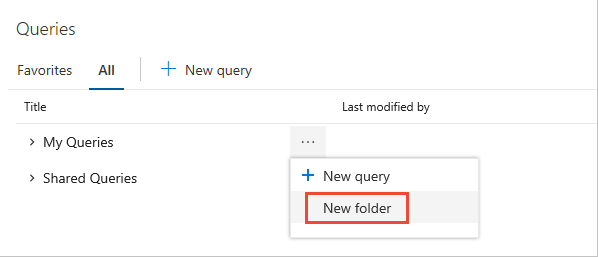
You add query folders from the Boards > Queries > All page.
Choose All. Expand My Queries or Shared Queries depending on where you want to add a query folder.
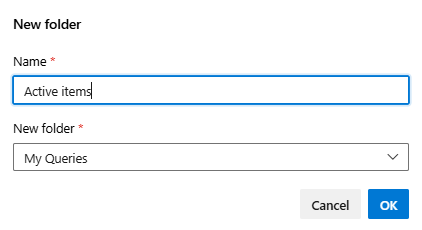
To add a folder, choose actions icon for an existing folder or the top container folder, and choose New folder.
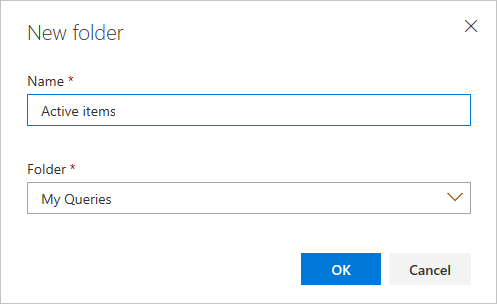
Enter the name for the folder in the New folder dialog. If you want to change the location of the folder, select it from the Folder drop down menu.
To move items into a folder, drag-and-drop a query onto the folder. From the web portal, you can only drag a single query from outside a folder into a folder.
Optionally, you can choose More commands
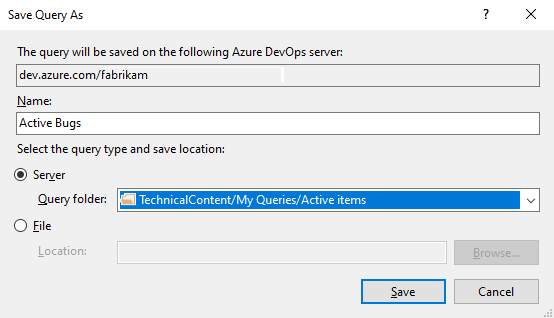
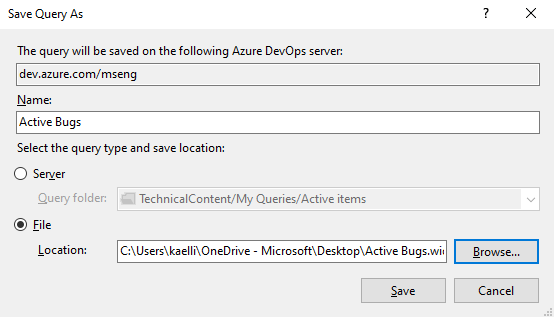
 for an existing query, choose Edit, and then choose Save As. In the Save query as dialog, choose the folder you want to save the query in.
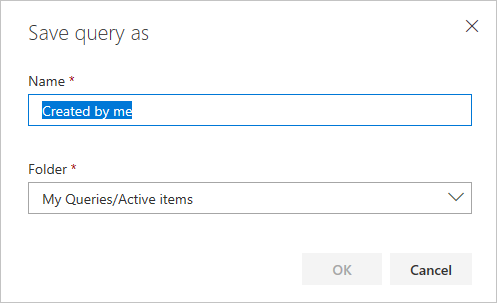
You add query folders from the Boards > Queries > All page.
Choose All. Expand My Queries or Shared Queries depending on where you want to add a query folder.
To add a folder, choose New folder.

Enter the name for the folder in the New folder dialog. If you want to change the location of the folder, select it from the Folder drop down menu.
To move items into a folder, drag-and-drop a query onto the folder. From the web portal, you can only drag a single query from outside a folder into a folder.
Optionally, you can choose More commands
for an existing query, choose Edit, and then choose Save As. In the Save query as dialog, choose the folder you want to save the query in.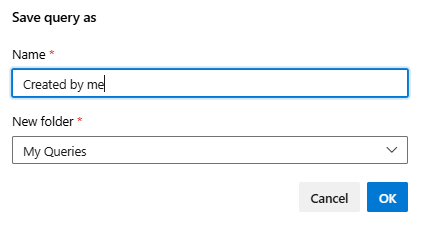

Save a query as a team favorite
To save a shared query as a team favorite, you must be a member of the team.
You can add a shared query to team favorites. Share queries with your team by adding them to a folder under the Shared Queries container. To save a query to a Shared Queries folder, get added to the Project Collection Administrators group or have your permissions set for a folder under Shared Queries.
You can only add shared queries as team favorites if you have team administrator or project administrator permissions.
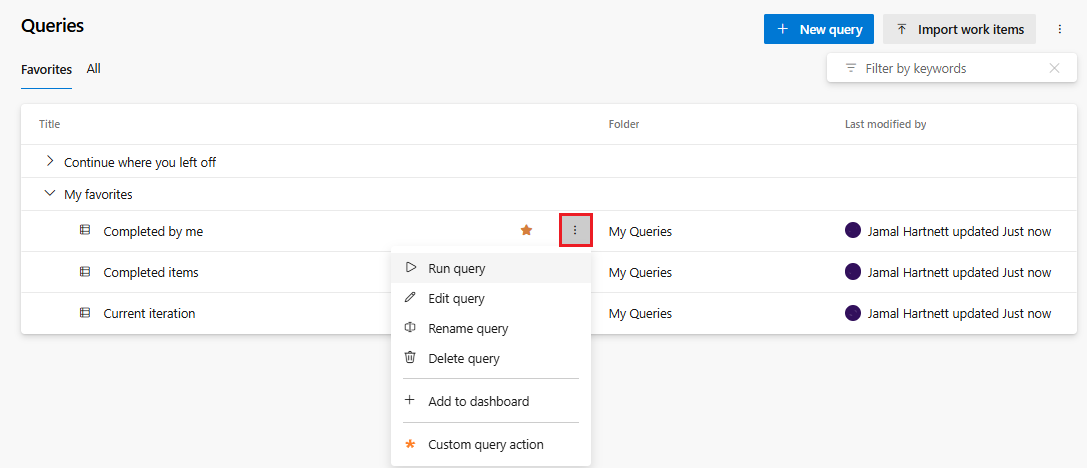
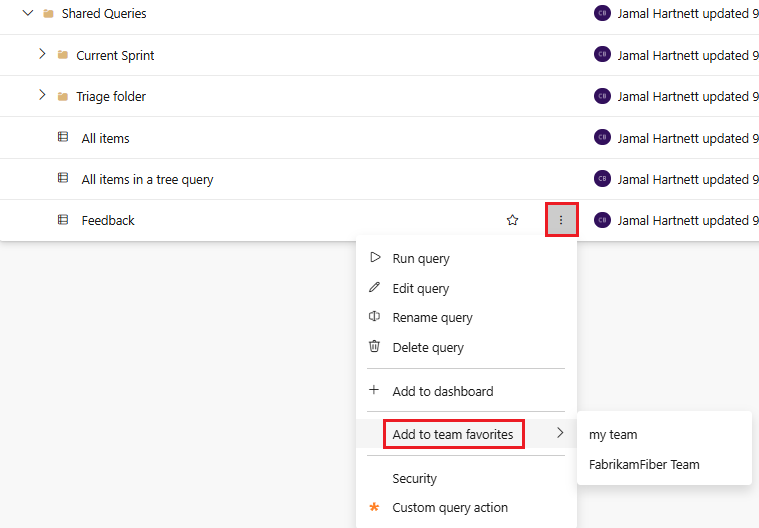
To save a query as a team favorite, open More actions
or the  context menu for the query from the Queries page.
Choose Add to team favorites, and then select from the teams listed. Only teams for which you're a member are listed.
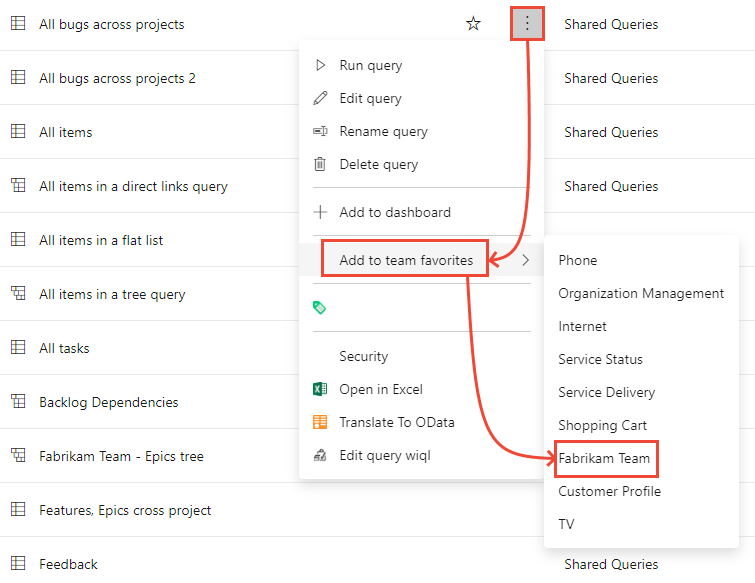
To save a query as a team favorite, open the More actions
 context menu for the query from the Shared Queries on the Queries page.
Choose Add to team favorites, and then select from the teams listed. Only teams for which you're a member are listed.
Add a query tile to a dashboard
A query tile displays a count of the work items in a query. You can also quickly open the query from the dashboard. You can add a query tile to a dashboard from the Queries page using the following steps, or by following the steps outlined in Add widgets to a dashboard.
Note
You must be a member of the team or be granted permissions to edit the dashboard.
To add a query to a dashboard from the Queries page, open the More actions menu
actions icon (or
context icon) for the query.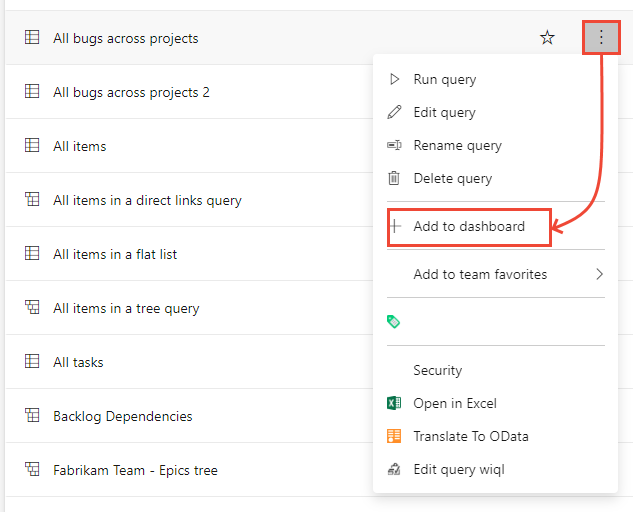
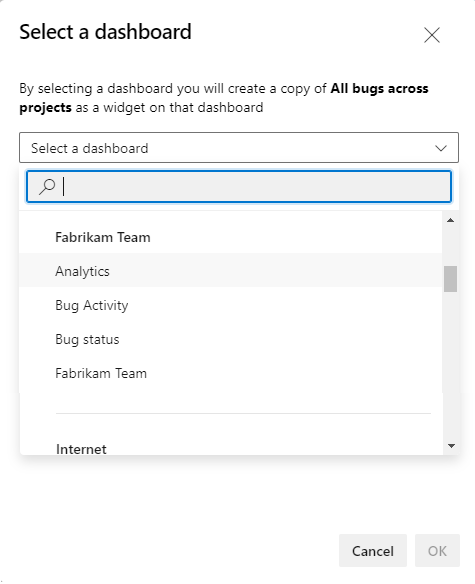
From the Select a dashboard dialog, choose the dashboard you want to add the query to.
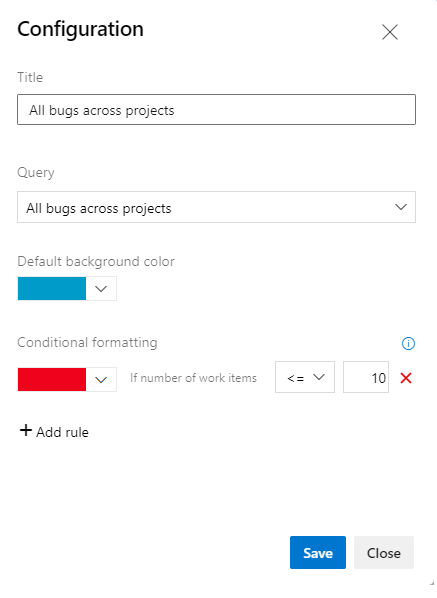
Open the dashboard, and verify the query tile was added. You can configure the query tile to change the default color and to specify the color for the tile based on a conditional rule you specify.
To add a query to a dashboard from the Queries page, open the More actions menu
for the query.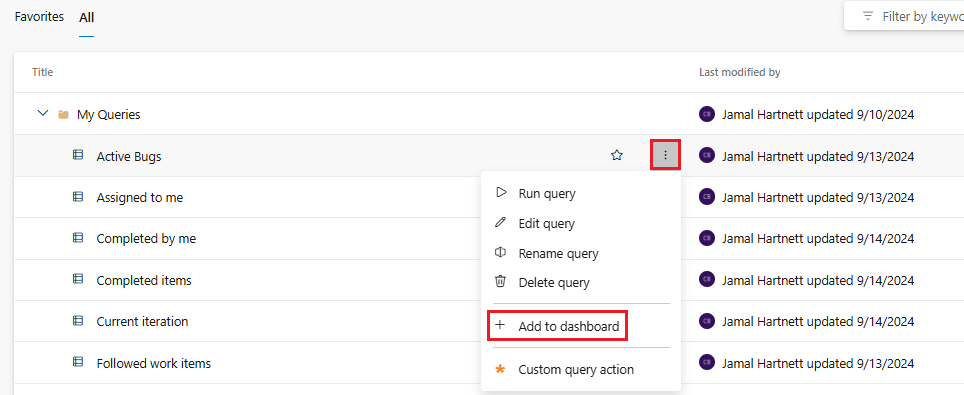
From the Select a dashboard dialog, choose the dashboard you want to add the query to.
Open the dashboard, and verify the query tile was added. You can configure the query tile to change the default color and to specify the color for the tile based on a conditional rule you specify.