Note
Access to this page requires authorization. You can try signing in or changing directories.
Access to this page requires authorization. You can try changing directories.
In this tutorial, you will host an inventory application on Azure Kubernetes Service (AKS) and find out how you can use active geo-replication to replicate data in your Azure Cache for Redis Enterprise or Azure Managed Redis instances across Azure regions.
Prerequisites
- An Azure subscription. If you don't have an Azure subscription, create a free account.
- One Azure Kubernetes Service Cluster - For more information on creating a cluster, see Quickstart: Deploy an Azure Kubernetes Service (AKS) cluster using the Azure portal. Alternatively, you can host two instances of the demo application on the two different AKS clusters. In a production environment, you would use two different clusters located in the same regions as your clusters to deploy two versions of the application. For this tutorial, you deploy both instances of the application on the same AKS cluster.
Important
This tutorial assumes that you are familiar with basic Kubernetes concepts like containers, pods and service.
Overview
This tutorial uses a sample inventory page that shows three different T-shirt options. The user can "purchase" each T-shirt and see the inventory drop. The unique thing about this demo is that we run the inventory app in two different regions. Typically, you would have to run the database storing inventory data in a single region so that there are no consistency issues. With other database backends and synchronization, customers might have unpleasant experience due to higher latency for calls across different Azure regions. When you use Azure Cache for Redis Enterprise as the backend, you can link two caches together with active geo-replication so that the inventory remains consistent across both regions while enjoying low latency performance from Redis Enterprise in the same region.
Set up two Azure Redis instances
Create a new Azure Cache for Redis Enterprise or Azure Managed Redis instance in West US 2 region by using the Azure portal or your preferred CLI tool. Alternately, you can use any region of your choice. Use the quickstart guide to get started.
On the Advanced tab:
- Enable Non-TLS access only.
- Set Clustering Policy to Enterprise
- Configure a new active geo-replication group using this guide. Eventually, you add both caches to the same replication group. Create the group name with the first cache, and add the second cache to the same group.
Important
This tutorial uses a non-TLS port for demonstration, but we highly recommend that you use a TLS port for anything in production.
Set up another Azure Cache for Redis Enterprise in East US region with the same configuration as the first cache. Alternatively, you can use any region of your choice. Ensure that you choose the same replication group as the first cache.
Prepare Kubernetes deployment files
Create two .yml files using the following procedure. One file for each cache you created in the two regions.
To demonstrate data replication across regions, we run two instances of the same application in different regions. Let's make one instance run in Seattle, west namespace, while the second runs in New York, east namespace.
West namespace
Update the following fields in the following YAML file and save it as app_west.yaml.
- Update the variable
REDIS_HOSTwith the Endpoint value URL after removing the port suffix: 10000 - Update
REDIS_PASSWORDwith the Access key of your West US 2 cache. - Update
APP_LOCATIONto display the region where this application instance is running. For this cache, configure theAPP_LOCATIONtoSeattleto indicate this application instance is running in Seattle. - Verify that the variable
namespacevalue iswestin both places in the file.
It should look like following code:
apiVersion: apps/v1
kind: Deployment
metadata:
  name: shoppingcart-app
  namespace: west
spec:
  replicas: 1
  selector:
    matchLabels:
      app: shoppingcart
  template:
    metadata:
      labels:
        app: shoppingcart
    spec:
      containers:
      - name: demoapp
        image: mcr.microsoft.com/azure-redis-cache/redisactivereplicationdemo:latest
        resources:
          limits:
            cpu: "0.5"
            memory: "250Mi"
          requests:
            cpu: "0.5"
            memory: "128Mi"
        env:
         - name: REDIS_HOST
           value: "DemoWest.westus2.redisenterprise.cache.azure.net"
         - name: REDIS_PASSWORD
           value: "myaccesskey"
         - name: REDIS_PORT
           value: "10000"   # redis enterprise port
         - name: HTTP_PORT
           value: "8080"
         - name: APP_LOCATION
           value: "Seattle, WA"
---
apiVersion: v1
kind: Service
metadata:
  name: shoppingcart-svc
  namespace: west
spec:
  type: LoadBalancer
  ports:
  - protocol: TCP
    port: 80
    targetPort: 8080
  selector:
    app: shoppingcart
East namespace
Save another copy of the same YAML file as app_east.yaml. This time, use the values that correspond with your second cache.
- Update the variable
REDIS_HOSTwith the Endpoint value after removing the port suffix: 10000 - Update
REDIS_PASSWORDwith the Access key of your East US cache. - Update
APP_LOCATIONto display the region where this application instance is running. For this cache, configure theAPP_LOCATIONto New York to indicate this application instance is running in New York. - Verify that the variable
namespacevalue iseastin both places in the file.
It should look like following code:
apiVersion: apps/v1
kind: Deployment
metadata:
  name: shoppingcart-app
  namespace: east
spec:
  replicas: 1
  selector:
    matchLabels:
      app: shoppingcart
  template:
    metadata:
      labels:
        app: shoppingcart
    spec:
      containers:
      - name: demoapp
        image: mcr.microsoft.com/azure-redis-cache/redisactivereplicationdemo:latest
        resources:
          limits:
            cpu: "0.5"
            memory: "250Mi"
          requests:
            cpu: "0.5"
            memory: "128Mi"
        env:
         - name: REDIS_HOST
           value: "DemoEast.eastus.redisenterprise.cache.azure.net"
         - name: REDIS_PASSWORD
           value: "myaccesskey"
         - name: REDIS_PORT
           value: "10000"   # redis enterprise port
         - name: HTTP_PORT
           value: "8080"
         - name: APP_LOCATION
           value: "New York, NY"
---
apiVersion: v1
kind: Service
metadata:
  name: shoppingcart-svc
  namespace: east
spec:
  type: LoadBalancer
  ports:
  - protocol: TCP
    port: 80
    targetPort: 8080
  selector:
    app: shoppingcart
Install Kubernetes CLI and connect to your AKS cluster
In this section, you first install the Kubernetes CLI and then connect to an AKS cluster.
Note
An Azure Kubernetes Service Cluster is required for this tutorial. You deploy both instances of the application on the same AKS cluster.
Install the Kubernetes CLI
Use the Kubernetes CLI, _kubectl, to connect to the Kubernetes cluster from your local computer. If you're running locally, then you can use the following command to install kubectl.
az aks install-cli
If you use Azure Cloud Shell, kubectl is already installed, and you can skip this step.
Connect to your AKS clusters in two regions
Use the portal to copy the resource group and cluster name for your AKS cluster in the West US 2 region. To configure kubectl to connect to your AKS cluster, use the following command with your resource group and cluster name:
az aks get-credentials --resource-group myResourceGroup --name myClusterName
Verify that you're able to connect to your cluster by running the following command:
kubectl get nodes
You should see similar output showing the list of your cluster nodes.
NAME                                STATUS   ROLES   AGE   VERSION
aks-agentpool-21274953-vmss000001   Ready    agent   1d    v1.24.15
aks-agentpool-21274953-vmss000003   Ready    agent   1d    v1.24.15
aks-agentpool-21274953-vmss000006   Ready    agent   1d    v1.24.15
Deploy and test your application
You need two namespaces for your applications to run on your AKS cluster. Create a west and then deploy the application.
Run the following command to deploy the application instance to your AKS cluster in the west namespace:
kubectl create namespace west

kubectl apply -f app_west.yaml
You get a response indicating your deployment and service was created:
deployment.apps/shoppingcart-app created
service/shoppingcart-svc created
To test the application, run the following command to check if the pod is running:
kubectl get pods -n west
You see your pod running successfully like:
NAME                                READY   STATUS                       RESTARTS   AGE
shoppingcart-app-5fffdcb5cd-48bl5   1/1     Running                      0          68s
Run the following command to get the endpoint for your application:
kubectl get service -n west
You might see that the EXTERNAL-IP has status <pending> for a few minutes. Keep retrying until the status is replaced by an IP address.
NAME                   TYPE           CLUSTER-IP     EXTERNAL-IP     PORT(S)        AGE
shoppingcart-svc       LoadBalancer   10.0.166.147   20.69.136.105   80:30390/TCP   90s
Once the External-IP is available, open a web browser to the External-IP address of your service and you see the application.
Run the same deployment steps and deploy an instance of the demo application to run in East US region.
kubectl create namespace east

kubectl apply -f app_east.yml

kubectl get pods -n east

kubectl get service -n east
With each of the two services opened in a browser, you see that changing the inventory in one region is almost instantly reflected in the other region. The inventory data is stored in the Redis Enterprise instances that are replicating data across regions.
You did it! Click on the buttons and explore the demo.

To reset the count, add /reset after the url:
<IP address>/reset
Clean up your deployment
To clean up your cluster, run the following commands:
kubectl delete deployment shoppingcart-app -n west
kubectl delete service shoppingcart-svc -n west

kubectl delete deployment shoppingcart-app -n east
kubectl delete service shoppingcart-svc -n east
Clean up resources
If you want to continue to use the resources you created in this article, keep the resource group.
Otherwise, if you're finished with the resources, you can delete the Azure resource group that you created to avoid charges.
Important
Deleting a resource group is irreversible. When you delete a resource group, all the resources in it are permanently deleted. Make sure that you do not accidentally delete the wrong resource group or resources. If you created the resources inside an existing resource group that contains resources you want to keep, you can delete each resource individually instead of deleting the resource group.
To delete a resource group
Sign in to the Azure portal, and then select Resource groups.
Select the resource group you want to delete.
If there are many resource groups, use the Filter for any field... box, type the name of your resource group you created for this article. Select the resource group in the results list.
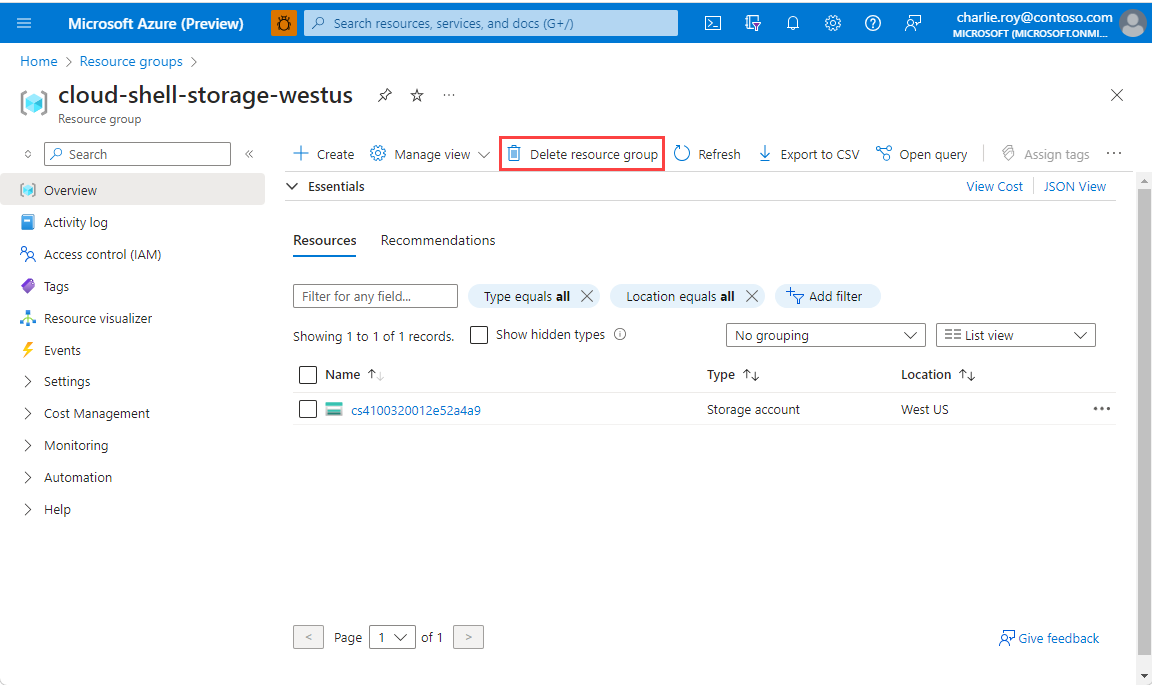
Select Delete resource group.
You're asked to confirm the deletion of the resource group. Type the name of your resource group to confirm, and then select Delete.
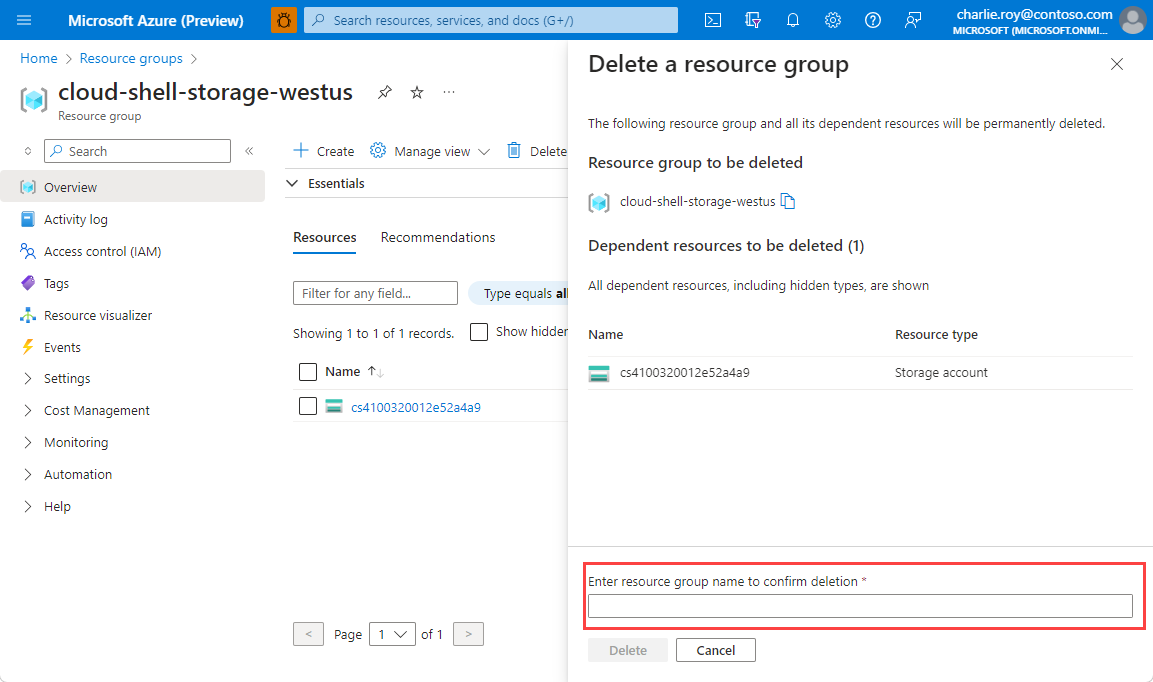
After a few moments, the resource group and all of its resources are deleted.