Note
Access to this page requires authorization. You can try signing in or changing directories.
Access to this page requires authorization. You can try changing directories.
Applies to: ![]() SQL Server on Azure VM
SQL Server on Azure VM
This article provides storage best practices and guidelines to optimize performance for your SQL Server on Azure Virtual Machines (VM). Learn how to select the right disk types, configure storage pools, and implement caching strategies to maximize your database performance.
There's typically a trade-off between optimizing for costs and optimizing for performance. This performance best practices series is focused on getting the best performance for SQL Server on Azure VMs. If your workload is less demanding, you might not require every recommended optimization. Consider your performance needs, costs, and workload patterns as you evaluate these recommendations.
To learn more, see the other articles in this series: Checklist, VM size, Security, HADR configuration, and Collect baseline.
Checklist
Review the following checklist for a brief overview of the storage best practices that the rest of the article covers in greater detail:
- Monitor the application and determine storage bandwidth and latency requirements for SQL Server data, log, and
tempdbfiles before choosing the disk type. - If available, configure the
tempdbdata and log files on the D: local SSD volume when you deploy a new virtual machine, or after you've installed SQL Server manually. The SQL IaaS Agent extension handles the folder and permissions needed upon re-provisioning. - To optimize storage performance, plan for highest uncached IOPS available and use data caching as a performance feature for data reads while avoiding virtual machine and disks capping.
- Set host caching to read-only for data file disks.
- Set host caching to none for log file disks.
- Don't enable read/write caching on disks that contain SQL Server data or log files.
- Always stop the SQL Server service before changing the cache settings of your disk.
- When using the Ebdsv5 or Ebsv5 series SQL Server VMs, use Premium SSD v2 for the best price performance. You can deploy your SQL Server VM with Premium SSD v2 by using the Azure portal (currently in preview).
- If your workload requires more than 160,000 IOPS, use Premium SSD v2 or Azure Ultra Disks.
- Place data, log, and
tempdbfiles on separate drives.- For the data drive, use premium P30 and P40 or smaller disks to ensure the availability of cache support. When using the Ebdsv5 VM series, use Premium SSD v2 which provides better price-performance for workloads that require high IOPS and I/O throughput.
- For the log drive plan for capacity and test performance versus cost while evaluating either Premium SSD v2 or Premium SSD P30 - P80 disks
- If submillisecond storage latency is required, use either Premium SSD v2 or Azure ultra disks for the transaction log.
- For M-series virtual machine deployments, consider write accelerator over using Azure ultra disks.
- Place tempdb on the temporary disk (the temporary disk is ephemeral, and defaults to
D:\) for most SQL Server workloads that aren't part of a failover cluster instance (FCI) after choosing the optimal VM size.- If the capacity of the local drive isn't enough for
tempdb, consider sizing up the VM. For more information, see Data file caching policies.
- If the capacity of the local drive isn't enough for
- For failover cluster instances (FCI) place
tempdbon the shared storage.- If the FCI workload is heavily dependent on
tempdbdisk performance, then as an advanced configuration placetempdbon the local ephemeral SSD (defaultD:\) drive, which isn't part of FCI storage. This configuration needs custom monitoring and action to ensure the local ephemeral SSD (defaultD:\) drive is available all the time as any failures of this drive won't trigger action from FCI.
- If the FCI workload is heavily dependent on
- Stripe multiple Azure data disks using Storage Spaces to increase I/O bandwidth up to the target virtual machine's IOPS and throughput limits.
- When migrating several different workloads to the cloud, Azure Elastic SAN can be a cost-effective consolidated storage solution. However, when using Azure Elastic SAN, achieving desired IOPS/throughput for SQL Server workloads often requires overprovisioning capacity. While not typically appropriate for single SQL Server workloads, you can attain a cost-effective solution when combining low-performance workloads with SQL Server.
- For development and test workloads, and long-term backup archival consider using standard storage. It isn't recommended to use Standard HDD/SSD for production workloads.
- Credit-based Disk Bursting (P1-P20) should only be considered for smaller dev/test workloads and departmental systems.
- Format your data disk to use 64-KB allocation unit size for all data files placed on a drive other than the temporary
D:\drive (which has a default of 4 KB). SQL Server VMs deployed through Azure Marketplace come with data disks formatted with allocation unit size and interleave for the storage pool set to 64 KB. - Configure the storage account in the same region as the SQL Server VM.
- Disable Azure geo-redundant storage (geo-replication) and use LRS (local redundant storage) on the storage account.
- Enable the SQL Best Practices Assessment to identify possible performance issues and evaluate that your SQL Server VM is configured to follow best practices.
- Review and monitor disk and VM limits using Storage IO utilization metrics.
- Exclude SQL Server files from antivirus software scanning, including data files, log files, and backup files.
- Resize the storage pool appropriately.
To compare the storage checklist with the other best practices, see the comprehensive Performance best practices checklist.
Overview
To find the most effective configuration for SQL Server workloads on an Azure VM, start by measuring the storage performance of your business application. Once storage requirements are known, select a virtual machine that supports the necessary IOPS and throughput with the appropriate memory-to-vCore ratio.
Choose a VM size with enough storage scalability for your workload and a mixture of disks (usually in a storage pool) that meet the capacity and performance requirements of your business.
The type of disk depends on both the file type that's hosted on the disk and your peak performance requirements.
Tip
Provisioning a SQL Server VM through the Azure portal helps guide you through the storage configuration process and implements most storage best practices such as creating separate storage pools for your data and log files, targeting tempdb to the D:\ drive, and enabling the optimal caching policy. For more information about provisioning and configuring storage, see SQL VM storage configuration.
VM disk types
You have a choice in the performance level for your disks. The types of managed disks available as underlying storage (listed by increasing performance capabilities) are Standard hard disk drives (HDD), Standard solid-state drives (SSD), Premium SSDs, Premium SSD v2, and Ultra Disks.
For Standard HDDs, Standard SSDs, and Premium SSDs, the performance of the disk increases with the size of the disk, grouped by premium disk labels such as the P1 with 4 GiB of space and 120 IOPS to the P80 with 32 TiB of storage and 20,000 IOPS. Premium storage supports a storage cache that helps improve read and write performance for some workloads. For more information, see Managed disks overview.
The performance of Premium SSD v2 and Ultra Disks can be changed independently of the size of the disk, for details see Ultra disk performance and Premium SSD v2 performance. If your workload requires more than 160,000 IOPS, then consider using Premium SSD v2 or Ultra Disks.
There are also three main disk roles to consider for your SQL Server on Azure VM - an OS disk, a temporary disk, and your data disks. Carefully choose what is stored on the operating system drive (C:\) and the ephemeral temporary drive (D:\).
Operating system disk
An operating system disk is a VHD that can be booted and mounted as a running version of an operating system and is labeled as the C:\ drive. When you create an Azure VM, the platform attaches at least one disk to the VM for the operating system disk. The C:\ drive is the default location for application installs and file configuration.
For production SQL Server environments, don't use the operating system disk for data files, log files, error logs.
Temporary disk
Many Azure VMs contain another disk type called the temporary disk (labeled as the D:\ drive). Depending on the VM series and size the capacity of this disk will vary. The temporary disk is ephemeral, which means the disk storage is recreated (as in, it's deallocated and allocated again), when the VM is restarted, or moved to a different host (for service healing, for example).
The temporary storage drive isn't persisted to remote storage and therefore shouldn't store user database files, transaction log files, or anything that must be preserved. For example, you can use it for buffer pool extensions, the page file, and tempdb.
Place tempdb on the local temporary SSD D:\ drive for SQL Server workloads unless consumption of local cache is a concern. If you're using a VM that doesn't have a temporary disk then it's recommended to place tempdb on its own isolated disk or storage pool with caching set to read-only. To learn more, see tempdb data caching policies.
Data disks
Data disks are remote storage disks that are often created in storage pools in order to exceed the capacity and performance that any single disk could offer to the VM.
Attach the minimum number of disks that satisfies the IOPS, throughput, and capacity requirements of your workload. Don't exceed the maximum number of data disks of the smallest VM you plan to resize to.
Place data and log files on data disks provisioned to best suit performance requirements.
Format your data disk to use 64-KB allocation unit size for all data files placed on a drive other than the temporary D:\ drive (which has a default of 4 KB). SQL Server VMs deployed through Azure Marketplace come with data disks formatted with allocation unit size and interleave for the storage pool set to 64 KB.
Note
It's also possible to host your SQL Server database files directly on Azure Blob storage or on SMB storage such as Azure premium file share, but we recommend using Azure managed disks for the best performance, reliability, and feature availability.
Premium SSD v2
You should use Premium SSD v2 disks when running SQL Server workloads in supported regions, if the current limitations are suitable for your environment. Depending on your configuration, Premium SSD v2 can be cheaper than Premium SSDs, while also providing performance improvements. With Premium SSD v2, you can individually adjust your throughput or IOPS independently from the size of your disk. Being able to individually adjust performance options allows for this larger cost savings and allows you to script changes to meet performance requirements during anticipated or known periods of need.
We recommend using Premium SSD v2 when using the Ebdsv5 or Ebsv5 virtual machine series as it is a more cost-effective solution for these high I/O throughput machines. If your workload requires more than 160,000 IOPS, then consider using Premium SSD v2 or Ultra Disks.
You can deploy your SQL Server VMs with Premium SSD v2 by using the Azure portal (currently in preview).
If you're deploying your SQL Server VM by using the Azure portal and want to use Premium SSD v2, you're currently limited to the Ebdsv5 or Ebsv5 series virtual machines. However, if you manually create your VM with Premium SSD v2 storage and then manually install SQL Server on the VM, you can use any VM series that supports Premium SSD v2. Be sure to register your SQL Server VM with the SQL IaaS Agent extension so you can take advantage of all the benefits provided by the extension.
Azure Elastic SAN
Azure Elastic SAN is a network-attached storage offering that provides customers a flexible and scalable solution with the potential to reduce cost through storage consolidation. Azure Elastic SAN delivers a cost-effective, performant, and reliable block storage solution that connects to a variety of Azure compute services over iSCSI protocol. Elastic SAN enables a seamless transition from an existing SAN storage estate to the cloud without having to refactor customer application architecture.
This solution can scale up to millions of IOPS, double-digit GB/s of throughput, and low single-digit millisecond latencies, with built-in resiliency to minimize downtime. Use Azure Elastic SAN if you need to consolidate storage, work with multiple compute services, or have workloads that require high throughput levels when driving storage over network bandwidth. However, since achieving desired IOPS/throughput for SQL Server workloads often requires overprovisioning capacity, it's not typically appropriate for single SQL Server workloads. To attain the most cost-effective solution with Elastic SAN, consider using it as storage for multiple SQL server workloads, or a combination of SQL Server and other low-performance workloads.
Consider placing SQL Server workloads on Elastic SAN for better cost efficiency, storage consolidation, dynamic performance sharing, and to drive higher storage throughput.
Premium SSD
Use Premium SSDs for data and log files for production SQL Server workloads. Premium SSD IOPS and bandwidth vary based on the disk size and type.
For production workloads, use the P30 and/or P40 disks for SQL Server data files to ensure caching support and use the P30 up to P80 for SQL Server transaction log files. For the best total cost of ownership, start with P30s (5000 IOPS/200 MBps) for data and log files and only choose higher capacities when you need to control the VM disk count. For dev/test or small systems you can choose to use sizes smaller than P30 as these do support caching, but they don't offer reserved pricing.
For OLTP workloads, match the target IOPS per disk (or storage pool) with your performance requirements using workloads at peak times and the Disk Reads/sec + Disk Writes/sec performance counters. For data warehouse and reporting workloads, match the target throughput using workloads at peak times and the Disk Read Bytes/sec + Disk Write Bytes/sec.
Use Storage Spaces to achieve optimal performance, configure two pools, one for the log file(s) and the other for the data files. If you aren't using disk striping, use two premium SSD disks mapped to separate drives, where one drive contains the log file and the other contains the data.
The provisioned IOPS and throughput per disk that is used as part of your storage pool. The combined IOPS and throughput capabilities of the disks is the maximum capability up to the throughput limits of the VM.
The best practice is to use the least number of disks possible while meeting the minimal requirements for IOPS (and throughput) and capacity. However, the balance of price and performance tends to be better with a large number of small disks rather than a small number of large disks.
Scale premium disks
The size of your Premium SSD determines the initial performance tier of your disk. Designate the performance tier at deployment or change it afterwards, without changing the size of the disk. If demand increases, you can increase the performance level to meet your business needs.
Changing the performance tier allows administrators to prepare for and meet higher demand without relying on disk bursting.
Use the higher performance for as long as needed where billing is designed to meet the storage performance tier. Upgrade the tier to match the performance requirements without increasing the capacity. Return to the original tier when the extra performance is no longer required.
This cost-effective and temporary expansion of performance is a strong use case for targeted events such as shopping, performance testing, training events and other brief windows where greater performance is needed only for a short term.
For more information, see Performance tiers for managed disks.
Azure ultra disk
If there's a need for submillisecond response times with reduced latency consider using Azure ultra disk for the SQL Server log drive, or even the data drive for applications that are extremely sensitive to I/O latency.
Ultra disk can be configured where capacity and IOPS can scale independently. With ultra disk administrators can provision a disk with the capacity, IOPS, and throughput requirements based on application needs.
Ultra disk isn't supported on all VM series and has other limitations such as region availability, redundancy, and support for Azure Backup. To learn more, see Using Azure ultra disks for a full list of limitations.
Standard HDDs and SSDs
Standard HDDs and SSDs have varying latencies and bandwidth and are only recommended for dev/test workloads. Production workloads should use Premium SSD v2 or Premium SSDs. If you're using Standard SSD (dev/test scenarios), the recommendation is to add the maximum number of data disks supported by your VM size and use disk striping with Storage Spaces for the best performance.
Caching
VMs that support premium storage caching can take advantage of an additional feature called the Azure BlobCache or host caching to extend the IOPS and throughput capabilities of a VM. VMs enabled for both premium storage and premium storage caching have these two different storage bandwidth limits that can be used together to improve storage performance.
The IOPS and MBps throughput without caching counts against a VM's uncached disk throughput limits. The maximum cached limits provide another buffer for reads that helps address growth and unexpected peaks.
Enable premium caching whenever the option is supported to significantly improve performance for reads against the data drive without extra cost.
Reads and writes to the Azure BlobCache (cached IOPS and throughput) don't count against the uncached IOPS and throughput limits of the VM.
Note
Disk Caching is not supported for disks 4 TiB and larger (P50 and larger). If multiple disks are attached to your VM, each disk that is smaller than 4 TiB will support caching. For more information, see Disk caching.
Uncached throughput
The max uncached disk IOPS and throughput is the maximum remote storage limit that the VM can handle. This limit is defined at the VM and isn't a limit of the underlying disk storage. This limit applies only to I/O against data drives remotely attached to the VM, not the local I/O against the temp drive (D:\ drive) or the OS drive.
The amount of uncached IOPS and throughput that is available for a VM can be verified in the documentation for your VM.
For example, the M-series documentation shows that the max uncached throughput for the Standard_M8ms VM is 5000 IOPS and 125 MBps of uncached disk throughput.

Likewise, you can see that the Standard_M32ts supports 20,000 uncached disk IOPS and 500-MBps uncached disk throughput. This limit is governed at the VM level regardless of the underlying premium disk storage.
For more information, see uncached and cached limits.
Cached and temp storage throughput
The max cached and temp storage throughput limit is a separate limit from the uncached throughput limit on the VM. The Azure BlobCache consists of a combination of the VM host's random-access memory and locally attached SSD. The temp drive (D:\ drive) within the VM is also hosted on this local SSD.
The max cached and temp storage throughput limit governs the I/O against the local temp drive (D:\ drive) and the Azure BlobCache only if host caching is enabled.
When caching is enabled on premium storage, VMs can scale beyond the limitations of the remote storage uncached VM IOPS and throughput limits.
Only certain VMs support both premium storage and premium storage caching (which needs to be verified in the virtual machine documentation). For example, the M-series documentation indicates that both premium storage, and premium storage caching is supported:
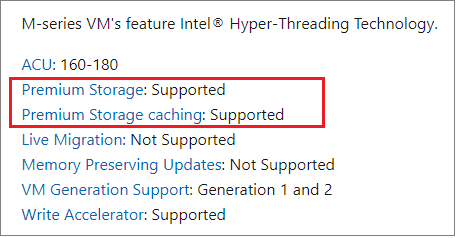
The limits of the cache vary based on the VM size. For example, the Standard_M8ms VM supports 10000 cached disk IOPS and 1000-MBps cached disk throughput with a total cache size of 793 GiB. Similarly, the Standard_M32ts VM supports 40000 cached disk IOPS and 400-MBps cached disk throughput with a total cache size of 3,174 GiB.

You can manually enable host caching on an existing VM. Stop all application workloads and the SQL Server services before any changes are made to your VM's caching policy. Changing any of the VM cache settings results in the target disk being detached and reattached after the settings are applied.
Data file caching policies
Your storage caching policy varies depending on the type of SQL Server data files that are hosted on the drive.
The following table provides a summary of the recommended caching policies based on the type of SQL Server data:
| SQL Server disk | Recommendation |
|---|---|
| Data disk | Enable Read-only caching for the disks hosting SQL Server data files.Reads from cache will be faster than the uncached reads from the data disk. Uncached IOPS and throughput plus Cached IOPS and throughput yield the total possible performance available from the VM within the VMs limits, but actual performance varies based on the workload's ability to use the cache (cache hit ratio). |
| Transaction log disk | Set the caching policy to None for disks hosting the transaction log. There's no performance benefit to enabling caching for the Transaction log disk, and in fact having either Read-only or Read/Write caching enabled on the log drive can degrade performance of the writes against the drive and decrease the amount of cache available for reads on the data drive. |
| Operating OS disk | The default caching policy is Read/write for the OS drive.It isn't recommended to change the caching level of the OS drive. |
tempdb |
If tempdb can't be placed on the ephemeral drive D:\ due to capacity reasons, either resize the VM to get a larger ephemeral drive or place tempdb on a separate data drive with Read-only caching configured.The VM cache and ephemeral drive both use the local SSD, so keep this in mind when sizing as tempdb I/O will count against the cached IOPS and throughput VM limits when hosted on the ephemeral drive. |
Important
Changing the cache setting of an Azure disk detaches and reattaches the target disk. When changing the cache setting for a disk that hosts SQL Server data, log, or application files, be sure to stop the SQL Server service along with any other related services to avoid data corruption.
To learn more, see Disk caching.
Disk striping
Analyze the throughput and bandwidth required for your SQL data files to determine the number of data disks, including the log file and tempdb. Throughput and bandwidth limits vary by VM size. For more information, see VM sizes.
Add more data disks and use disk striping for more throughput. For example, an application that needs 12,000 IOPS and 180-MB/s throughput can use three striped P30 disks to deliver 15,000 IOPS and 600-MB/s throughput.
To configure disk striping, see disk striping.
Disk capping
There are throughput limits at both the disk and VM level. The maximum IOPS limits per VM and per disk differ and are independent of each other.
Applications that consume resources beyond these limits will be throttled (also known as capped). Select a VM and disk size in a disk stripe that meets application requirements and won't face capping limitations. To address capping, use caching, or tune the application so that less throughput is required.
For example, an application that needs 12,000 IOPS and 180 MB/s can:
- Use the Standard_M32ms, which has a maximum uncached disk throughput of 20,000 IOPS and 500 MBps.
- Stripe three P30 disks to deliver 15,000 IOPS and 600-MB/s throughput.
- Use a Standard_M16ms VM and use host caching to utilize local cache over consuming throughput.
VMs configured to scale up during times of high utilization should provision storage with enough IOPS and throughput to support the maximum VM size while keeping the overall number of disks less than or equal to the maximum number supported by the smallest VM SKU targeted to be used.
For more information on disk capping limitations and using caching to avoid capping, see Disk IO capping.
Note
Some disk capping may still result in satisfactory performance to users; tune and maintain workloads rather than resize to a larger VM to balance managing cost and performance for the business.
Write Acceleration
Write Acceleration is a disk feature that is only available for the M-Series VMs. The purpose of Write Acceleration is to improve the I/O latency of writes against Azure Premium Storage when you need single digit I/O latency due to high volume mission critical OLTP workloads or data warehouse environments.
Use Write Acceleration to improve write latency to the drive hosting the log files. Don't use Write Acceleration for SQL Server data files.
Write Accelerator disks share the same IOPS limit as the VM. Attached disks can't exceed the Write Accelerator IOPS limit for a VM.
The following table outlines the number of data disks and IOPS supported per VM:
| VM SKU | # Write Accelerator disks | Write Accelerator disk IOPS per VM |
|---|---|---|
| M416ms_v2, M416s_v2 | 16 | 20000 |
| M128ms, M128s | 16 | 20000 |
| M208ms_v2, M208s_v2 | 8 | 10000 |
| M64ms, M64ls, M64s | 8 | 10000 |
| M32ms, M32ls, M32ts, M32s | 4 | 5000 |
| M16ms, M16s | 2 | 2500 |
| M8ms, M8s | 1 | 1250 |
There are several restrictions to using Write Acceleration. To learn more, see Restrictions when using Write Accelerator.
Compare to Azure ultra disk
The biggest difference between Write Acceleration and Azure ultra disks is that Write Acceleration is a VM feature only available for the M-Series and Azure ultra disks is a storage option. Write Acceleration is a write-optimized cache with its own limitations based on the VM size. Azure ultra disks are a low latency disk storage option for Azure VMs.
If possible, use Write Acceleration over ultra disks for the transaction log disk. For VMs that don't support Write Acceleration but require low latency to the transaction log, use Azure ultra disks.
Resize storage pools appropriately
In Azure, when you want to resize a storage pool, do so by changing the number of disks in the pool, instead of modifying the size of the disks already in the pool. Changing the sizes of the virtual or physical disks in a storage pool does not increase the available space of the volume when it's inside the storage pool, so the increased disk space is unused and wasted.
For SQL Server on Azure VMs that are deployed from the Azure Marketplace using Premium SSD (v1), disks are automatically added to the storage pool, and you can use the Storage pane of the SQL virtual machines resource in the Azure portal to resize the disks in the storage pool.
For SQL Server on Azure VM Marketplace images that use Premium SSD v2 disks, or Ultra Disks, or virtual machines with self-installed SQL Server instances, manually modify the number of disks in the storage pool to change volume size.
For example, follow these steps to expand a storage pool:
- Add a new disk:
- Connect to the virtual machine.
- Add the disks to the storage pool from Server Manager > File and Storage Services > Volumes > Storage Pools. Use Tasks to select the Add Physical Disk option.
- After the disk is added, right-click the target virtual disk and select Extend virtual disk.
- Open Disk Management, right-click the target volume, and select Extend Volume.
Monitor storage performance
To assess storage needs, and determine how well storage is performing, you need to understand what to measure, and what those indicators mean.
IOPS (Input/Output per second) is the number of requests the application is making to storage per second. Measure IOPS using Performance Monitor counters Disk Reads/sec and Disk Writes/sec. OLTP (Online transaction processing) applications need to drive higher IOPS in order to achieve optimal performance. Applications such as payment processing systems, online shopping, and retail point-of-sale systems are all examples of OLTP applications.
Throughput is the volume of data that is being sent to the underlying storage, often measured by megabytes per second. Measure throughput with the Performance Monitor counters Disk Read Bytes/sec and Disk Write Bytes/sec. Data warehousing is optimized around maximizing throughput over IOPS. Applications such as data stores for analysis, reporting, ETL workstreams, and other business intelligence targets are all examples of data warehousing applications.
I/O unit sizes influence IOPS and throughput capabilities as smaller I/O sizes yield higher IOPS and larger I/O sizes yield higher throughput. SQL Server chooses the optimal I/O size automatically. For more information about, see Optimize IOPS, throughput, and latency for your applications.
There are specific Azure Monitor metrics that are invaluable for discovering capping at the VM and disk level as well as the consumption and the health of the AzureBlob cache. To identify key counters to add to your monitoring solution and Azure portal dashboard, see Storage utilization metrics.
Note
Azure Monitor doesn't currently offer disk-level metrics for the ephemeral temp drive (D:\). VM Cached IOPS Consumed Percentage and VM Cached Bandwidth Consumed Percentage will reflect IOPS and throughput from both the ephemeral temp drive (D:\) and host caching together.
Monitor transaction log growth
Since a full transaction log can lead to performance issues and outages, it's important to monitor the available space in your transaction log, as well as the utilized disk space of the drive that holds your transaction log. Address transaction log issues before they impact your workload.
Review Troubleshoot a full transaction log if your log becomes full.
If you need to extend your disk, you can do so on the Storage pane of the SQL virtual machines resource if you deployed a SQL Server image from Azure Marketplace, or on the Disks pane for your Azure virtual machine and self-installed SQL Server.
Next steps
To learn more, see the other articles in this best practices series:
For security best practices, see Security considerations for SQL Server on Azure Virtual Machines.
For detailed testing of SQL Server performance on Azure VMs with TPC-E and TPC_C benchmarks, refer to the blog Optimize OLTP performance.
Review other SQL Server Virtual Machine articles at SQL Server on Azure Virtual Machines Overview. If you have questions about SQL Server virtual machines, see the Frequently Asked Questions.