Elevar
Implement Clarity Pixel/Web Tracking via Google Tag Manager through Elevar
Elevar helps track conversions of your marketing channels with server-side tracking. Elevar makes it easy to install and use Clarity's features.
Using Clarity through Elevar, you can use the same GTM triggers to track events and link with Clarity. In the Clarity interface, choose to view recordings of this particular feature, thereby focusing on recordings and heatmaps of the specific behavior.
Note
To start using Elevar, install Elevar's Data Layer on your Shopify Guide.
Step 1
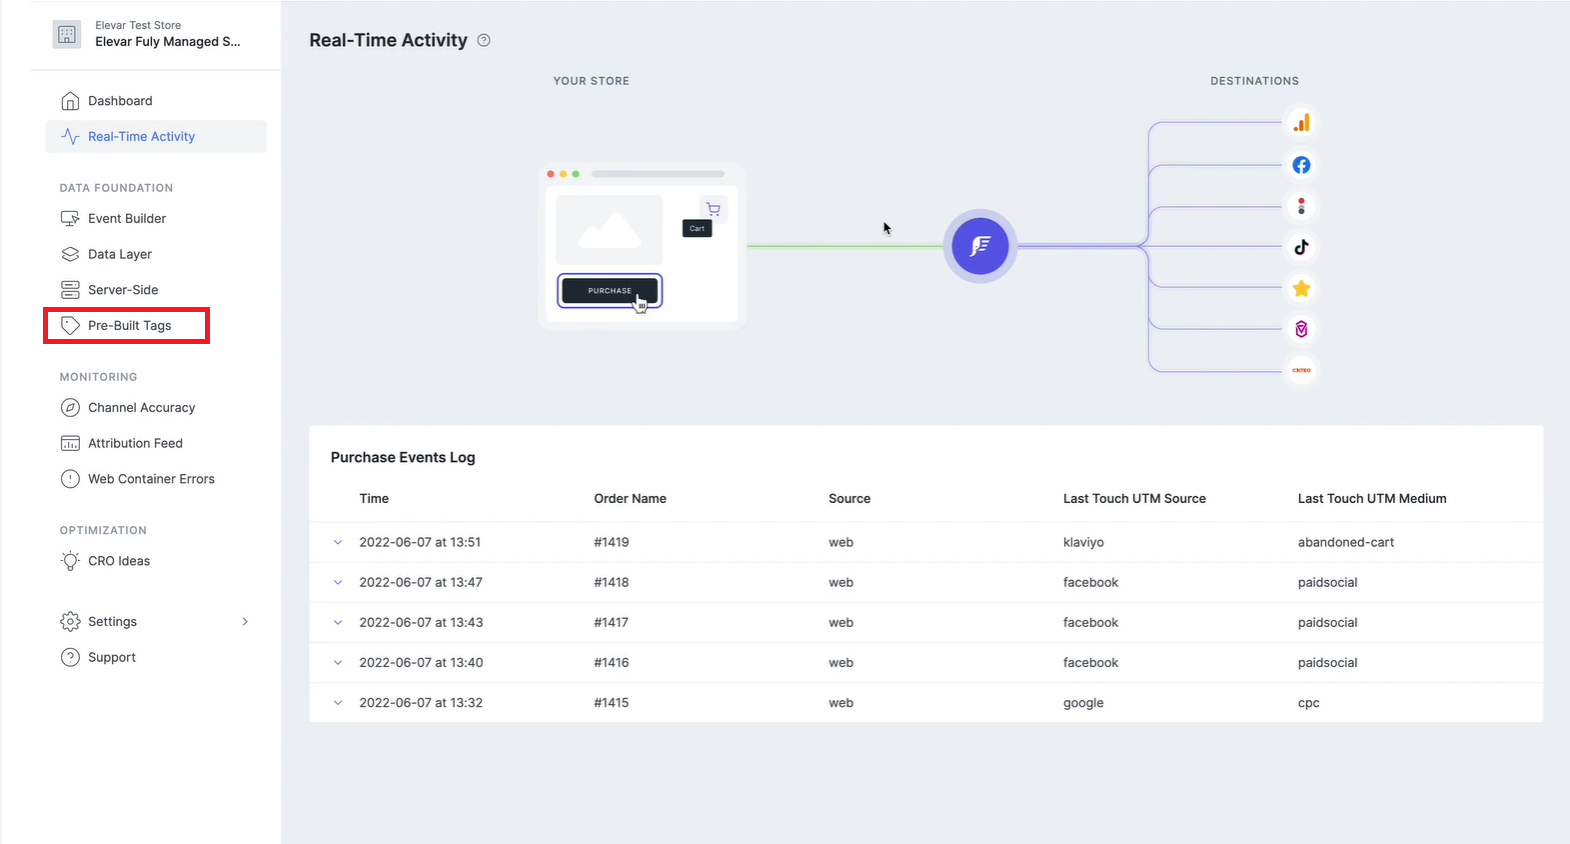
In your Elevar App, go to Pre-Built Tags.
Step 2
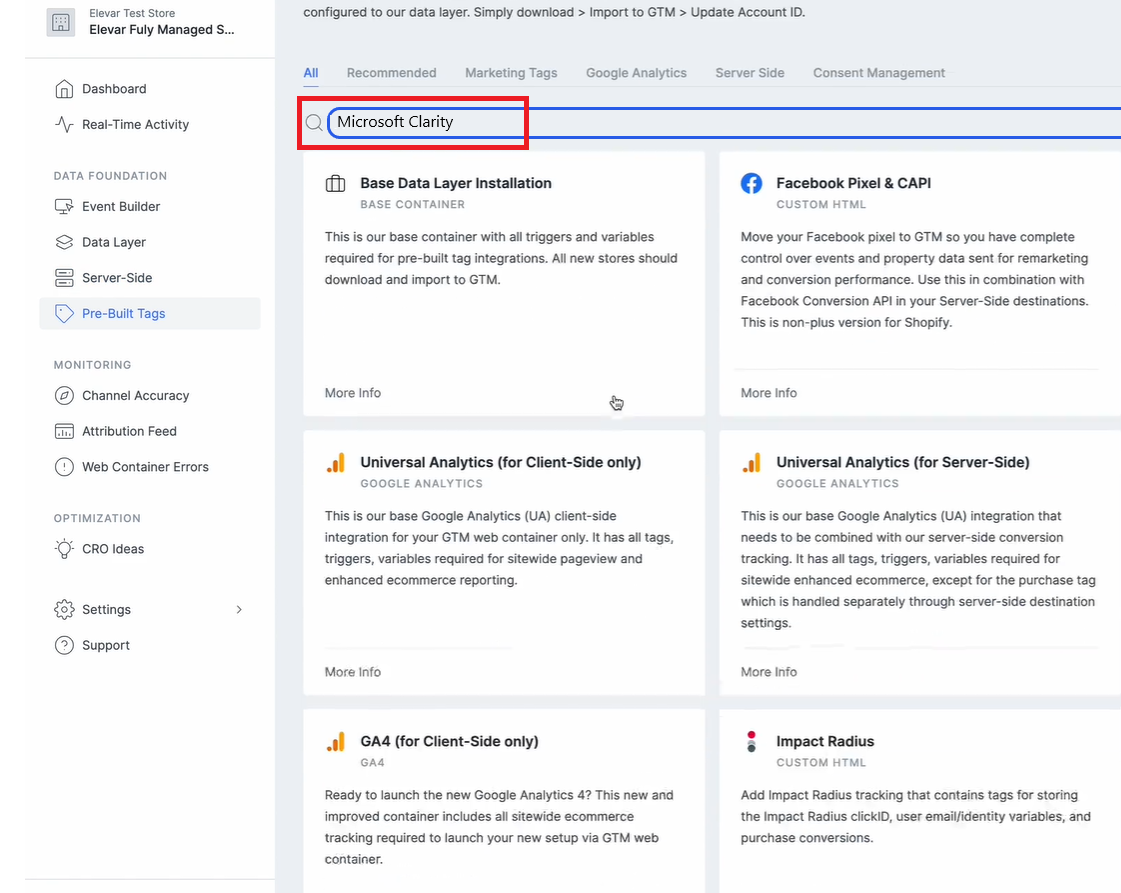
In the Search bar, search for Microsoft Clarity.
Step 3
Note
You would need a Clarity Project ID to activate Clarity on Elevar. If you don't have a project on Clarity, check how to create a new project.
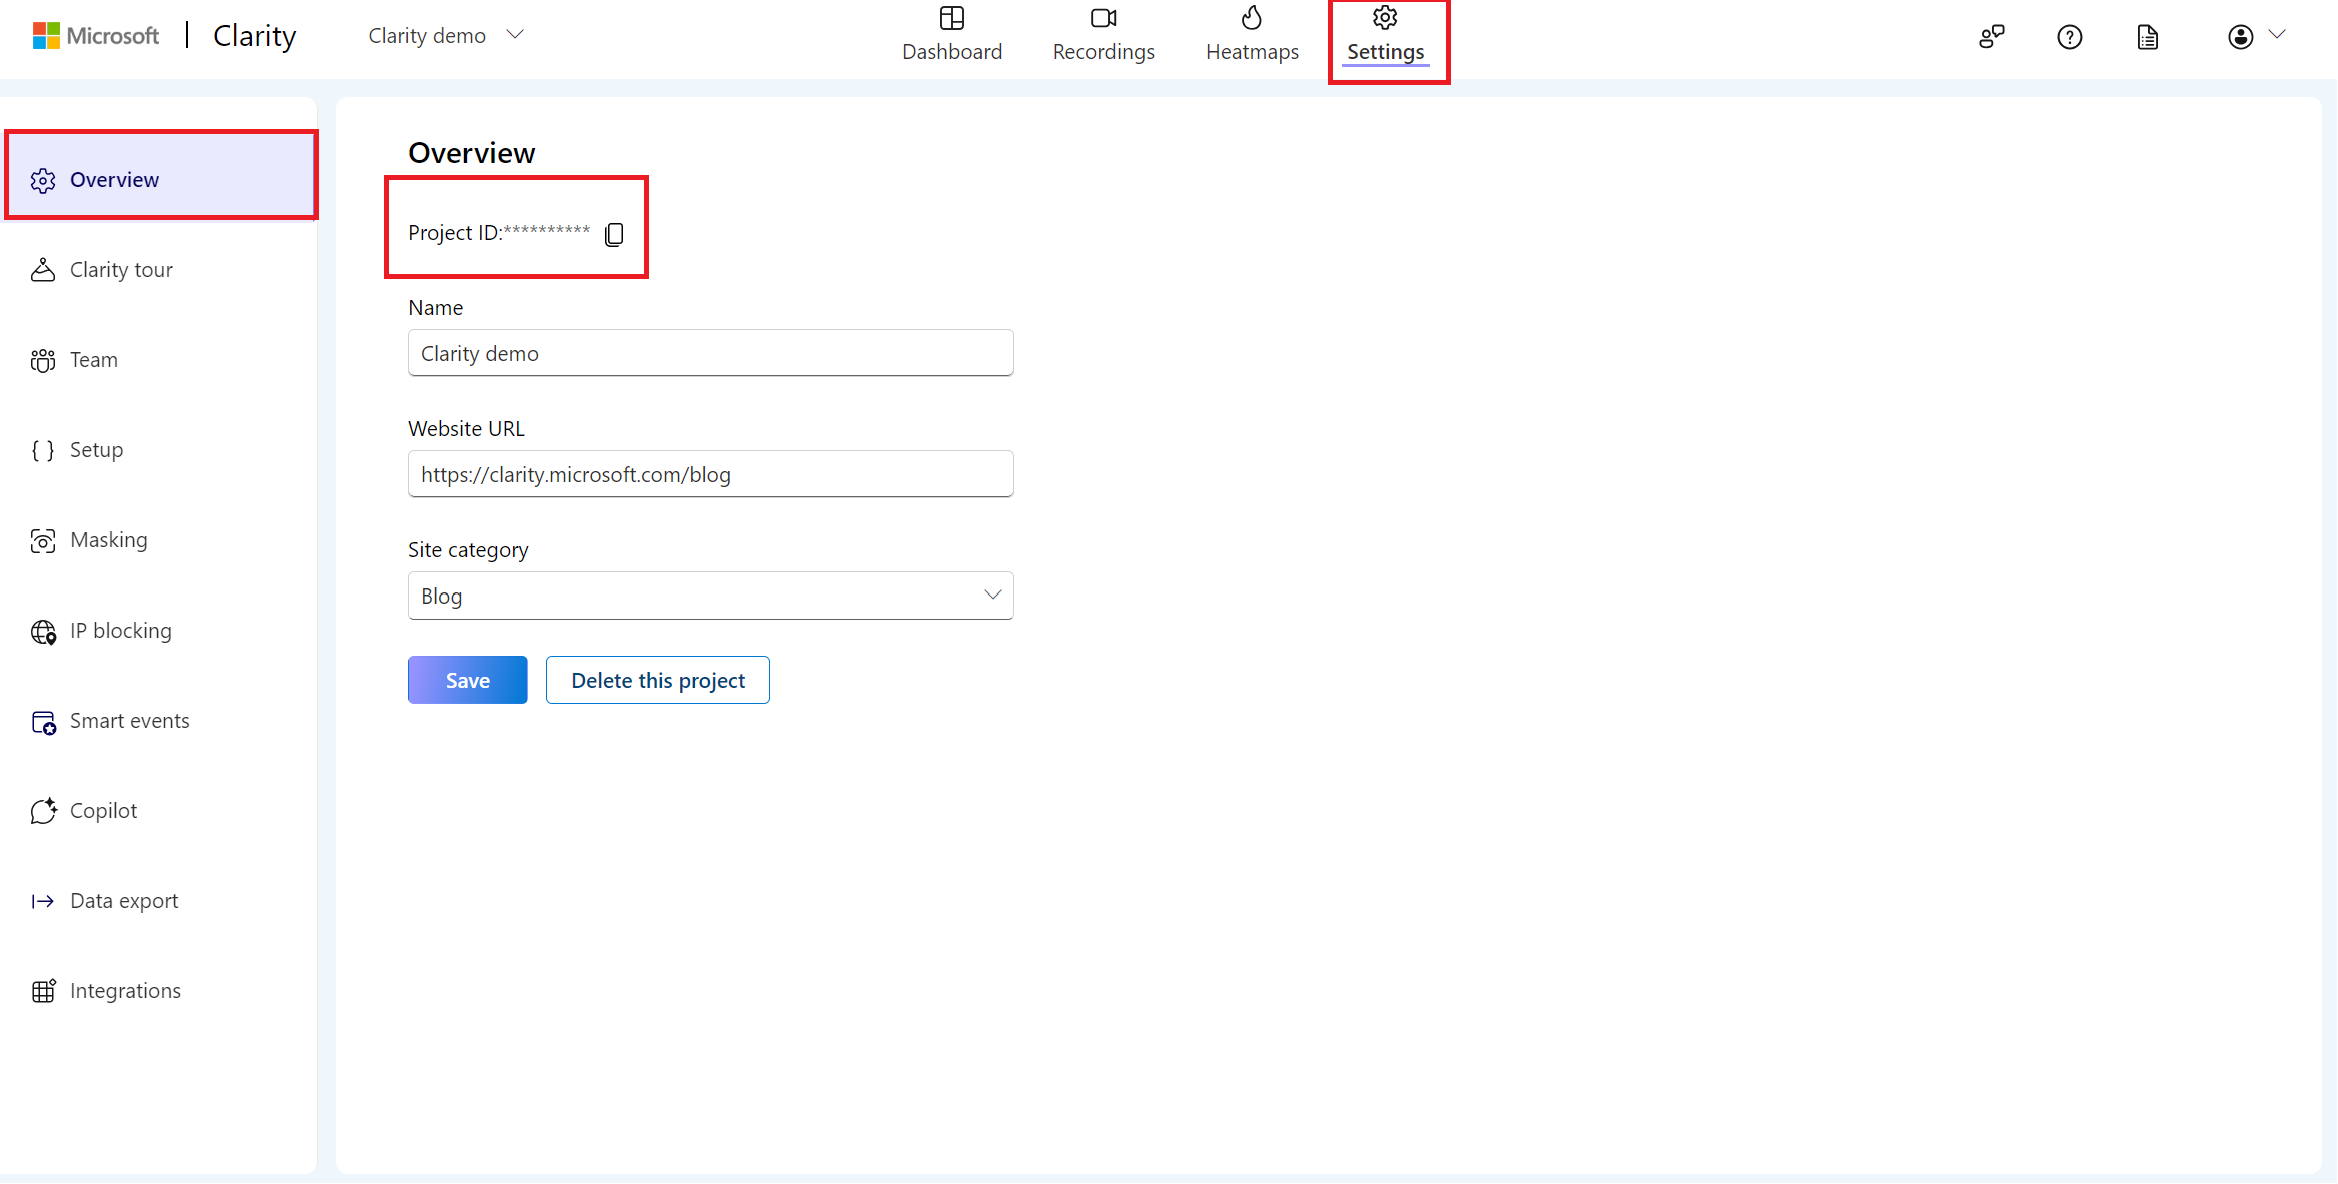
Locate your Clarity Project ID and copy it by following the below instructions:
- From the Clarity dashboard, go to Settings.
- Select Overview from the left panel.
- Copy the Project ID (for example, 55u86t0118).
Step 4
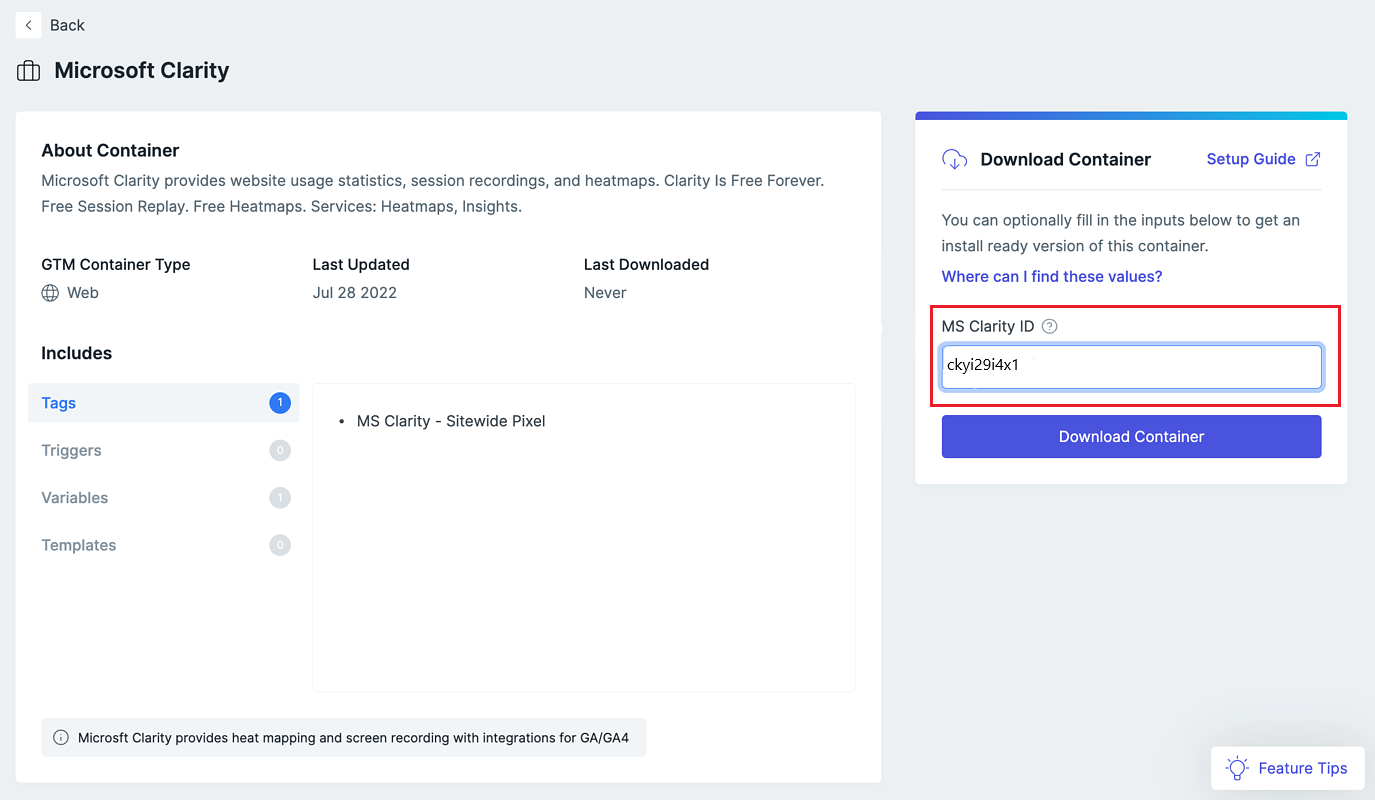
Paste the Clarity Project ID into MS Clarity ID. Select Download Container.
Step 5
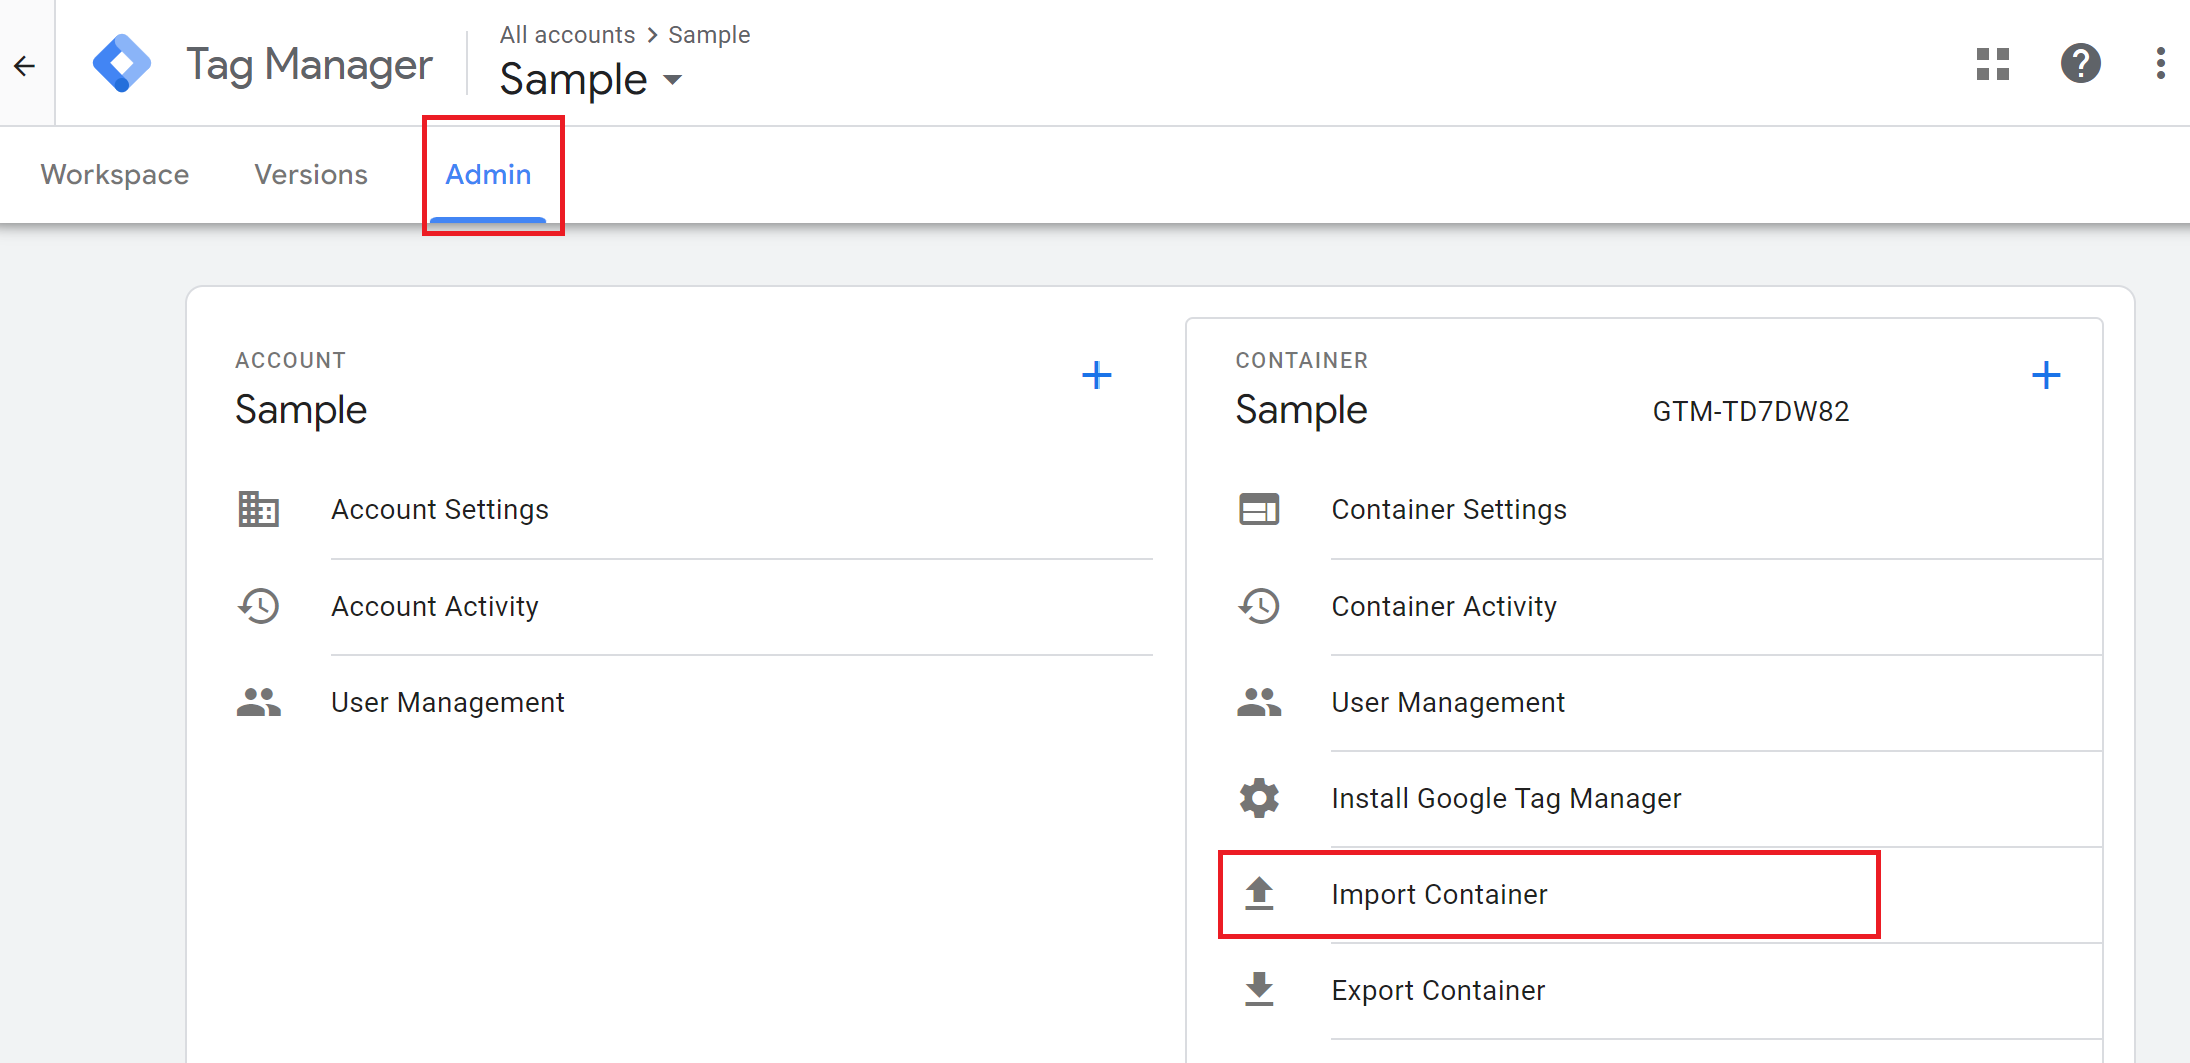
Sign in to your Google Tag Manager Account. Go to GTM Web Container. Select Admin > Import Container.
Step 6
Select to import the file you downloaded in Step 4. Create a New Workspace and name it Microsoft Clarity Tracking. In Choose an import option, select Merge > Overwrite conflicting tags, triggers, and variables.
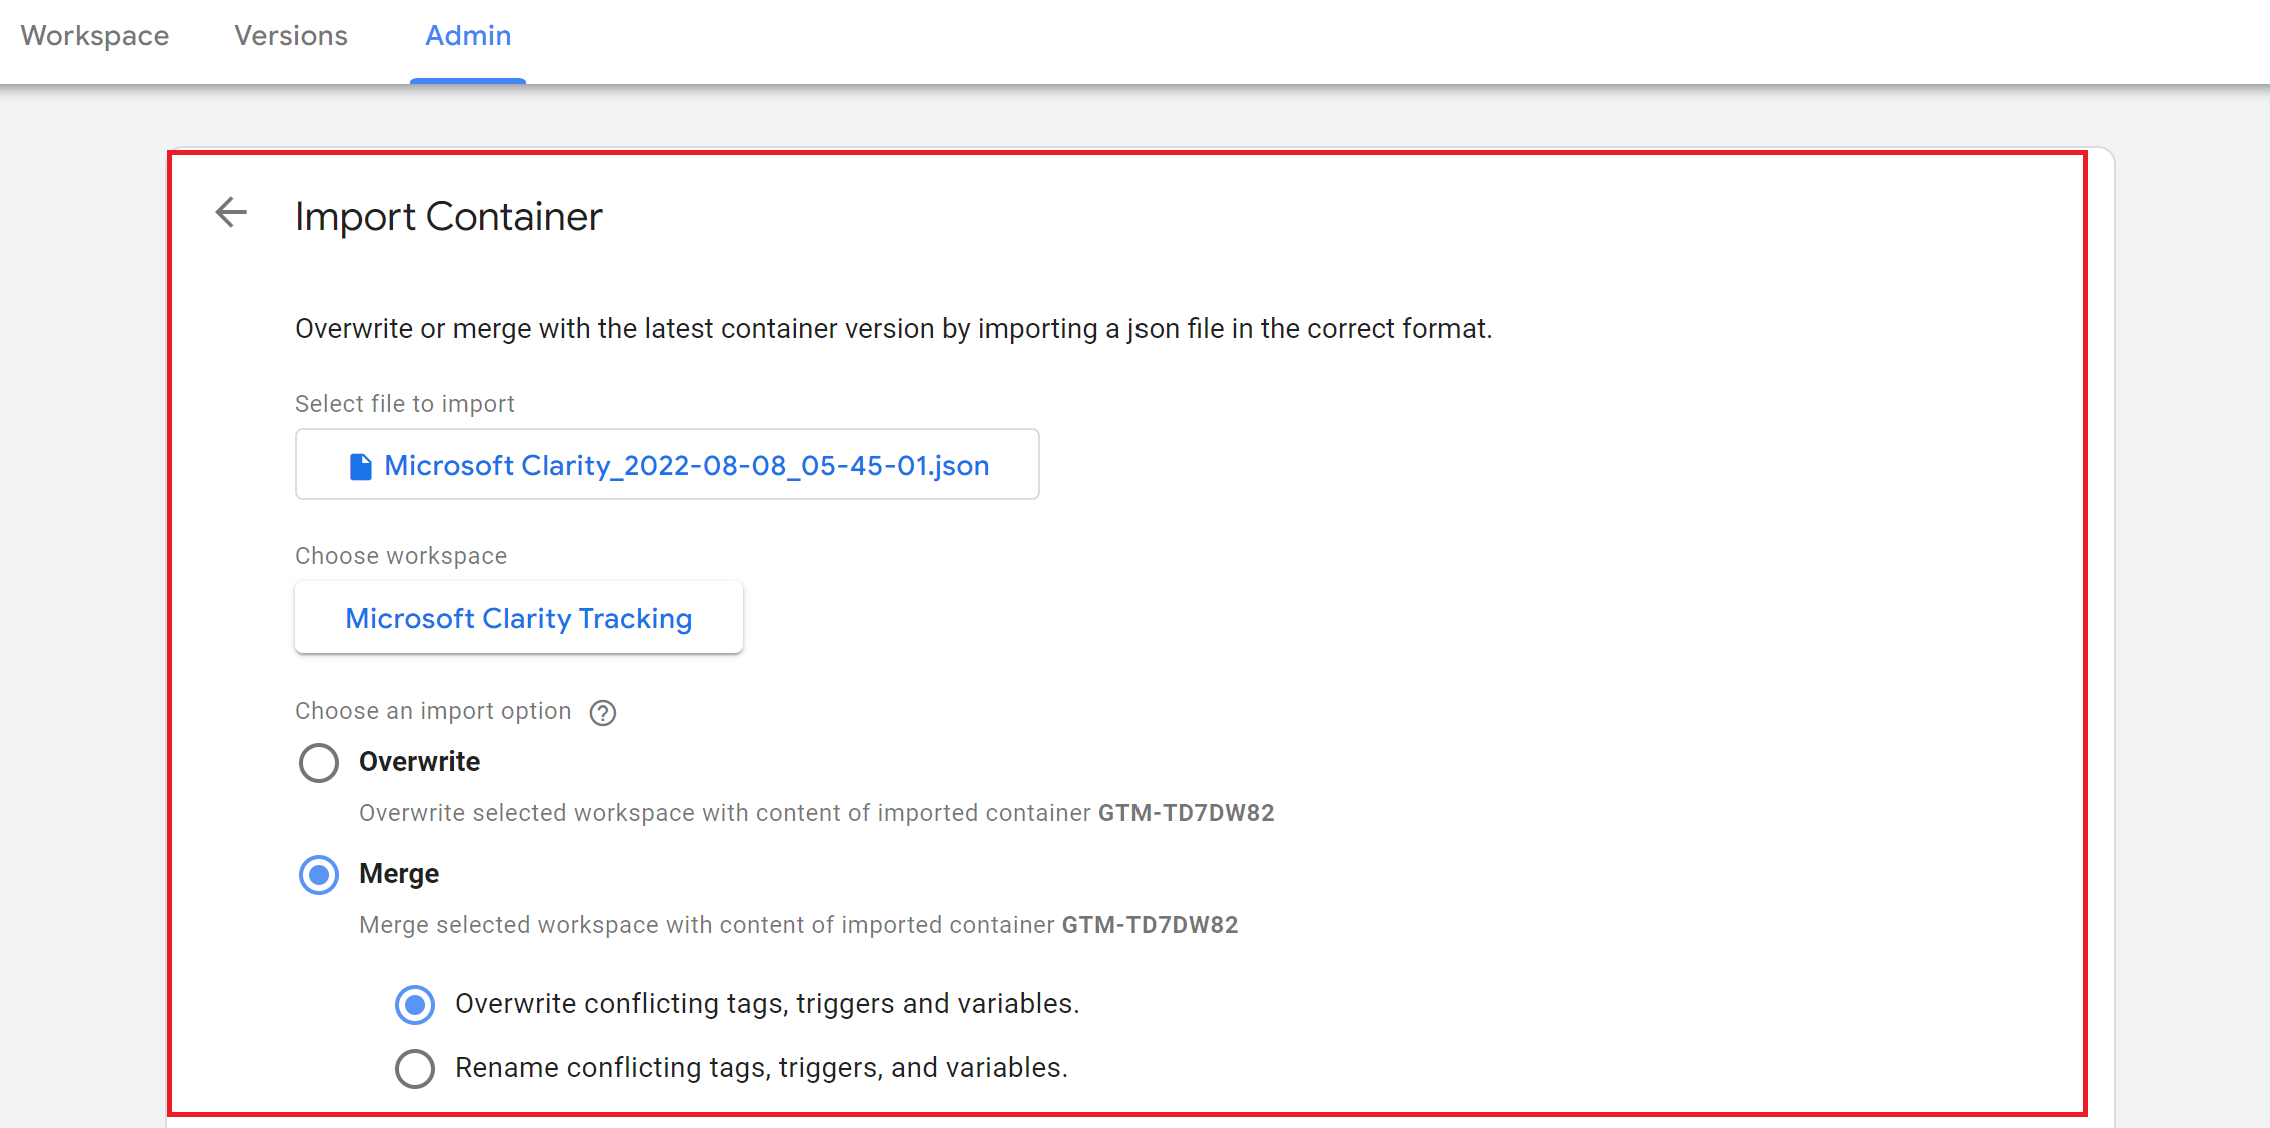
Select Confirm to import tags.

Step 7
Go to Workspace. Select Microsoft Clarity Tracking in CURRENT WORKSPACE.
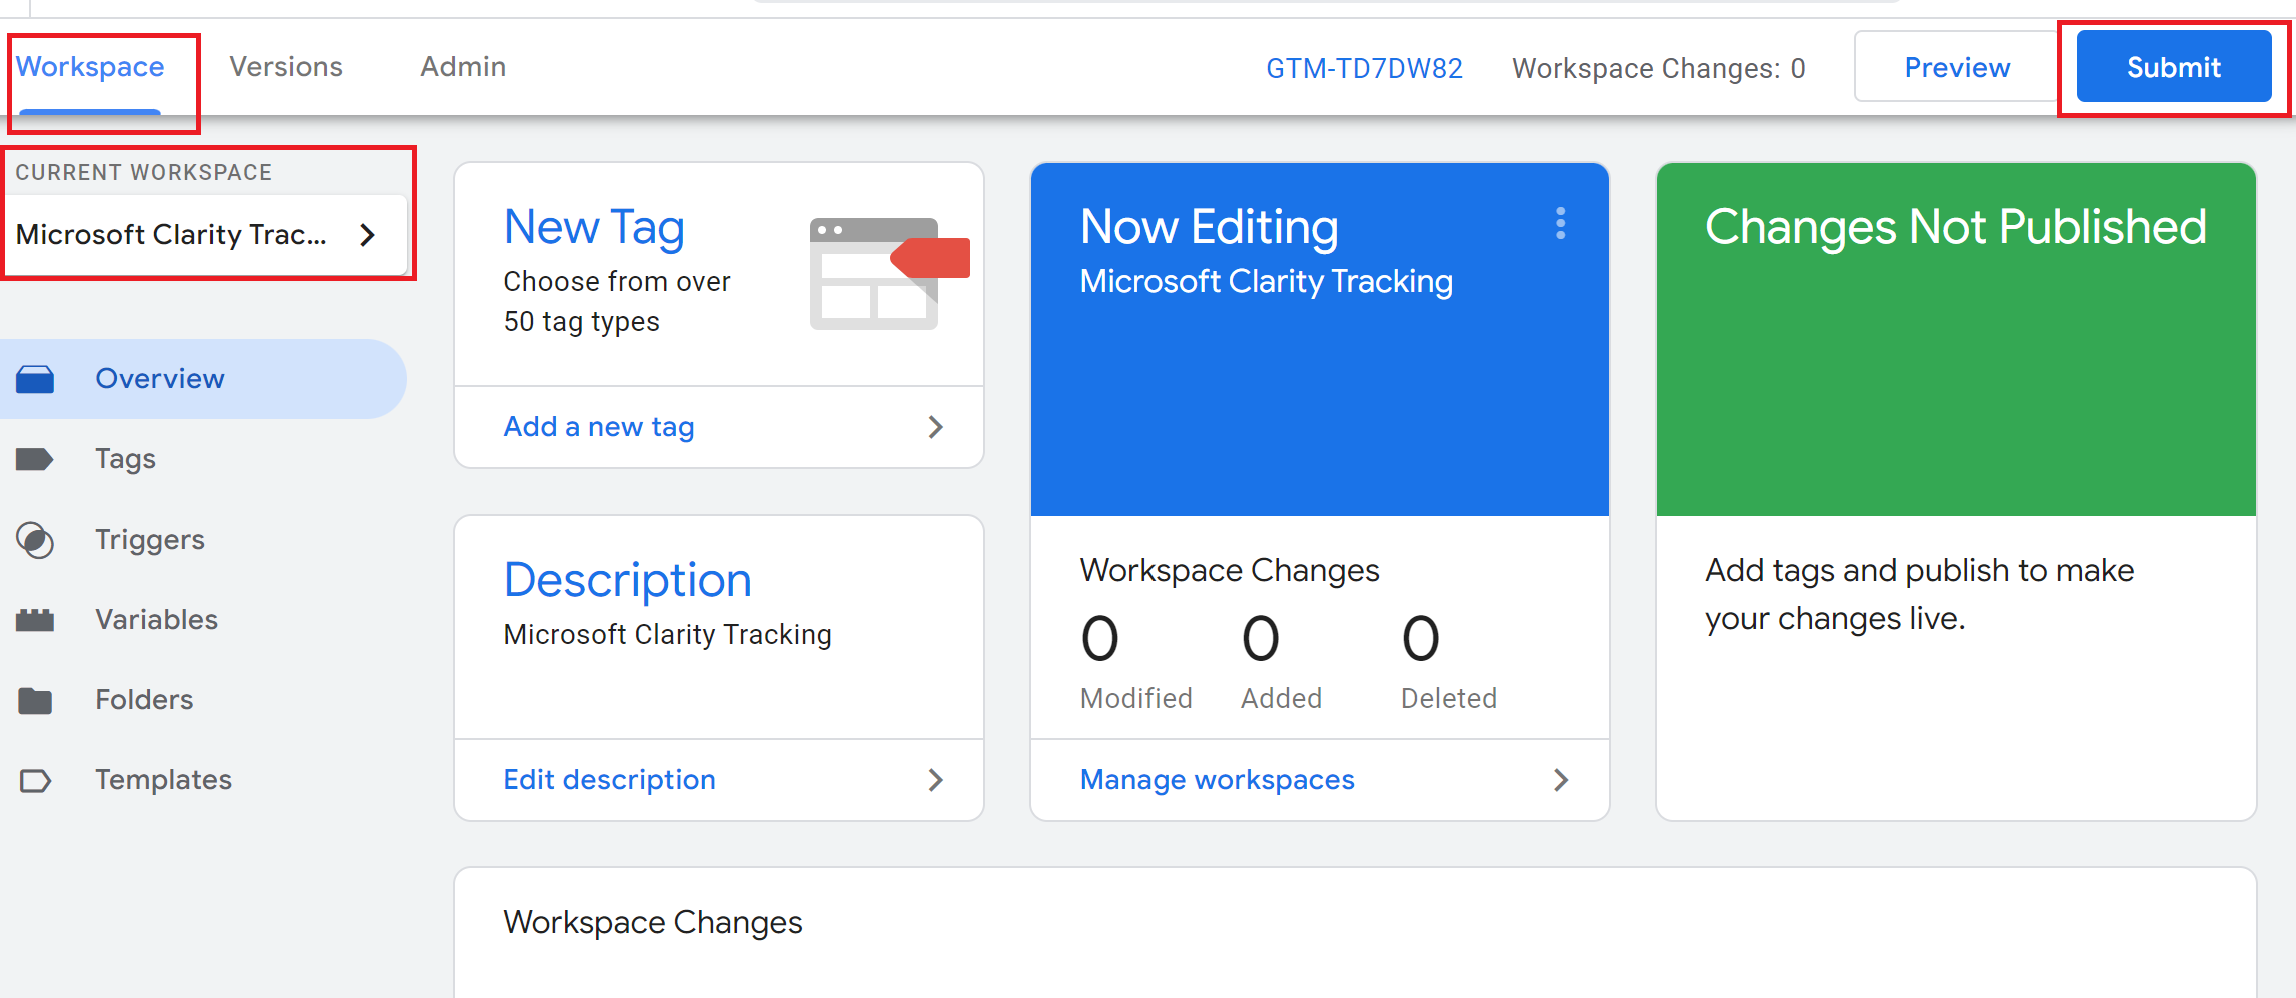
Select Submit.
Step 8
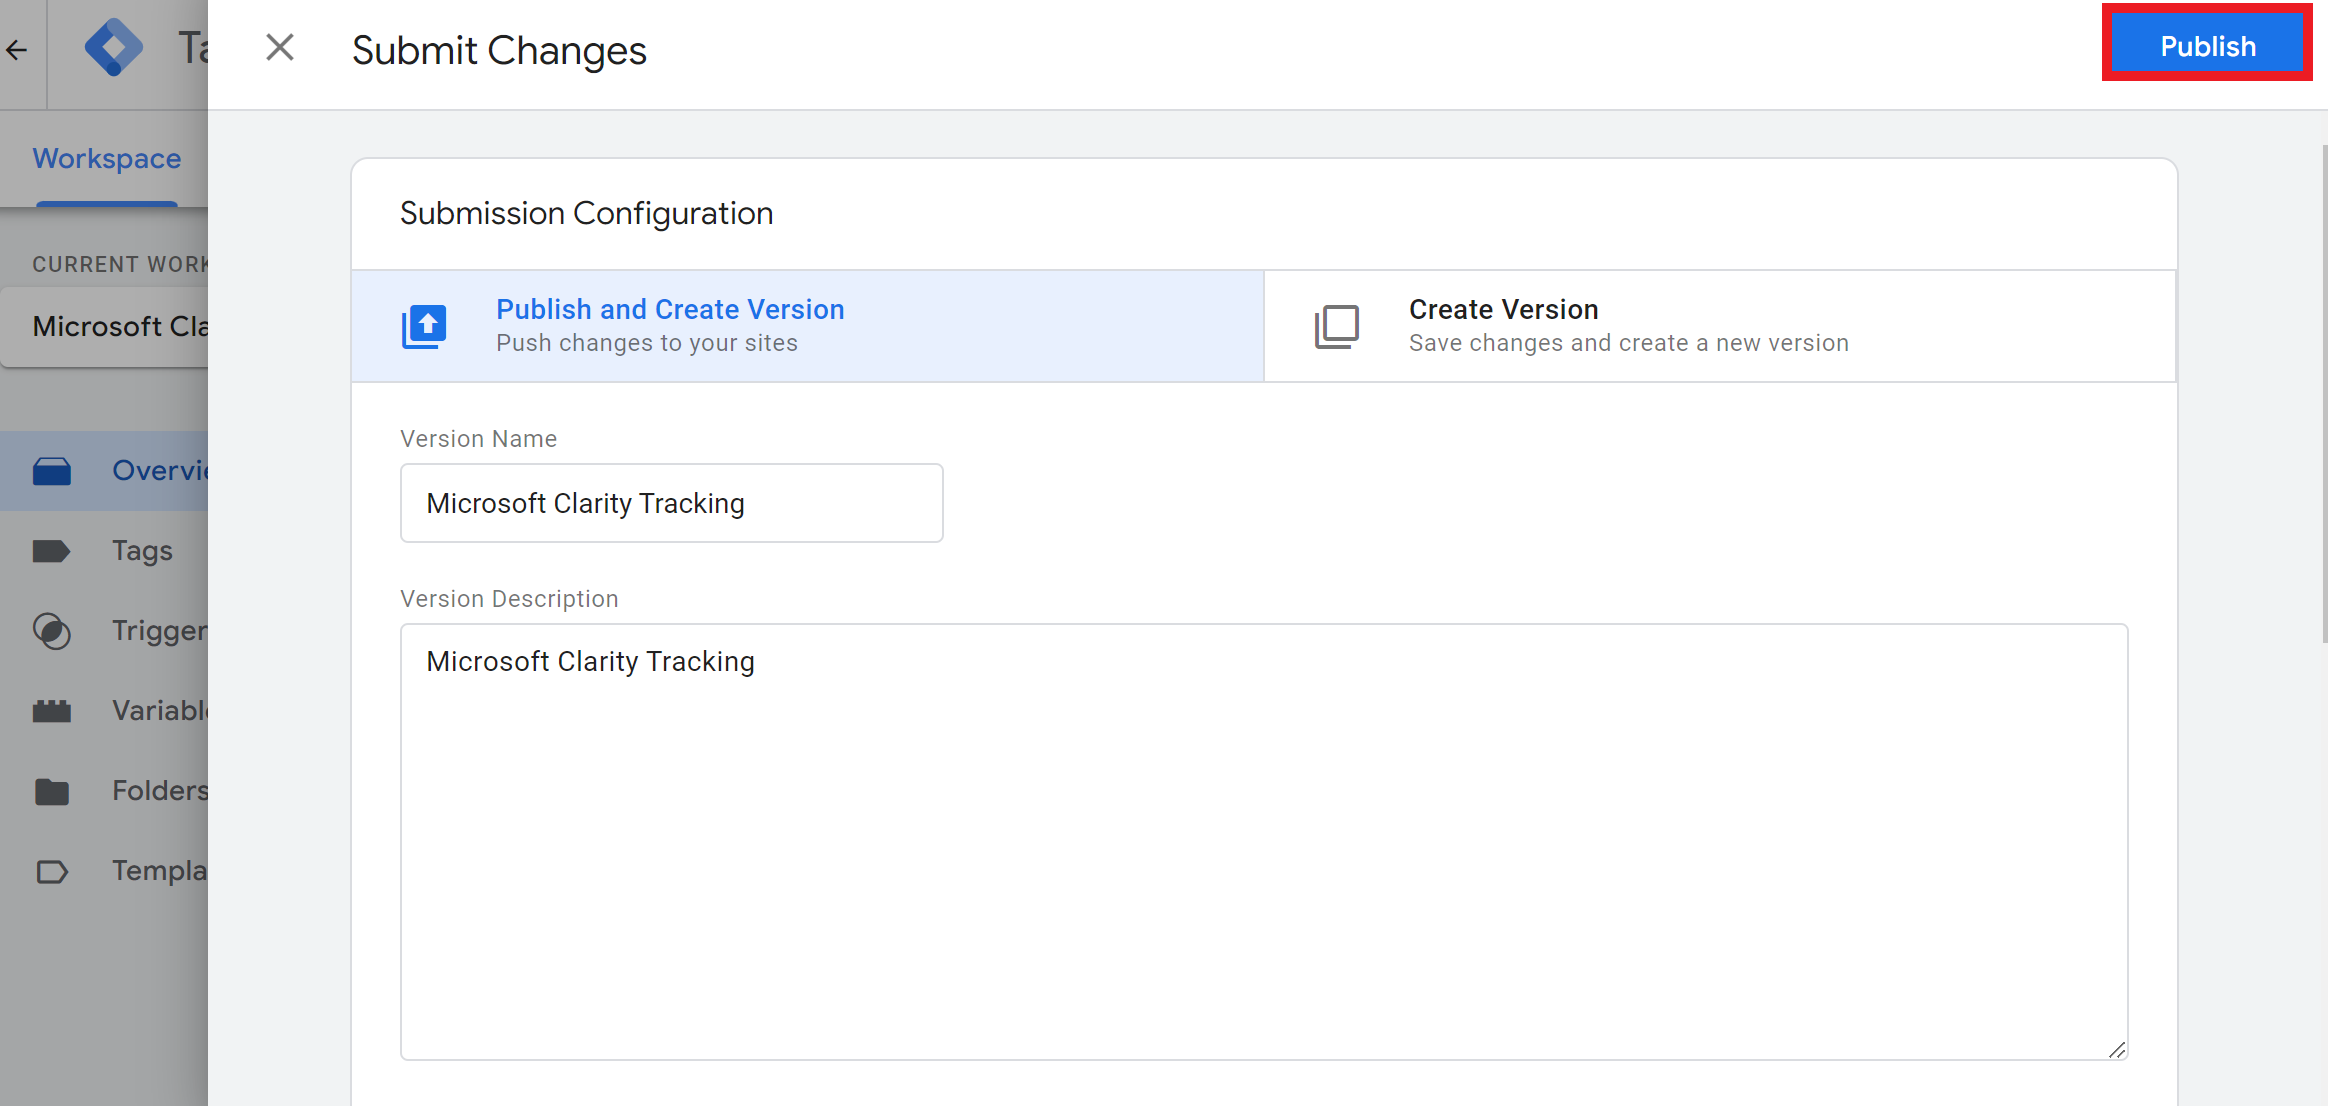
Select Publish to save Submission Configurations and set your tracking live.
Start viewing Recordings, Heatmaps, and Dashboard data in a few hours.
FAQ
For more answers, refer to Setup FAQ.