Create an Azure Data Studio dashboard extension
Important
Azure Data Studio is retiring on February 28, 2026. We recommend that you use Visual Studio Code. For more information about migrating to Visual Studio Code, visit What's happening to Azure Data Studio?
This tutorial demonstrates how to create a new Azure Data Studio dashboard extension. The extension contributes to the Azure Data Studio connection dashboard, so you can extend the functionality of Azure Data Studio in a manner easily visible to users.
In this article you learn how to:
- Install the extension generator.
- Create your extension.
- Contribute to the dashboard in your extension.
- Test your extension.
- Package your extension.
- Publish your extension to the marketplace.
Prerequisites
Azure Data Studio is built on the same framework as Visual Studio Code, so extensions for Azure Data Studio are built by using Visual Studio Code. To get started, you need the following components:
- Node.js installed and available in your
$PATH. Node.js includes npm, the Node.js Package Manager, which is used to install the extension generator. - Visual Studio Code to debug the extension.
- The Azure Data Studio Debug extension (optional). The Debug extension lets you test your extension without needing to package and install it in Azure Data Studio.
- Ensure
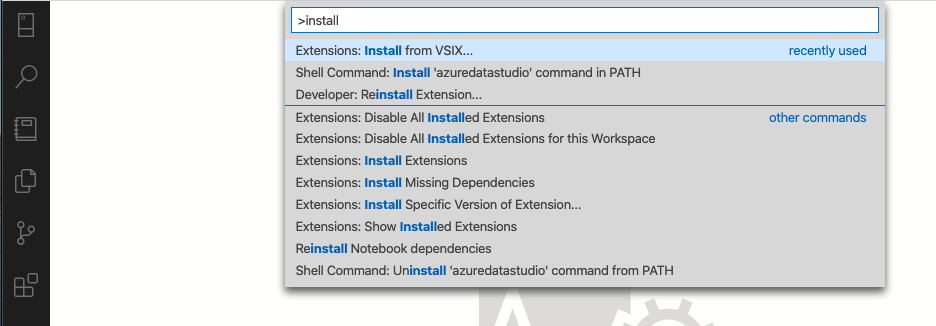
azuredatastudiois in your path. For Windows, make sure you choose the Add to Path option in setup.exe. For Mac or Linux, run Install 'azuredatastudio' command in PATH from the Command Palette in Azure Data Studio.
Install the extension generator
To simplify the process of creating extensions, we've built an extension generator using Yeoman. To install it, run the following command from the command prompt:
npm install -g yo generator-azuredatastudio
Create your dashboard extension
Introduction to the dashboard
The Azure Data Studio connection dashboard is a powerful tool that summarizes and provides insight into a user's connections.
There are two variations of the dashboard. The server dashboard summarizes the entire server, and the database dashboard summarizes an individual database. You can access either dashboard by right-clicking a server or a database in the Connections viewlet of Azure Data Studio, and selecting Manage.

There are three key contribution points for extensions to add functionality to the dashboard:
Full Dashboard tab: A separate tab in the dashboard for your extension. Can be added to either a server or database dashboard. Customizable with widgets, a toolbar, and a navigation section.
Homepage Actions: Action buttons at the top of the connection toolbar.
Widgets: Graphs that run against your SQL Server.

Run the extension generator
To create an extension:
Start the extension generator with the following command:
yo azuredatastudioChoose New Dashboard from the list of extension types.
Fill in the prompts, as shown, to create an extension that contributes a tab to the server dashboard.

There are many prompts, so here's a little more information on what each question means:

Completing the previous steps creates a new folder. Open the folder in Visual Studio Code, and you're ready to create your own dashboard extension.
Run the extension
Let's see what the dashboard template gives us by running the extension. Before you run it, ensure that the Azure Data Studio Debug extension is installed in Visual Studio Code.
Select F5 in Visual Studio Code to launch Azure Data Studio in Debug mode with the extension running. Then, you can see how this default template contributes to the dashboard.
Next, we look at how to modify this default dashboard.
Develop the dashboard
The most important file to get started with extension development is package.json. This file is the manifest file, where the dashboard contributions are registered. Note the dashboard.tabs, dashboard.insights, and dashboard.containers sections.
Here are some changes to try out:
- Play around with the insights types, which include bar, horizontalBar, and timeSeries.
- Write your own queries to run against your SQL Server connection.
- See this sample insight tutorial or this tutorial for specific insight tutorials.
Package your extension
To share with others, you need to package the extension into a single file. Your extension can be published to the Azure Data Studio extension marketplace or shared with your team or community. To do this step, you need to install another npm package from the command line.
npm install -g vsce
Edit the README.md file to your liking. Then go to the base directory of the extension, and run vsce package. You can optionally link a repository with your extension or continue without one. To add one, add a similar line to your package.json file.
"repository": {
    "type": "git",
    "url": "https://github.com/anjalia/my-test-extension.git"
}
After these lines are added, a my-test-extension-0.0.1.vsix file is created and ready to install in Azure Data Studio.

Publish your extension to the marketplace
The Azure Data Studio extension marketplace is under construction. The current process is to host the extension VSIX somewhere, for example, on a GitHub release page. Then you submit a pull request that updates this JSON file with your extension information.
Next steps
In this tutorial, you learned how to:
- Install the extension generator.
- Create your extension.
- Contribute to the dashboard in your extension.
- Test your extension.
- Package your extension.
- Publish your extension to the marketplace.
We hope that after reading this article you're inspired to build your own extension for Azure Data Studio. We have support for Dashboard Insights (attractive graphs that run against your SQL Server), a number of SQL-specific APIs, and a huge existing set of extension points inherited from Visual Studio Code.
If you have an idea but aren't sure how to get started, open an issue or tweet the team at azuredatastudio.
For more information, the Visual Studio Code extension guide covers all the existing APIs and patterns.
To learn how to work with T-SQL in Azure Data Studio, complete the T-SQL Editor tutorial: