Događaji
Izgradite inteligentne aplikacije
M03 17 23 - M03 21 23
Pridružite se seriji susreta kako biste sa kolegama programerima i stručnjacima izgradili skalabilna AI rješenja zasnovana na stvarnim slučajevima korištenja.
Registrirajte seOvaj preglednik više nije podržan.
Nadogradite na Microsoft Edge da iskoristite najnovije osobine, sigurnosna ažuriranja i tehničku podršku.
Azure App Service provides predefined application stacks on Windows, like ASP.NET or Node.js, that run on IIS. The preconfigured application stacks lock down the operating system and prevent low-level access. Custom Windows containers don't have these restrictions. They let developers fully customize the containers and give containerized applications full access to Windows functionality.
This quickstart shows how to deploy an ASP.NET app in a Windows image to Azure Container Registry from Visual Studio. You run the app in a custom container in Azure App Service.
Install Visual Studio 2022 with the ASP.NET and web development and Azure development workloads. In Visual Studio 2022 Community, ensure that .NET Framework project and item templates component is selected with ASP.NET and web development workload. If you installed Visual Studio 2022 already:
Create an ASP.NET web app by following these steps:
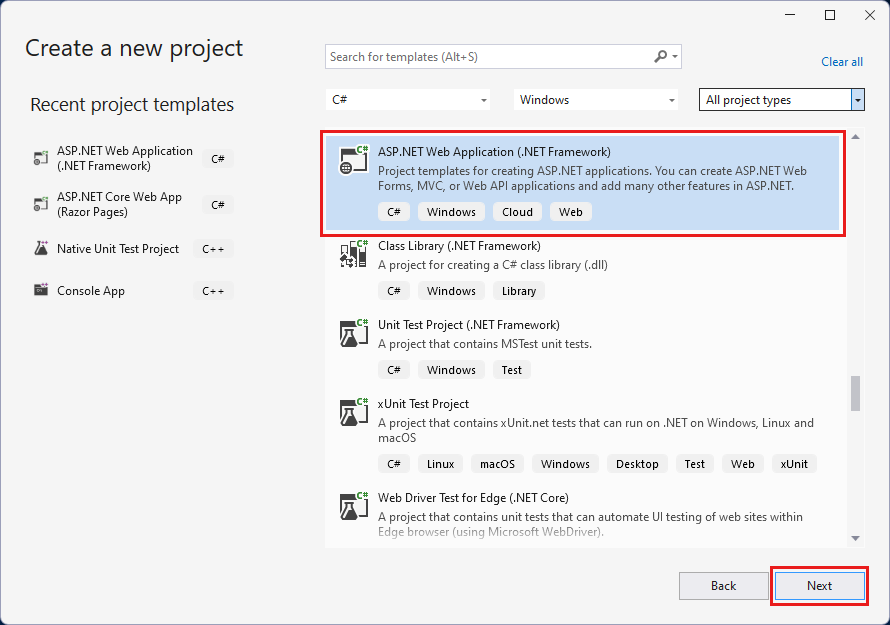
Open Visual Studio and then select Create a new project.
In Create a new project, select ASP.NET Web Application (.NET Framework) for C#, then select Next.
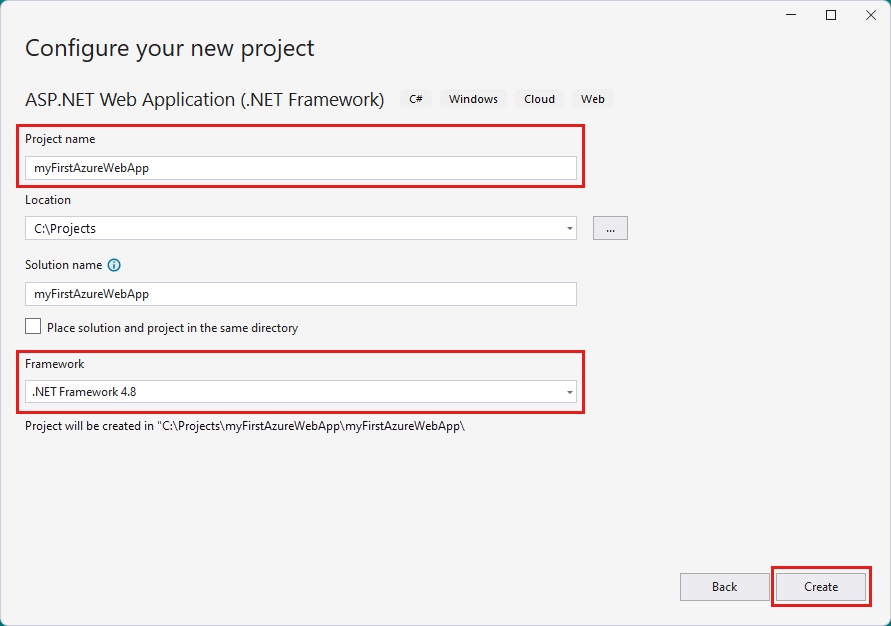
In Configure your new project, under Project name, name the application myfirstazurewebapp. Under Framework, select .NET Framework 4.8 and then select Create.
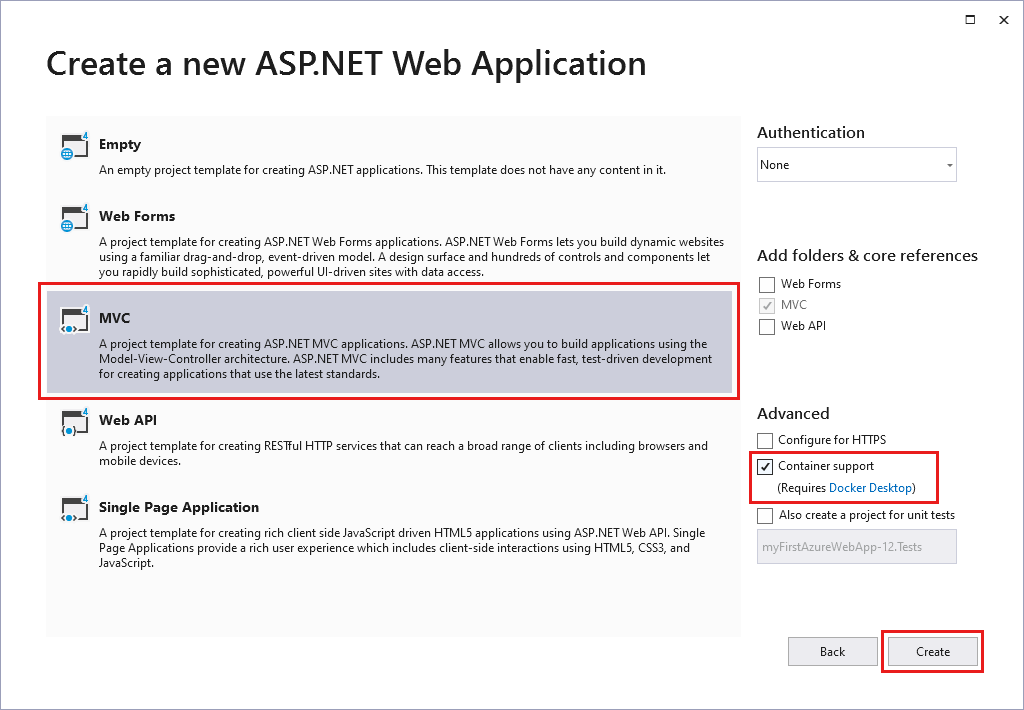
You can deploy any type of ASP.NET web app to Azure. For this quickstart, choose the MVC template.
Under Authentication, select None. Under Advanced, select Container support and uncheck Configure for HTTPS. Select Create.
If the Dockerfile file isn't opened automatically, open it from the Solution Explorer.
You need a supported parent image. Change the parent image by replacing the FROM line with the following code and save the file:
FROM mcr.microsoft.com/dotnet/framework/aspnet:4.8-windowsservercore-ltsc2019
From the Visual Studio menu, select Debug > Start Without Debugging to run the web app locally.
In Solution Explorer, right-click the myfirstazurewebapp project and select Publish.
In Target, select Docker Container Registry, and then select Next.
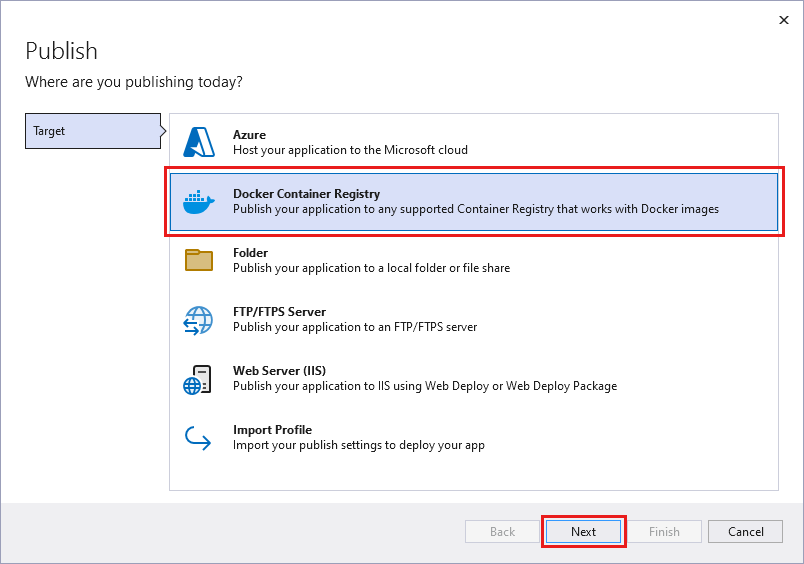
In Specific Target, select Azure Container Registry, and then select Next.

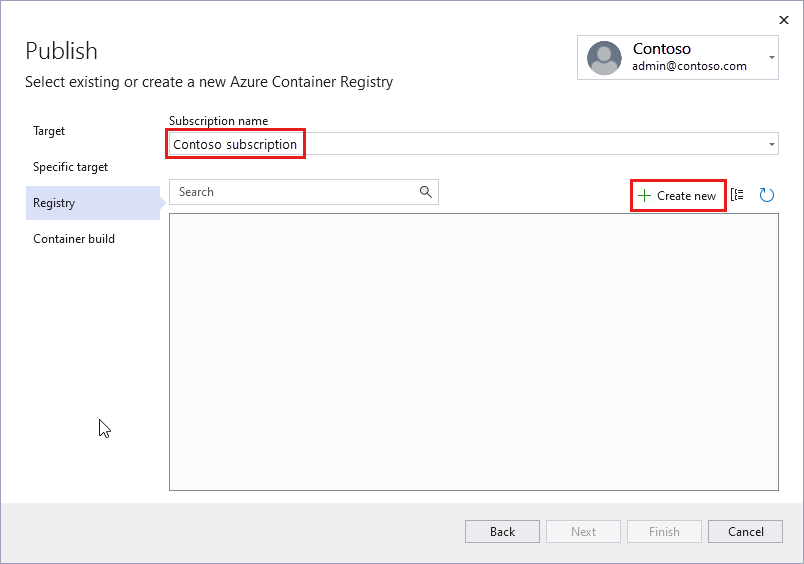
In Publish, choose the correct subscription. In Container registries select Create new to create a new Azure Container Registry.
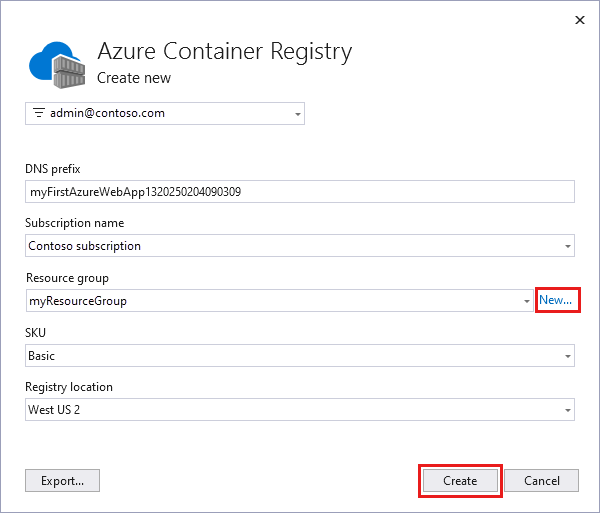
In Create new, select the correct subscription. Under Resource group, select New and type myResourceGroup for the name, and select OK. Under SKU, select Basic. Under Registry location, select a location of the registry then select Create.
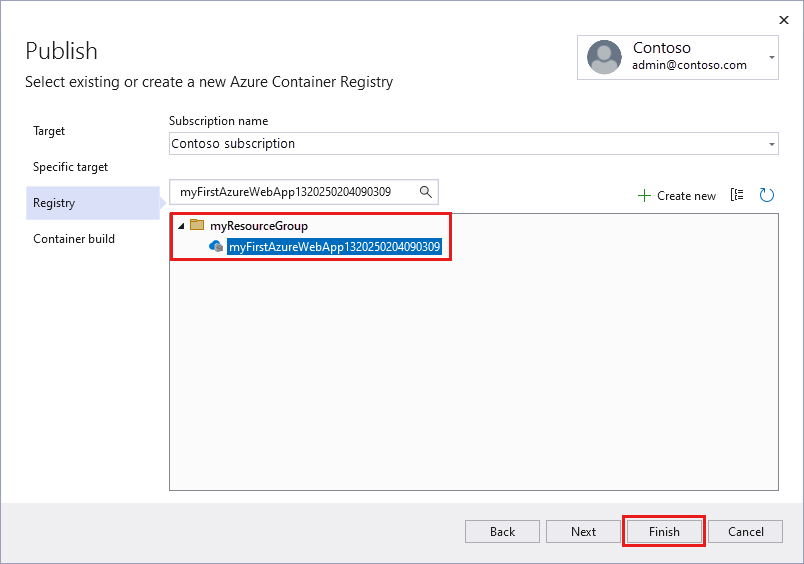
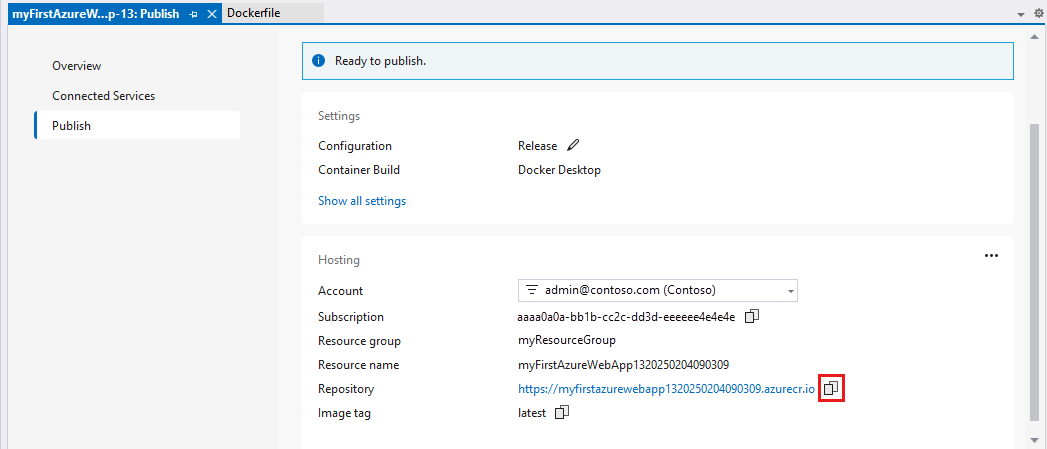
In Publish, under Container Registry, select the registry you created, and then select Finish.
Wait for the deployment to complete. The Publish page now shows the repository name. Select the copy button to copy the Repository name for later.
Sign in to the Azure portal.
Choose Create a resource in the upper left-hand corner of the Azure portal.
Under Popular services, select Create under Web App.
In Create Web App, choose your subscription and a Resource Group. You can create a new resource group if needed.
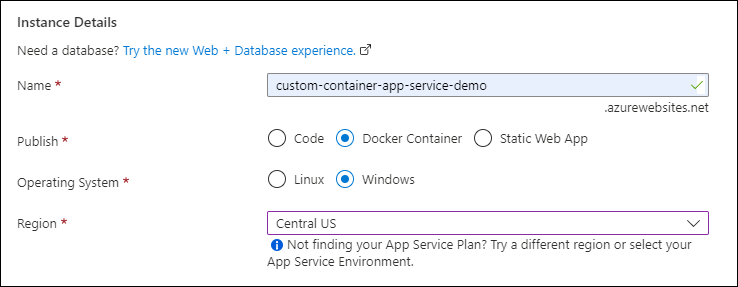
Provide an app name, such as win-container-demo. For Publish, select Container. For Operating System, select Windows.

Select Next: Database, then Next: Container to continue.
For Image Source, choose Docker Hub and for Image and tag, enter the repository name you copied in Publish to Azure Container Registry.
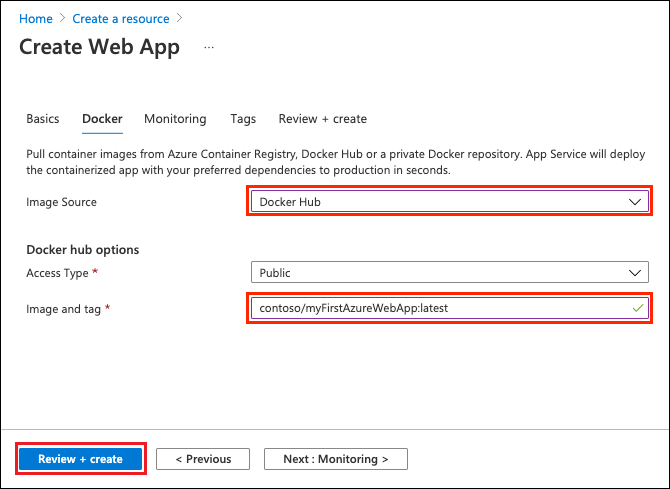
If you have a custom image elsewhere for your web application, such as in Azure Container Registry or in any other private repository, you can configure it here. Select Review + Create to continue.
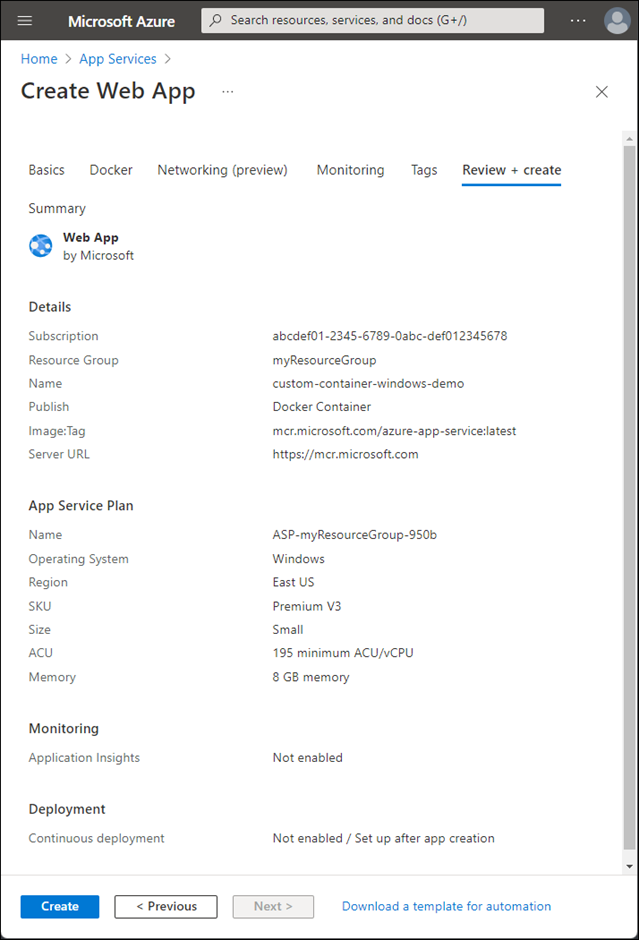
Verify all the details and then select Create.
Wait for Azure to create the required resources.
When the operation finishes, the Azure portal displays a notification.
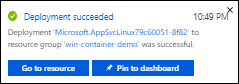
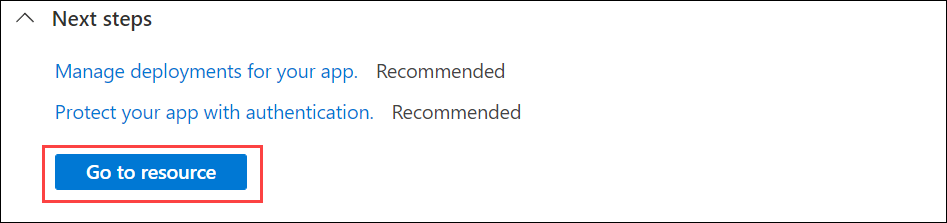
Select Go to resource.
In the overview of this resource, follow the link next to Default domain.
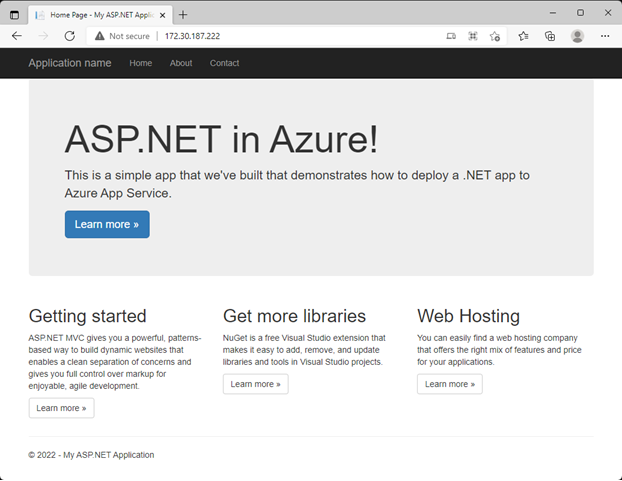
A new browser page opens to the following page:

Wait a few minutes and try again, until you get the default ASP.NET home page:
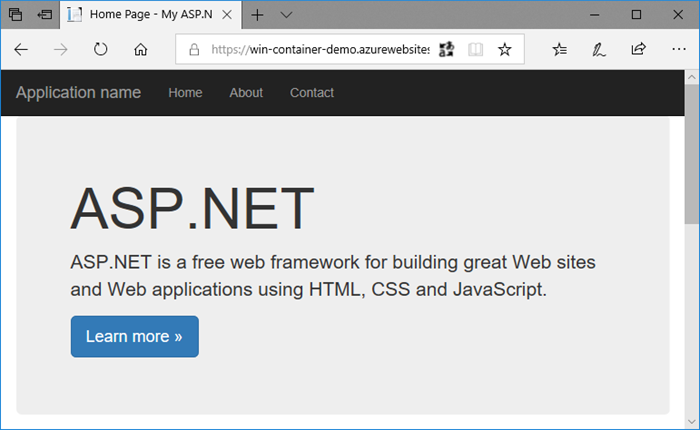
Congratulations! You're running your first custom Windows container in Azure App Service.
It can take some time for the Windows container to load. To see the progress, navigate to the following URL by replacing <app_name> with the name of your app.
https://<app_name>.scm.azurewebsites.net/api/logstream
The streamed logs look like this:
2018-07-27T12:03:11  Welcome, you are now connected to log-streaming service.
27/07/2018 12:04:10.978 INFO - Site: win-container-demo - Start container succeeded. Container: facbf6cb214de86e58557a6d073396f640bbe2fdec88f8368695c8d1331fc94b
27/07/2018 12:04:16.767 INFO - Site: win-container-demo - Container start complete
27/07/2018 12:05:05.017 INFO - Site: win-container-demo - Container start complete
27/07/2018 12:05:05.020 INFO - Site: win-container-demo - Container started successfully
In Visual Studio, in Solution Explorer, open Views > Home > Index.cshtml.
Find the <div class="jumbotron"> HTML tag near the top, and replace the entire element with the following code:
<div class="jumbotron">
    <h1>ASP.NET in Azure!</h1>
    <p class="lead">This is a simple app that we've built that demonstrates how to deploy a .NET app to Azure App Service.</p>
</div>
To redeploy to Azure, right-click the myfirstazurewebapp project in Solution Explorer and choose Publish.
On the publish page, select Publish and wait for publishing to complete.
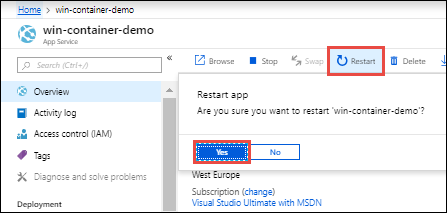
To tell App Service to pull in the new image from Docker Hub, restart the app. In the app page in the Azure portal, select Restart > Yes.
Browse to the custom container again. As you refresh the webpage, the app should revert to the "Starting up" page at first, then display the updated webpage.

In the preceding steps, you created Azure resources in a resource group. If you don't expect to need these resources in the future, you can delete them by deleting the resource group.
From the Azure portal menu or Home page, select Resource groups. Then, on the Resource groups page, select myResourceGroup.
On the myResourceGroup page, make sure that the listed resources are the ones you want to delete.
Select Delete resource group, type myResourceGroup in the text box to confirm, and then select Delete.
Azure App Service on Linux provides predefined application stacks on Linux with support for languages such as .NET, Java, Node.js, and PHP. You can also use a custom Docker image to run your web app on an application stack that isn't already defined in Azure. This quickstart shows you how to deploy an image from an Azure Container Registry (ACR) to App Service.
For more information about containerized applications in a serverless environment, see Container Apps.
This quickstart uses Azure Container Registry as the registry. You can use other registries, but the steps might differ slightly.
Create a container registry by following the instructions in Quickstart: Create a private container registry using the Azure portal.
Važno
Be sure to set the Admin User option to Enable when you create the Azure container registry. You can also set it from the Access keys section of your registry page in the Azure portal. This setting is required for App Service access. For managed identity, see Deploy from ACR tutorial.
Launch Visual Studio Code.
Select the Azure logo in the Activity Bar, navigate to ACCOUNTS & TENANTS. Select Sign in to Azure and follow the instructions.
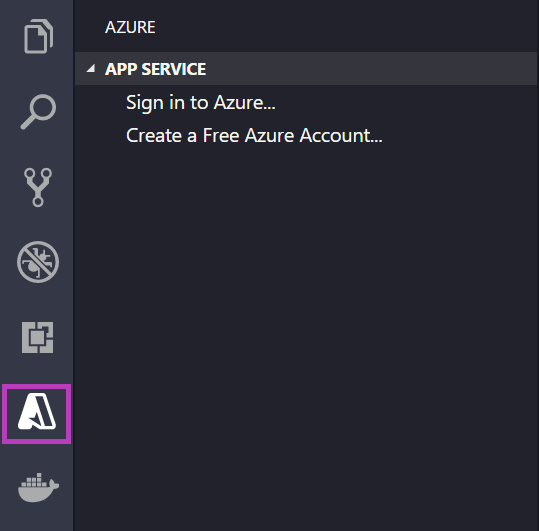
In the Status Bar at the bottom, verify your Azure account email address. In the APP SERVICE explorer, your subscription should be displayed.
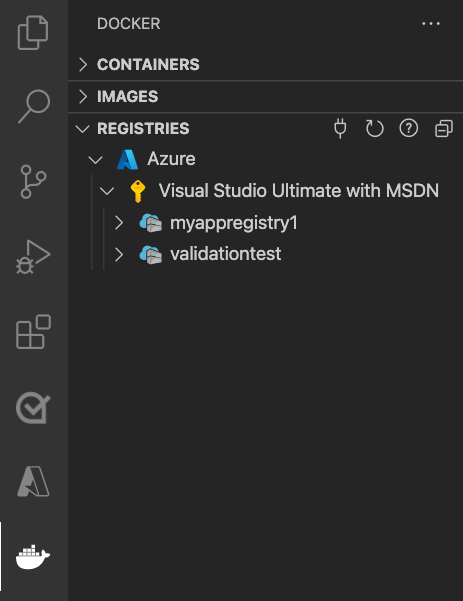
In the Activity Bar, select the Docker logo. In the REGISTRIES explorer, verify that the container registry you created appears.
Verify that Docker is installed and running. The following command displays the Docker version if it's running.
docker --version
In Visual Studio Code, open an empty folder and add a file called Dockerfile. In the Dockerfile, paste the content based on your desired language framework:
In this Dockerfile, the parent image is one of the built-in .NET containers of App Service.
FROM mcr.microsoft.com/appsvc/dotnetcore:lts

ENV PORT 8080
EXPOSE 8080

ENV ASPNETCORE_URLS "http://*:${PORT}"

ENTRYPOINT ["dotnet", "/defaulthome/hostingstart/hostingstart.dll"]
Open the Command Palette, and type Docker Images: Build Image. Select Enter to run the command.
In the image tag box, specify the tag you want in the following format: <acr-name>.azurecr.io/<image-name>:<tag>, where <acr-name> is the name of the container registry you created. Select Enter.
When the image finishes building, select Refresh at the top of the IMAGES explorer and verify that the image built successfully.
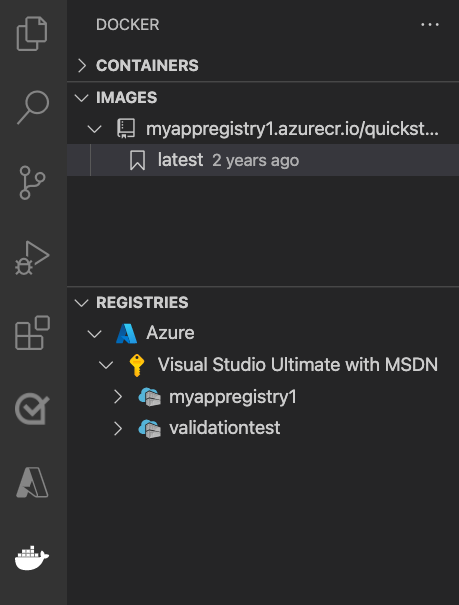
In the Activity Bar, select the Docker icon. In the IMAGES explorer, find the image you built.
Expand the image, right-click on the tag you want, and select Push.
Make sure the image tag begins with <acr-name>.azurecr.io and press Enter.
When Visual Studio Code finishes pushing the image to your container registry, select Refresh at the top of the REGISTRIES explorer and verify that the image is pushed successfully.

After deployment, your app is available at http://<app-name>.azurewebsites.net.
A Resource Group is a named collection of all your application's resources in Azure. For example, a Resource Group can contain a reference to a website, a database, and an Azure Function.
An App Service Plan defines the physical resources that to use to host your website. This quickstart uses a Basic hosting plan on Linux infrastructure, which means the site is hosted on a Linux machine alongside other websites. If you start with the Basic plan, you can use the Azure portal to scale up so that yours is the only site running on a machine. For pricing, see App Service pricing.
The Output panel shows the status of the deployment operations. When the operation completes, select Open Site in the pop-up notification to open the site in your browser.
In the preceding steps, you created Azure resources in a resource group. If you don't expect to need these resources in the future, you can delete them by deleting the resource group.
From the Azure portal menu or Home page, select Resource groups. Then, on the Resource groups page, select myResourceGroup.
On the myResourceGroup page, make sure that the listed resources are the ones you want to delete.
Select Delete resource group, type myResourceGroup in the text box to confirm, and then select Delete.
Congratulations, you've successfully completed this quickstart.
The App Service app pulls from the container registry every time it starts. If you rebuild your image, you just need to push it to your container registry, and the app pulls in the updated image when it restarts. To tell your app to pull in the updated image immediately, restart it.
Other Azure extensions:
Azure App Service on Linux provides predefined application stacks on Linux with support for languages such as .NET, Java, Node.js, and PHP. You can also use a custom Docker image to run your web app on an application stack that isn't already defined in Azure. This quickstart shows you how to deploy an image from Azure Container Registry to Azure App Service.
For more information about containerized applications in a serverless environment, see Container Apps.
Clone the the .NET 6.0 sample app with the following command:
git clone https://github.com/Azure-Samples/dotnetcore-docs-hello-world.git
Make sure you are in the cloned repository's root folder. This repository contains a Dockerfile.linux file.
Sign in to the Azure CLI.
az login
Sign in to Azure Container Registry.
az acr login -n <your_registry_name>
Build the container image. This example uses the image name dotnetcore-docs-hello-world-linux.
docker build -f Dockerfile.linux -t <your_registry_name>.azurecr.io/dotnetcore-docs-hello-world-linux .
Push the container image to Azure Container Registry.
docker push <your_registry_name>.azurecr.io/dotnetcore-docs-hello-world-linux:latest
Bilješka
The Dockerfile sets the port number to 80 internally. For more information about configuring the container, see Configure custom container.
Sign in to the Azure portal.
Type app services in the search. Under Services, select App Services.

In the App Services page, select Create > Web App.
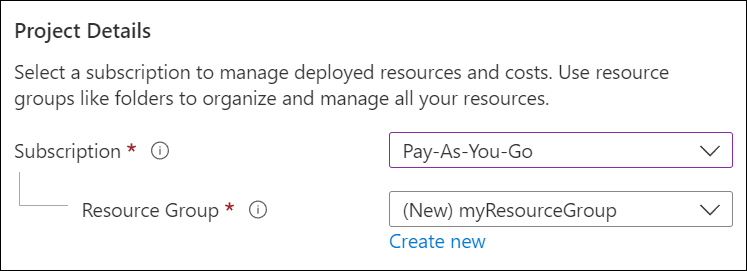
In the Basics tab, under Project details, select the correct subscription. Select Create new resource group. Type myResourceGroup for the name.
Under Instance details:

Under App Service Plan, select Create new App Service Plan. Enter myAppServicePlan for the name. To change to the Free tier, select Change size, select the Dev/Test tab, select F1. Select Apply.

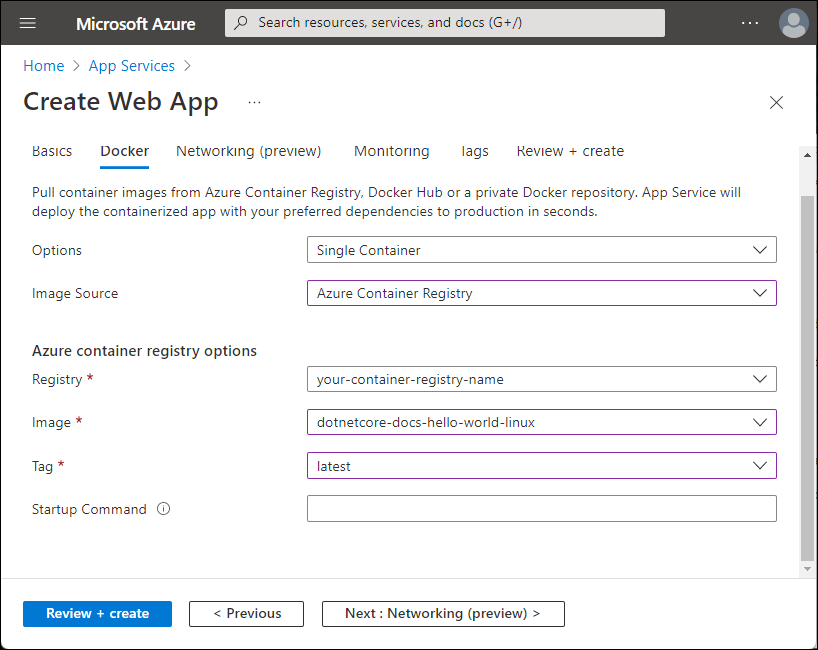
At the top of the page, select the Container tab.
In the Container tab, for Image Source, select Azure Container Registry. Under Azure container registry options, set the following values:
Select Review + create at the bottom of the page.

After validation runs, select Create.
After deployment finishes, select Go to resource.
Browse to the deployed application in your web browser at the URL http://<app-name>.azurewebsites.net.
In the preceding steps, you created Azure resources in a resource group. If you don't expect to need these resources in the future, you can delete them by deleting the resource group.
From the Azure portal menu or Home page, select Resource groups. Then, on the Resource groups page, select myResourceGroup.
On the myResourceGroup page, make sure that the listed resources are the ones you want to delete.
Select Delete resource group, type myResourceGroup in the text box to confirm, and then select Delete.
Congratulations, you've successfully completed this quickstart.
The App Service app pulls from the container registry each time it starts. If you rebuild your image, just push it to your container registry. The app pulls in the updated image when it restarts. To tell your app to pull in the updated image immediately, restart it.
Azure App Service provides predefined application stacks on Windows, like ASP.NET or Node.js, that run on IIS. The preconfigured application stacks lock down the operating system and prevent low-level access. Custom Windows containers don't have these restrictions. They let developers fully customize the containers and give containerized applications full access to Windows functionality.
This quickstart shows you how to deploy an ASP.NET app in a Windows image from Azure Container Registry to Azure App Service.
Clone the the .NET 6.0 sample app with the following command:
git clone https://github.com/Azure-Samples/dotnetcore-docs-hello-world.git
Make sure you are in the cloned repository's root folder. This repository contains a Dockerfile.windows file. This article uses Windows Nano Server Long Term Servicing Channel (LTSC) 2022 as the base operating system, explicitly calling out our Windows base.
Bilješka
Even though this container is a Windows container, the paths still need to use forward slashes. For more information, see Write a Dockerfile.
Sign in to the Azure CLI.
az login
Sign in to Azure Container Registry.
az acr login -n <your_registry_name>
Build the container image. This example uses the image name dotnetcore-docs-hello-world-windows.
docker build -f Dockerfile.windows -t <your_registry_name>.azurecr.io/dotnetcore-docs-hello-world-windows .
Push the container image to Azure Container Registry.
docker push <your_registry_name>.azurecr.io/dotnetcore-docs-hello-world-windows:latest
Bilješka
The Dockerfile sets the port number to 80 internally. For more information about configuring the container, see Configure custom container.
Sign in to the Azure portal.
Type app services in the search. Under Services, select App Services.
In the App Services page, select Create > Web App.
In the Basics tab, under Project details, select the correct subscription. Select Create new resource group. Type myResourceGroup for the name.
Under Instance details:
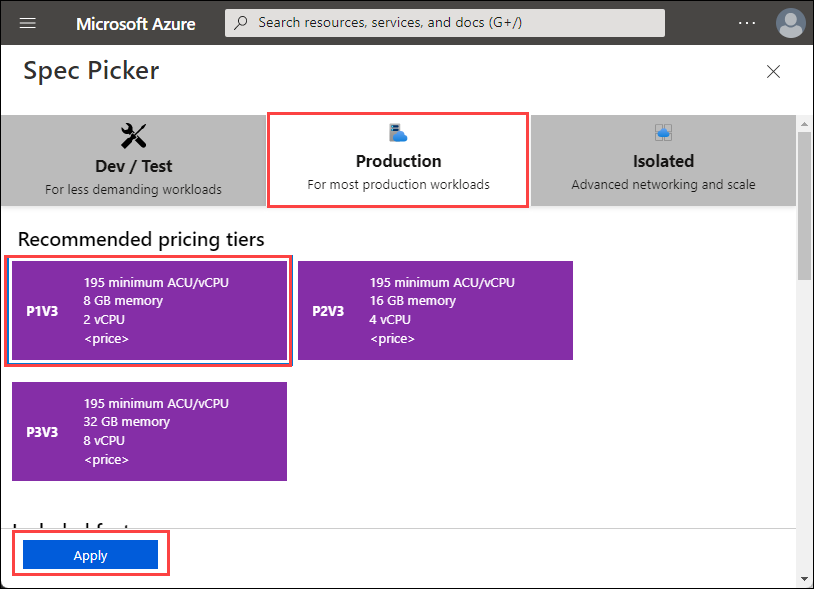
Under App Service Plan, select Create new App Service Plan. Enter myAppServicePlan for the name. To change tier, select Explore pricing plans, select a plan, and choose Select at the bottom of the page.
At the top of the page, select the Container tab.
In the Container tab, for Image Source, select Azure Container Registry . Under Azure container registry options, set the following values:
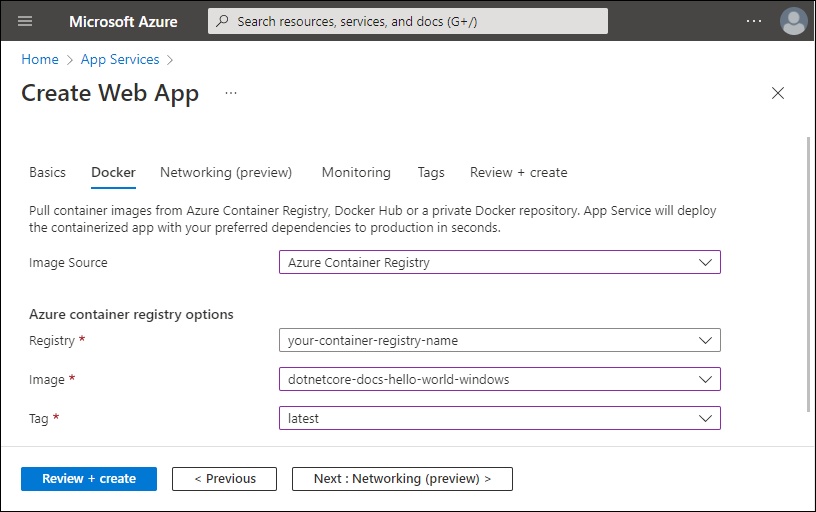
Select Review + create at the bottom of the page.
After validation runs, select Create.
After deployment finishes, select Go to resource.
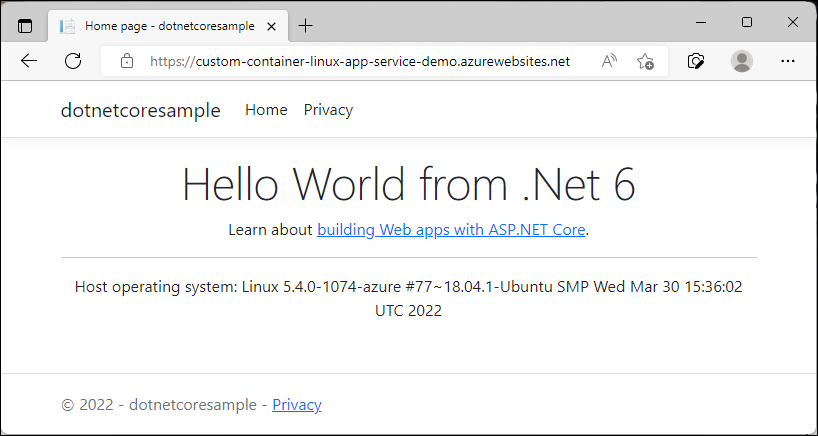
Browse to the deployed application in your web browser at the URL http://<app-name>.azurewebsites.net.
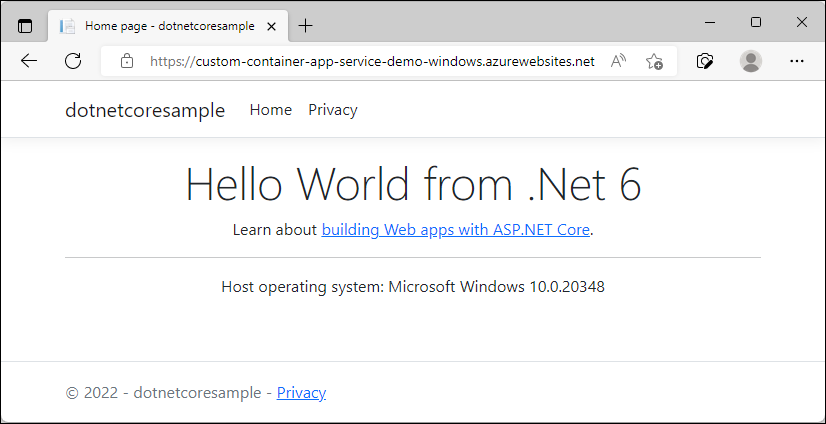
The Host operating system appears in the footer, which confirms that it runs in a Windows container.
In the preceding steps, you created Azure resources in a resource group. If you don't expect to need these resources in the future, you can delete them by deleting the resource group.
From the Azure portal menu or Home page, select Resource groups. Then, on the Resource groups page, select myResourceGroup.
On the myResourceGroup page, make sure that the listed resources are the ones you want to delete.
Select Delete resource group, type myResourceGroup in the text box to confirm, and then select Delete.
Congratulations, you've successfully completed this quickstart.
The App Service app pulls from the container registry each time it starts. If you rebuild your image, just push it to your container registry. The app pulls in the updated image when it restarts. To tell your app to pull in the updated image immediately, restart it.
Azure App Service provides predefined application stacks on Windows, like ASP.NET or Node.js, that run on IIS. The preconfigured application stacks lock down the operating system and prevent low-level access. Custom Windows containers don't have these restrictions. They let developers fully customize the containers and give containerized applications full access to Windows functionality.
This quickstart shows you how to deploy an ASP.NET app in a Windows image from Microsoft Artifact Registry to Azure App Service.
Sign into your Azure account by using the Connect-AzAccount command and following the prompt:
Connect-AzAccount
Create a resource group with the New-AzResourceGroup command. An Azure resource group is a logical container into which Azure resources are deployed and managed.
The following example creates a resource group named myResourceGroup in the eastus location. To see all supported locations for App Service, run the Get-AzLocation command.
New-AzResourceGroup -Name myResourceGroup -Location eastus
The command returns Login Succeeded.
Create a new App service Plan by using the New-AzAppServicePlan command.
The following example creates an App Service plan named myAppServicePlan in the PremiumV3 pricing tier (-Tier PremiumV3). The -HyperV parameter specifies Windows container.
New-AzAppServicePlan -Name myAppServicePlan -Location eastus -ResourceGroupName myResourceGroup -Tier PremiumV3 -HyperV
Create a new app by using the New-AzWebApp command:
New-AzWebApp -Name myWebApp -AppServicePlan myAppServicePlan -Location eastus -ResourceGroupName myResourceGroup -ContainerImageName mcr.microsoft.com/azure-app-service/windows/parkingpage:latest
The command might take a few minutes to complete.
Browse to the deployed application in your web browser at the URL http://<app-name>.azurewebsites.net.

Remove the resource group by using the Remove-AzResourceGroup command:
Remove-AzResourceGroup myResourceGroup
Congratulations, you've successfully completed this quickstart.
The App Service app pulls from the container registry each time it starts. If you rebuild your image, just push it to your container registry. The app pulls in the updated image when it restarts. To tell your app to pull in the updated image immediately, restart it.
Azure App Service provides predefined application stacks on Windows, like ASP.NET or Node.js, that run on IIS. The preconfigured application stacks lock down the operating system and prevent low-level access. Custom Windows containers don't have these restrictions. They let developers fully customize the containers and give containerized applications full access to Windows functionality.
This quickstart shows you how to deploy an ASP.NET app in a Windows image from Microsoft Artifact Registry to Azure App Service.
Sign into your Azure account by using the az login command and following the prompt:
az login
Create a resource group with the az group create command. An Azure resource group is a logical container into which Azure resources are deployed and managed.
The following example creates a resource group named myResourceGroup in the eastus location. To see all supported locations for App Service, run the az appservice list-locations command.
az group create --name myResourceGroup --location eastus
Create an App Service plan in the resource group with the az appservice plan create command.
The following example creates an App Service plan named myAppServicePlan in the P1V3 pricing tier (--sku P1V3).
az appservice plan create --resource-group myResourceGroup --location eastus --name myAppServicePlan --hyper-v --sku p1v3
Bilješka
If you run into the error, The behavior of this command has been altered by the following extension: appservice-kube, remove the appservice-kube extension.
Create a custom container web app in the myAppServicePlan App Service plan with the az webapp create command. Don't forget to replace myContainerApp with a unique app name (valid characters are a-z, 0-9, and -).
az webapp create --name myContainerApp --plan myAppServicePlan --resource-group myResourceGroup --deployment-container-image-name mcr.microsoft.com/azure-app-service/windows/parkingpage:latest
Browse to the deployed application in your web browser at the URL http://<app-name>.azurewebsites.net.

Remove the resource group by using the az group delete command:
az group delete --no-wait --name <resource_group>
Congratulations, you've successfully completed this quickstart.
The App Service app pulls from the container registry each time it starts. If you rebuild your image, just push it to your container registry. The app pulls in the updated image when it restarts. To tell your app to pull in the updated image immediately, restart it.
Događaji
Izgradite inteligentne aplikacije
M03 17 23 - M03 21 23
Pridružite se seriji susreta kako biste sa kolegama programerima i stručnjacima izgradili skalabilna AI rješenja zasnovana na stvarnim slučajevima korištenja.
Registrirajte seObučavanje
Modul
Deploy and run a containerized web app with Azure App Service - Training
Discover how to create a Docker image and store it in the Azure Container Registry, then use Azure App Service to deploy a web application based on the image.
Certifikacija
Microsoft Certified: Azure Developer Associate - Certifications
Build end-to-end solutions in Microsoft Azure to create Azure Functions, implement and manage web apps, develop solutions utilizing Azure storage, and more.
Dokumentacija
Tutorial: Build and run a custom image in Azure App Service - Azure App Service
A step-by-step guide to build a custom Linux or Windows image, push the image to Azure Container Registry, and then deploy that image to Azure App Service. Learn how to migrate custom software to App Service in a custom container.
Configure a custom container - Azure App Service
Learn how to configure a custom container in Azure App Service. This article shows the most common configuration tasks.
Deployment best practices - Azure App Service
Learn about the key mechanisms of deploying to Azure App Service. Find language-specific recommendations and other caveats.