Tutorial: Create a metric alert for an Azure resource
Azure Monitor alerts proactively notify you when important conditions are found in your monitoring data. Metric alert rules create an alert when a metric value from an Azure resource exceeds a threshold.
In this tutorial, you learn how to:
- Create a metric alert rule from metrics explorer
- Configure the alert threshold
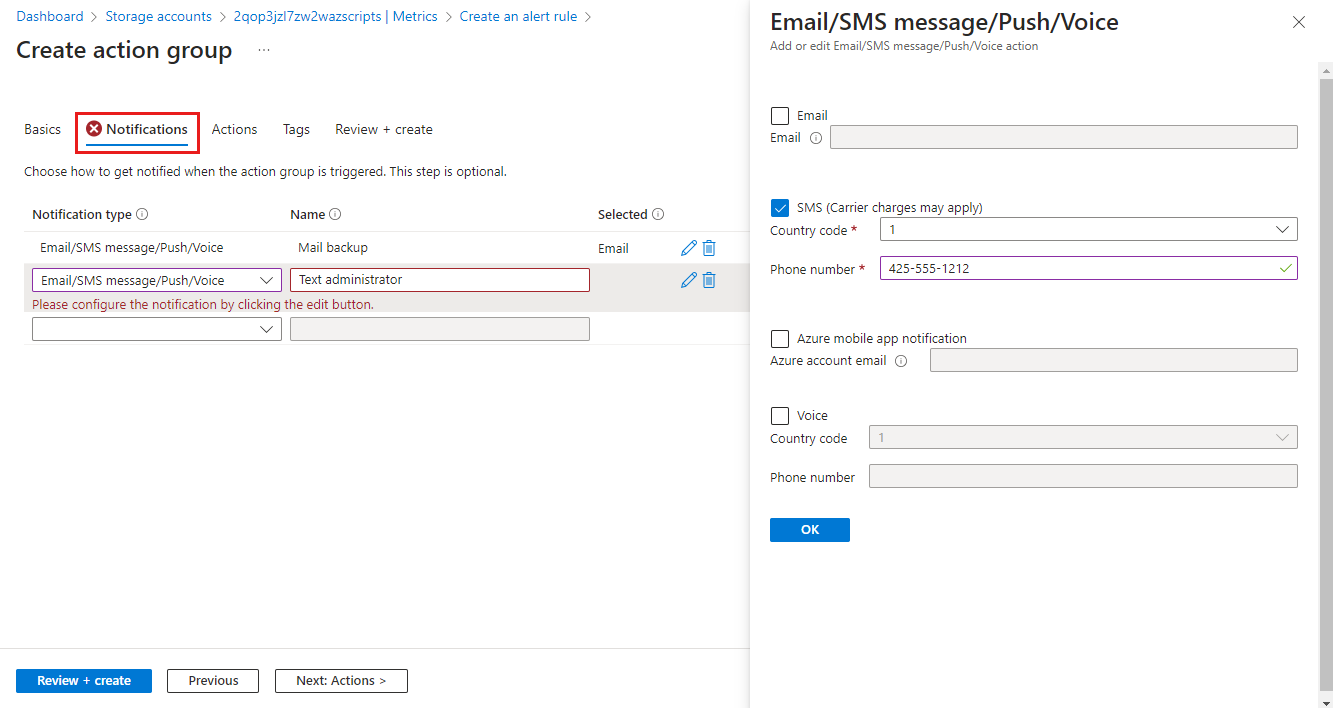
- Create an action group to define notification details
Prerequisites
To complete this tutorial you need the following:
- An Azure resource to monitor. You can use any resource in your Azure subscription that supports metrics. To determine whether a resource supports metrics, go to its menu in the Azure portal and verify that there's a Metrics option in the Monitoring section of the menu.
- Chart in metrics explorer with one or more metrics that you want to alert on. Complete Tutorial: Analyze metrics for an Azure resource.
Create new alert rule
From metrics explorer, click New alert rule. The rule will be preconfigured with the target object and the metric that you selected in metrics explorer.
Configure alert logic
The resource will already be selected. You need to modify the signal logic to specify the threshold value and any other details for the alert rule.
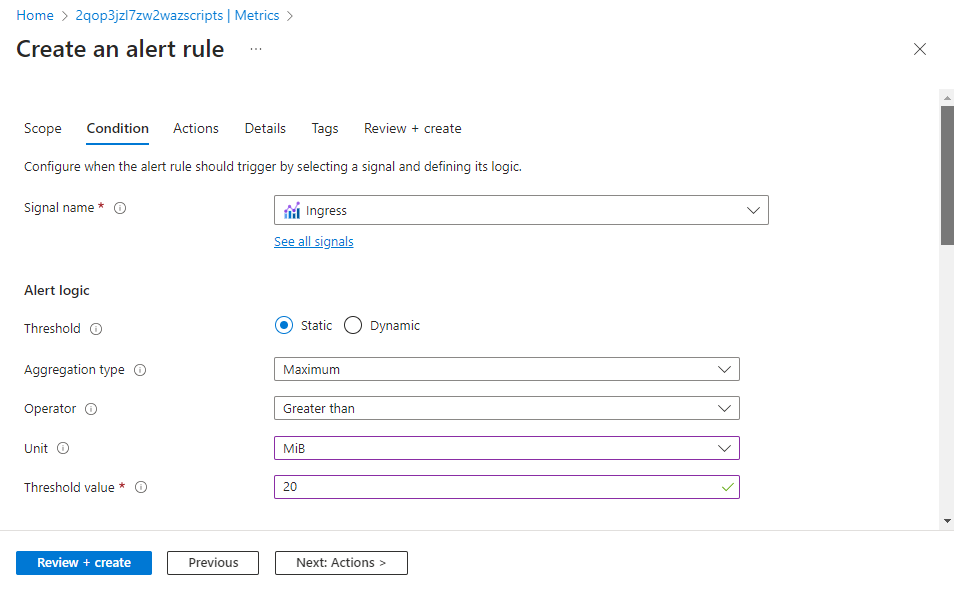
To view these settings, select the Condition tab.
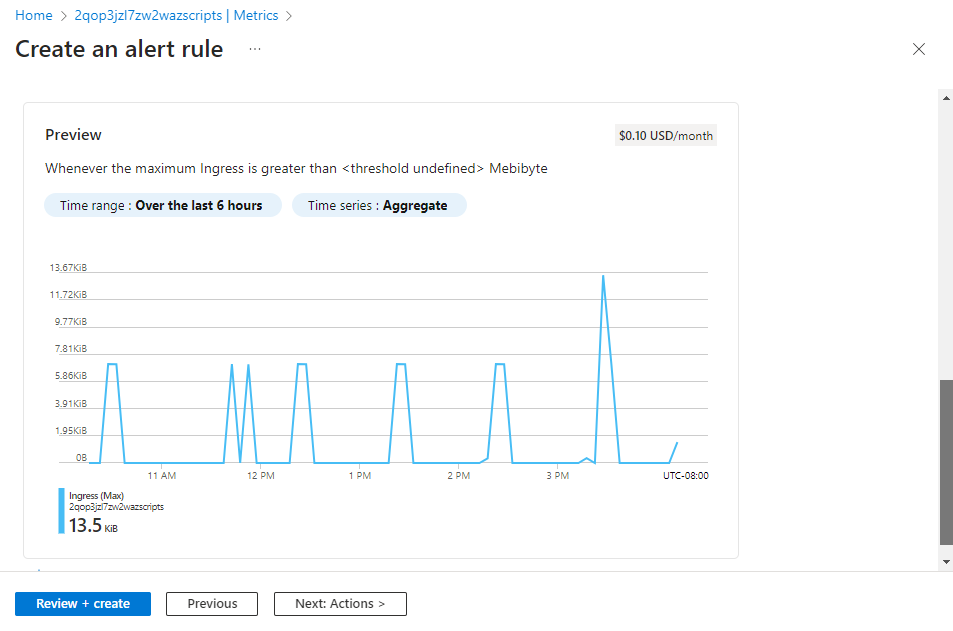
The chart shows the value of the selected signal over time so that you can see when the alert would have been fired. This chart will update as you specify the signal logic.
The Alert logic is defined by the condition and the evaluation time. The alert fires when this condition is true. Provide a Threshold value for your alert rule and modify the Operator and Aggregation type to define the logic you need.
You can accept the default time granularity or modify it to your requirements. Check every defines how often the alert rule will check if the condition is met. Lookback period defines the time interval over which the collected values are aggregated. For example, every 1 minute, you’ll be looking at the past 5 minutes.
When you're done configuring the signal logic, click Next: Actions > or the Actions tab to configure actions.
Configure actions
Action groups define a set of actions to take when an alert is fired such as sending an email or an SMS message.
To configure actions, select the Actions tab.
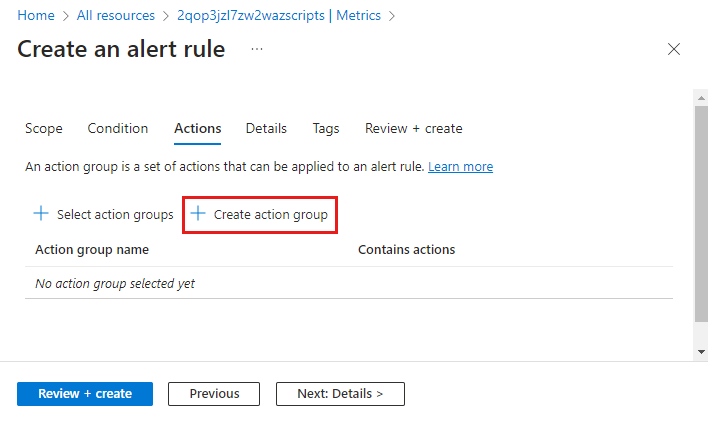
Click Select action groups to add one to the alert rule.
If you don't already have an action group in your subscription to select, then click Create action group to create a new one.
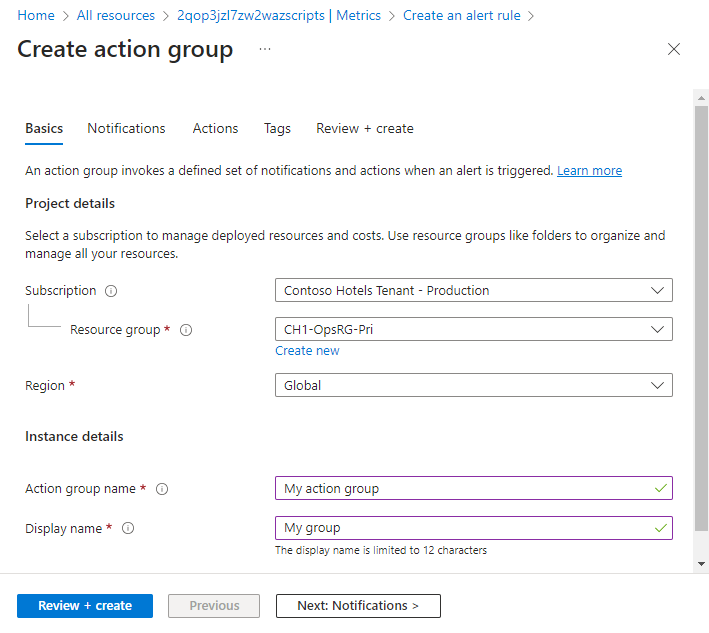
Select a Subscription and Resource group for the action group and give it an Action group name that will appear in the portal and a Display name that will appear in email and SMS notifications.
Select the Notifications tab and add one or more methods to notify appropriate people when the alert is fired.
Configure details
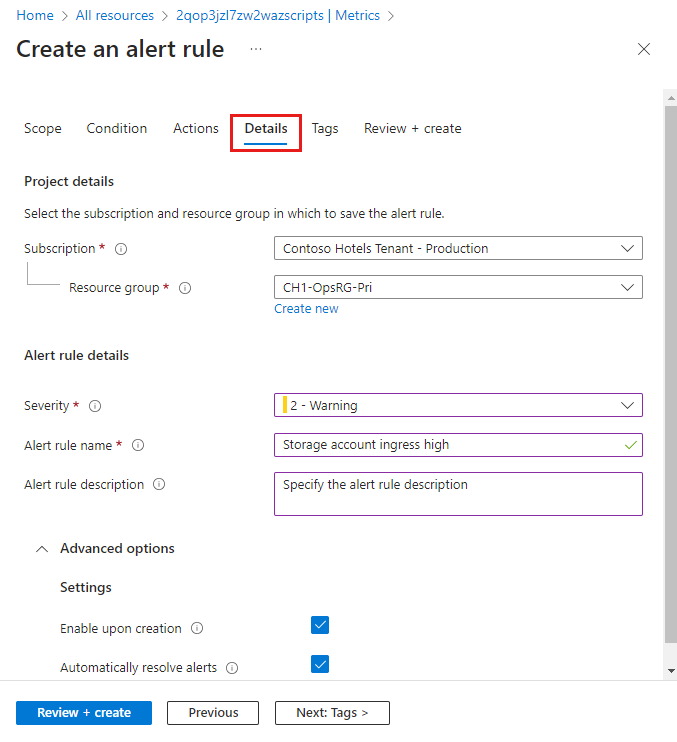
Select the Details tab and configure different settings for the alert rule.
- Alert rule name which should be descriptive since it will be displayed when the alert is fired.
- Optionally provide an Alert rule description that's included in the details of the alert.
- Subscription and Resource group where the alert rule will be stored. This doesn't need to be in the same resource group as the resource that you're monitoring.
- Severity for the alert. The severity allows you to group alerts with a similar relative importance. A severity of Error is appropriate for an unresponsive virtual machine.
- Under Advanced options, keep the box checked to Enable upon creation.
- Under Advanced options, keep the box checked to Automatically resolve alerts. This will make the alert stateful, which means that the alert is resolved when the condition isn't met anymore.
Click Review + create and then Create to create the alert rule.
View the alert
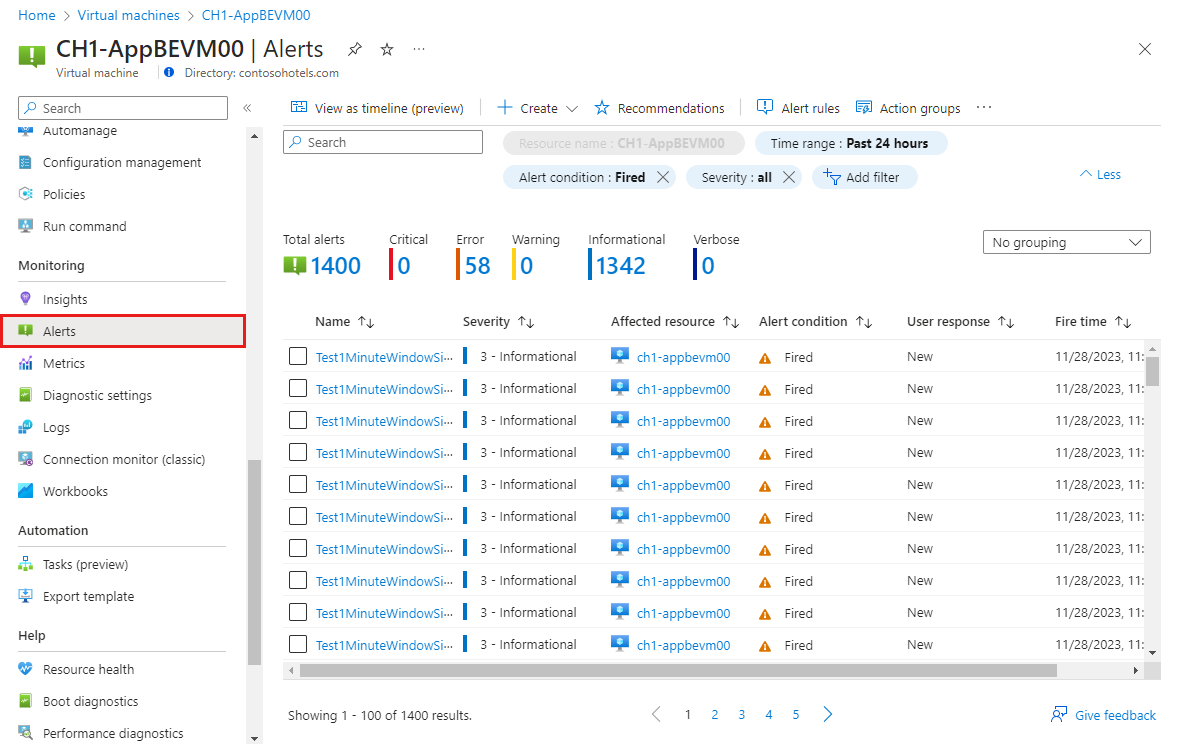
When an alert fires, it sends any notifications in its action groups. You can also view the alert in the Azure portal.
Select Alerts from the resource's menu. If there are any open alerts for the resources, they are included in the view.
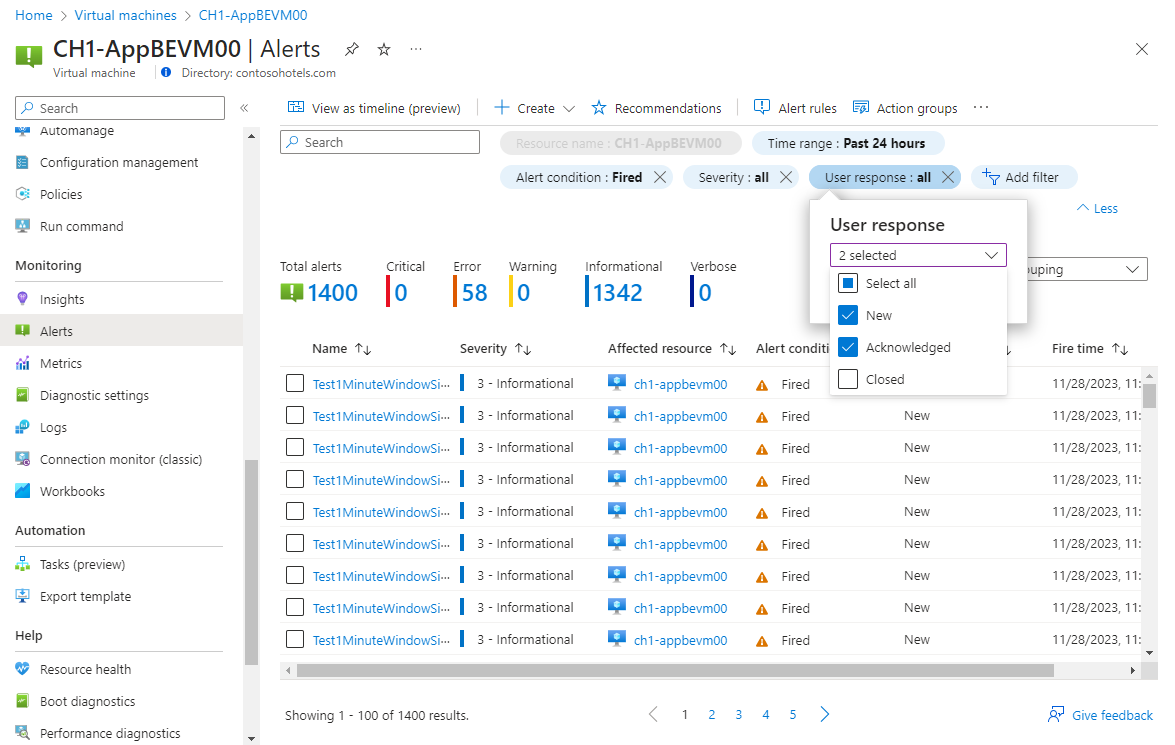
Click on a severity to show the alerts with that severity. Select the User response and unselect Closed to view only open alerts.
Click on the name of an alert to view its detail.
Next steps
Now that you've learned how to create a metric alert for an Azure resource, use one of the following tutorials to collect log data.
Povratne informacije
Uskoro: tokom 2024. postepeno ćemo ukidati probleme s uslugom GitHub kao mehanizam povratnih informacija za sadržaj i zamijeniti ga novim sistemom povratnih informacija. Za više informacija, pogledajte https://aka.ms/ContentUserFeedback.
Pošalјite i prikažite povratne informacije za


