Bilješka
Pristup ovoj stranici zahtijeva provjeru vjerodostojnosti. Možete pokušati da se prijavite ili promijenite direktorije.
Pristup ovoj stranici zahtijeva provjeru vjerodostojnosti. Možete pokušati promijeniti direktorije.
The Azure Resource Manager Tools for Visual Studio Code provide language support, resource snippets, and resource autocompletion. These tools help you create and validate Azure Resource Manager templates (ARM templates). Because of these features, we recommend using these tools to create and configure ARM templates. In this quickstart, you use the extension to create an ARM template from scratch. While doing so, you experience the extension's capabilities, such as ARM template snippets, validation, completions, and parameter file support.
This quickstart focuses on using the Visual Studio Code extension to build the ARM template. For a tutorial that is more focused on syntax, see Tutorial: Create and deploy your first ARM template.
To complete this quickstart, you need Visual Studio Code, with the Azure Resource Manager tools extension installed. You also need either the Azure CLI or the Azure PowerShell module installed and authenticated.
If you don't have an Azure subscription, create a free account before you begin.
Tip
We recommend Bicep because it offers the same capabilities as ARM templates and the syntax is easier to use. To learn more, see Quickstart: Create Bicep files with Visual Studio Code.
Note
The current release of the Azure Resource Manager Tools extension for Visual Studio Code does not recognize the enhancements made in languageVersion 2.0.
Create an ARM template
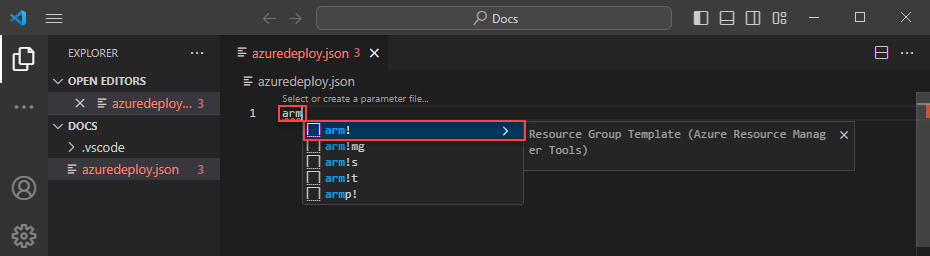
Create and open with Visual Studio Code a new file named azuredeploy.json. Enter arm into the code editor, which initiates Azure Resource Manager snippets for scaffolding out an ARM template.
Select arm! to create a template scoped for an Azure resource group deployment.
This snippet creates the basic building blocks for an ARM template.
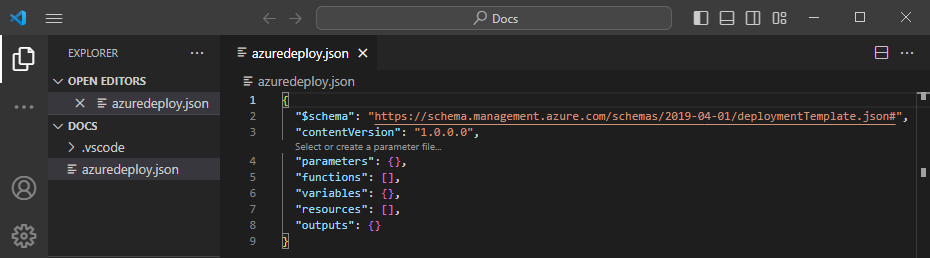
Notice that the Visual Studio Code language mode changed from JSON to Azure Resource Manager Template. The extension includes a language server specific to ARM templates that provides template-specific validation, completion, and other language services.

Add an Azure resource
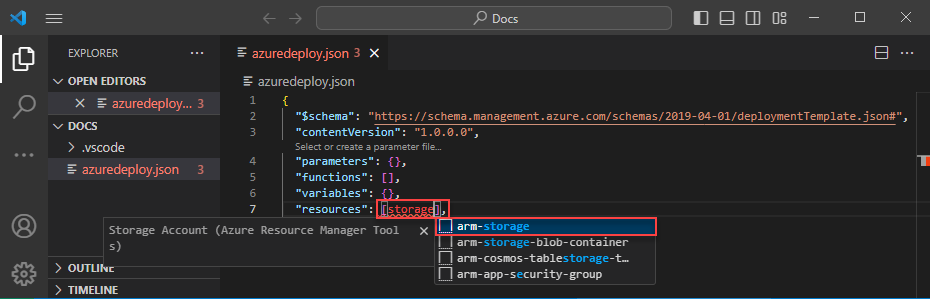
The extension includes snippets for many Azure resources. Use these snippets to easily add resources to your template deployment.
Place the cursor in the template resources block, type storage, and select the arm-storage snippet.
This action adds a storage resource to the template.
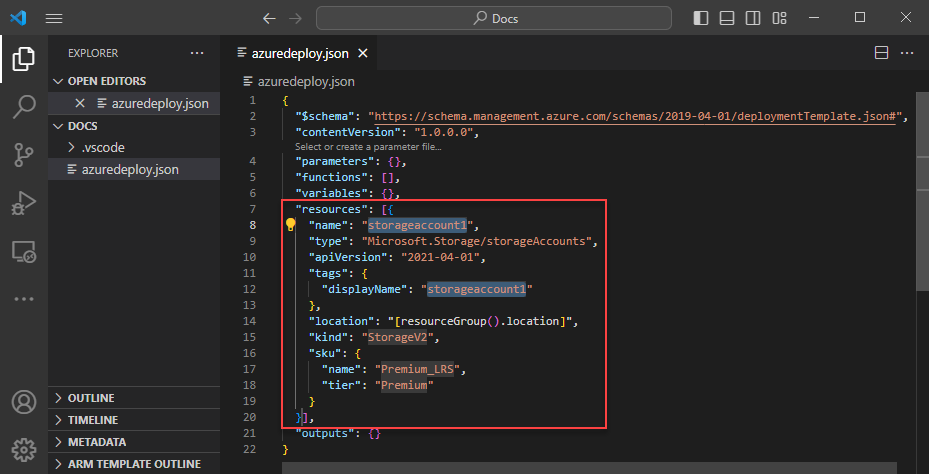
Use the tab key to tab through configurable properties on the storage account.
Completion and validation
One of the most powerful capabilities of the extension is its integration with Azure schemas. Azure schemas provide the extension with validation and resource-aware completion capabilities. To see validation and completion in action, modify the storage account.
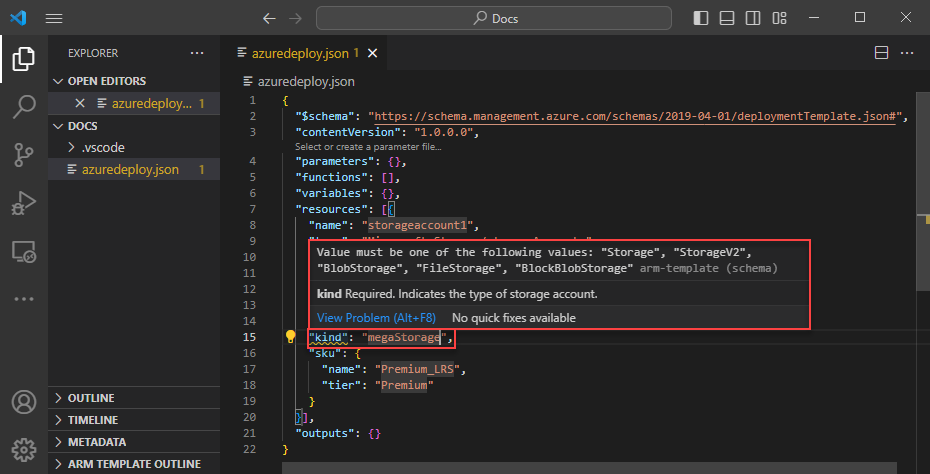
First, update the storage account kind to an invalid value such as megaStorage. This action produces a warning that megaStorage isn't a valid value.
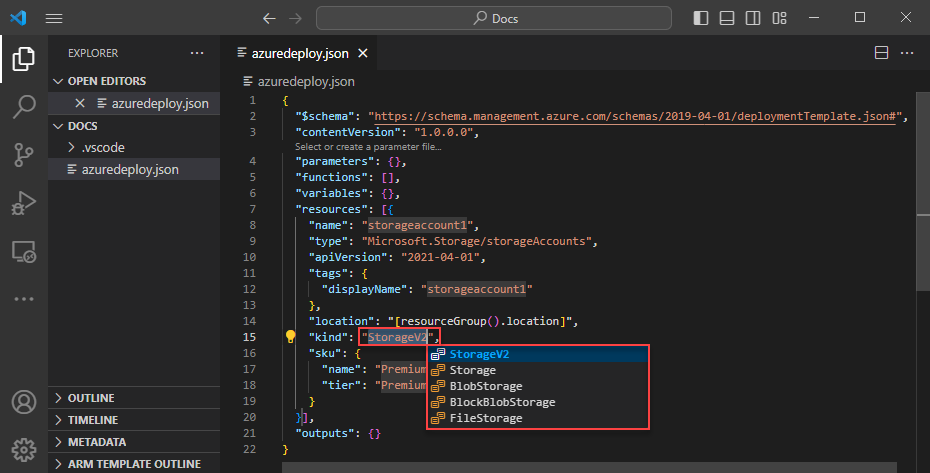
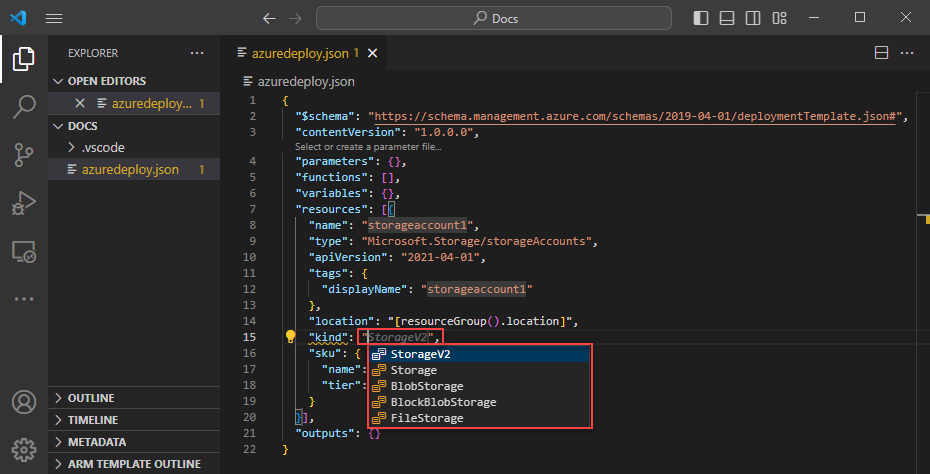
To use the completion capabilities, remove megaStorage, place the cursor inside of the double quotes, and press ctrl + space. This action presents a completion list of valid values.
Add template parameters
Now create and use a parameter to specify the storage account name.
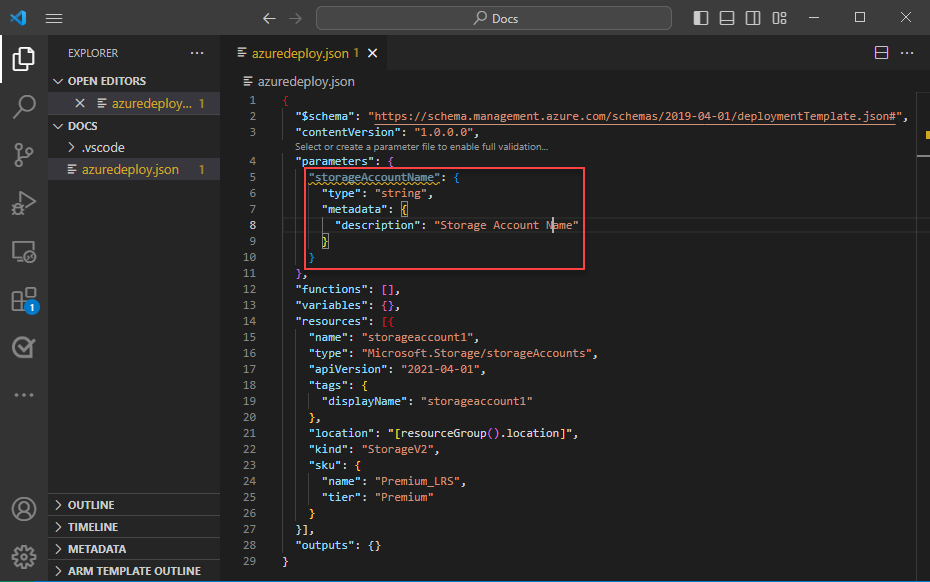
Place your cursor in the parameters block, add a carriage return, type ", and then select the new-parameter snippet. This action adds a generic parameter to the template.

Update the name of the parameter to storageAccountName and the description to Storage account name.
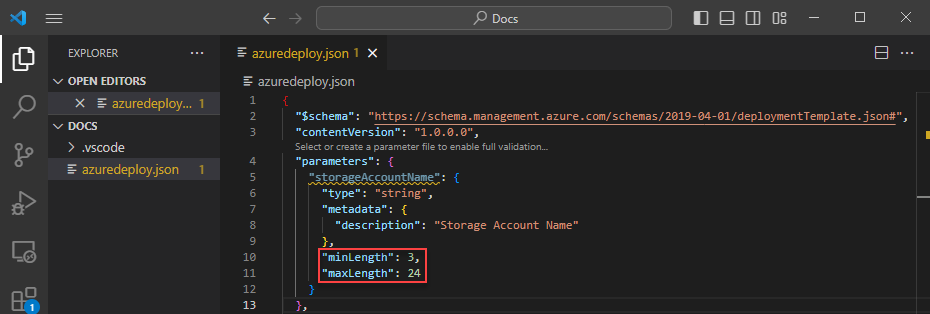
Azure storage account names have a minimum length of three characters and a maximum of 24. Add both minLength and maxLength to the parameter and provide appropriate values.
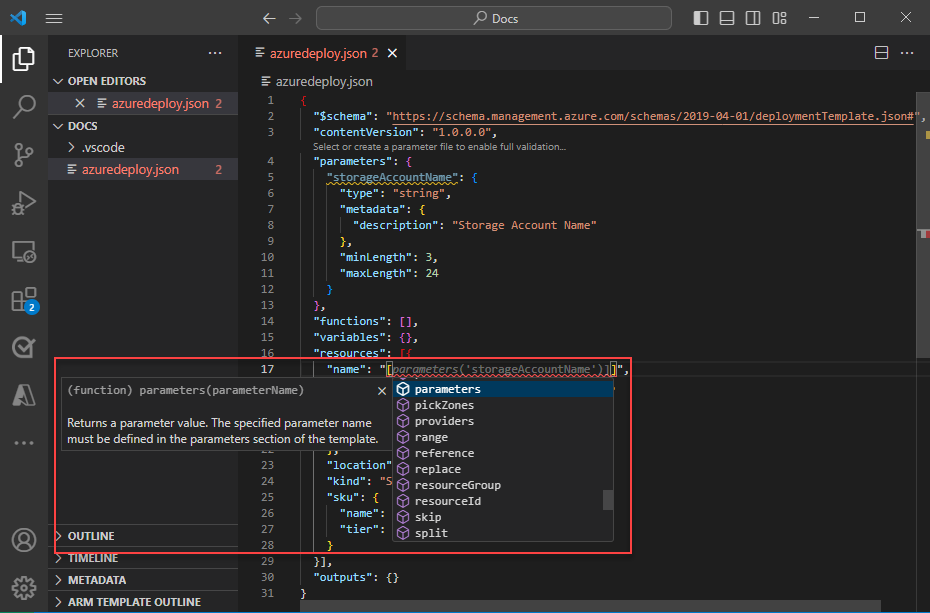
Now, on the storage resource, update the name property to use the parameter. To do so, remove the current name. Enter a double quote and an opening square bracket [, which produces a list of ARM template functions. Select parameters from the list.
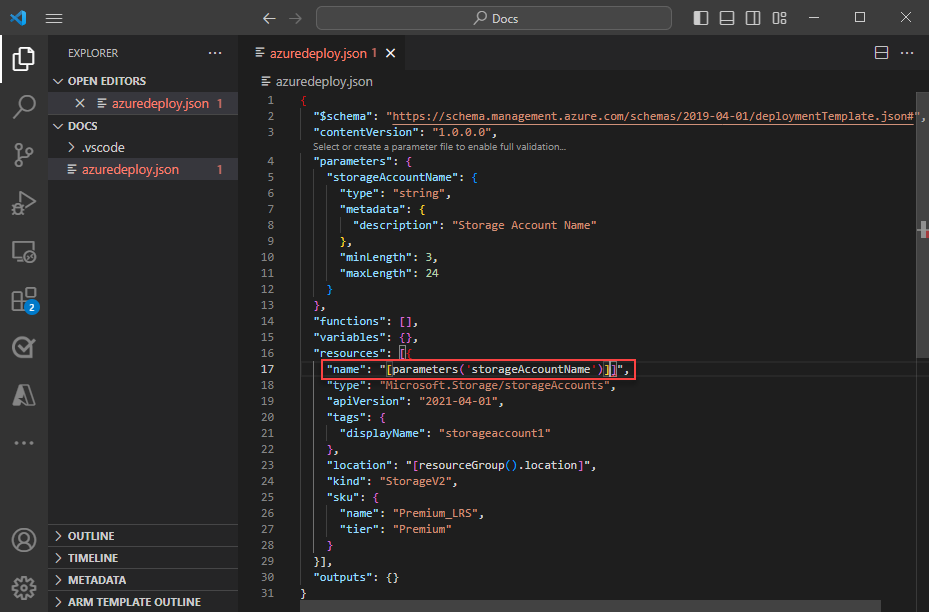
Entering a single quote ' inside of the round brackets produces a list of all parameters defined in the template, in this case, storageAccountName. Select the parameter.
Create a parameter file
An ARM template parameter file allows you to store environment-specific parameter values and pass these values in as a group at deployment time. For example, you can have a parameter file with values specific to a test environment and another for a production environment.
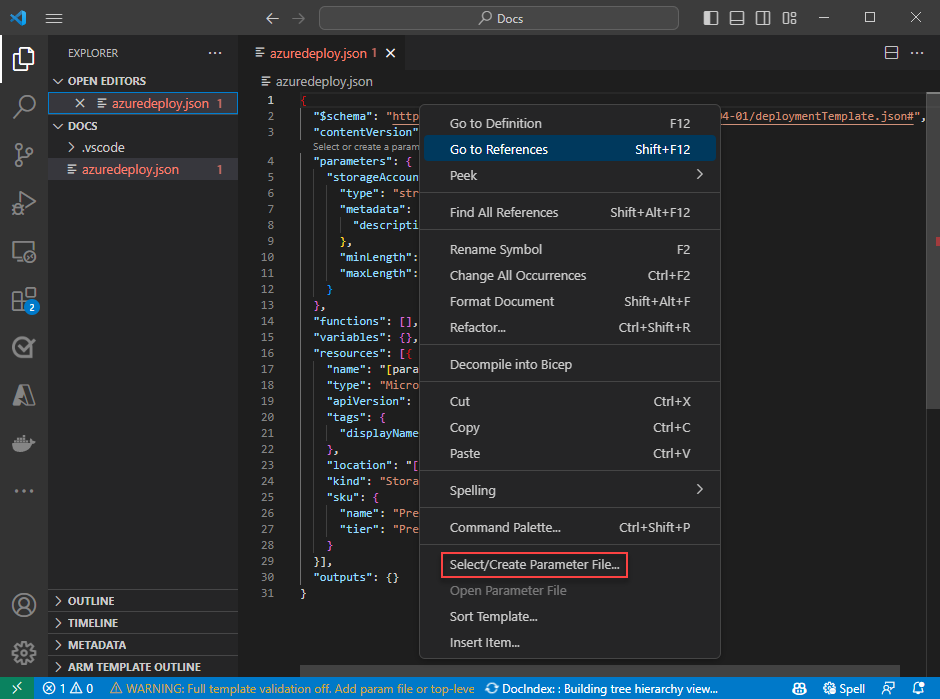
The extension makes it easy to create a parameter file from your existing templates. To do so, right-click on the template in the code editor and select Select/Create Parameter File.
Select New > All Parameters > Select a name and location for the parameter file.
This action creates a new parameter file and maps it with the template from which it was created. You can see and modify the current template/parameter file mapping in the Visual Studio Code status bar while the template is selected.

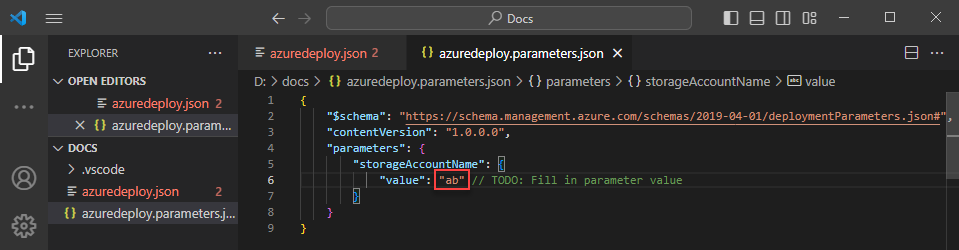
Now that the parameter file is mapped to the template, the extension validates both the template and parameter file together. To see this validation in practice, add a two-character value to the storageAccountName parameter in the parameter file and save the file.
Navigate back to the ARM template and notice the error indicating that the value doesn't meet the parameter criteria.
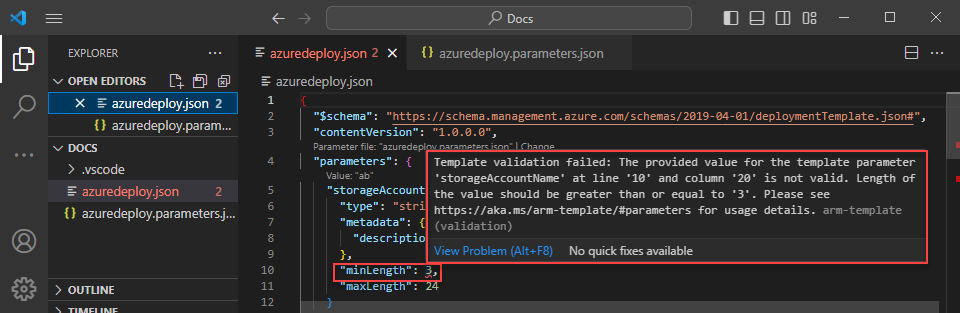
Update the value to something appropriate, save the file, and navigate back to the template. Notice that the error on the parameter is resolved.
Deploy the template
Open the integrated Visual Studio Code terminal using the ctrl + ` key combination and use either the Azure CLI or Azure PowerShell module to deploy the template.
az group create --name arm-vscode --location eastus

az deployment group create --resource-group arm-vscode --template-file azuredeploy.json --parameters azuredeploy.parameters.json
Clean up resources
When you no longer need the Azure resources, use the Azure CLI or Azure PowerShell module to delete the quickstart resource group.
az group delete --name arm-vscode