Deploy to different stages from multiple branches using Classic release pipelines
Azure DevOps Services | Azure DevOps Server 2022 - Azure DevOps Server 2019
Classic release pipelines provide a convenient graphical user interface for setting up a continuous delivery solution for your application. Classic releases can be configured to trigger deployments automatically whenever a new artifact is available. Artifact filters can be used with release triggers to deploy from multiple branches. By applying artifact filters to specific branches, you can control deployment to particular stages based on your needs.
In this article, you'll learn how to:
- Enable continuous deployment triggers.
- Release from multiple branches.
- Deploy to multiple stages.
Prerequisites
An Azure DevOps organization and a project. Create an organization or a project if you haven't already.
A working pipeline set up for your repository to build your project and generate a pipeline artifact. Create your first pipeline if you don't have one already.
Create a release pipeline
Sign in to your Azure DevOps organization, and then navigate to your project.
Select Pipelines > Releases. If this is your first release pipeline, select New Pipeline, otherwise select New > New release pipeline.
When prompted to select a template, select Start with an empty job.
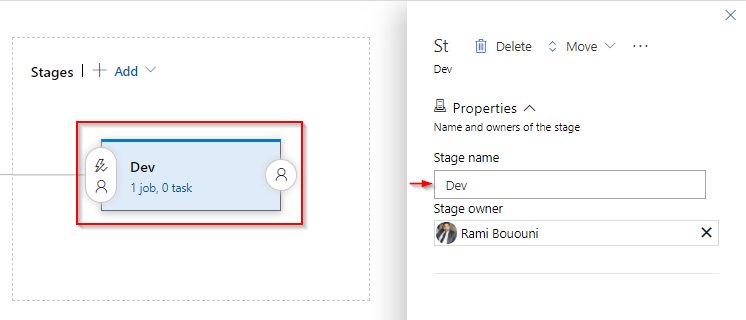
Under Stages, select the stage and rename it to Dev. The following steps show how to configure this stage to be triggered when an artifact is published from the Dev branch.

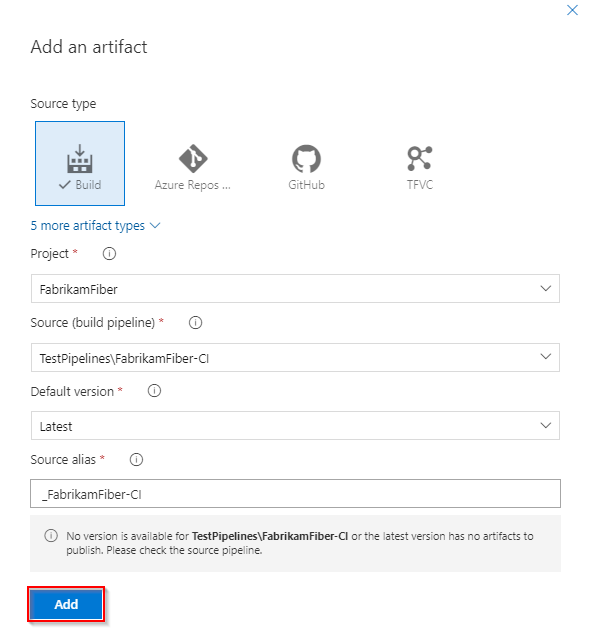
Under Artifacts, select Add to add an artifact. Specify your Source type and fill out the required fields (these vary based on the selected source type). Select Add when you're done.

Select the Continuous deployment trigger icon, and then enable the Continuous deployment trigger to create a release whenever a new artifact is available.

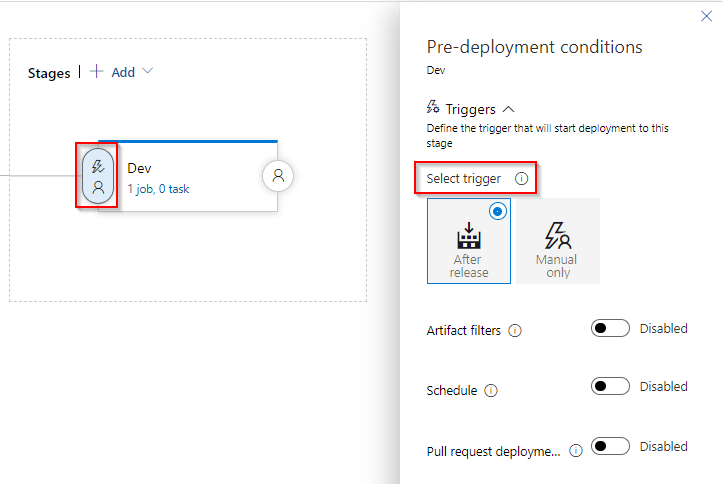
In the Dev stage, select the Pre-deployment conditions icon and set the deployment trigger to After release. This will trigger a deployment to this stage whenever a new release is created.

while still in Pre-deployment conditions, enable Artifact filters, select Add, and then specify the artifact you selected earlier and set the Build branch to Dev.

Add a new stage
Sign in to your Azure DevOps organization, and then navigate to your project.
Select Pipelines > Releases, select your release pipeline, and then select Edit.
Under Stages, select Add > New stage to add a new stage.
Select Start with an empty job when prompted to select a template.
Select your new stage and rename it to Prod. The following steps show how to configure this stage to trigger when an artifact is published from the main branch.
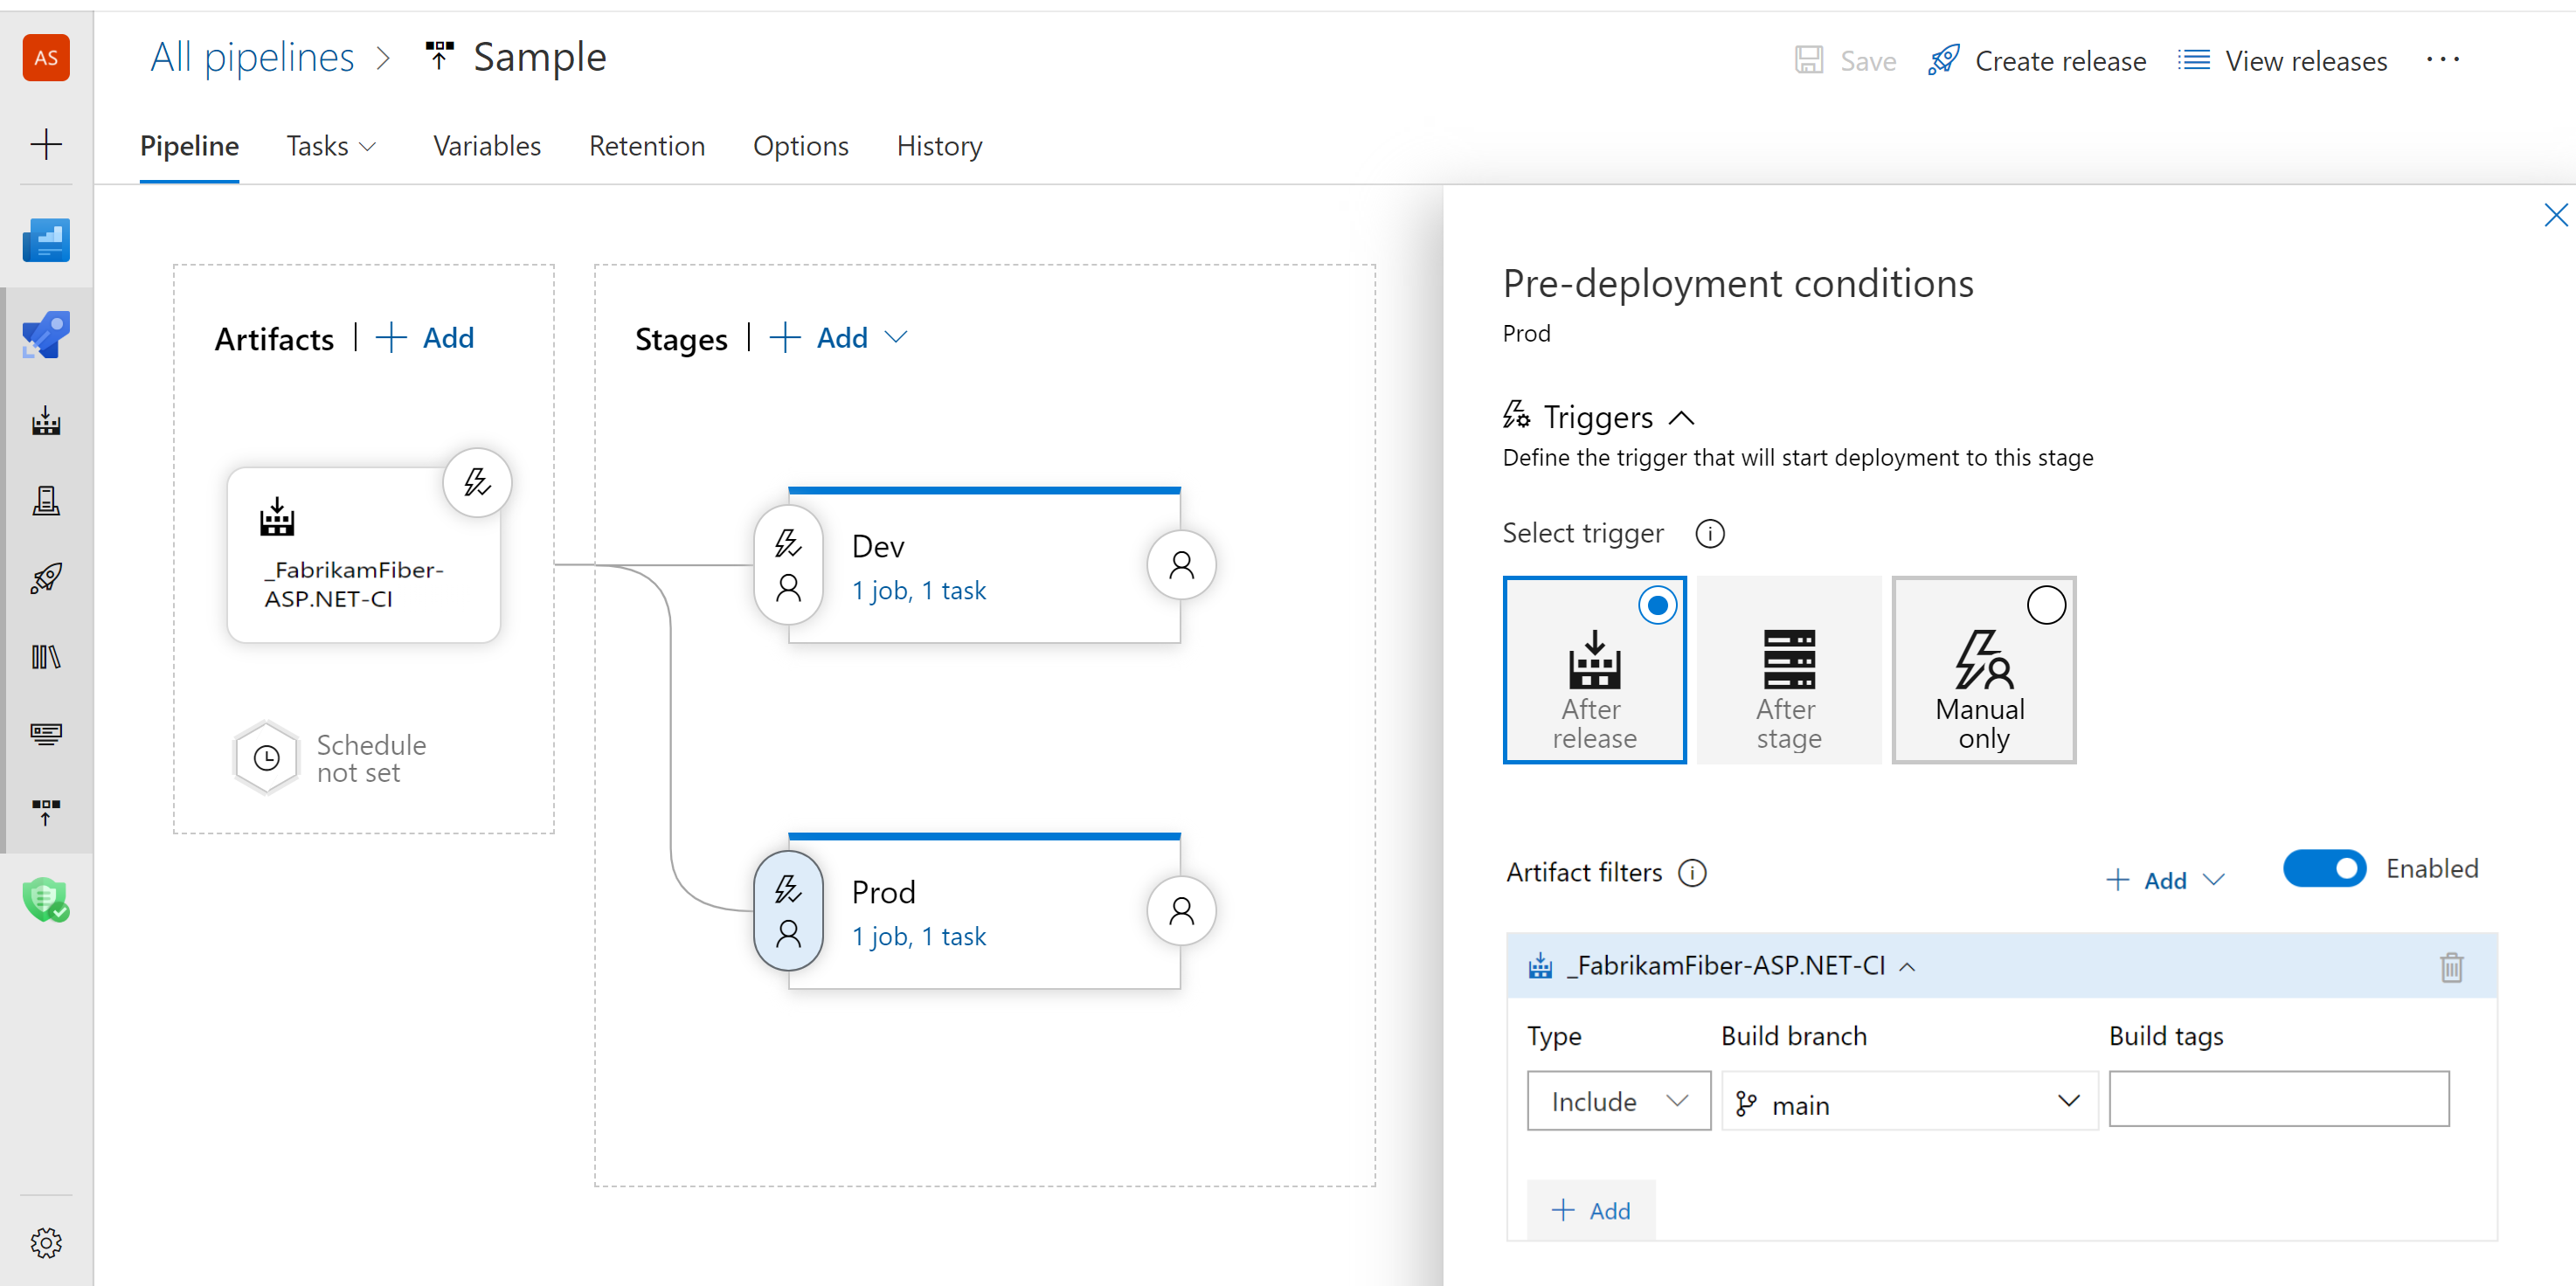
Select your Prod stage, select the Pre-deployment conditions icon, and set the deployment trigger to After release. This ensures deployment to this stage whenever a new release is created.
Select the toggle button to enable Artifact filters. Select Add, and then specify the artifact you selected earlier and set the Build branch to main.

Deploy to a specific stage
Now that you've set up your stages, every time a new artifact is available, the release pipeline will detect which branch triggered the build and deploy only to the appropriate stage.
