Napomena
Pristup ovoj stranici zahtijeva autorizaciju. Možete pokušati prijaviti se ili promijeniti direktorije.
Pristup ovoj stranici zahtijeva autorizaciju. Možeš pokušati promijeniti direktorije.
The MSSQL extension for Visual Studio Code provides built-in tools for common database operations. You can create and manage databases, search for objects, back up and restore databases, and import data from flat files, all without leaving the editor.
| Feature | Description |
|---|---|
| Database management | Create, rename, and drop databases directly from the Object Explorer. |
| Database Object Search | Find tables, views, functions, and stored procedures with type-aware search. |
| Backup database | Back up databases to disk or Azure Blob Storage with full, differential, or transaction log options. |
| Restore database | Restore databases from existing backup sets, backup files, or Azure Blob Storage. |
| Import flat file | Import CSV and TXT files into new SQL Server tables with a guided wizard. |
Tip
The features on this page are currently in preview and might change based on feedback. Join the community at GitHub Discussions to share ideas or report issues.
Database management
The MSSQL extension provides dialogs for creating, renaming, and dropping databases directly from the Object Explorer.
Create a database
In the Connections view, right-click a SQL Server instance node.
Select Create Database (Preview).
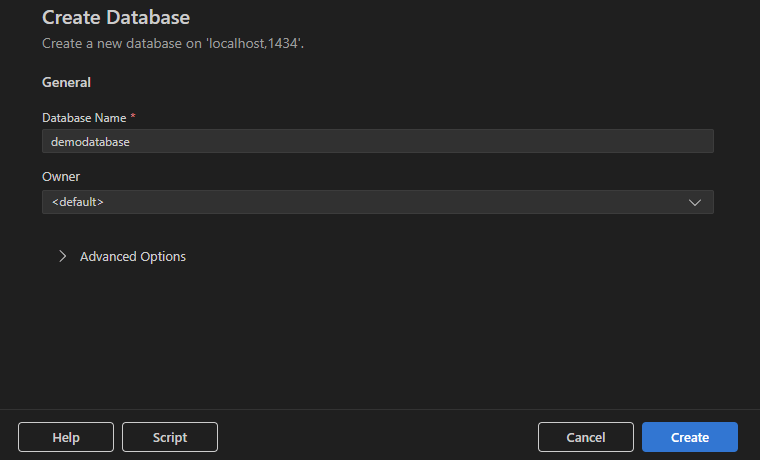
In the Create Database dialog, enter the following information:
- Database Name: Specify the name for the new database.
- Owner: Choose the database owner (defaults to
<default>).
(Optional) Expand Advanced Options to configure collation, recovery model, compatibility level, and containment type.
Select Create to create the database, or select Script to generate the equivalent T-SQL script.
After you create the database, it appears in the server's Databases list.
Rename a database
In the Connections view, right-click a database node.
Select Rename Database (Preview).
In the inline input box, enter the new name and press Enter to confirm, or press Escape to cancel.

Drop a database
In the Connections view, right-click a database node.
Select Drop Database (Preview).
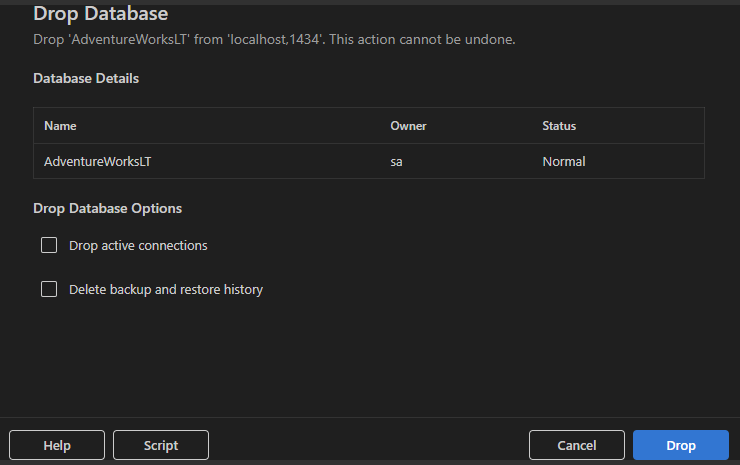
In the Drop Database dialog, review the database details (name, owner, and status).
(Optional) Select additional options:
- Drop active connections: Terminates all active connections to the database before dropping.
- Delete backup and restore history: Removes the backup and restore history for the database.
Select Drop to permanently delete the database, or select Script to generate the equivalent T-SQL script.
Important
Dropping a database is irreversible. Make sure you have a backup before proceeding.
Database Object Search
The Database Object Search feature lets you quickly find tables, views, functions, and stored procedures across your databases. You can search by name, filter by object type or schema, and run common actions directly from the results list.
Open Database Object Search
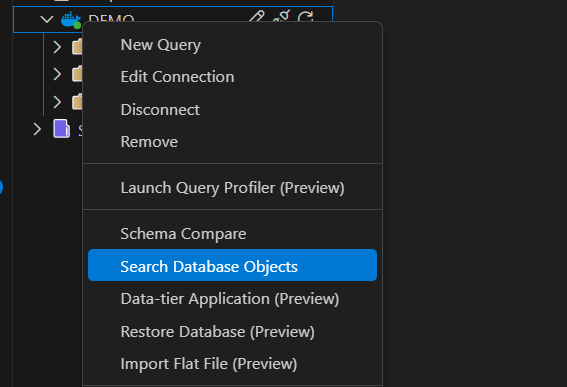
In the Connections view, right-click a server or database node.
Select Search Database Objects.
Search and filter
In the Database Object Search view, type an object name (partial matches work) or use type prefixes to narrow your search:
t:for tablesv:for viewsf:for functionssp:for stored procedures
For example, t:Customer or sp:GetOrders.
You can also switch databases from the dropdown list, filter by type or schema, and refresh results.

Actions
Each result row includes an Actions menu (...) with common operations such as scripting options, Edit Data, Modify Data, and Copy Object Name.

Backup database
The MSSQL extension provides a guided dialog for backing up SQL Server databases. You can save backups to disk or to Azure Blob Storage.
Start a backup
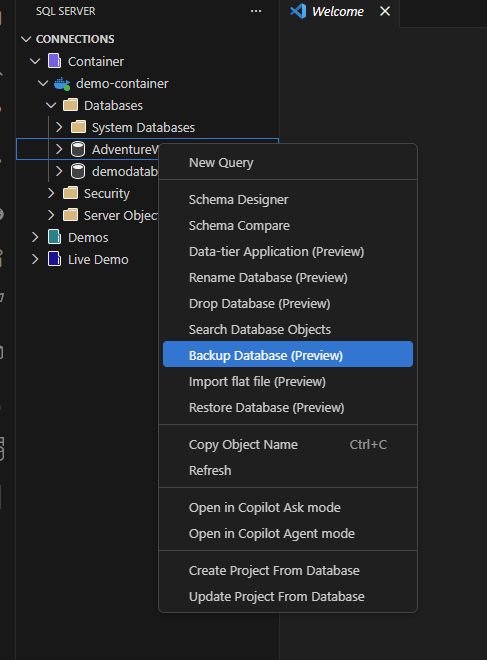
In the Connections view, expand a SQL Server instance and then expand Databases.
Right-click the database you want to back up.
Select Backup Database (Preview).
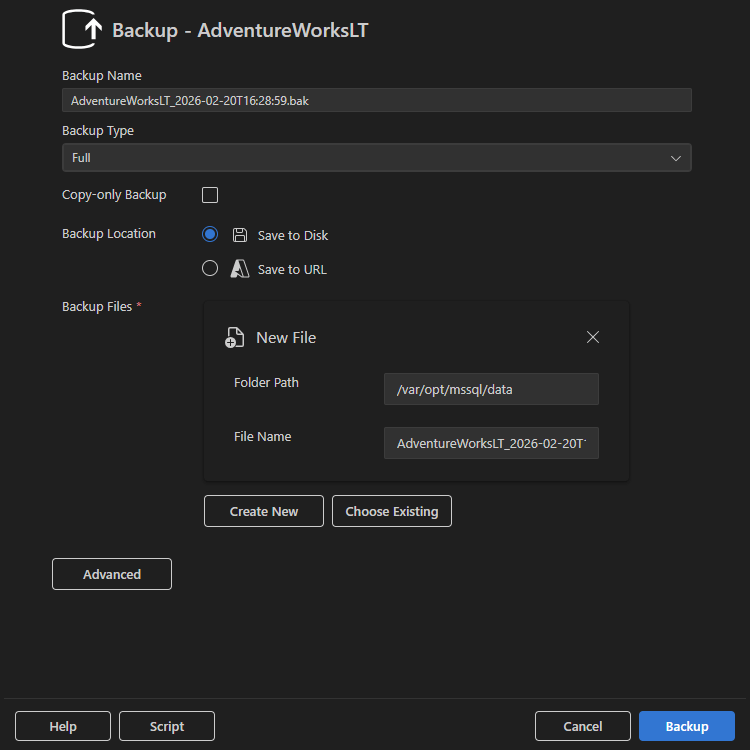
Backup options
In the Backup dialog, configure the following settings:
- Backup Name: Auto-generated by default using the database name and timestamp. You can edit this value.
- Backup Type: Choose Full, Differential, or Transaction Log.
- Copy-only Backup: Creates a backup that doesn't affect the normal backup chain. This type is useful for ad hoc backups.
Save to disk
Select Save to Disk to save the backup file to a location accessible by the SQL Server instance. Typically, you use this option for local or container-based SQL Server environments.
Save to URL (Azure Blob Storage)
Select Save to URL to save the backup to Azure Blob Storage. When you select this option, provide the following information:
- Azure Account: Select an existing signed-in account or select Add account to sign in.
- Tenant: The tenant associated with the account.
- Subscription: The Azure subscription containing the storage account.
- Storage Account: The Azure Storage Account where the backup is stored.
- Blob Container: The container where the
.bakfile is uploaded.
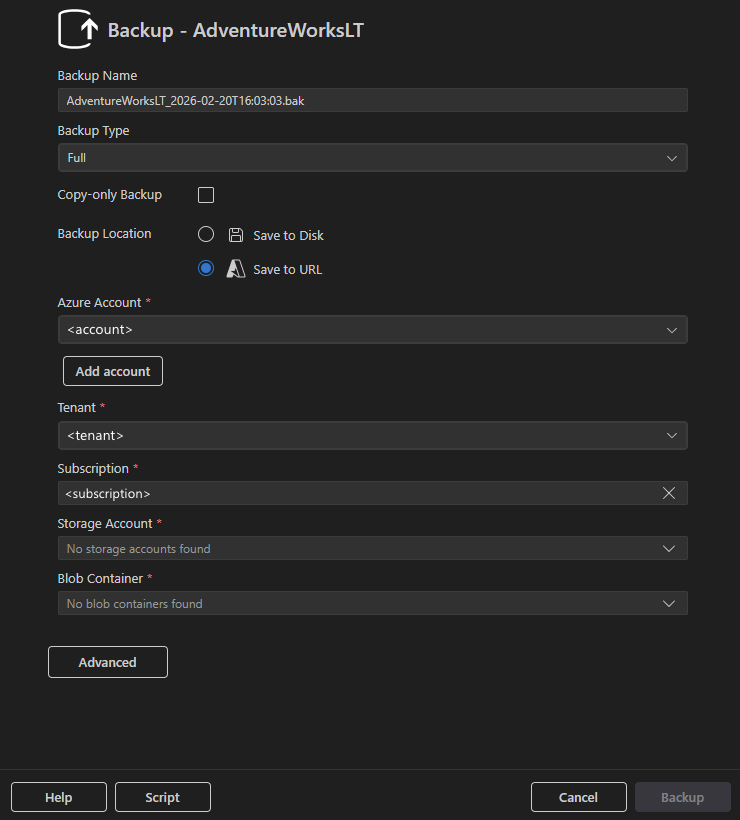
Select Backup to execute the operation, Script to generate the equivalent T-SQL script, or Cancel to close the dialog.
Restore database
The MSSQL extension provides a guided dialog for restoring SQL Server databases from multiple sources.
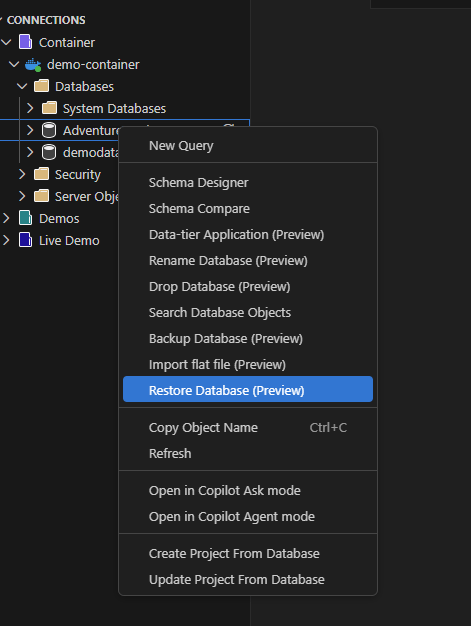
Start a restore
In the Connections view, expand a SQL Server instance and then expand Databases.
Right-click a database.
Select Restore Database (Preview).
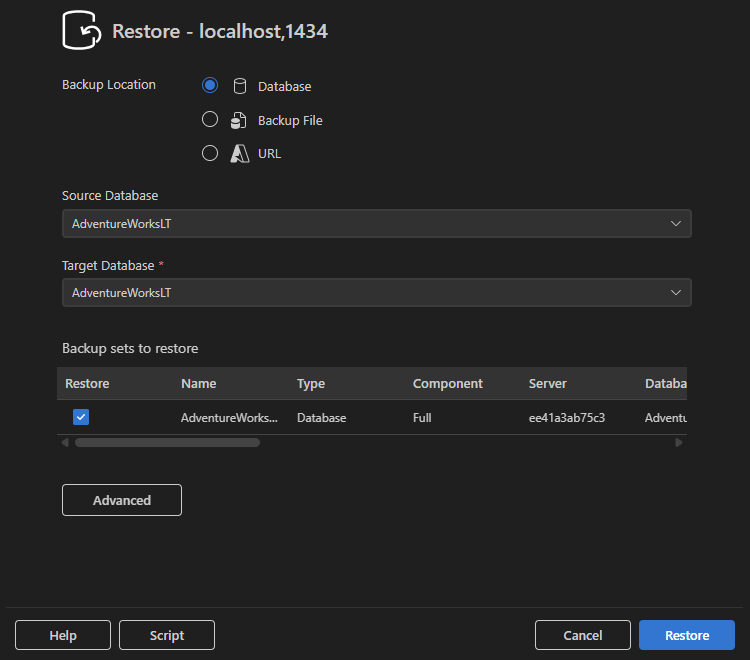
Restore from database
Select Database as the backup location to restore from an existing backup set on the same SQL Server instance.
- Select the Source Database that contains the backup history.
- Choose the Target Database to restore into.
- Review the available backup sets and select which ones to restore.
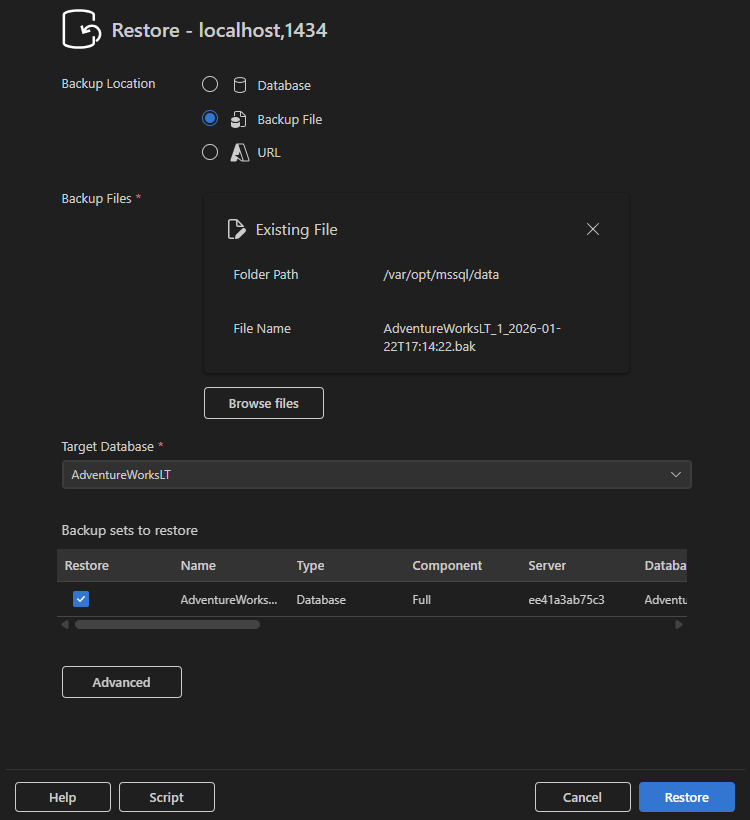
Restore from backup file
Select Backup File to restore from a .bak file accessible to the SQL Server instance.
- Select an existing file or use Browse files to locate a backup file.
- Specify the Target Database name.
- Review and select backup sets to restore.
Restore from URL (Azure Blob Storage)
Select URL to restore from a backup stored in Azure Blob Storage.
- Sign in with your Azure Account or select Add account.
- Select the Tenant, Subscription, Storage Account, and Blob Container.
- Select the Blob containing the backup file.
- Specify the Target Database name.

Select Restore to execute the operation, Script to generate the equivalent T-SQL script, or Cancel to close the dialog.
Import flat file
The Import Flat File feature provides a guided wizard that creates a new SQL Server table and populates it with data from a structured text file.
Supported file types
Currently, the following text-based flat files are supported:
.csv: Comma-separated values.txt: Delimited or fixed-width text files
Note
File formats such as Excel (.xlsx), JSON, XML, or Parquet aren't currently supported.
Start the import
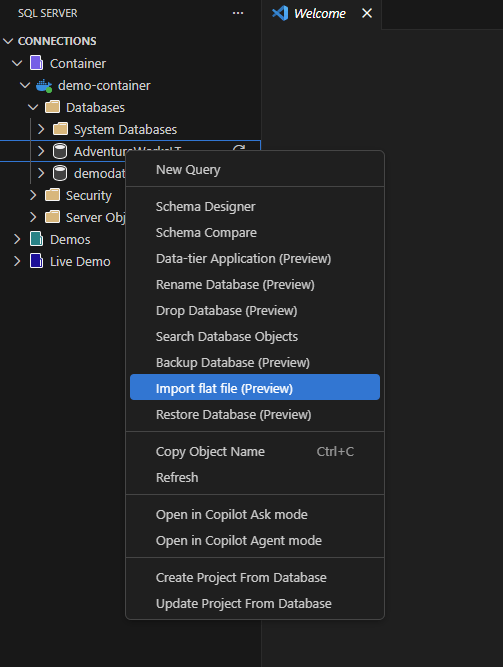
In the Connections view, expand your SQL Server connection and then expand Databases.
Right-click the database where you want to create the table.
Select Import flat file (Preview).
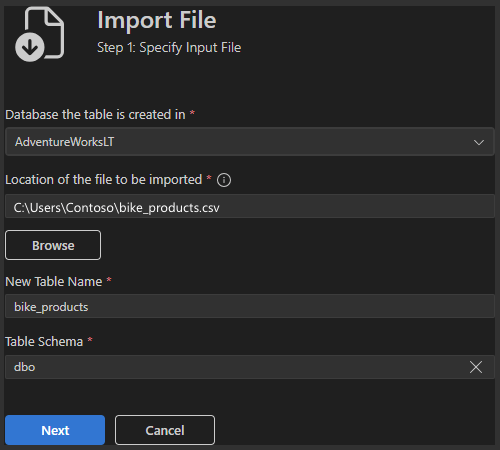
Step 1: Specify input file
In the first step, define where the data is imported and how the new table is created.
- Database: Select the target database.
- Location of the file to be imported: Enter the local file path or use Browse to select a file.
- New Table Name: Specify the name of the table to create.
- Table Schema: Choose the schema (for example,
dbo).
Select Next to continue.
Step 2: Preview data
The wizard analyzes the input file and generates a preview of the data. It automatically infers column names and data types. Use this step to validate column alignment, delimiters, and data formatting.
Select Next if the preview looks correct. If not, go back and verify the input file.

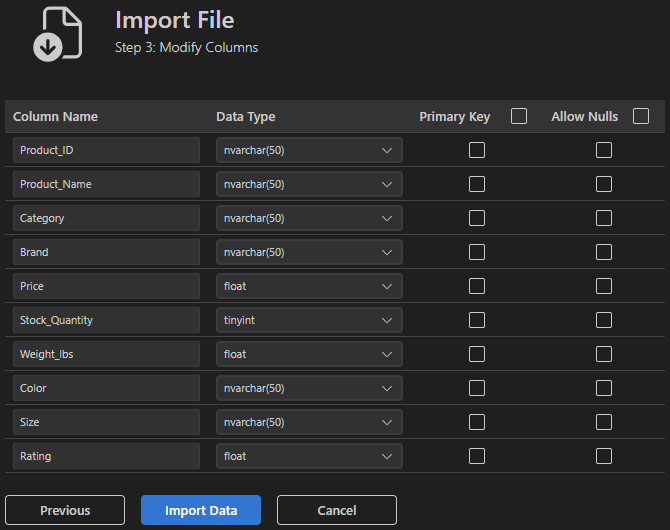
Step 3: Modify columns
Fine-tune the table schema before importing. For each column, you can:
- Edit the Column Name.
- Change the Data Type (for example, nvarchar, float, tinyint).
- Mark a column as a Primary Key.
- Configure Allow Nulls.
Select Import Data to create the table and import the data.
Feedback and support
If you have ideas, feedback, or want to engage with the community, join the discussion at https://aka.ms/vscode-mssql-discussions. To report a bug, visit https://aka.ms/vscode-mssql-bug. To request a new feature, go to https://aka.ms/vscode-mssql-feature-request.