Build a C# .NET app with WinUI 3 and Win32 interop
In this article, we step through how to build a basic C# .NET application with WinUI 3 and Win32 interop capabilities using Platform Invocation Services (PInvoke).
Prerequisites
- Set up your development environment as described in Install tools for the Windows App SDK.
- Test your configuration by following along with the steps in Create your first WinUI 3 project.
Basic managed C#/.NET app
For this example, we'll specify the location and size of the app window, convert and scale it for the appropriate DPI, disable the window minimize and maximize buttons, and finally query the current process to show a list of modules loaded in the current process.
We're going to build our example app from the initial template application (see Prerequisites). Also see WinUI 3 templates in Visual Studio.
The MainWindow.xaml file
With WinUI 3, you can create instances of the Window class in XAML markup.
The XAML Window class has been extended to support desktop windows, turning it into an abstraction of each of the low-level window implementations used by the UWP and desktop app models. Specifically, CoreWindow for UWP and window handles (or HWNDs) for Win32.
The following code shows the MainWindow.xaml file from the initial template app, which uses the Window class as the root element for the app.
<Window
    x:Class="WinUI_3_basic_win32_interop.MainWindow"
    xmlns="http://schemas.microsoft.com/winfx/2006/xaml/presentation"
    xmlns:x="http://schemas.microsoft.com/winfx/2006/xaml"
    xmlns:local="using:WinUI_3_basic_win32_interop"
    xmlns:d="http://schemas.microsoft.com/expression/blend/2008"
    xmlns:mc="http://schemas.openxmlformats.org/markup-compatibility/2006"
    mc:Ignorable="d">

    <StackPanel Orientation="Horizontal" HorizontalAlignment="Center" VerticalAlignment="Center">
        <Button x:Name="myButton" Click="myButton_Click">Click Me</Button>
    </StackPanel>
</Window>
Configuration
To call Win32 APIs exposed in User32.dll, add the open source PInvoke.User32 NuGet package to the VS project (from the Visual Studio menus, select Tools -> NuGet Package Manager -> Manage NuGet Packages for Solution... and search for "Pinvoke.User32"). For more details, see Calling Native Functions from Managed Code.
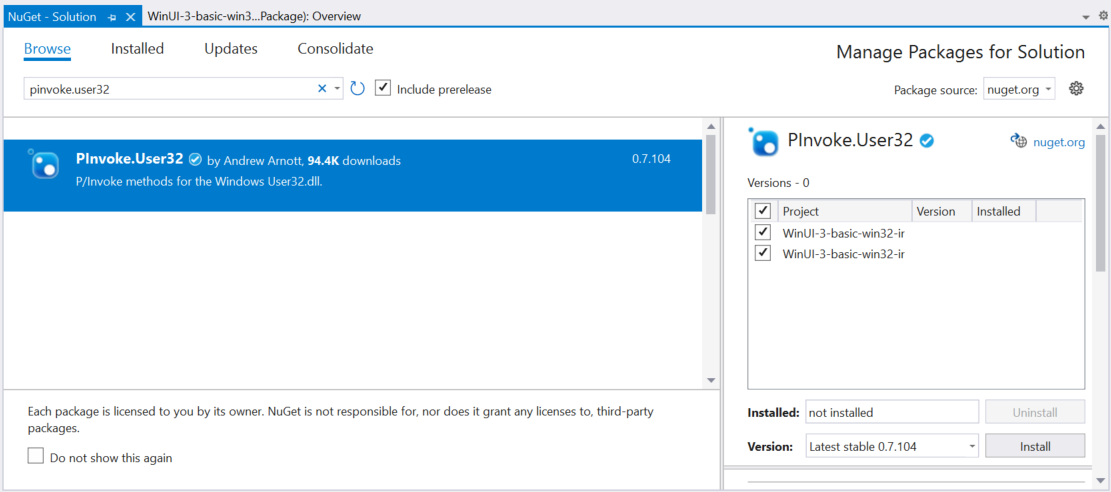
NuGet Package Manager with PInvoke.User32 selected.Confirm installation was successful by checking the Packages folder in the VS project.

Solution Explorer Packages with PInvoke.User32.Next, double-click the application project file (or right click and select "Edit project file") to open the file in a text editor and confirm the project file now includes the NuGet
PackageReferencefor "PInvoke.User32".<Project Sdk="Microsoft.NET.Sdk"> <PropertyGroup> <OutputType>WinExe</OutputType> <TargetFramework>net6.0-windows10.0.19041.0</TargetFramework> <TargetPlatformMinVersion>10.0.17763.0</TargetPlatformMinVersion> <RootNamespace>WinUI_3_basic_win32_interop</RootNamespace> <ApplicationManifest>app.manifest</ApplicationManifest> <Platforms>x86;x64;arm64</Platforms> <RuntimeIdentifiers>win10-x86;win10-x64;win10-arm64</RuntimeIdentifiers> <UseWinUI>true</UseWinUI> </PropertyGroup> <ItemGroup> <PackageReference Include="Microsoft.ProjectReunion" Version="0.8.1" /> <PackageReference Include="Microsoft.ProjectReunion.Foundation" Version="0.8.1" /> <PackageReference Include="Microsoft.ProjectReunion.WinUI" Version="0.8.1" /> <PackageReference Include="PInvoke.User32" Version="0.7.104" /> <Manifest Include="$(ApplicationManifest)" /> </ItemGroup> </Project>
Code
In the
App.xaml.cscode-behind file, we get a handle to the Window using the WindowNative.GetWindowHandle WinRT COM interop method (see Retrieve a window handle (HWND)).This method is called from the app's OnLaunched handler, as shown here:
/// <summary>
/// Invoked when the application is launched normally by the end user.  Other entry points
/// will be used such as when the application is launched to open a specific file.
/// </summary>
/// <param name="args">Details about the launch request and process.</param>
protected override void OnLaunched(Microsoft.UI.Xaml.LaunchActivatedEventArgs args)
{
    m_window = new MainWindow();

    var hwnd = WinRT.Interop.WindowNative.GetWindowHandle(m_window);

    SetWindowDetails(hwnd, 800, 600);

    m_window.Activate();
}
We then call a
SetWindowDetailsmethod, passing the Window handle and preferred dimensions. Remember to add theusing static PInvoke.User32;directive.In this method:
- We call GetDpiForWindow to get the dots per inch (dpi) value for the window (Win32 uses actual pixels while WinUI 3 uses effective pixels). This dpi value is used to calculate the scale factor and apply it to the width and height specified for the window.
- We then call SetWindowPos to specify the desired location of the window.
- Finally, we call SetWindowLong to disable the Minimize and Maximize buttons.
private static void SetWindowDetails(IntPtr hwnd, int width, int height)
{
    var dpi = GetDpiForWindow(hwnd);
    float scalingFactor = (float)dpi / 96;
    width = (int)(width * scalingFactor);
    height = (int)(height * scalingFactor);

    _ = SetWindowPos(hwnd, SpecialWindowHandles.HWND_TOP,
                                0, 0, width, height,
                                SetWindowPosFlags.SWP_NOMOVE);
    _ = SetWindowLong(hwnd,
           WindowLongIndexFlags.GWL_STYLE,
           (SetWindowLongFlags)(GetWindowLong(hwnd,
              WindowLongIndexFlags.GWL_STYLE) &
              ~(int)SetWindowLongFlags.WS_MINIMIZEBOX &
              ~(int)SetWindowLongFlags.WS_MAXIMIZEBOX));
}
In the MainWindow.xaml file, we use a ContentDialog with a ScrollViewer to display a list of all the modules loaded for the current process.
<StackPanel Orientation="Horizontal" HorizontalAlignment="Center" VerticalAlignment="Center">
    <Button x:Name="myButton" Click="myButton_Click">Display loaded modules</Button>

    <ContentDialog x:Name="contentDialog" CloseButtonText="Close">
        <ScrollViewer>
            <TextBlock x:Name="cdTextBlock" TextWrapping="Wrap" />
        </ScrollViewer>
    </ContentDialog>

</StackPanel>
We then replace the
MyButton_Clickevent handler with the following code.Here, we get a reference to the current process by calling GetCurrentProcess. We then iterate through the collection of Modules and append the filename of each ProcessModule to our display string.
private async void myButton_Click(object sender, RoutedEventArgs e)
{
    myButton.Content = "Clicked";

    var description = new System.Text.StringBuilder();
    var process = System.Diagnostics.Process.GetCurrentProcess();
    foreach (System.Diagnostics.ProcessModule module in process.Modules)
    {
        description.AppendLine(module.FileName);
    }

    cdTextBlock.Text = description.ToString();
    await contentDialog.ShowAsync();
}
Compile and run the app.
After the window appears, select the "Display loaded modules" button.
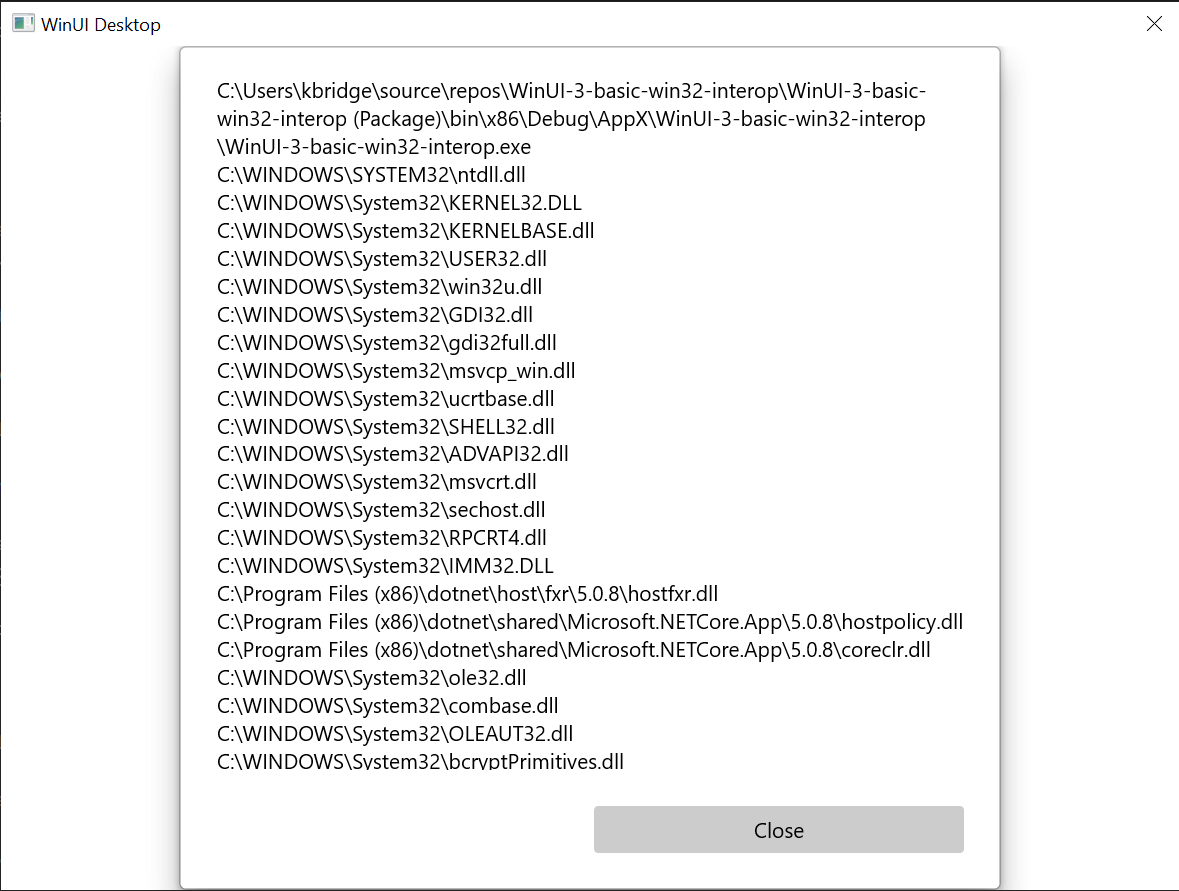
The basic Win32 interop application described in this topic.
Summary
In this topic we covered accessing the underlying window implementation (in this case Win32 and HWNDs) and using Win32 APIs along with the WinRT APIs. This demonstrates how you can use existing desktop application code when creating new WinUI 3 desktop apps.
For a more extensive sample, see the AppWindow gallery sample in the Windows App SDK Samples GitHub repo.
See also

Windows developer
Váš názor
Připravujeme: V průběhu roku 2024 budeme postupně vyřazovat problémy z GitHub coby mechanismus zpětné vazby pro obsah a nahrazovat ho novým systémem zpětné vazby. Další informace naleznete v tématu: https://aka.ms/ContentUserFeedback.
Odeslat a zobrazit názory pro