Localize your first scenario
In this tutorial, we'll walk through the steps required to localize a custom scenario.
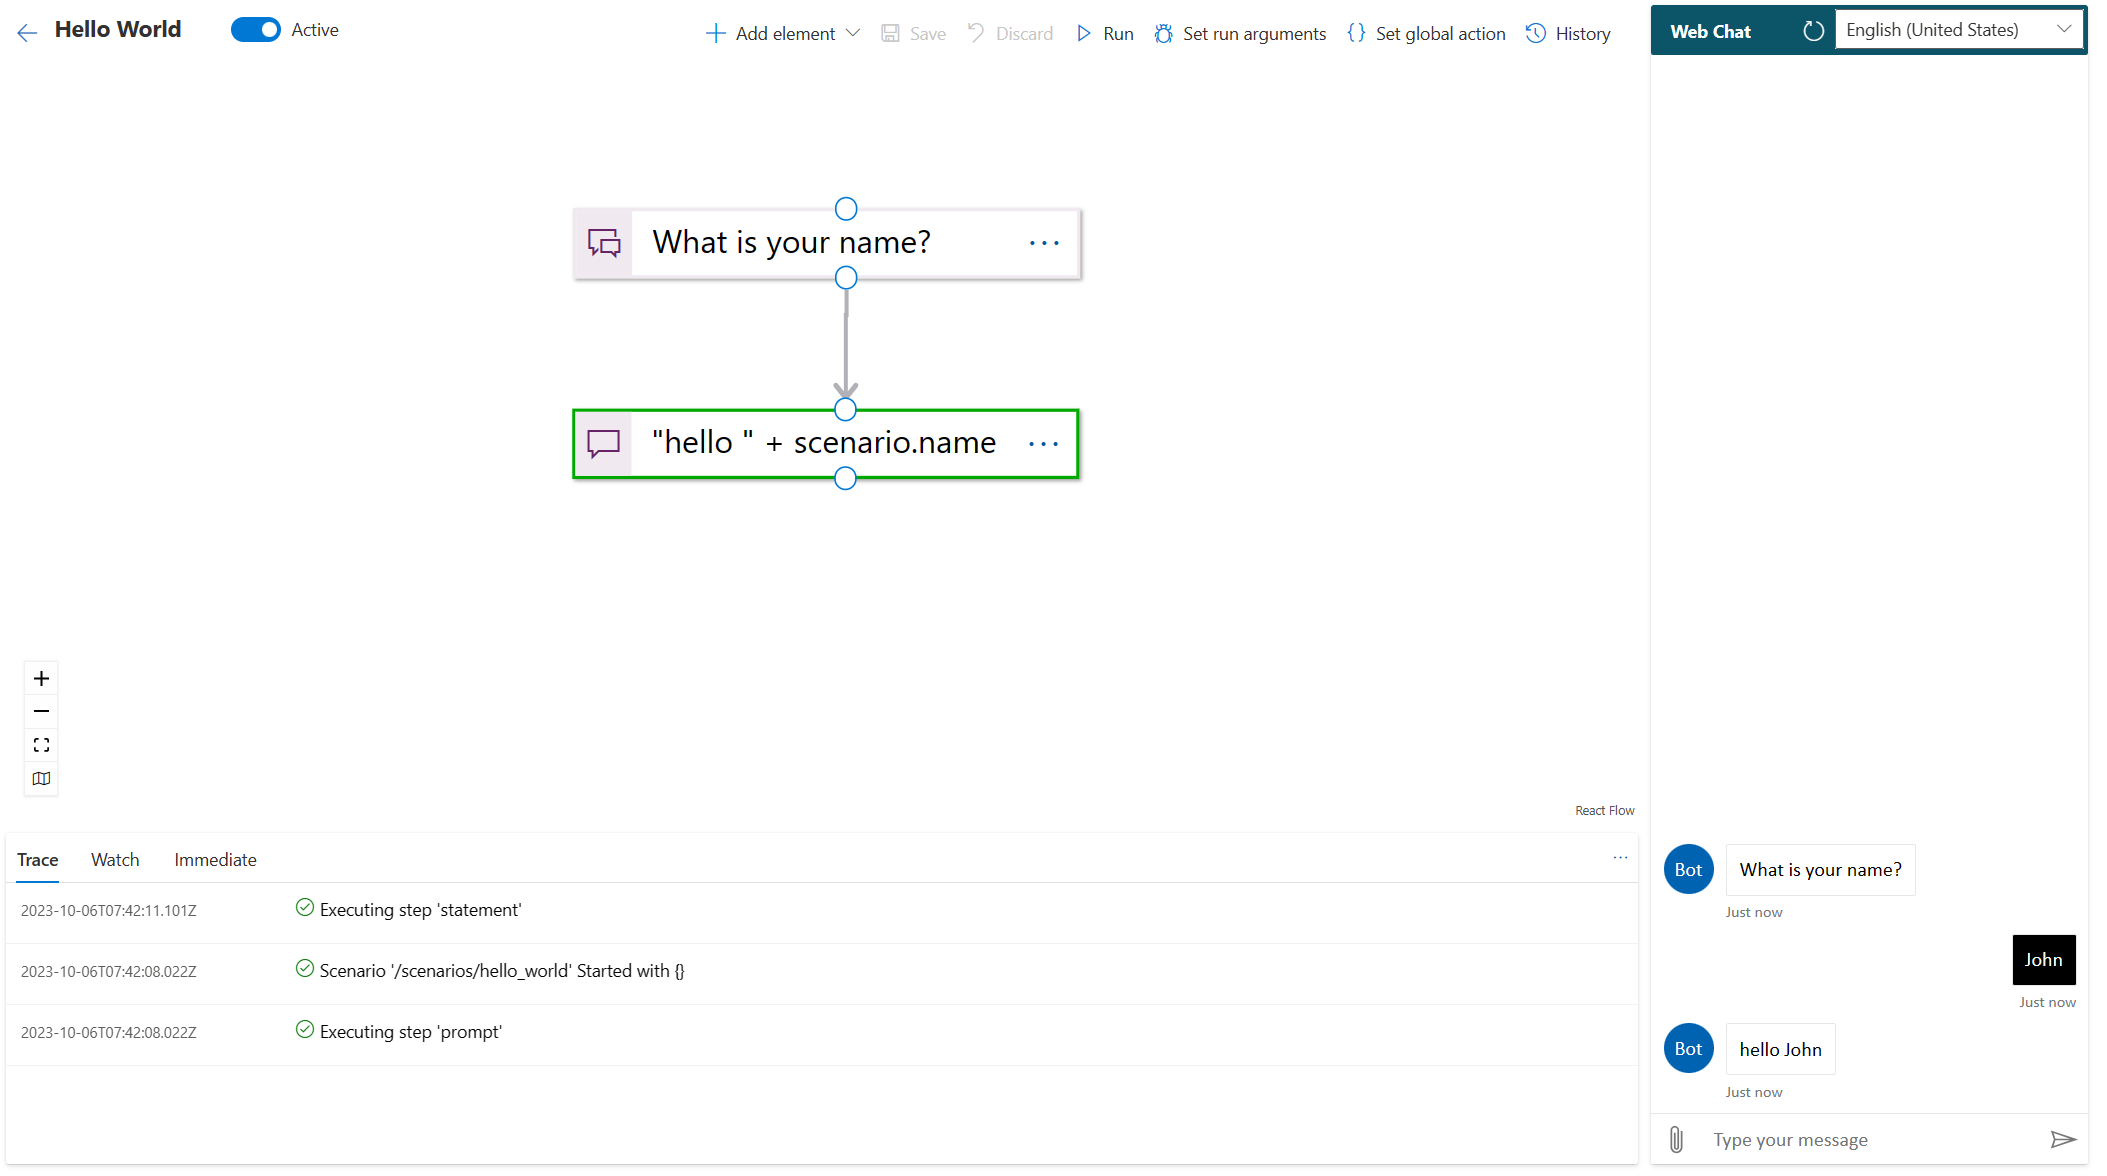
Before localizing, we build a "Hello World" custom scenario in English (en-US). It's easier to build your scenario logic in English and then "fetch" the strings in the localization manager.

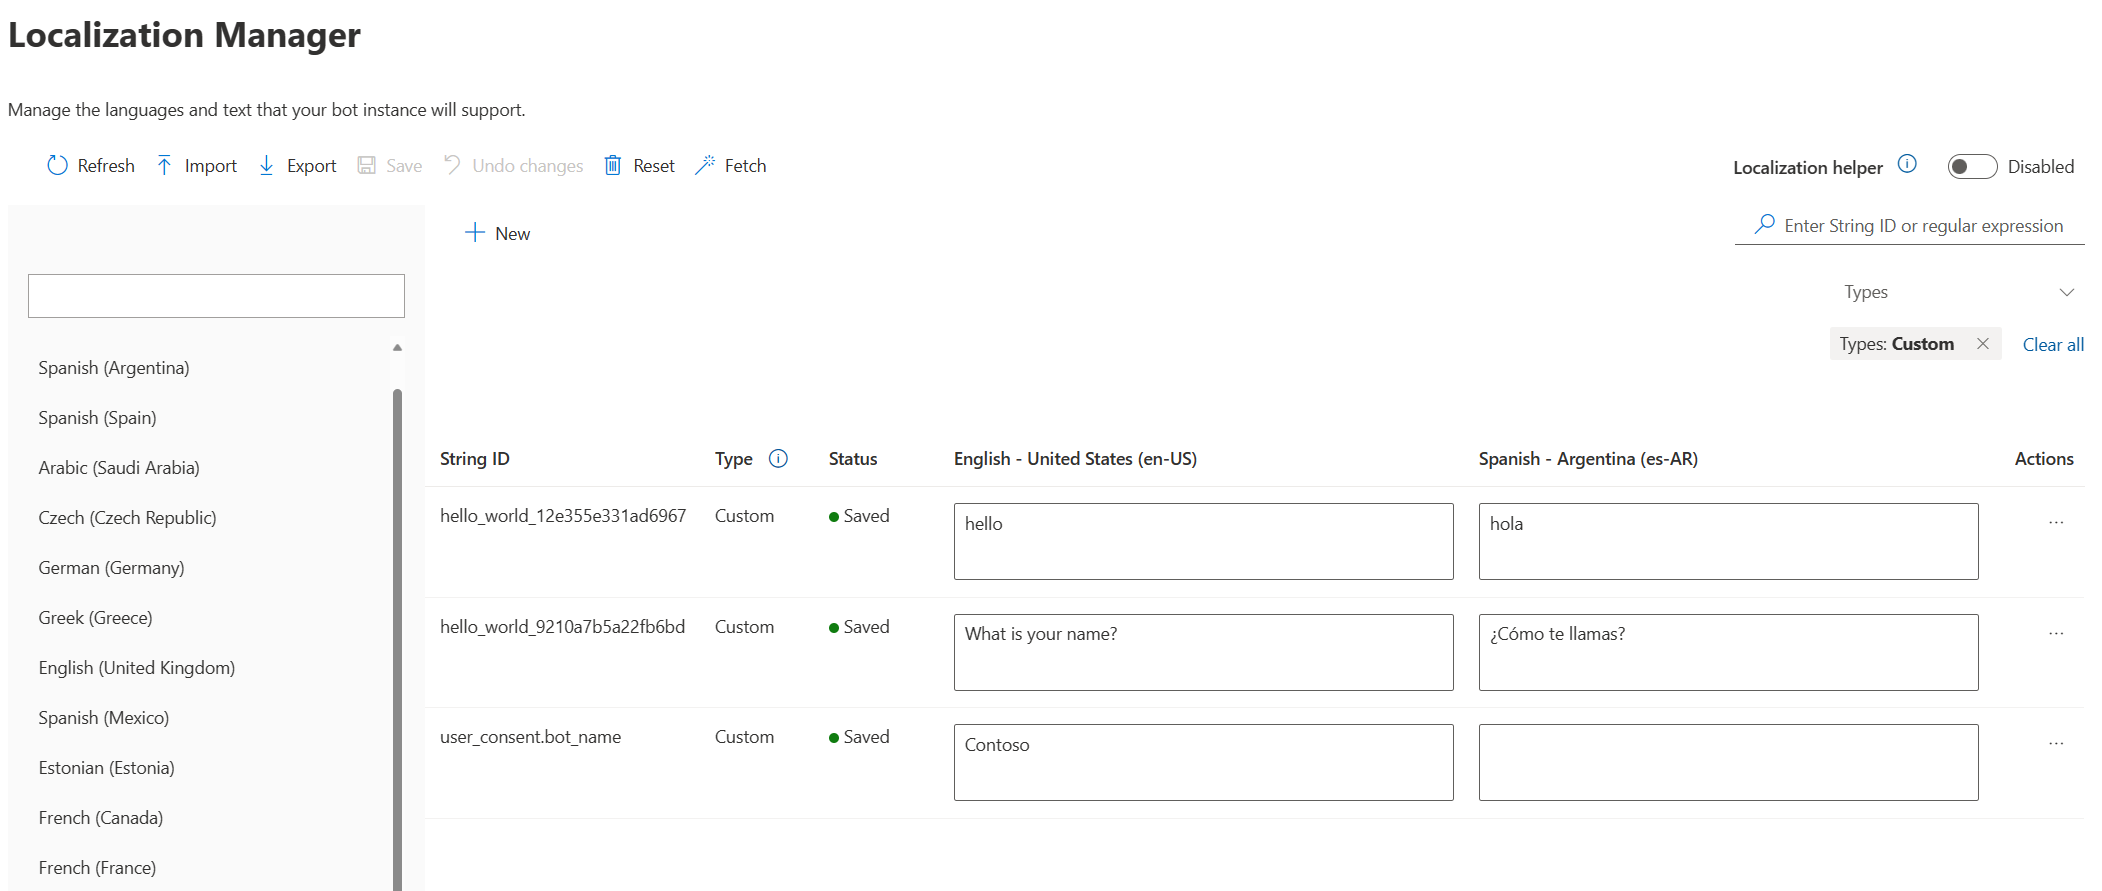
Once you have a working scenario in English, navigate to Configuration > Localization and use the "Fetch" control. The localization manager will import all the English strings from the statement and prompt steps in your custom scenarios. Use the "Search" bar to filter the strings from the welcome scenario (the string IDs are prefixed with the scenario name).

Select the Spanish locale and add a column for Spanish strings. You can then add a Spanish translation in ES-ES column and save the changes.

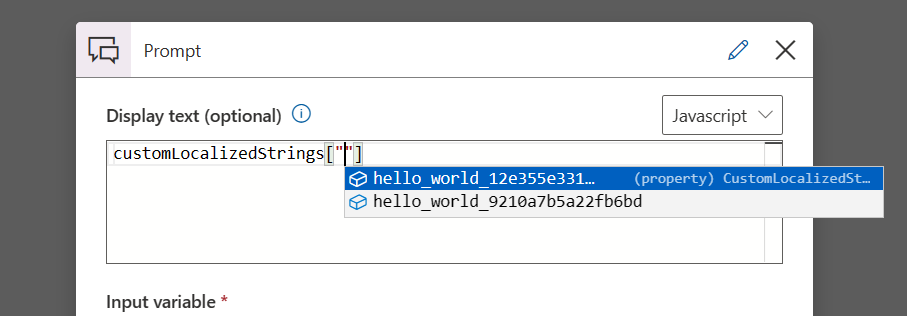
You should now return to your Hello World scenario and modify the statement and prompt steps to consume the new localized strings we created. In the text field, comment out the static text and use the customLocalizedString(<stringID>) function to bring the value of the string dynamically based on the locale. Use CTRL + SPACE to automatically suggest strings from the localization manager.

Start typing to filter the list and hit enter to select a string
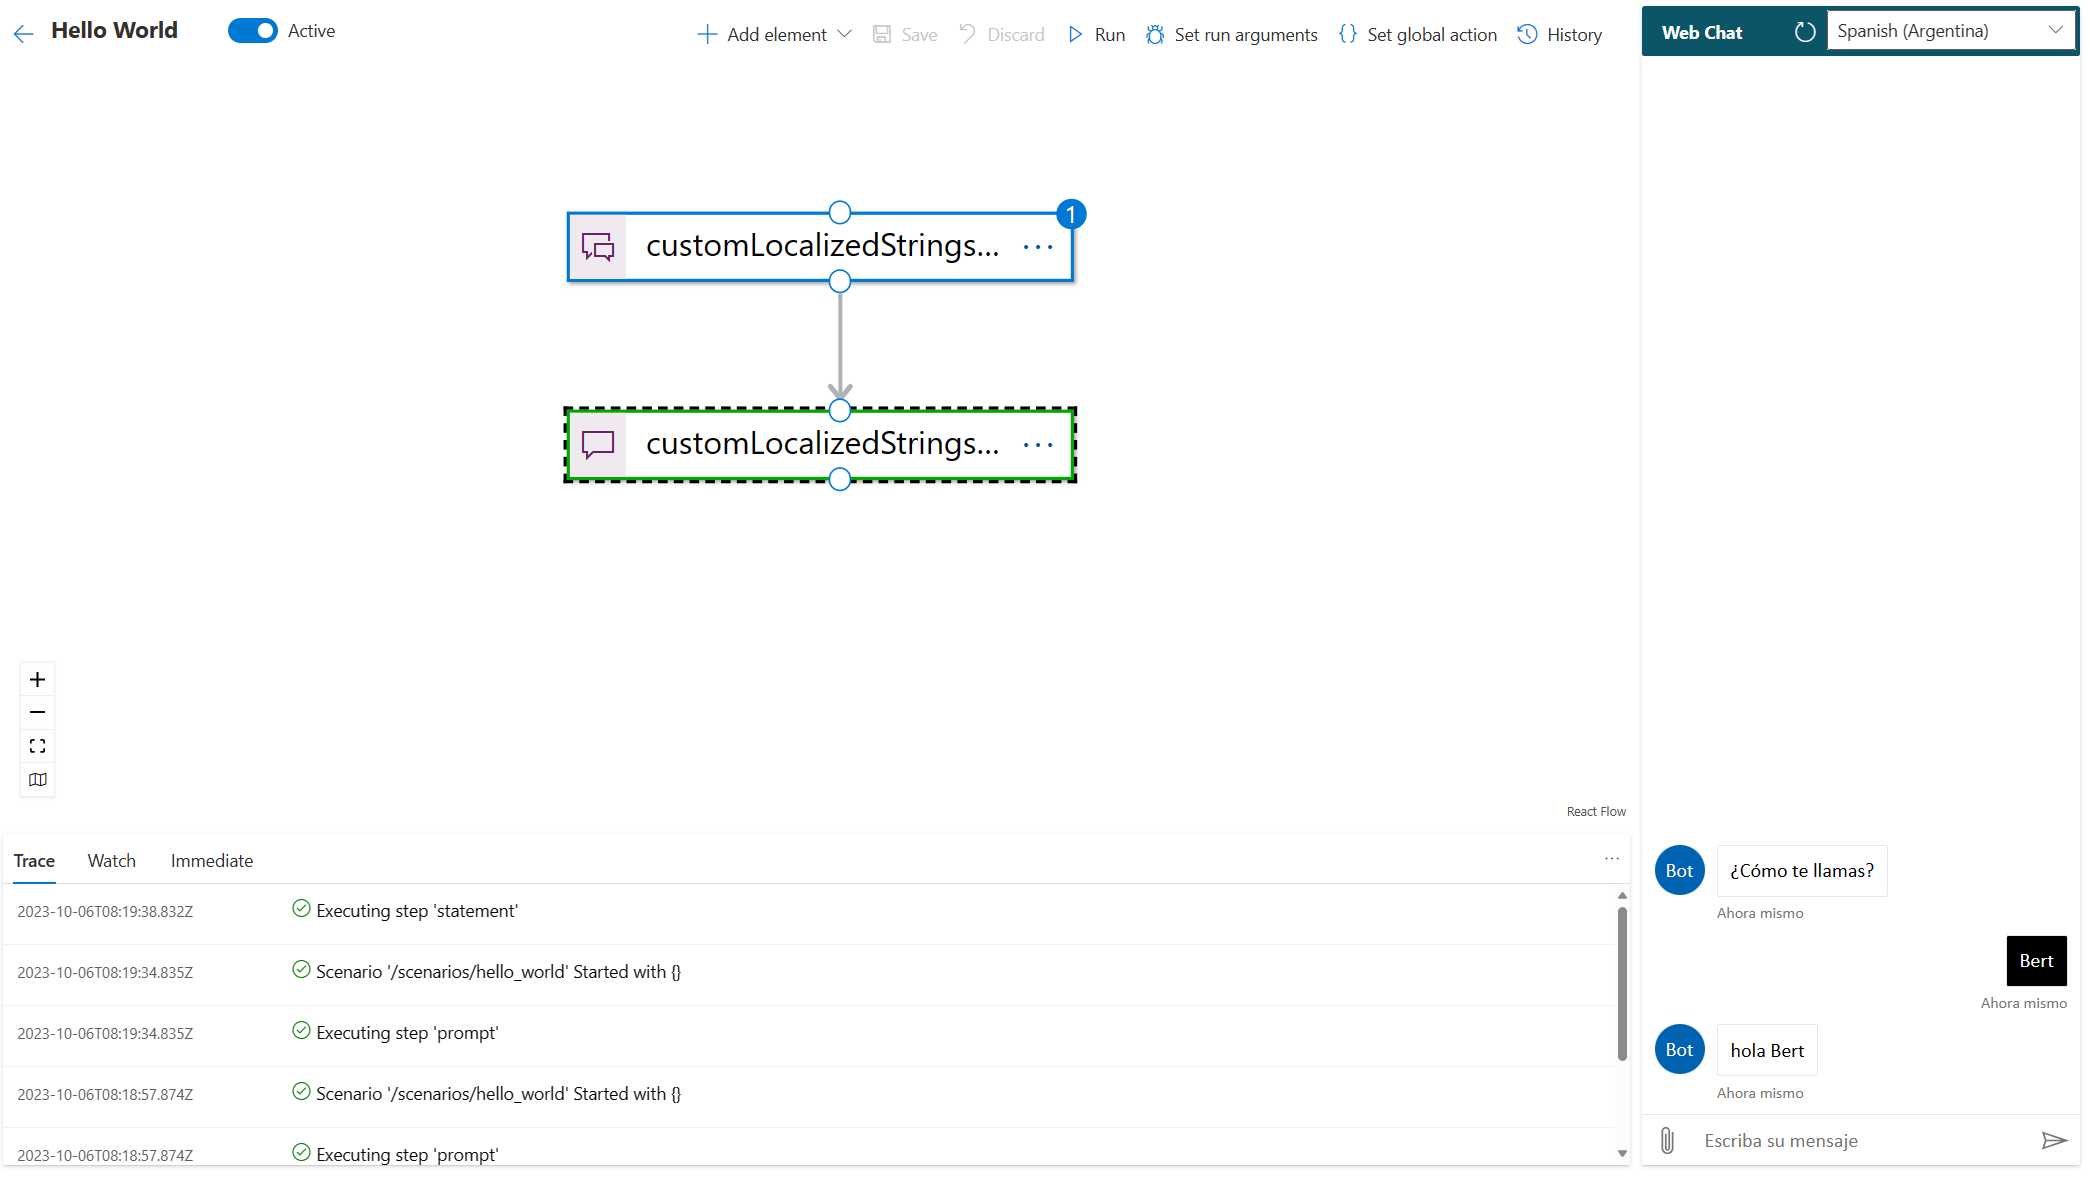
You should repeat this for both the statement and the prompt steps. You're now ready to run your scenario in Spanish. In the debugging webchat, select the es-ES locale and run the scenario.

If the language and locale in the query string match a language available for the scenario, the correct language is displayed. If an exact match for the locale isn't found, the bot will try to match the language from a different locale. For example, if ES-MX (Spanish Mexico) isn't available, the bot will look for another variant of Spanish. If no variants are found, the bot will default to English.
Well done, you have successfully localized your first scenario.