Poznámka:
Přístup k této stránce vyžaduje autorizaci. Můžete se zkusit přihlásit nebo změnit adresáře.
Přístup k této stránce vyžaduje autorizaci. Můžete zkusit změnit adresáře.
Using JavaScript in WebView2 controls allows you to customize native apps to meet your requirements. This article explores how to use JavaScript in WebView2, and reviews how to develop using advanced WebView2 features and functions.
Before you begin
This article assumes that you already have a working project. If you don't have a project, and want to follow along, see Get started with WebView2.
Basic WebView2 functions
Use the following functions to embed JavaScript in the native-side code of your WebView2 app:
| API | Description |
|---|---|
| ExecuteScriptAsync | Run JavaScript in a WebView2 control. Call this method after the page Document Object Model (DOM) content is loaded or the navigation is completed. See Get started with WebView2. |
| AddScriptToExecuteOnDocumentCreatedAsync | Runs on every page when the DOM is created. Call this method after the CoreWebView2 is initialized. |
Scenario: ExecuteScript JSON-encoded results
Because the result of ExecuteScriptAsync is JSON-encoded, if the result of evaluating the JavaScript is a string, your native-side code will receive a JSON-encoded string, not the value of the string.
For example, the following native-side code executes script that results in a string. The resulting string includes a quote at the start, a quote at the end, and escaping slashes:
string result = await coreWebView2.ExecuteScriptAsync(@"'example'");
Debug.Assert(result == "\"example\"");
The script returns a string that ExecuteScript JSON-encodes for you. If your web-side code calls JSON.stringify already, then the result is doubly encoded as a JSON string, the value of which is a JSON string.
Only the properties that are directly in the result are included in the JSON-encoded object; inherited properties aren't included in the JSON-encoded object. Most DOM objects inherit all properties, so your web-side code must explicitly copy the properties' values into another object and return that object to your native-side code. For example:
| Script | Result |
|---|---|
performance.memory |
{} |
(() => { const {totalJSHeapSize, usedJSHeapSize} = performance.memory; return {totalJSHeapSize, usedJSHeapSize}; })(); |
{"totalJSHeapSize":4434368,"usedJSHeapSize":2832912} |
When we return just performance.memory, we don't see any of its properties in the result, because all properties are inherited. If instead, the web-side code copies particular property values from performance.memory into a new object and returns that object, then the native-side code sees those properties in the result.
When executing script via ExecuteScriptAsync, that script is run in the global context. It helps to have your script in an anonymous function, so that any variables you define aren't polluting the global context.
For example:
If you run the script
const example = 10;more than once, the subsequent times you run the script will throw an exception, becauseexamplewas defined the first time you ran it.If you instead run the script
(() => { const example = 10; })();theexamplevariable is defined in the context of that anonymous function. That way, it's not polluting the global context, and can be run more than once.
Scenario: Running a dedicated JavaScript file
You can access a dedicated JavaScript file from your WebView2 control.
Inline JavaScript code works well for quick JavaScript commands. However, inline JavaScript code doesn't support color themes and line formatting in the code editor. That makes it difficult to write large sections of code, such as in Visual Studio.
To solve the problem, create a separate JavaScript file that contains your code, and then pass a reference to that file by using the ExecuteScriptAsync parameters.
To create and use a separate, dedicated JS file:
Create a
.jsfile in your project, and add the JavaScript code that you want to run. For example, create a file calledscript.js.Convert the JavaScript file to a string that's passed to
ExecuteScriptAsync, by pasting the following code after the page is done navigating:string text = System.IO.File.ReadAllText(@"C:\PATH_TO_YOUR_FILE\script.js");Pass the
textvariable toExecuteScriptAsync:await webView.CoreWebView2.ExecuteScriptAsync(text);
Scenario: Removing drag-and-drop functionality
In this section, you use JavaScript to remove the drag-and-drop functionality from your WebView2 control.
To begin, explore the current drag-and-drop functionality:
Create a
.txtfile in order to drag-and-drop. For example, create a file namedcontoso.txtand add text to it.Press F5 to build and run the project.
Drag-and-drop the
contoso.txtfile into the WebView2 control. A new window opens, which is the result of the code in your sample project: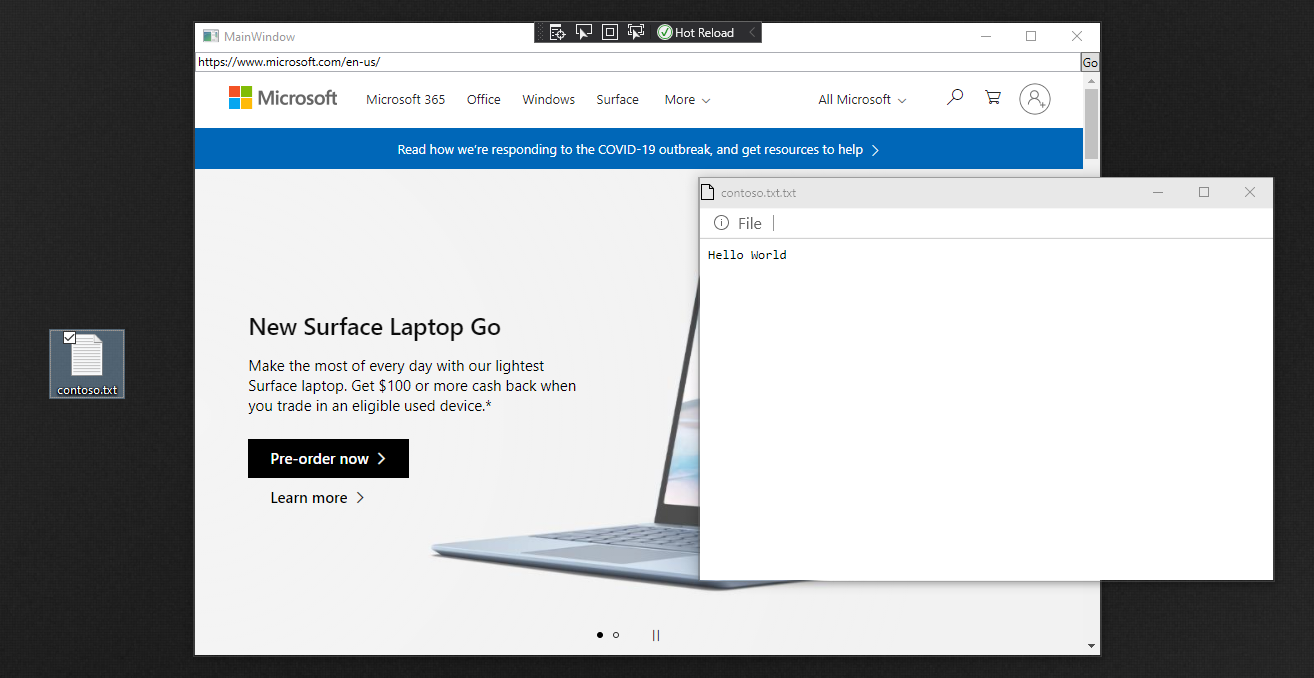
Next, add code to remove the drag-and-drop functionality from the WebView2 control. Paste the following code after the CoreWebView2 object is initialized in your code:
await webView.CoreWebView2.AddScriptToExecuteOnDocumentCreatedAsync(
   "window.addEventListener('dragover',function(e){e.preventDefault();},false);" +
   "window.addEventListener('drop',function(e){" +
      "e.preventDefault();" +
      "console.log(e.dataTransfer);" +
      "console.log(e.dataTransfer.files[0])" +
   "}, false);");
Press F5 to build and run the project.
Try to drag and drop
contoso.txtinto the WebView2 control. Confirm that you can't drag and drop.
Scenario: Removing the context menu
In this section, you remove the right-click menu from your WebView2 control.
To begin, explore the current functionality of the right-click menu:
Press F5 to build and run the project.
Right-click anywhere on the WebView2 control. The context menu displays the default right-click menu commands:
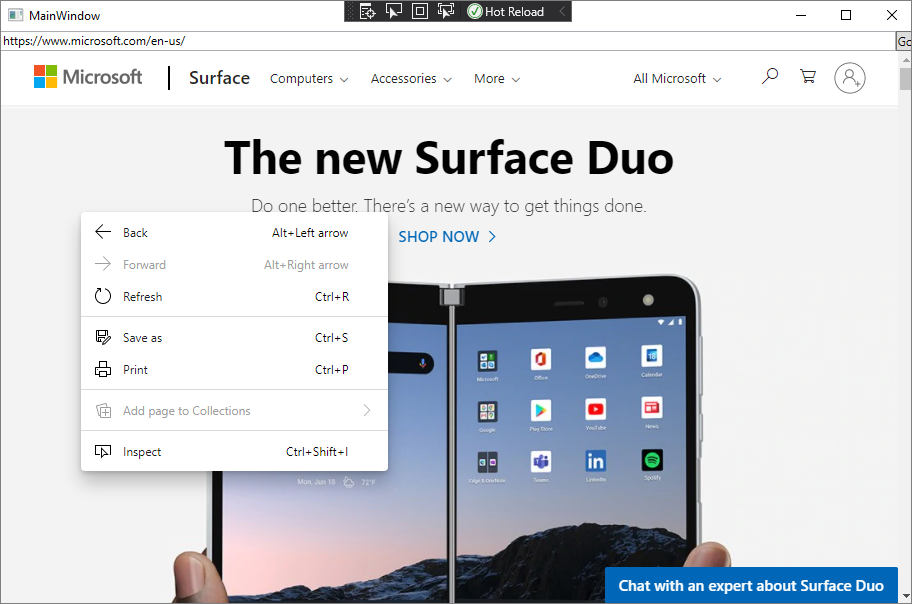
Next, add code to remove the right-click menu functionality from the WebView2 control.
Paste the following code after the CoreWebView2 object is initialized in your code:
await webView.CoreWebView2.ExecuteScriptAsync("window.addEventListener('contextmenu', window => {window.preventDefault();});");Press F5 to build and run the project. Confirm that you can't open a right-click menu.
See also
- Get started with WebView2
- WebView2Samples repo - a comprehensive example of WebView2 capabilities.
- WebView2 API reference
- Web/native interop in Overview of WebView2 APIs.